Coven Potluck

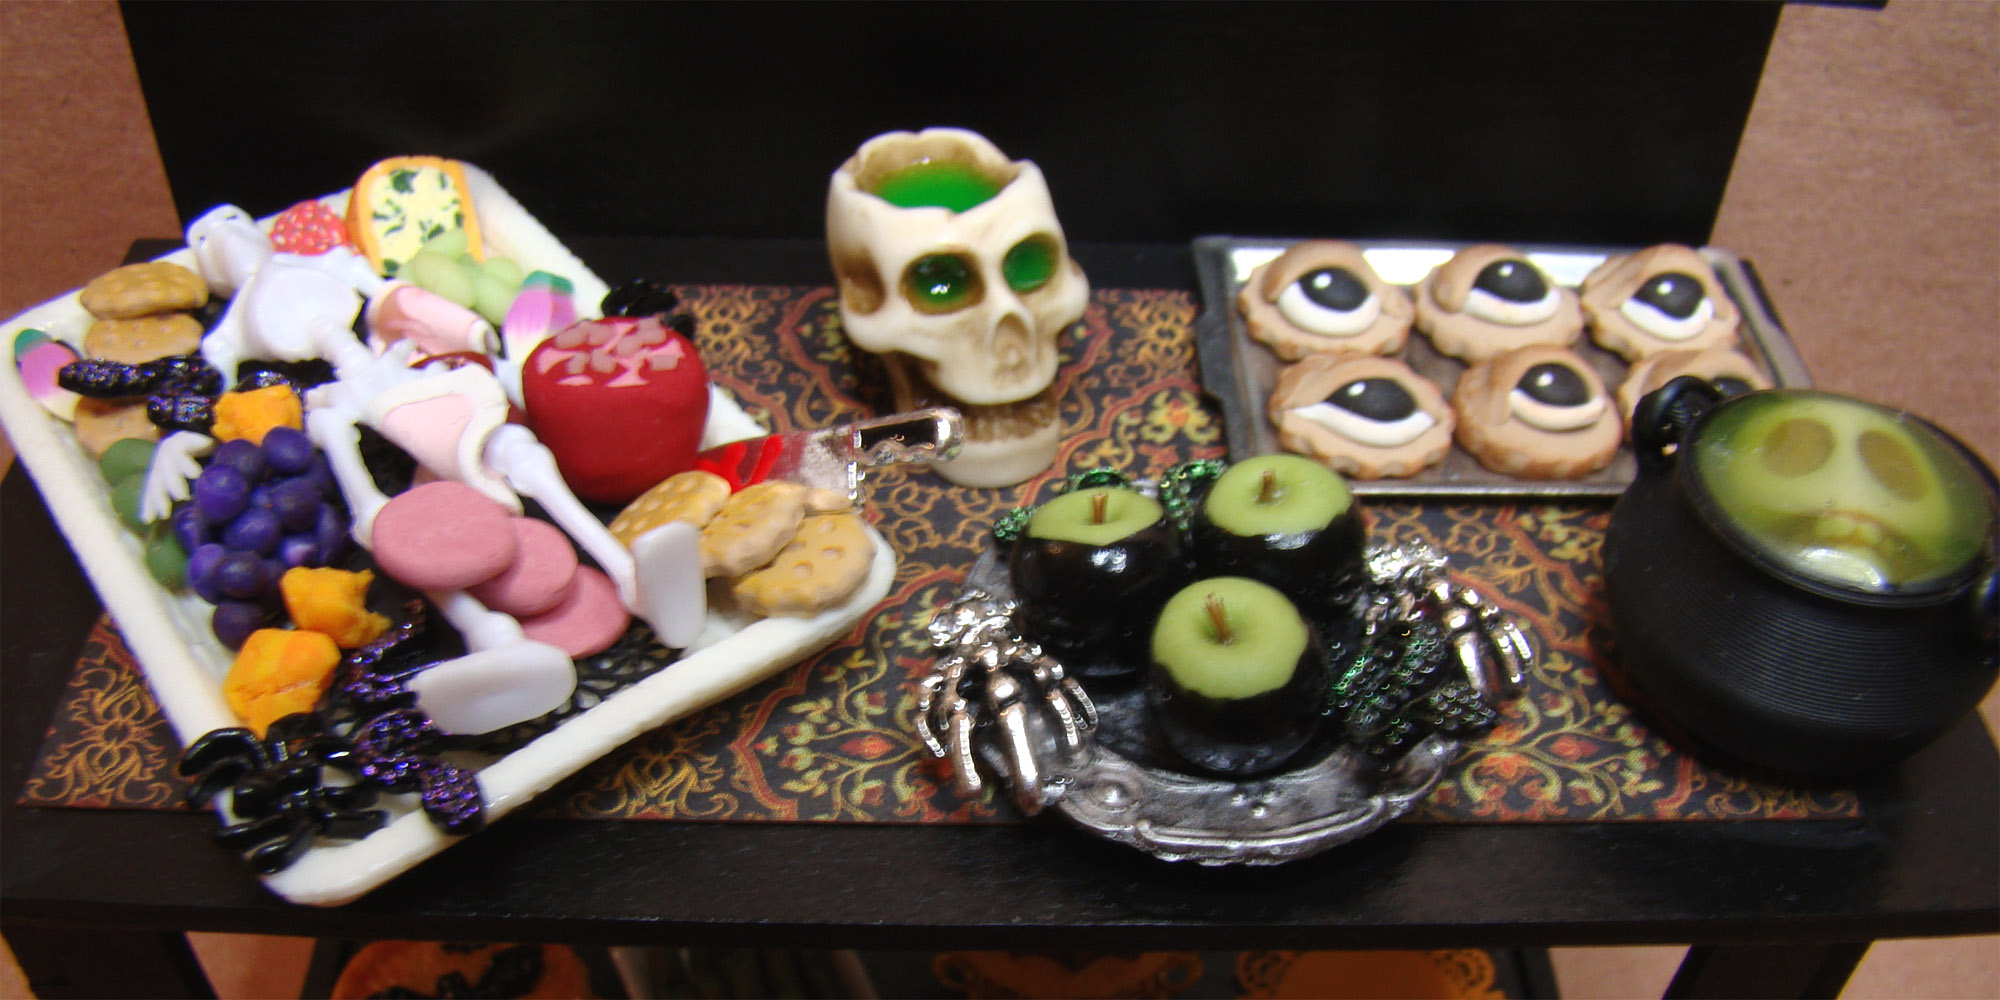
Halloween is just around the corner and I have one more frightful project to share. I turned a Workshop Table – 1:12 into a buffet for a coven’s covered dish supper. There are both savory and sweet dishes for this mystical gathering celebrating the season of the witch.
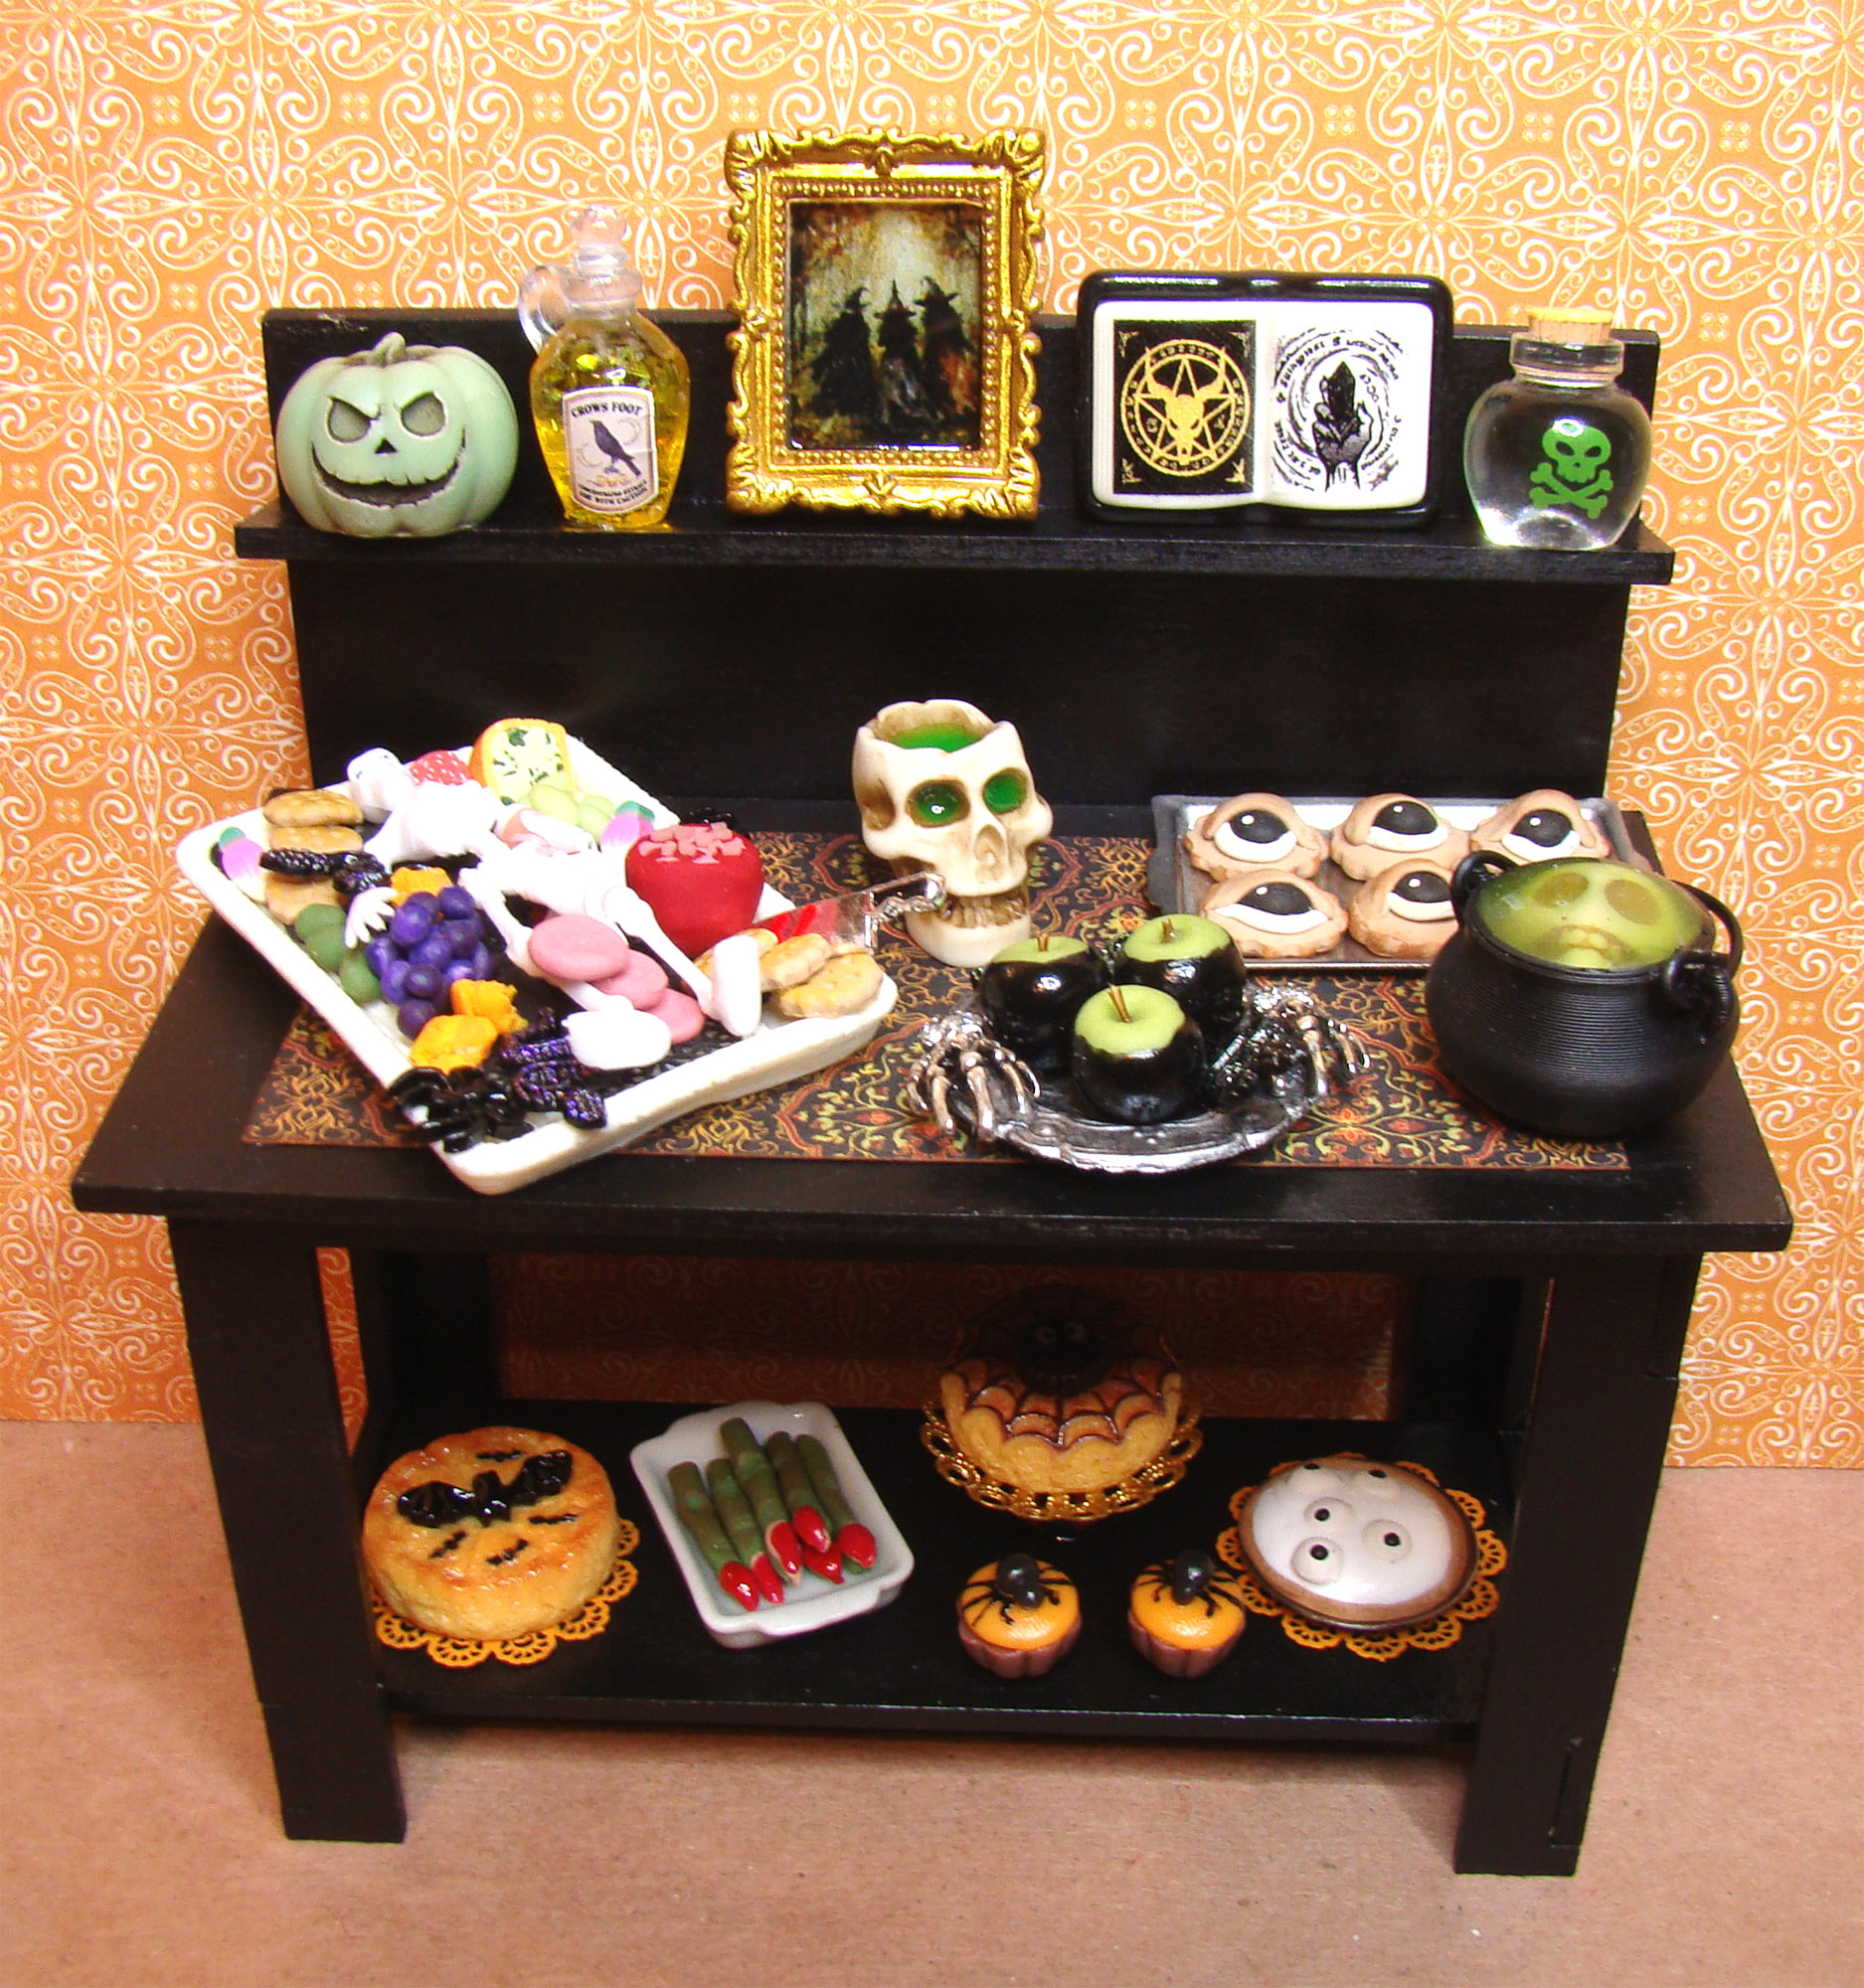
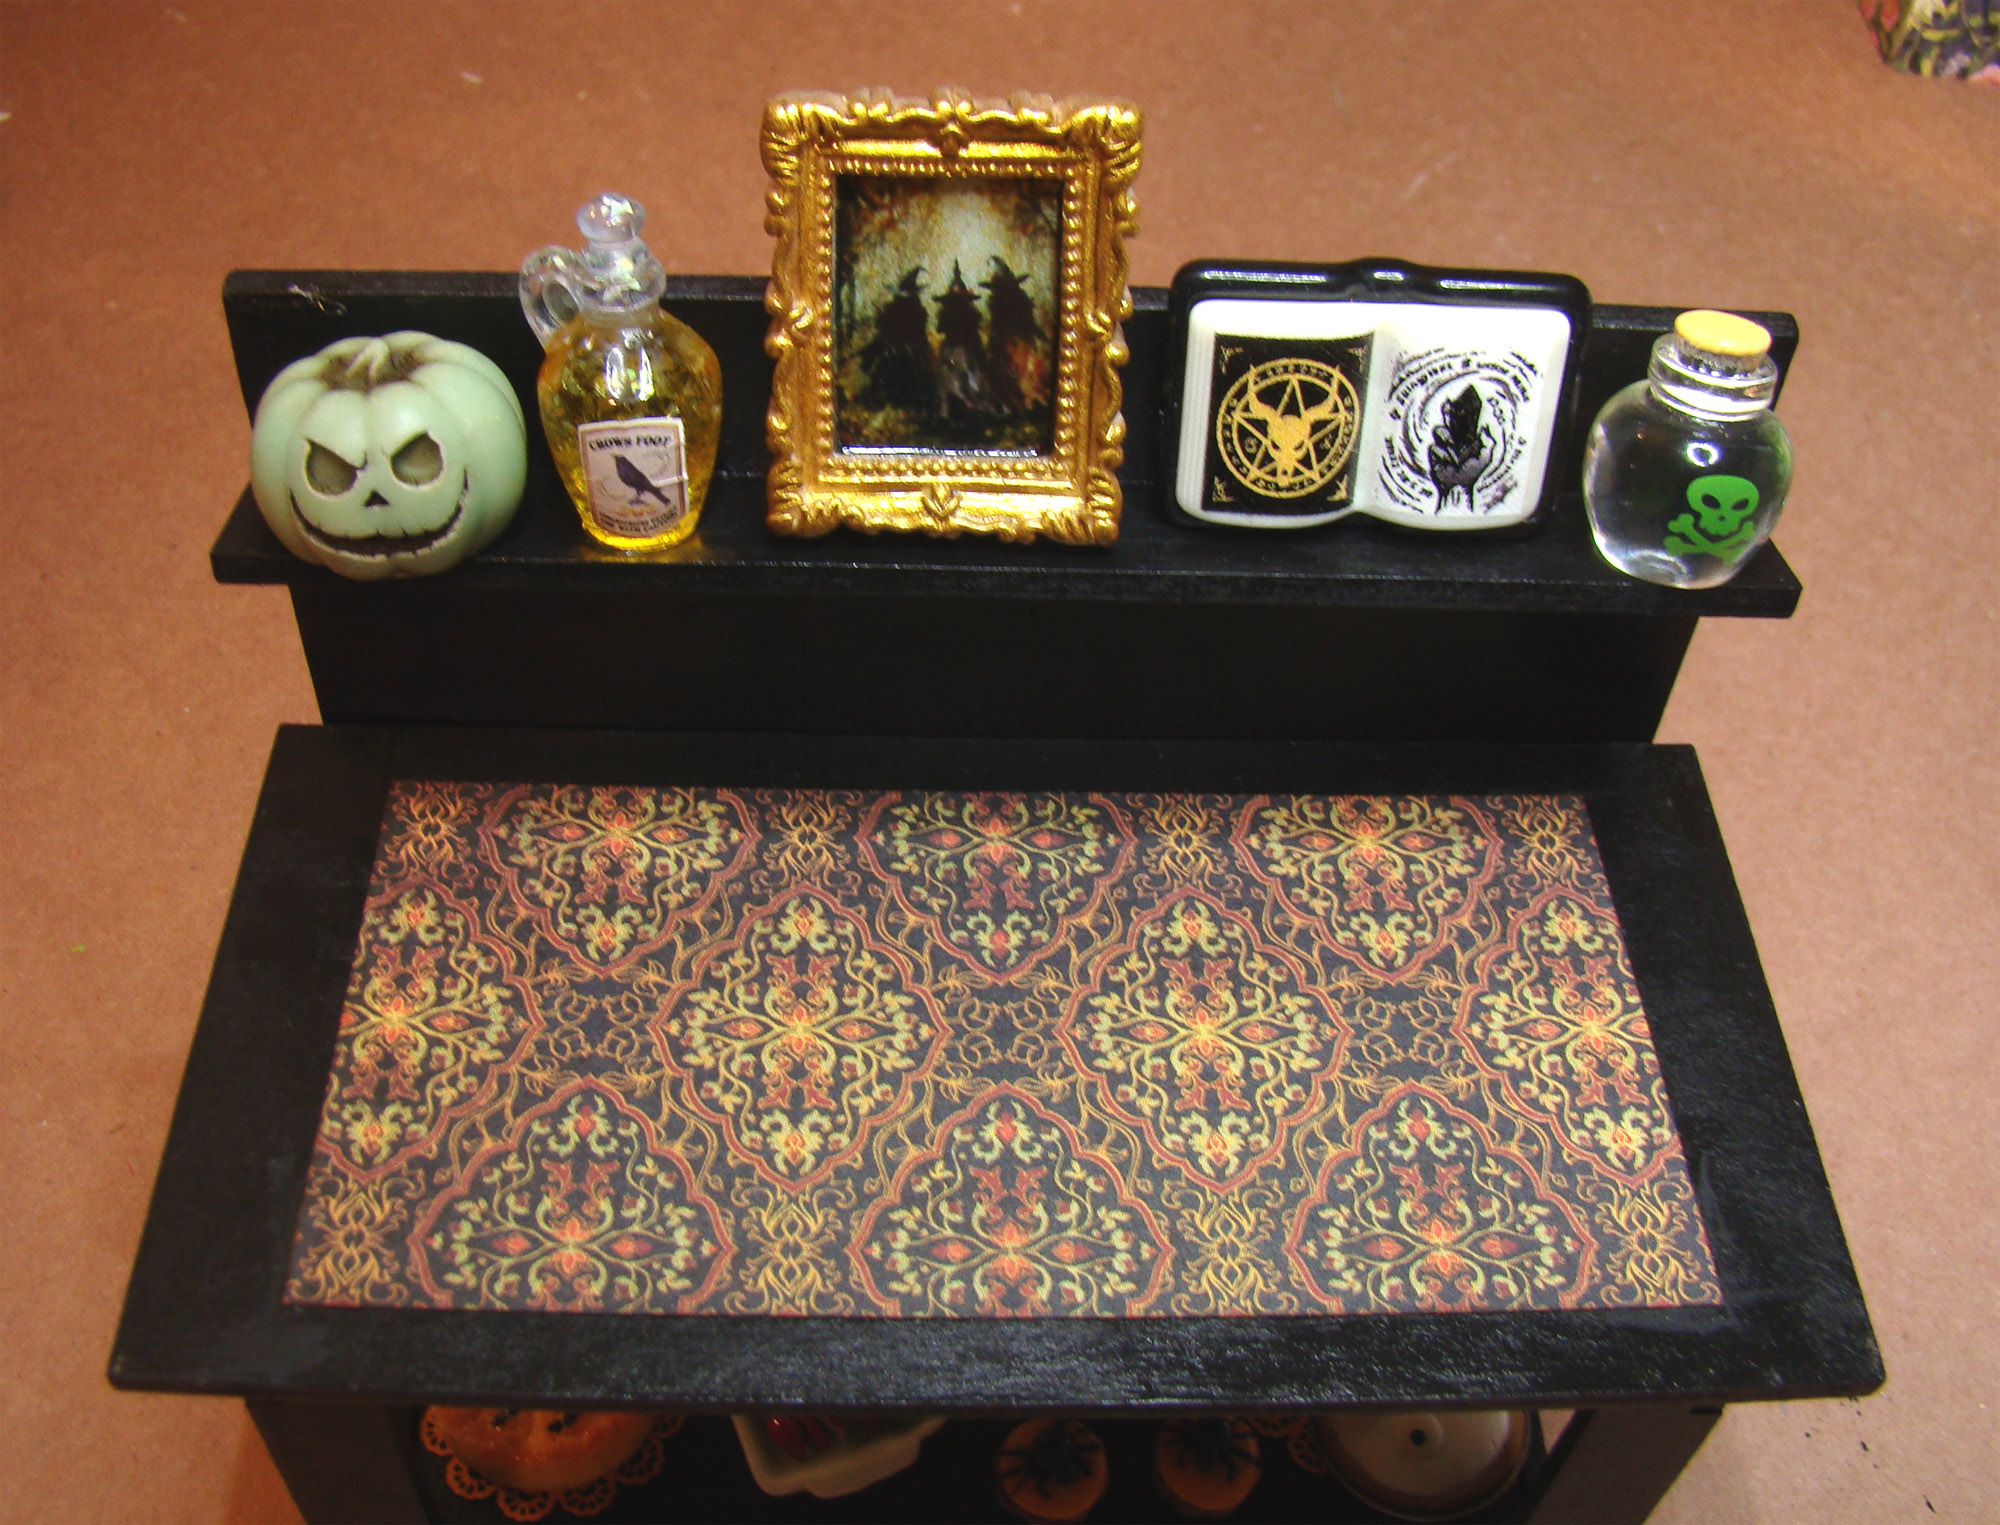
The lower shelf of the buffet is designated for sweets. Those include some Tall Chocolate Cupcakes with Spider, a Mini Pie with Bats and a Mini Spiderweb Pie sitting on a 25mm Round Raw Brass Filigree Setting.
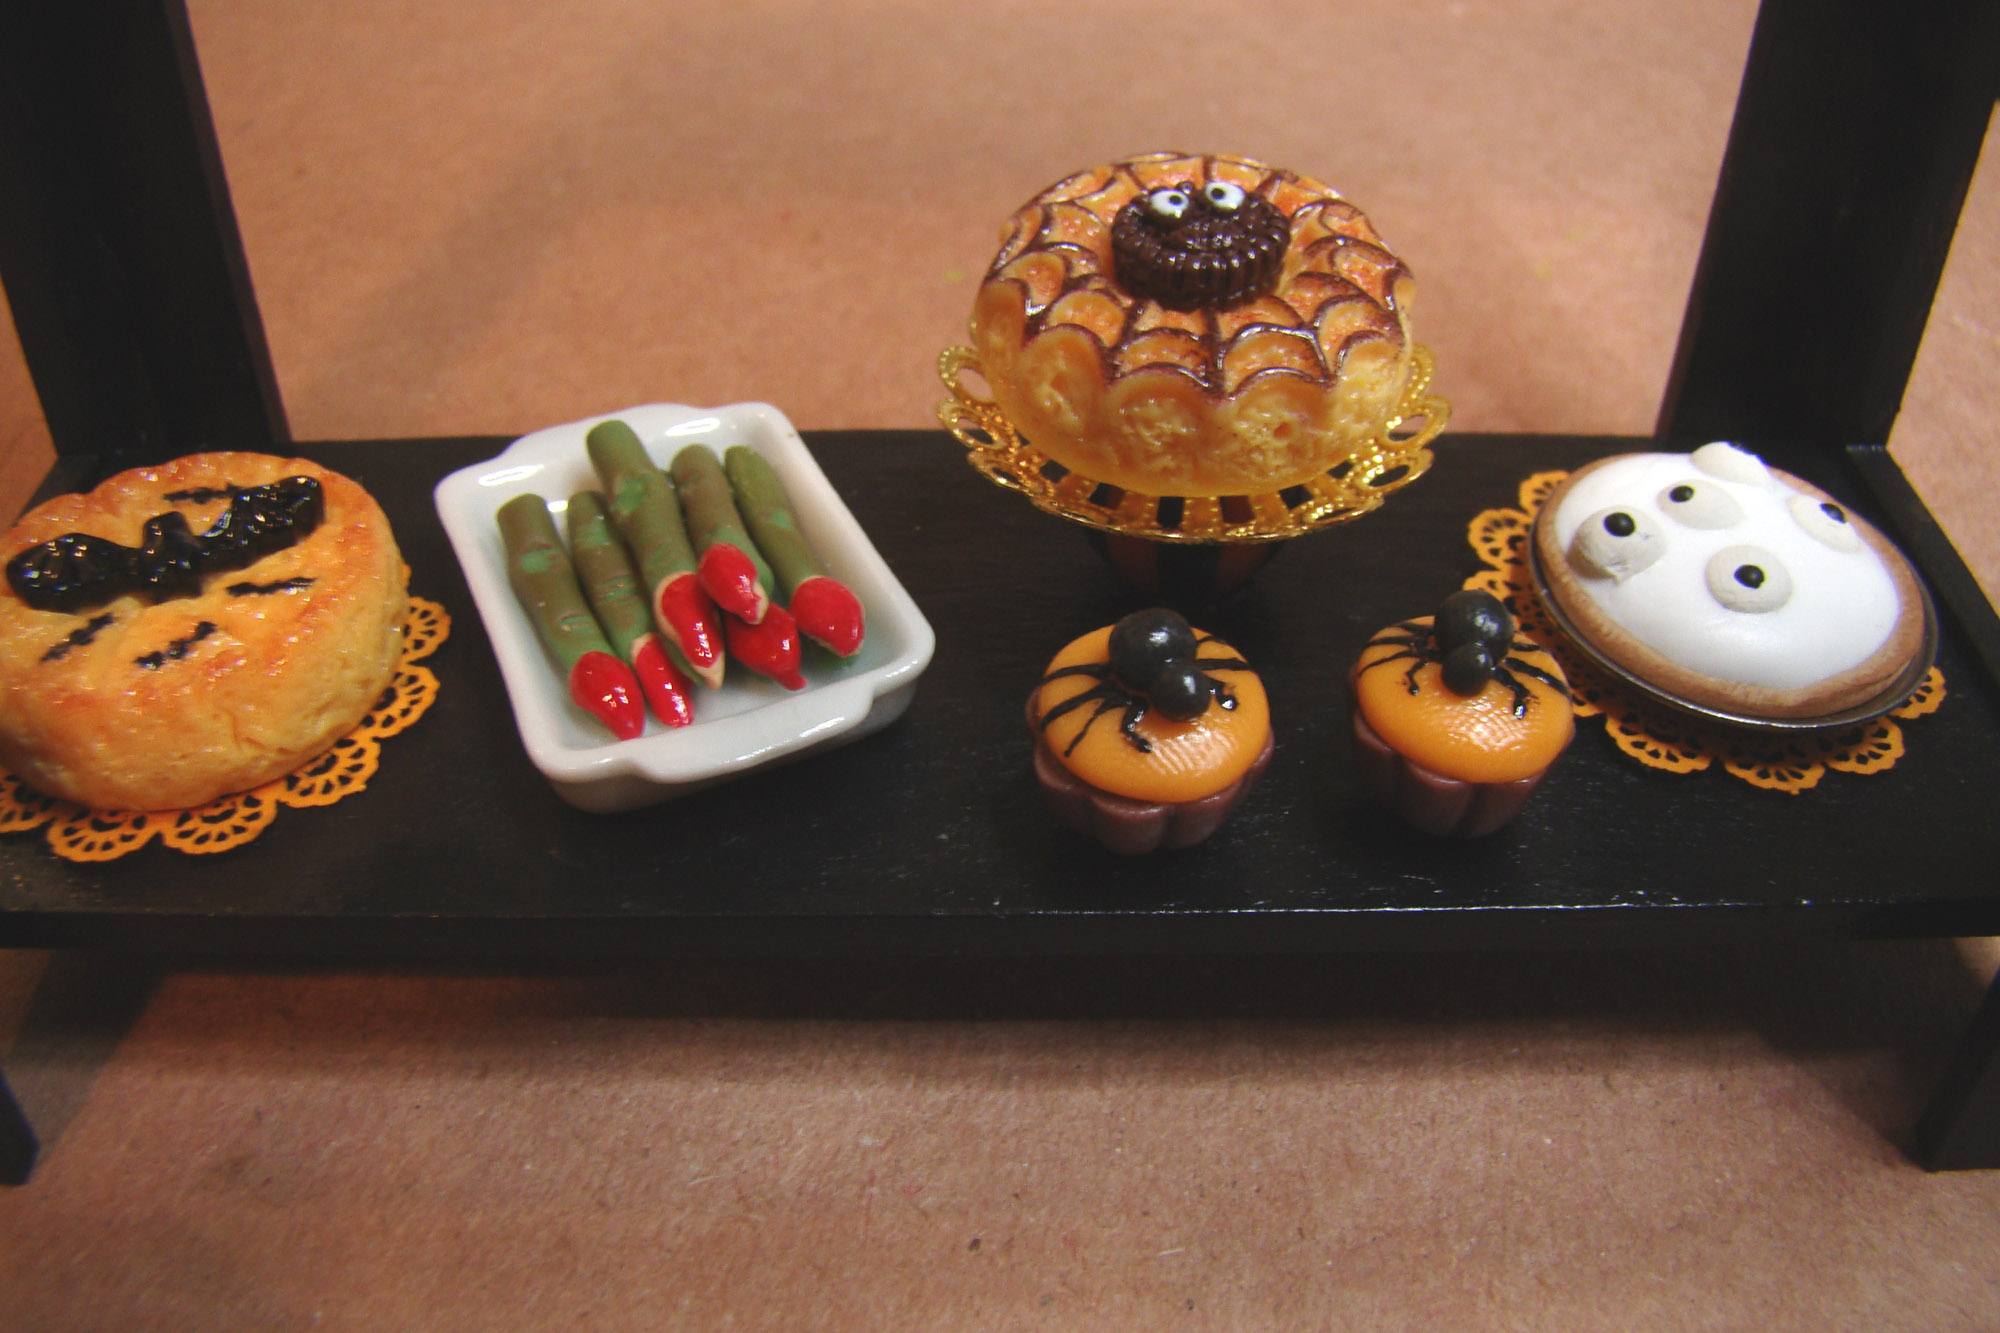
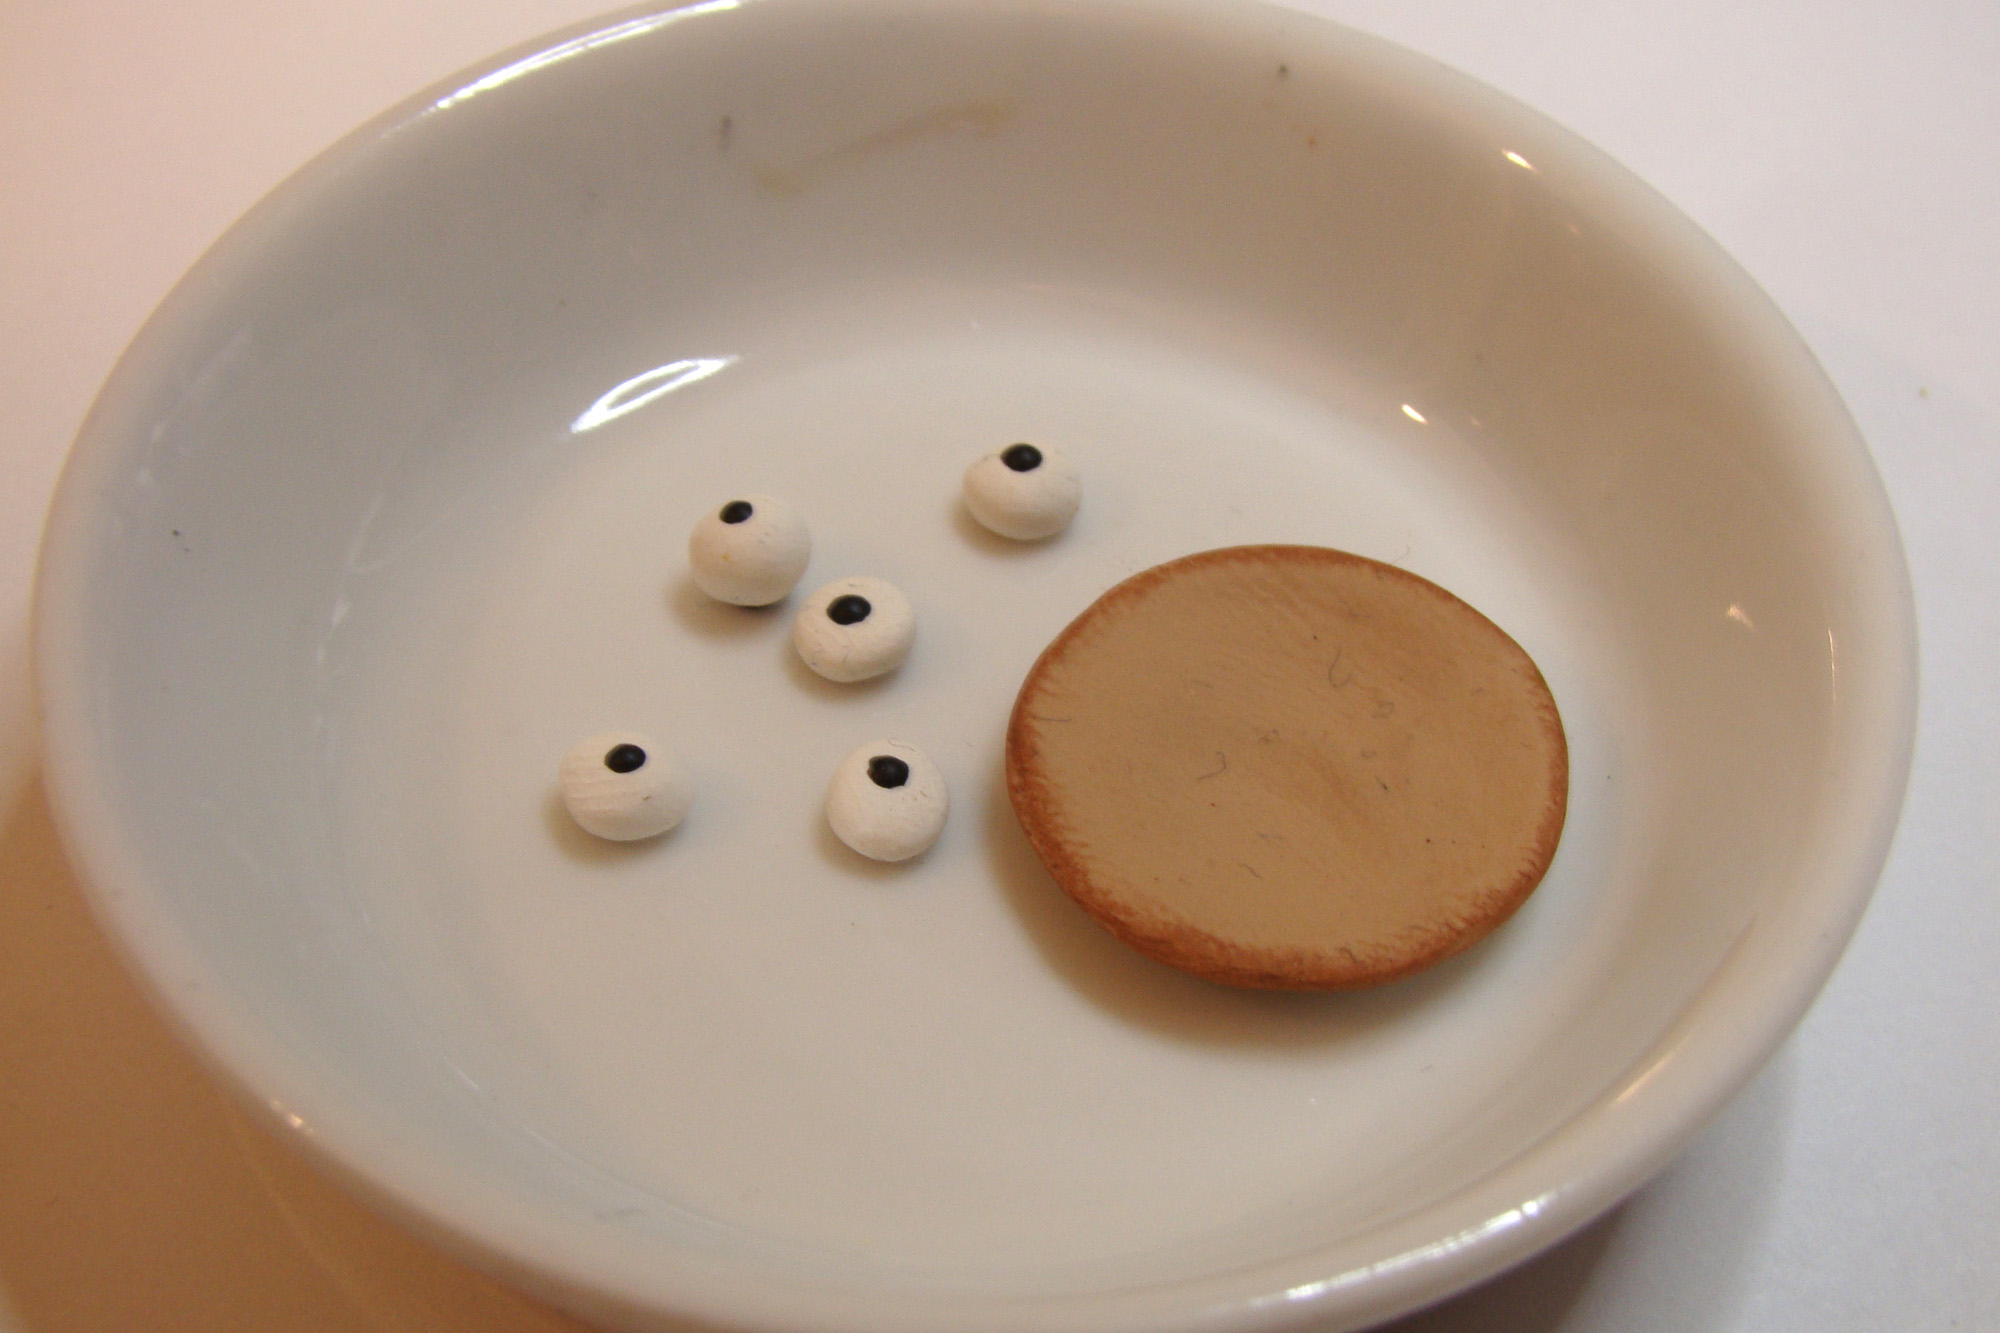
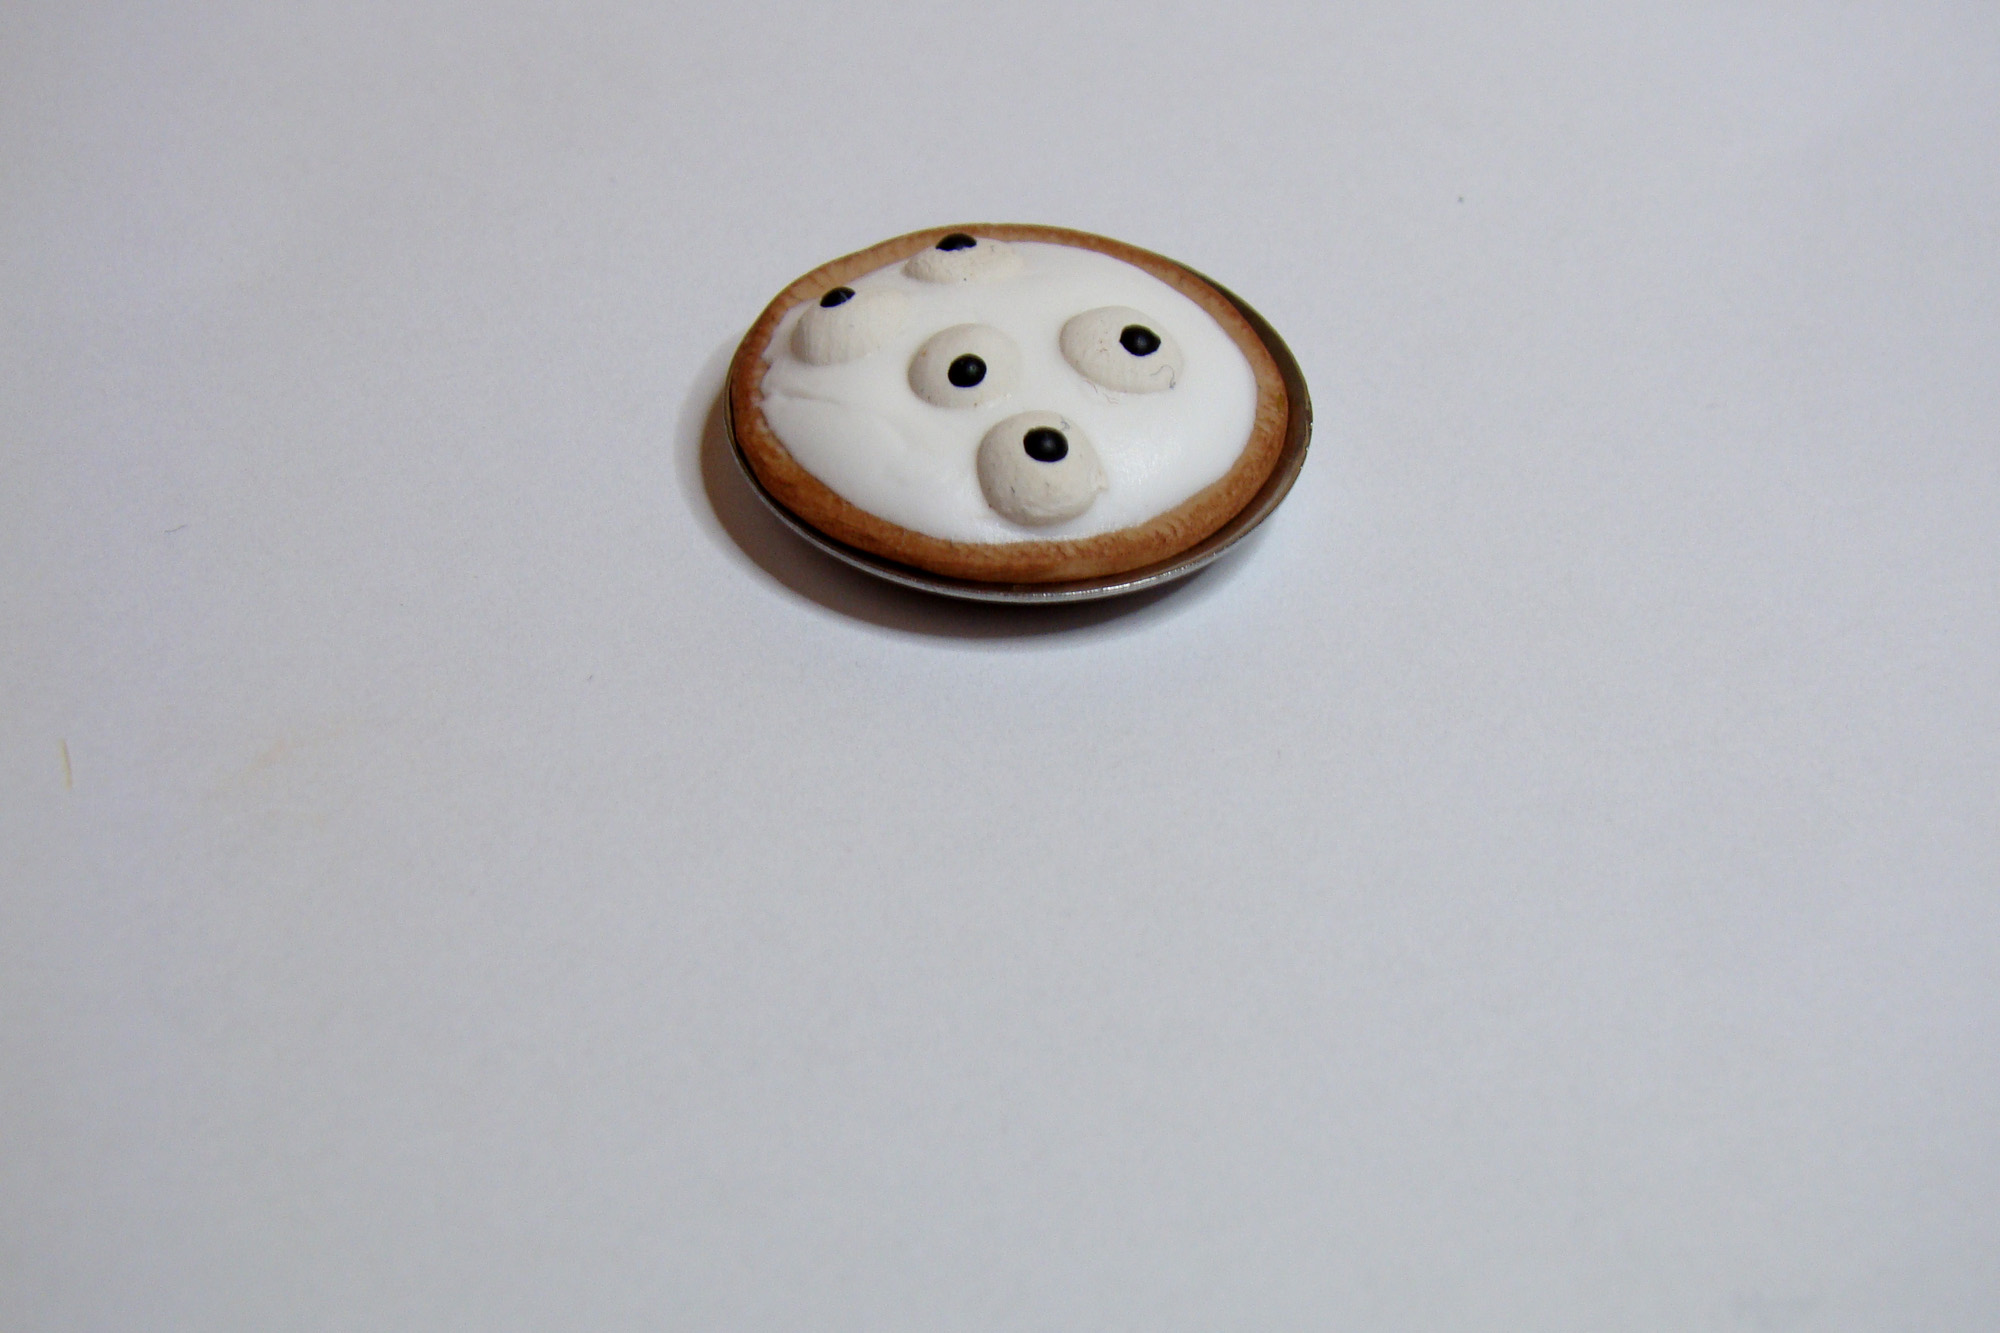
I made a few treats myself, starting with an eyeball pie that was made from a polymer clay piecrust baked into a Mini Pie Pan. The meringue is white Liquid Sculpey with poly clay eyes baked in.
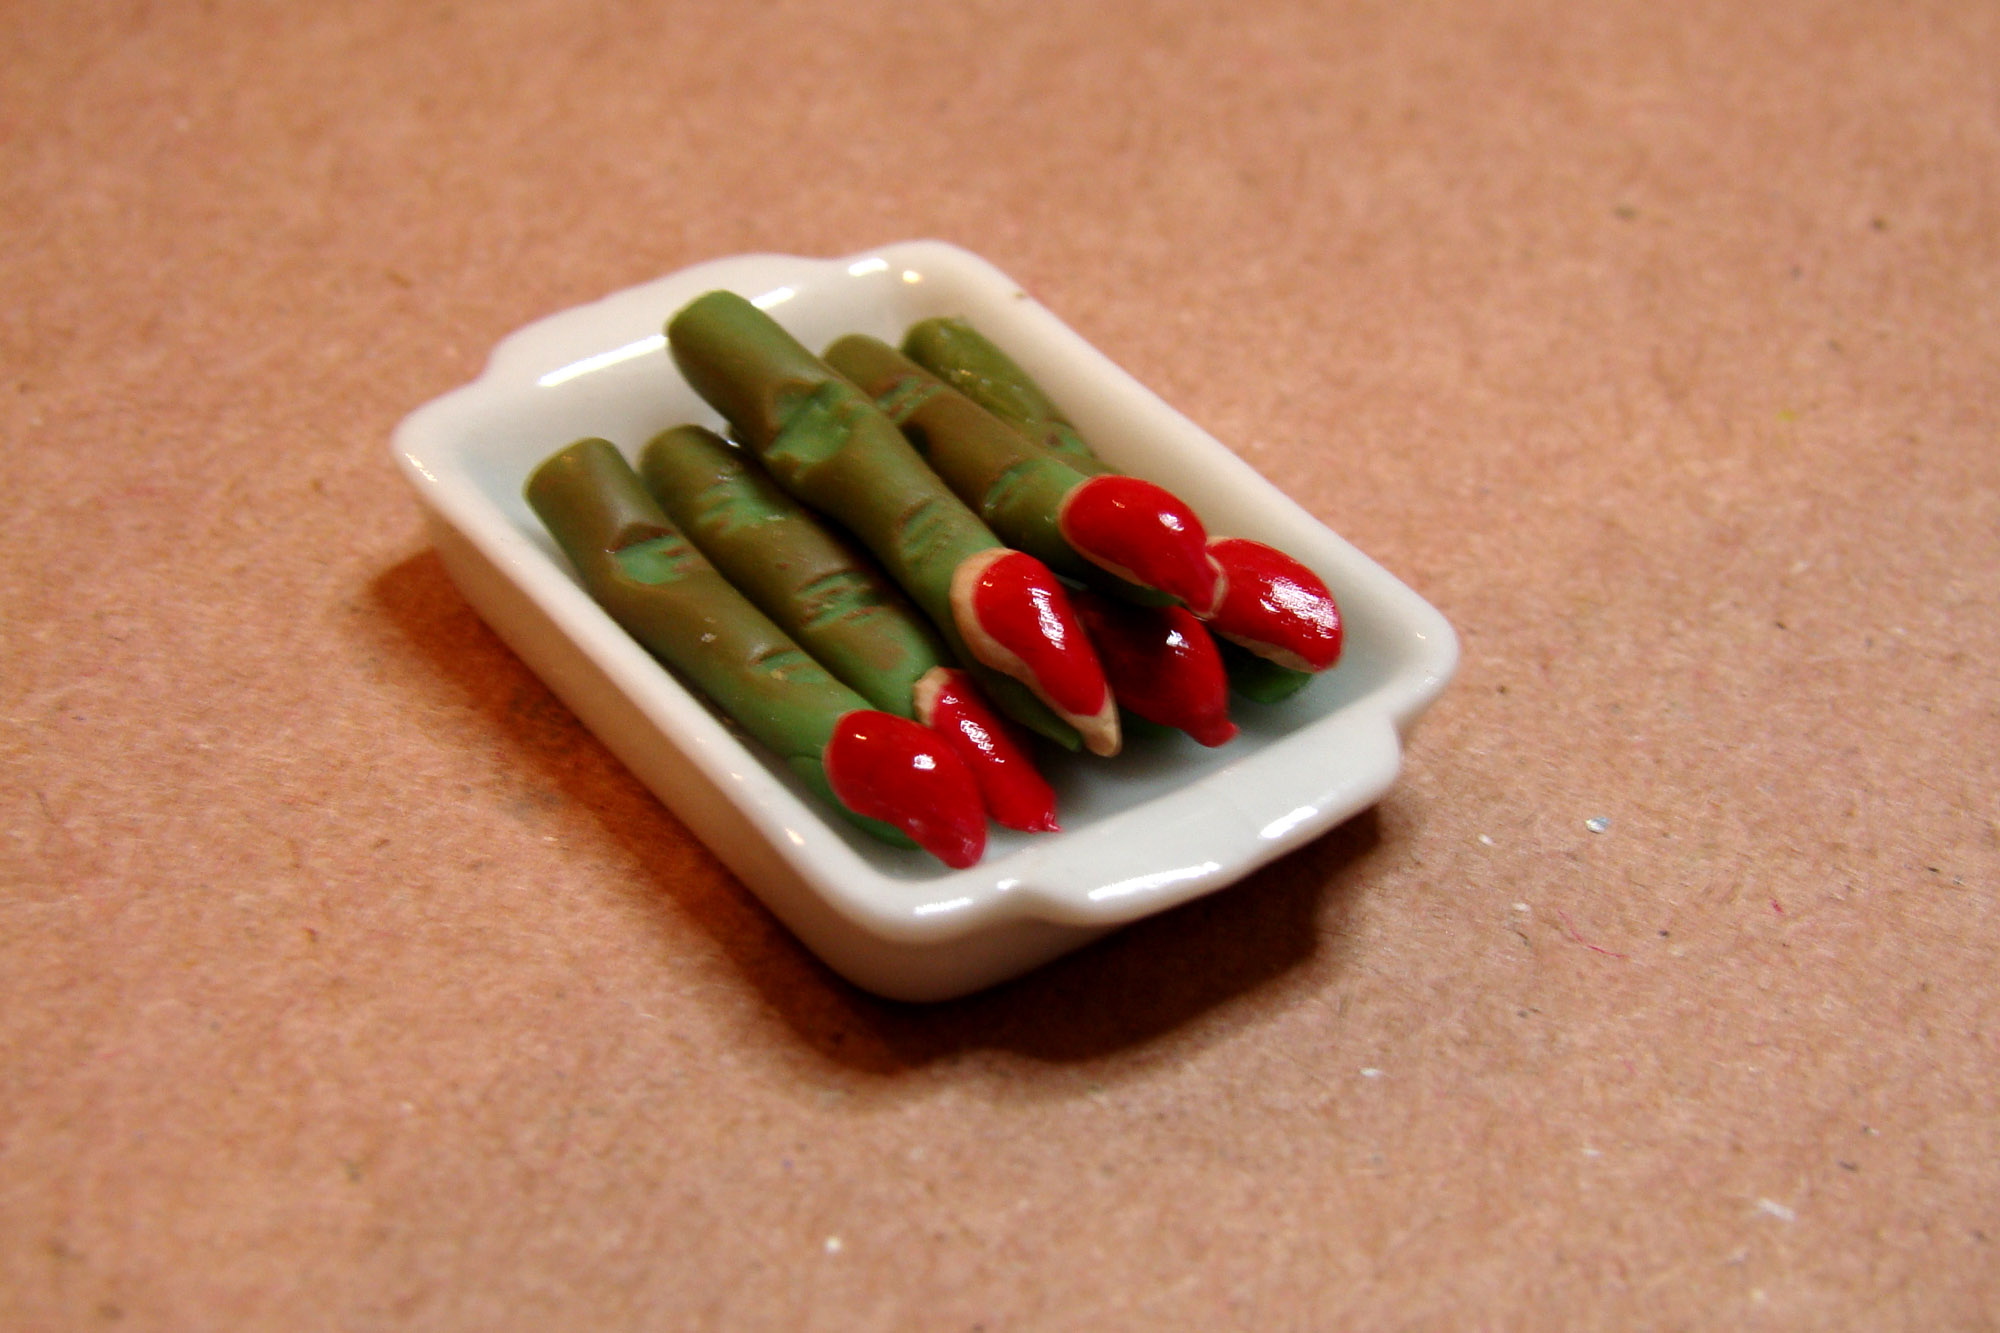
I made a miniature version of those shortbread witch finger cookies you see at Halloween parties that use almonds for the fingernails. I rolled out green polymer clay to finger length, added some texture where the knuckles would be then gave them a brush of brown pastel chalk. Beige fingernails were added before baking. Once cool, I literally painted the nails with red polish. They fit perfectly inside a White Ceramic Serving Tray.
The festive table covering is a scrap of Halloween cardstock. The top shelf holds a Green Scary Jack-o-Lantern, an Amber Resin Jug with Crow Label, Open Grimoire Book and Chubby Resin Jar with Skull. In the center sits a coven group portrait from the new 1 Inch Resin Halloween Framed Portraits.
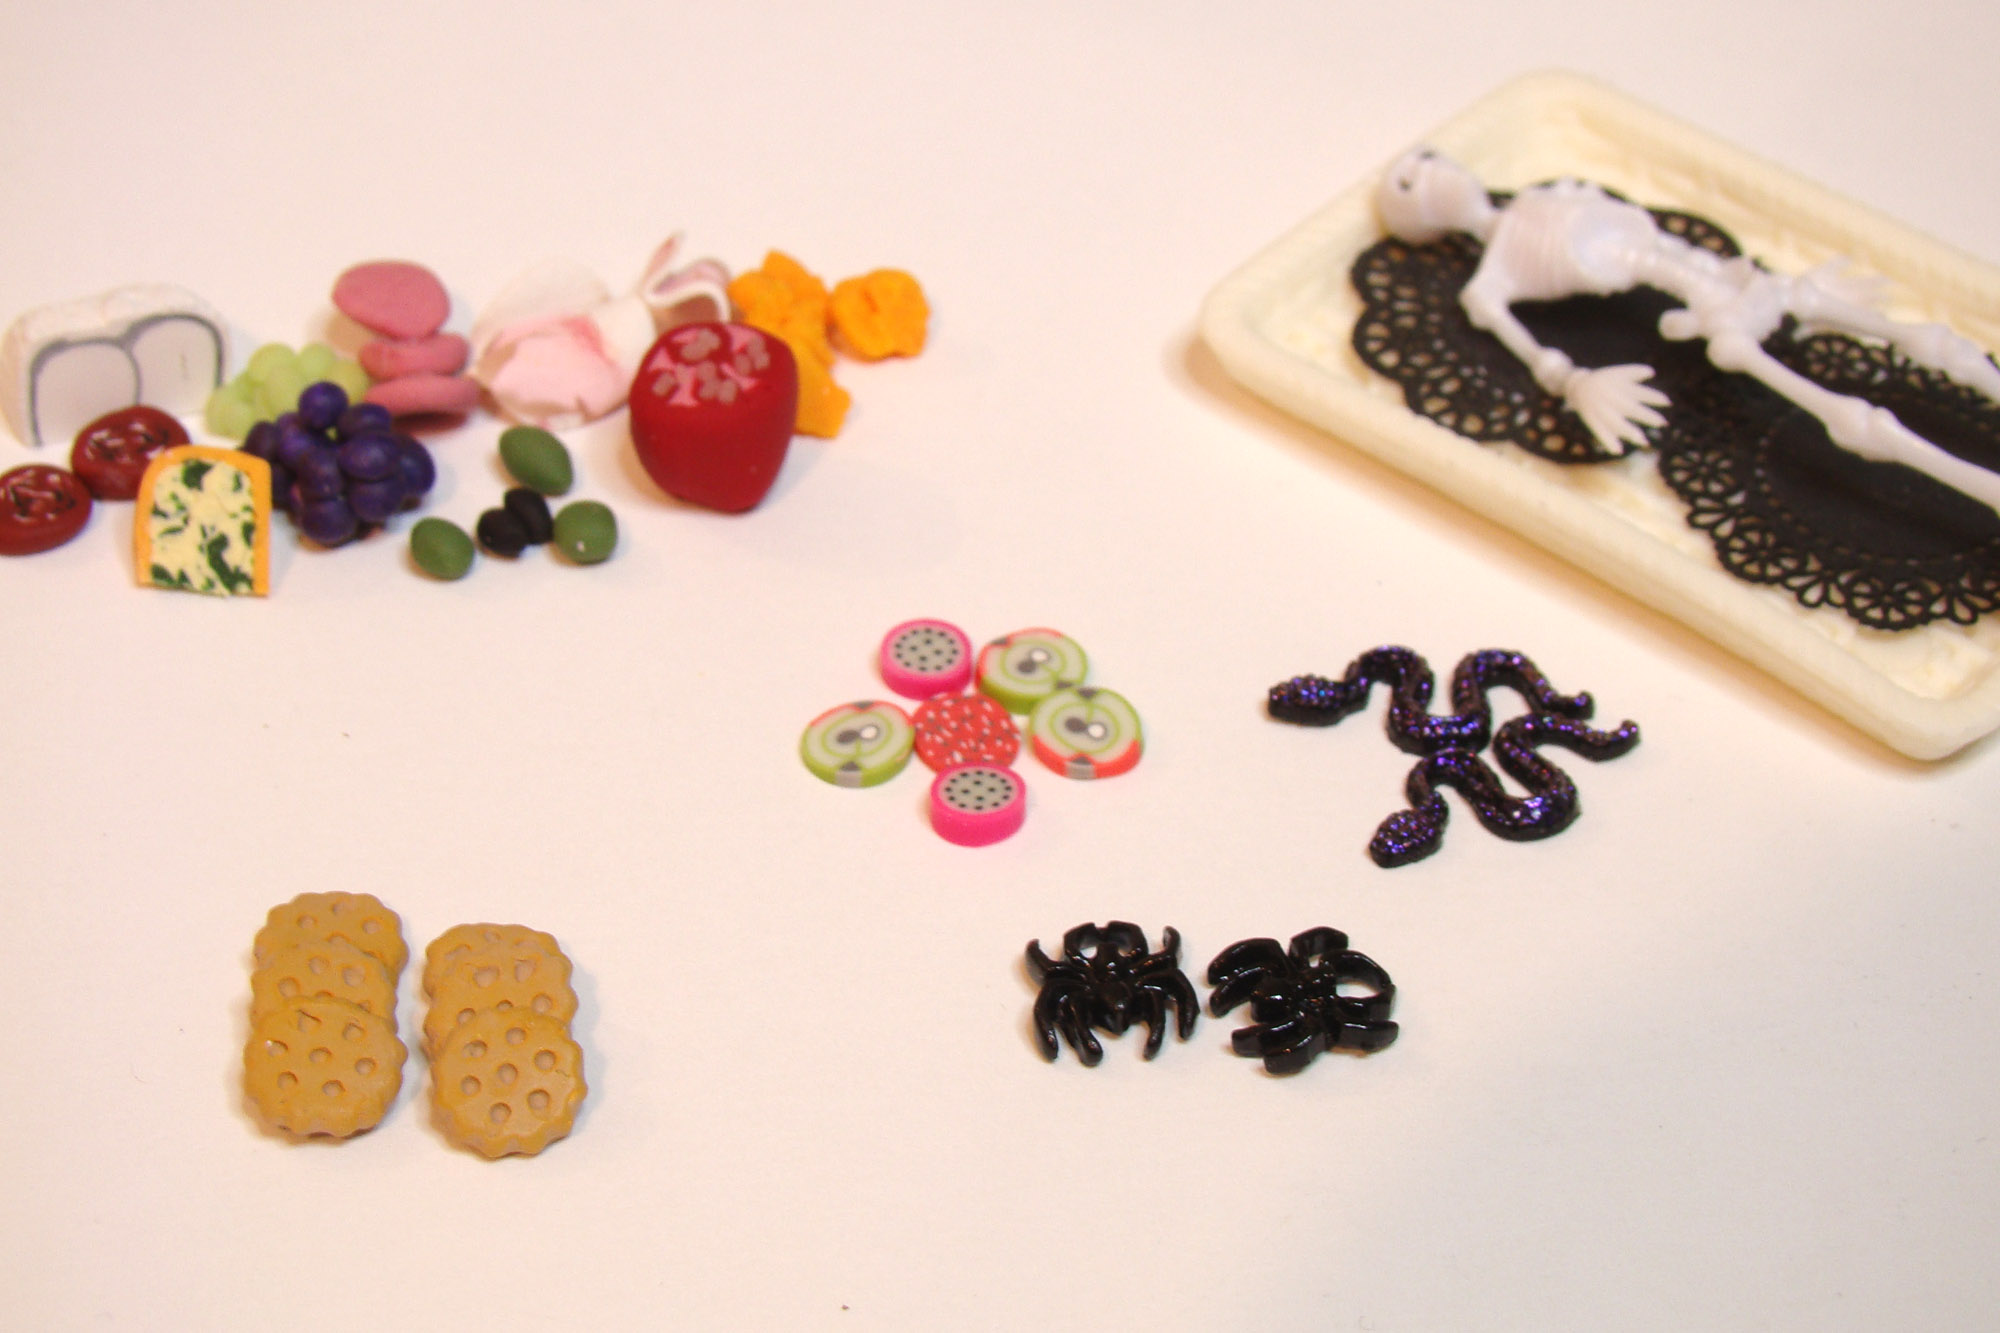
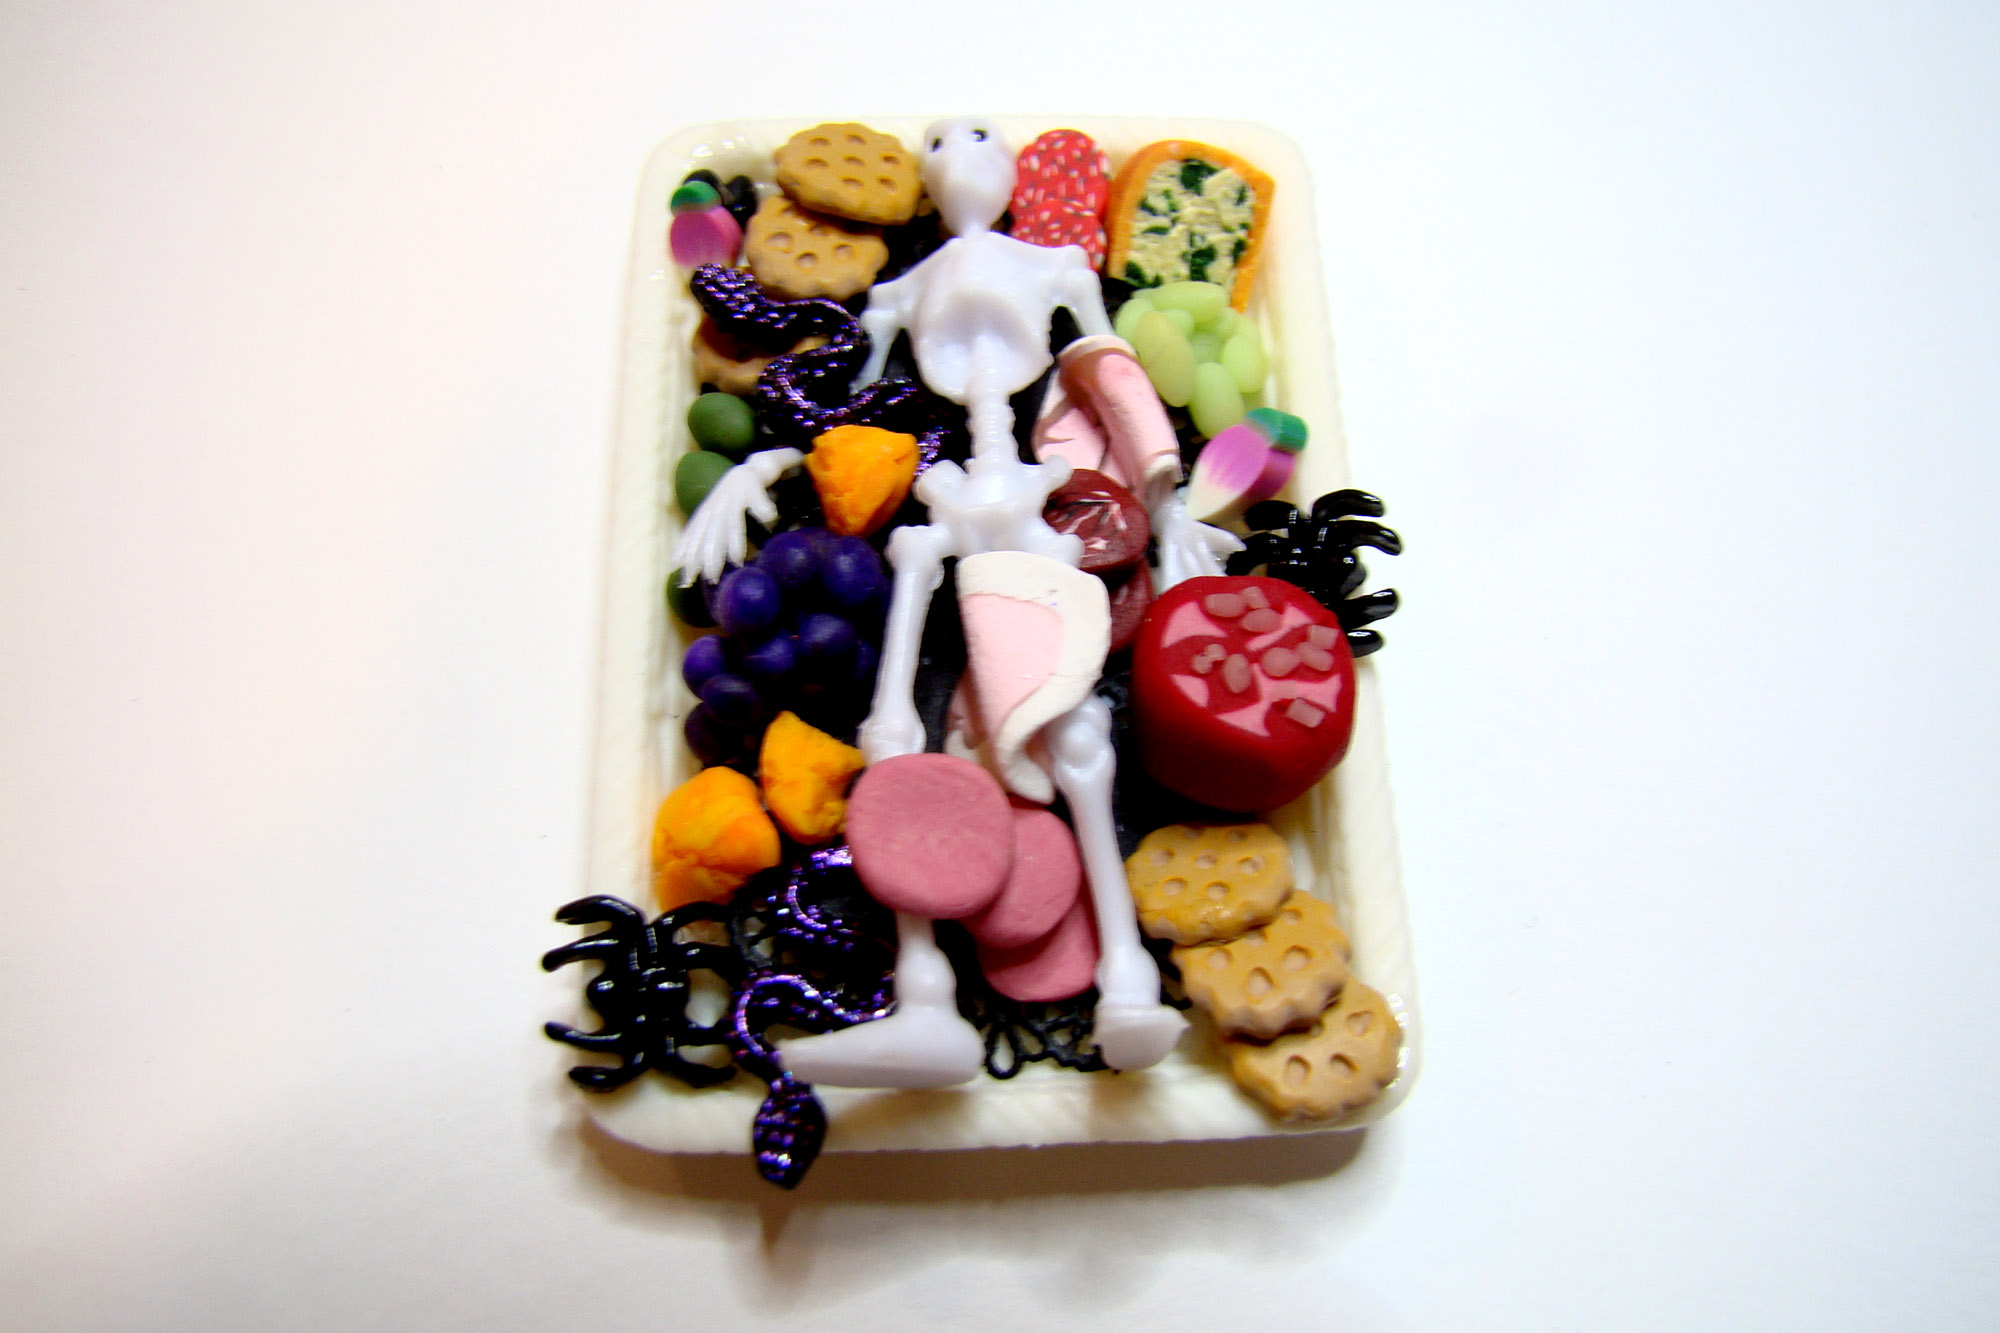
My most ambitious creation was a charcuterie board that started with a 2 Inch Tall Skeleton glued to a Plastic Serving Tray. I laid out an assortment of things to add such as the new Set of Resin Snakes, Tiny Black Metal Spiders, crackers made from paper clay and the Mini Silicone Mold – Biscuits & Bread, some cane slices and assorted handmade poly clay cheeses, olives, fruits and deli meats.
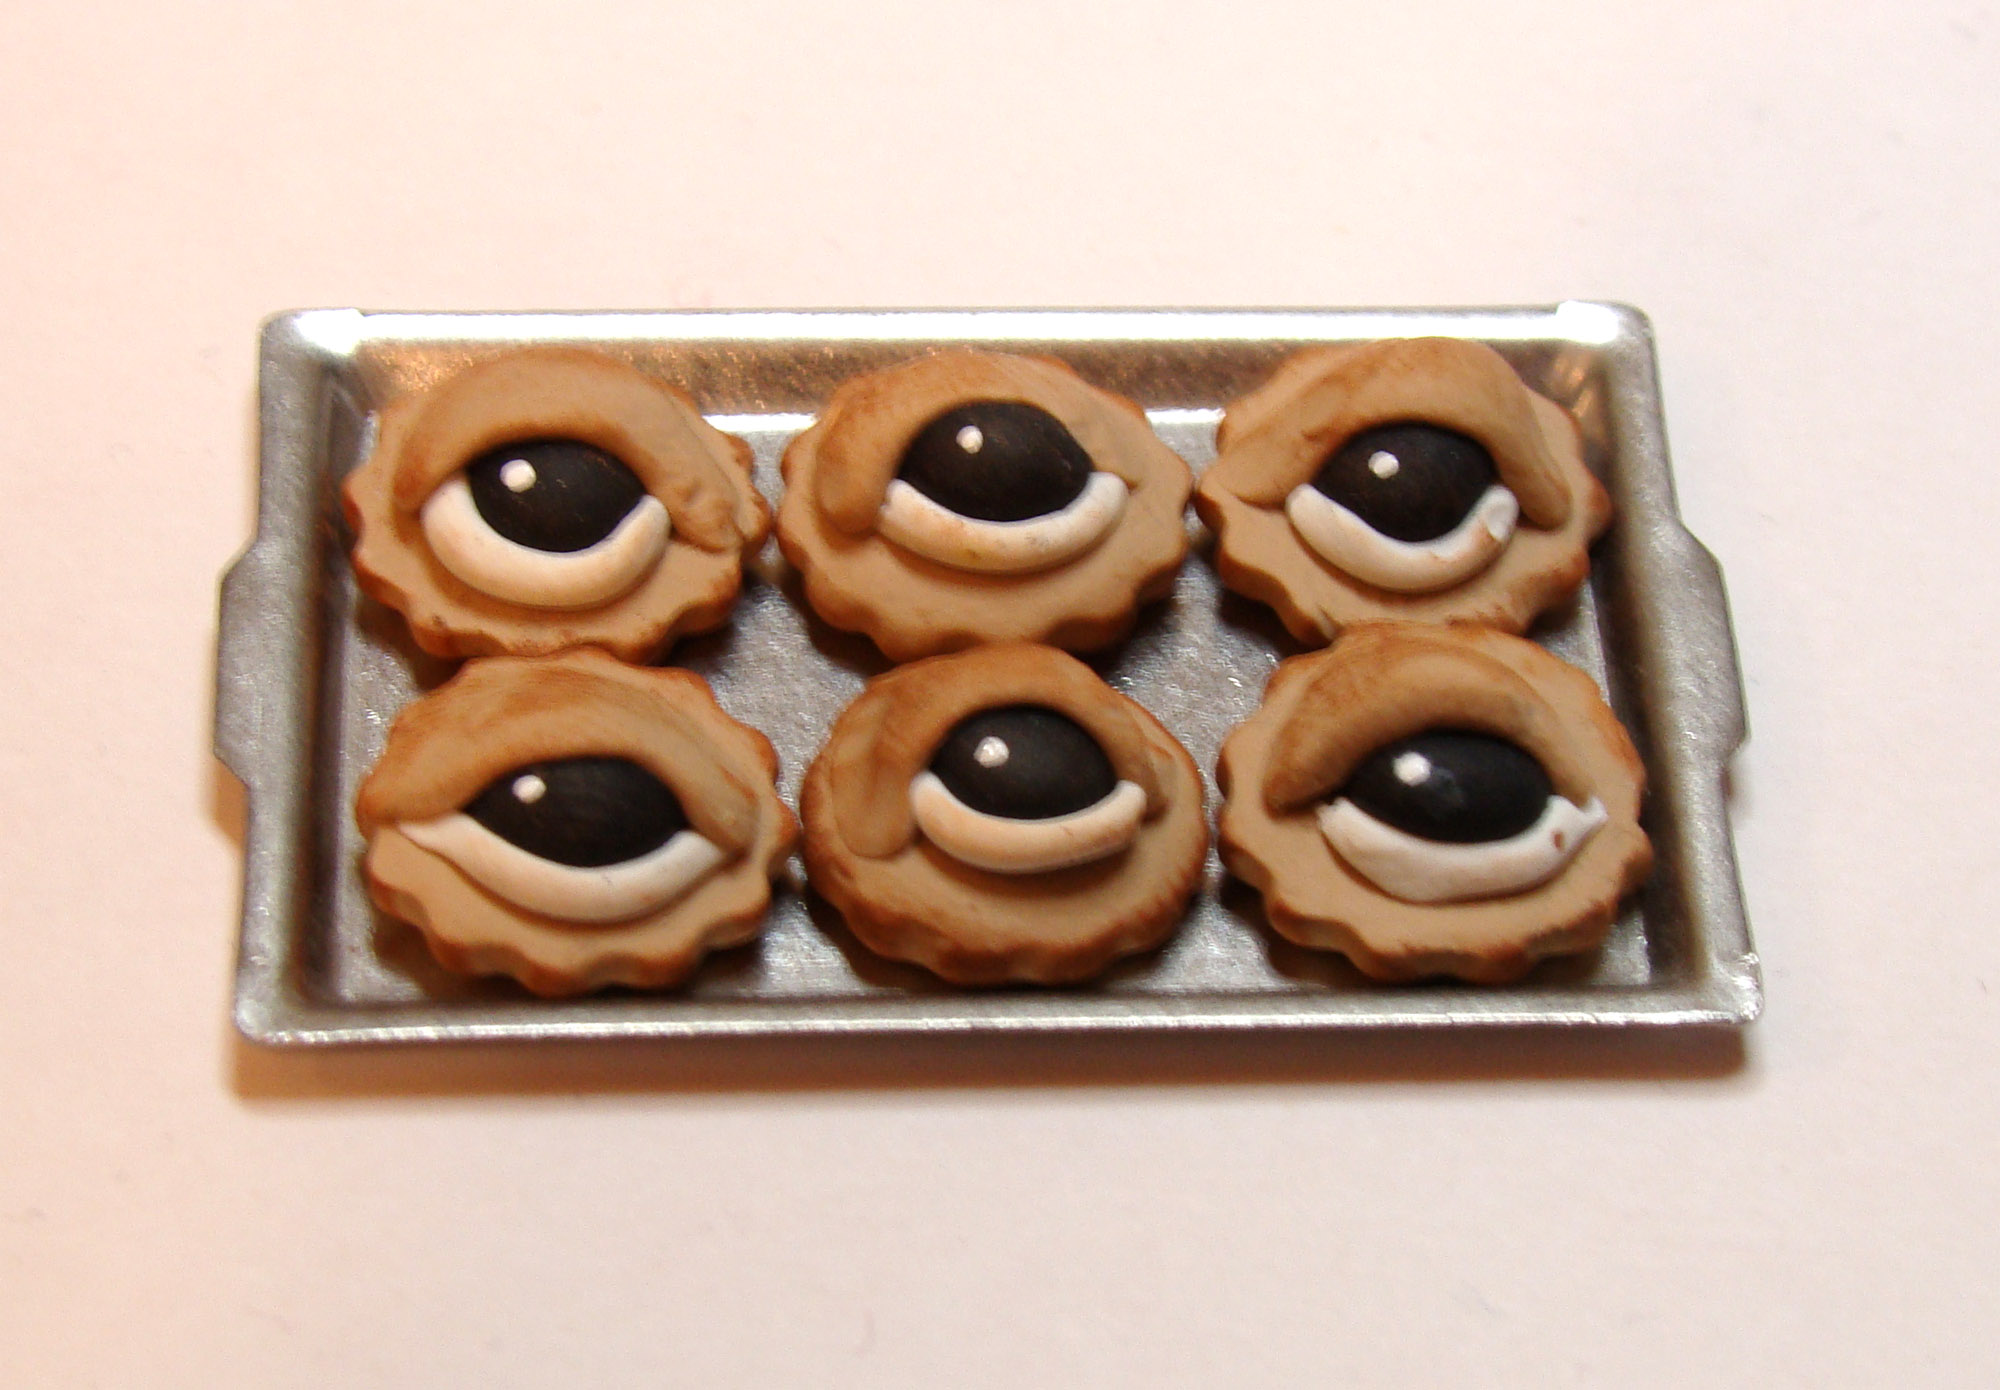
I used the same Biscuit Mold to make some savory eyeball tartlets. I filled the mold cavity with flesh colored clay, used black and white for the eyeball, added an eyelid and baked each one individually inside the mold.
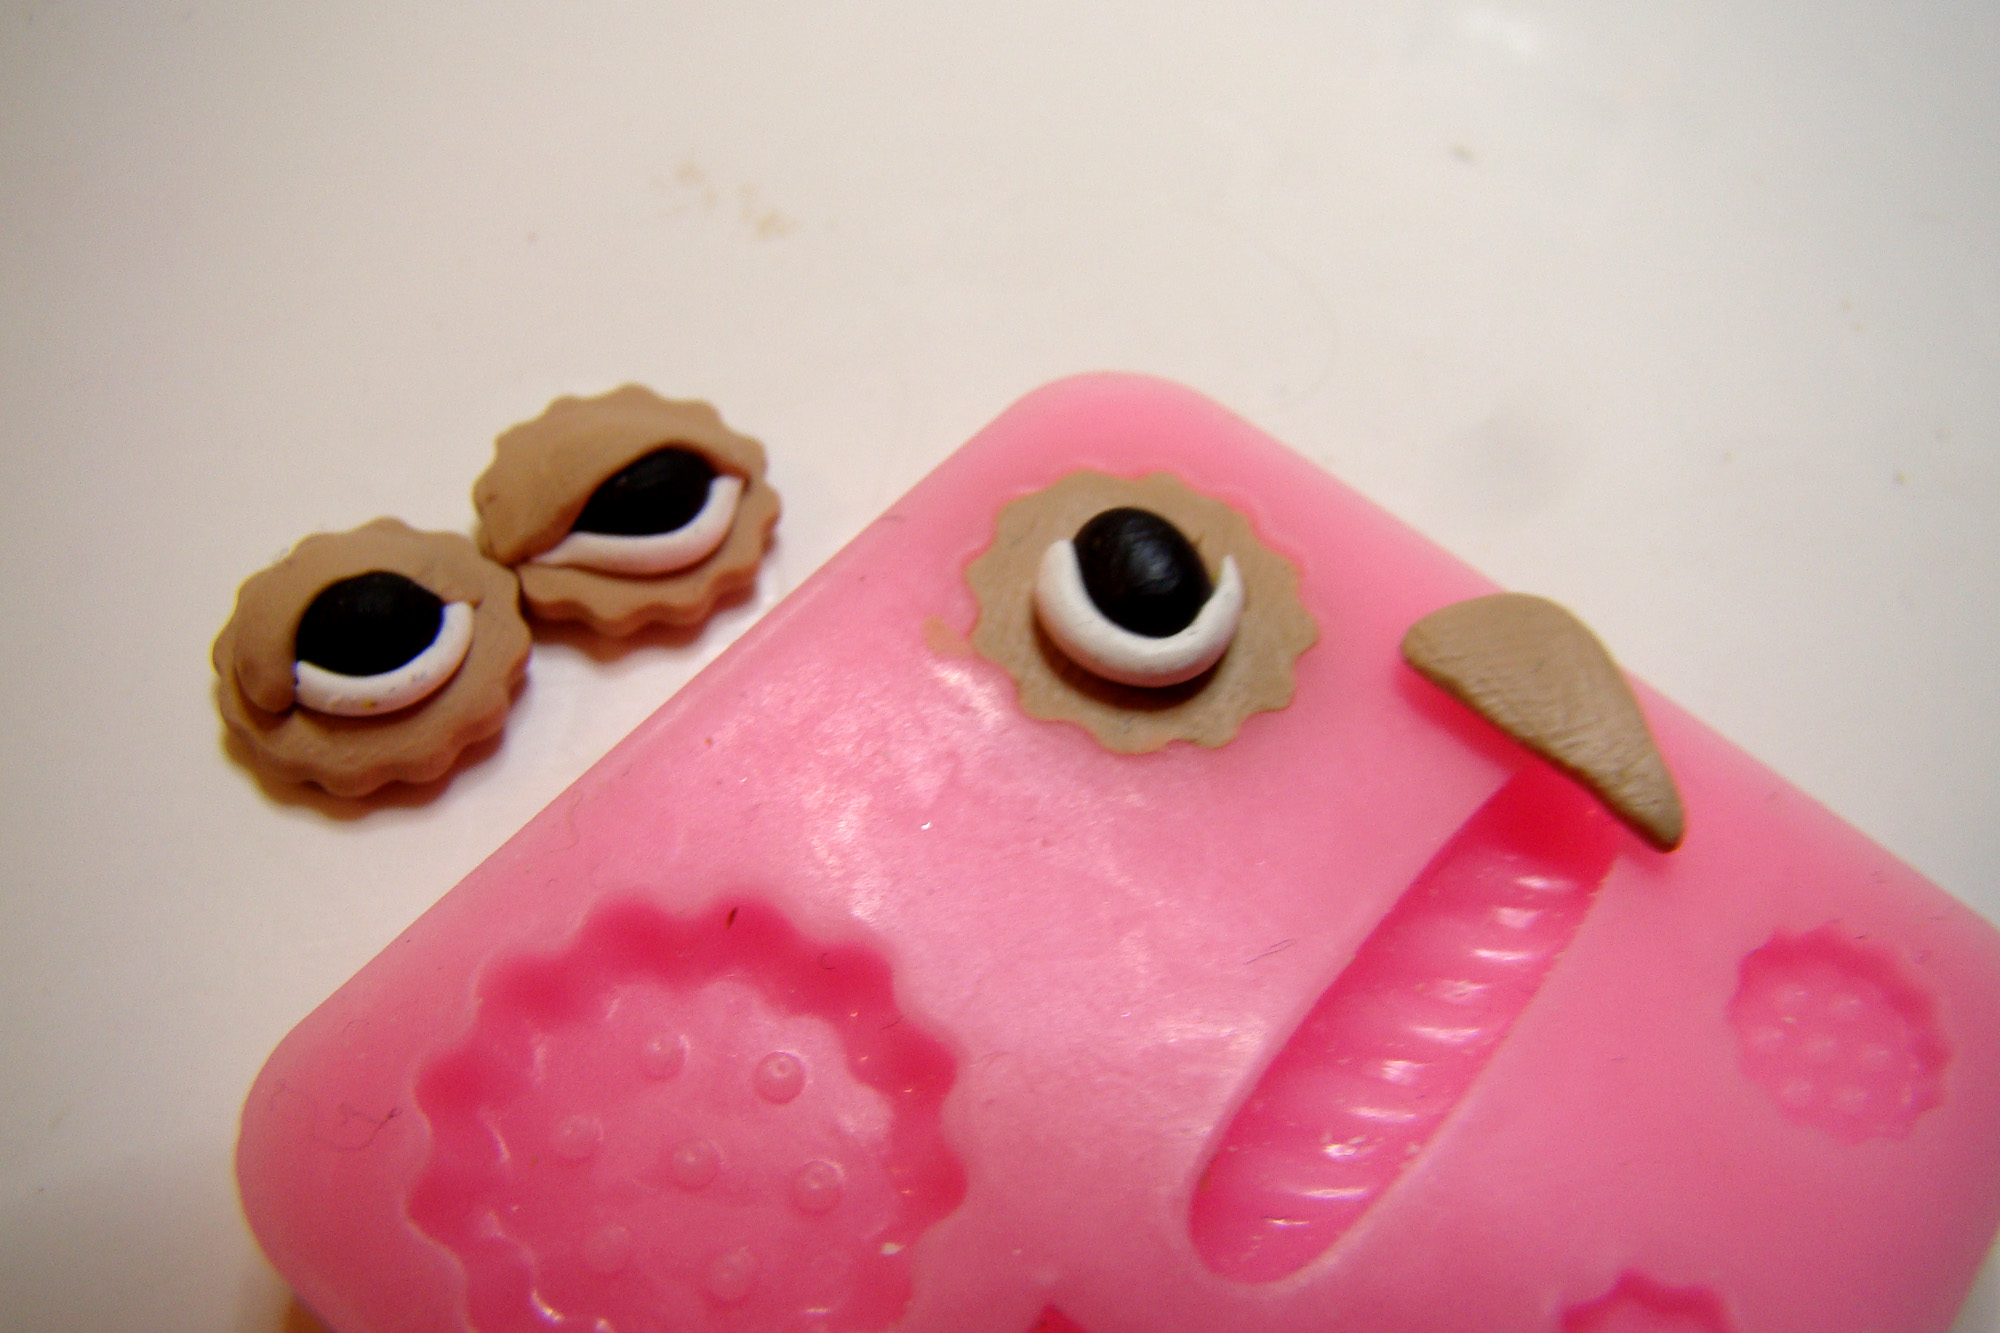
A glistening dot of white paint was added after baking. They are displayed on a Mini Cookie Sheet.
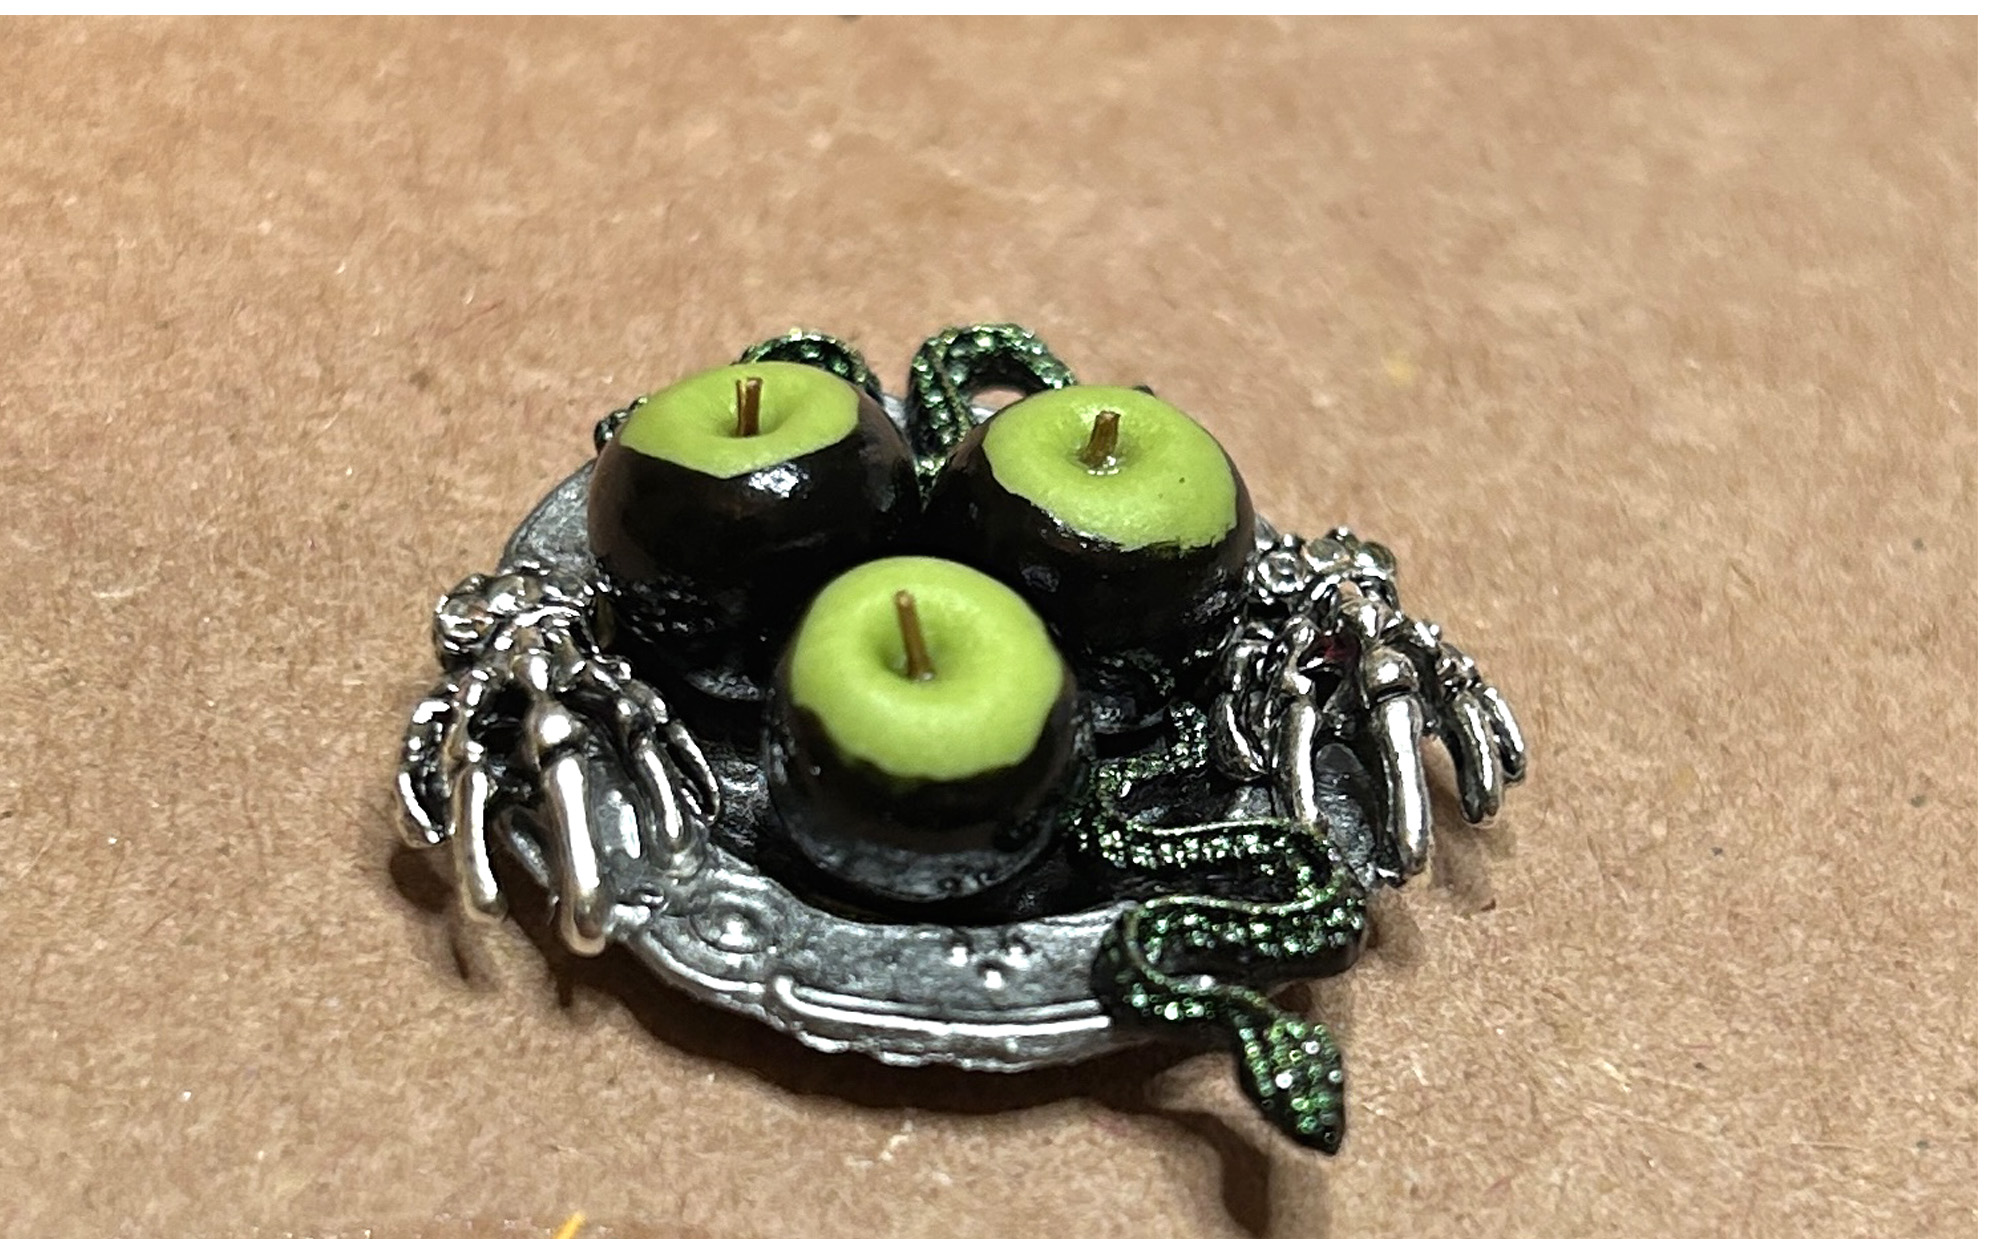
Poison apples were made by painting black nail polish on Green Apples. They sit on a Pewter Plate embellished with Tiny Metal Skeleton Hands. More of the new Resin Snakes complete the look.
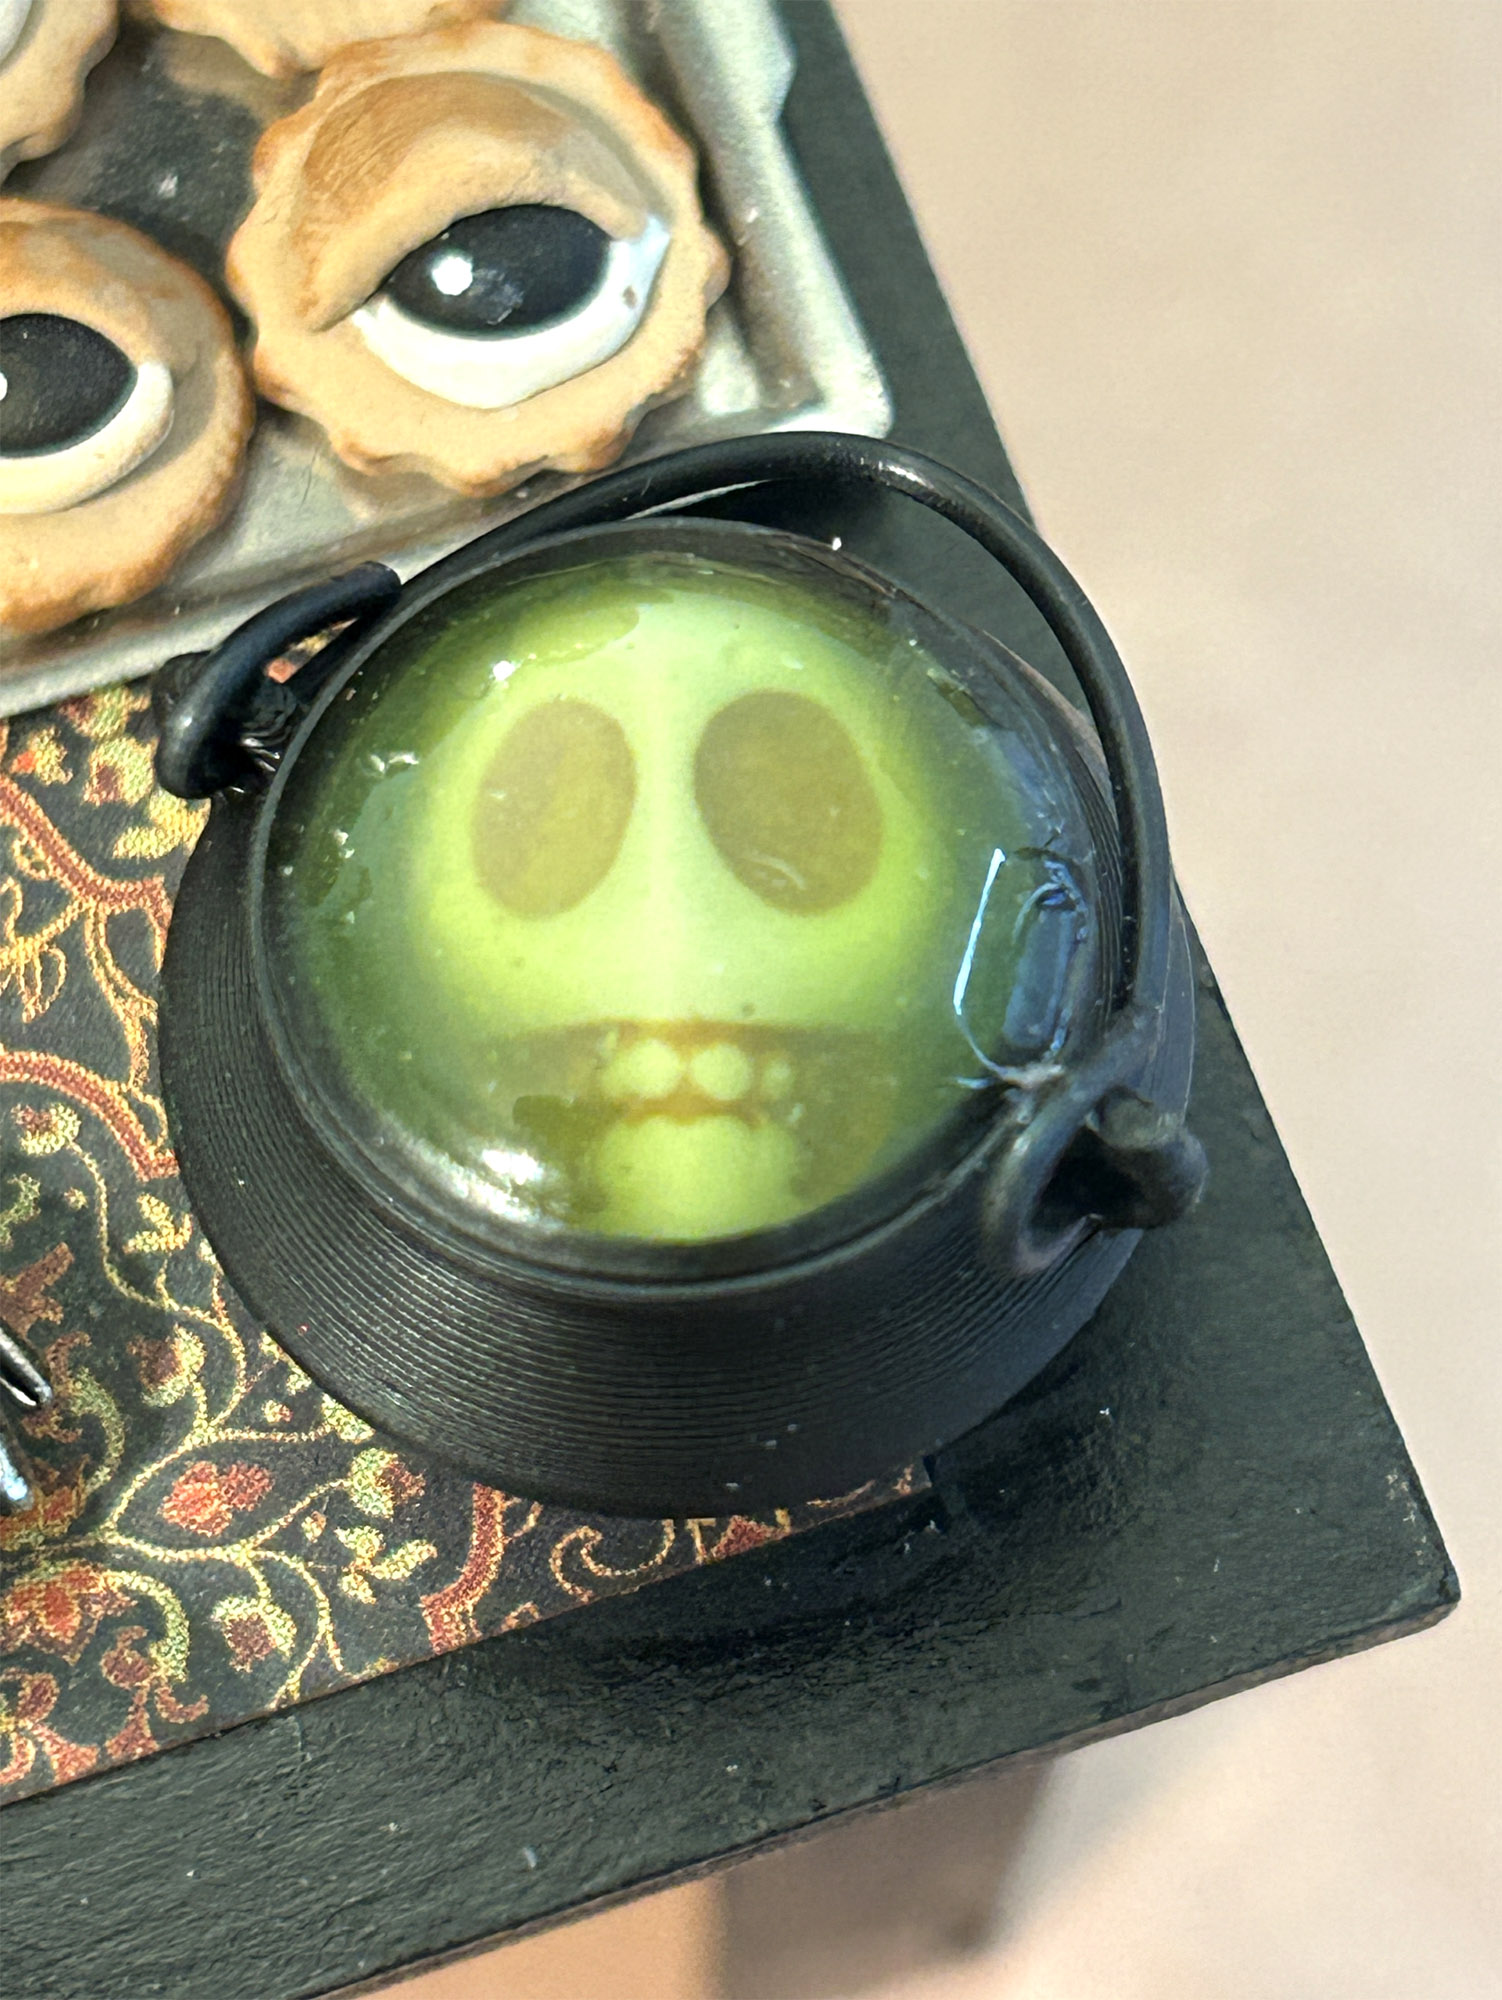
There is a 12mm White Turquoise Skull Bead encased in green resin set inside a Black Plastic Cauldron with Handle. Super creepy!
Completing the spread are a Skull Cap with Green Liquid and a Mini Bloody Knife tucked into the charcuterie platter.
That’s it until next Halloween! If you’re inpired to make your own spooky smorgasbord, the awesome supplies I used may be found right HERE.
The Pick Your Poison Tavern

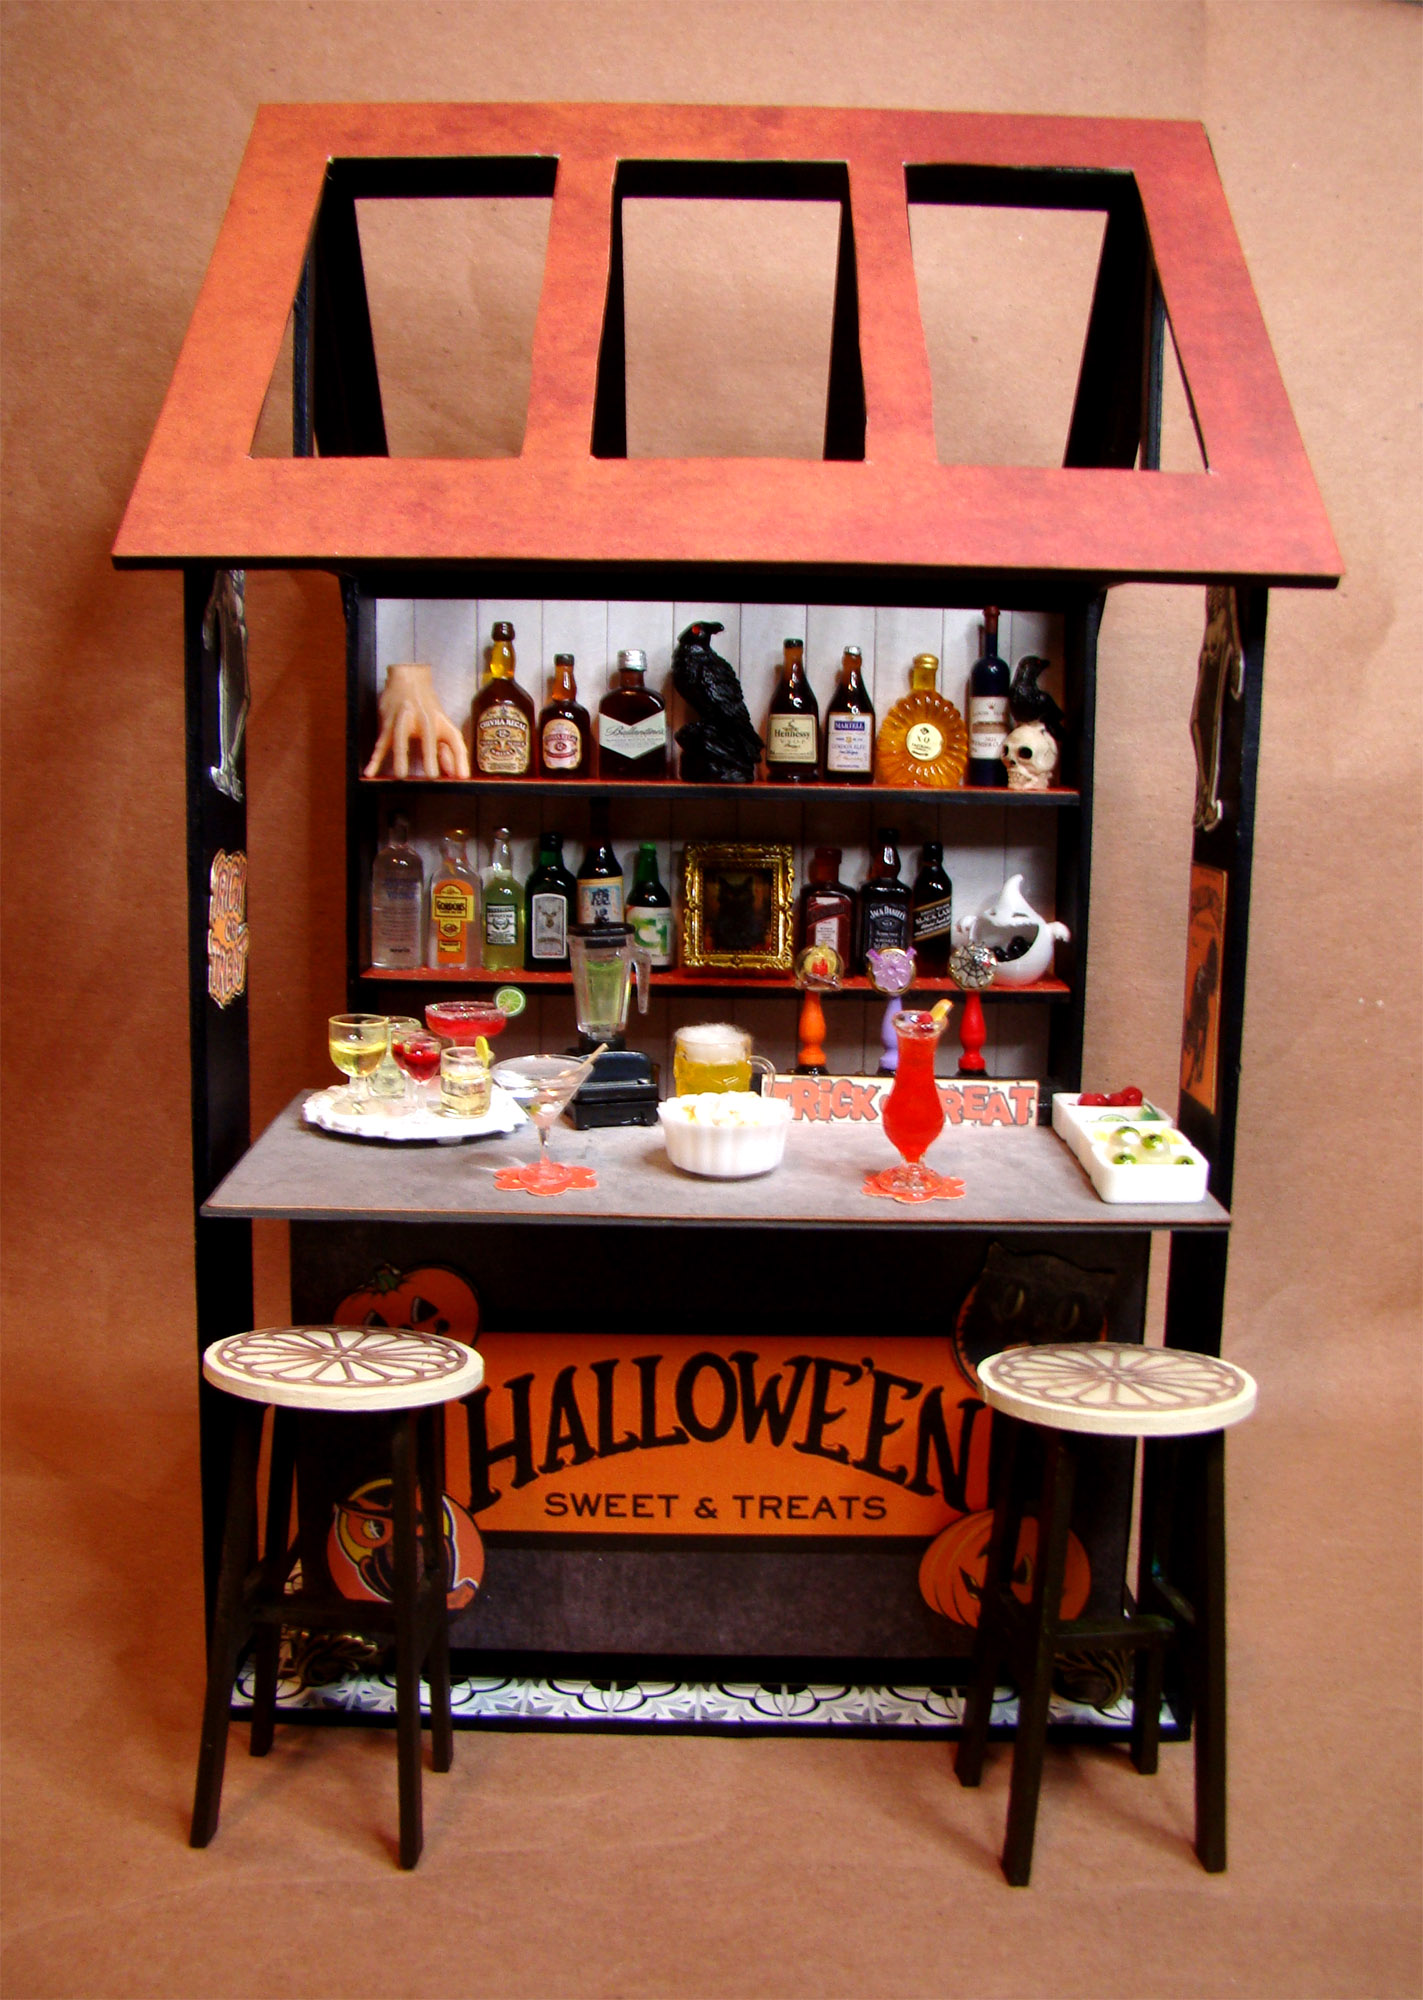
My most recent project was an enchanted goods marketplace made from the new 6×6 Simple Market Stall. Those shelves that were filled last time with crystal balls and devotional candles are exactly the right height for an assortment of tiny liquor bottles and glassware. Since a miniature bar has been a dream project of mine for a long time, I decided to combine this project with my favorite holiday and decorate one for spooky season and thus the Pick Your Poison ‘spook-easy’ was born.

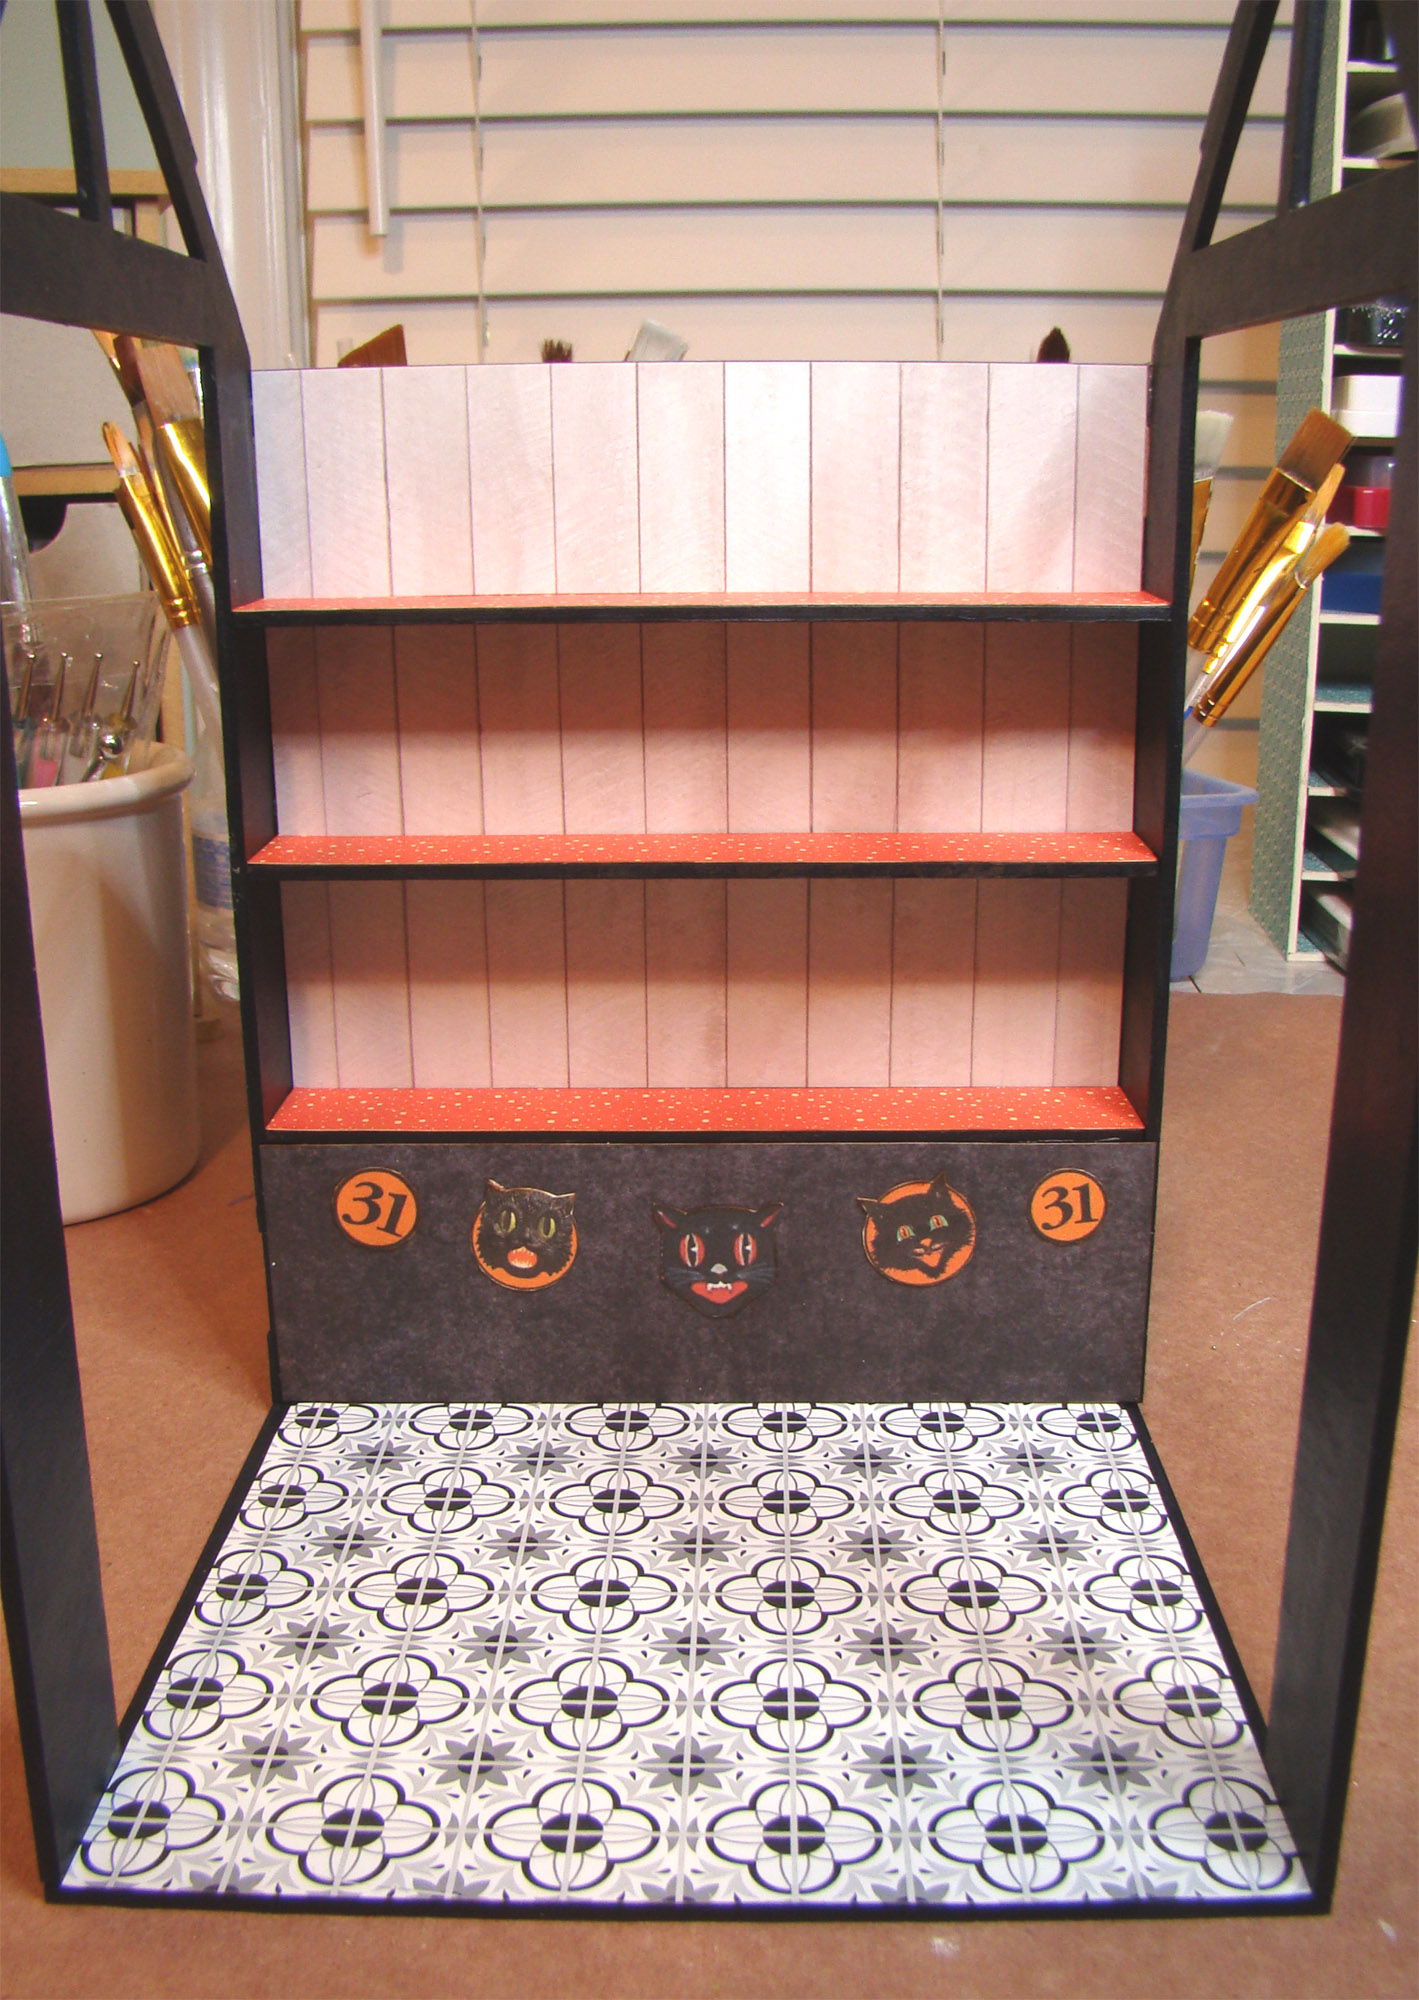
The tavern structure was assembled using tacky glue. The supports were painted a dark blue while the rear wall was papered with a neutral woodgrain print. I considered using a Halloween paper instead for the background but didn’t want all the bottles and decorations getting lost in the print. Besides, this place isn’t decorated year round, the proprietor brings up a big box of Halloween decorations from the basement every September. 🙂 All of the ‘hanging’ paper decorations in this project are from both the Retro Halloween Haunted House Trims Collage Sheet and the Halloween Market Signs & Props Collage Sheet.

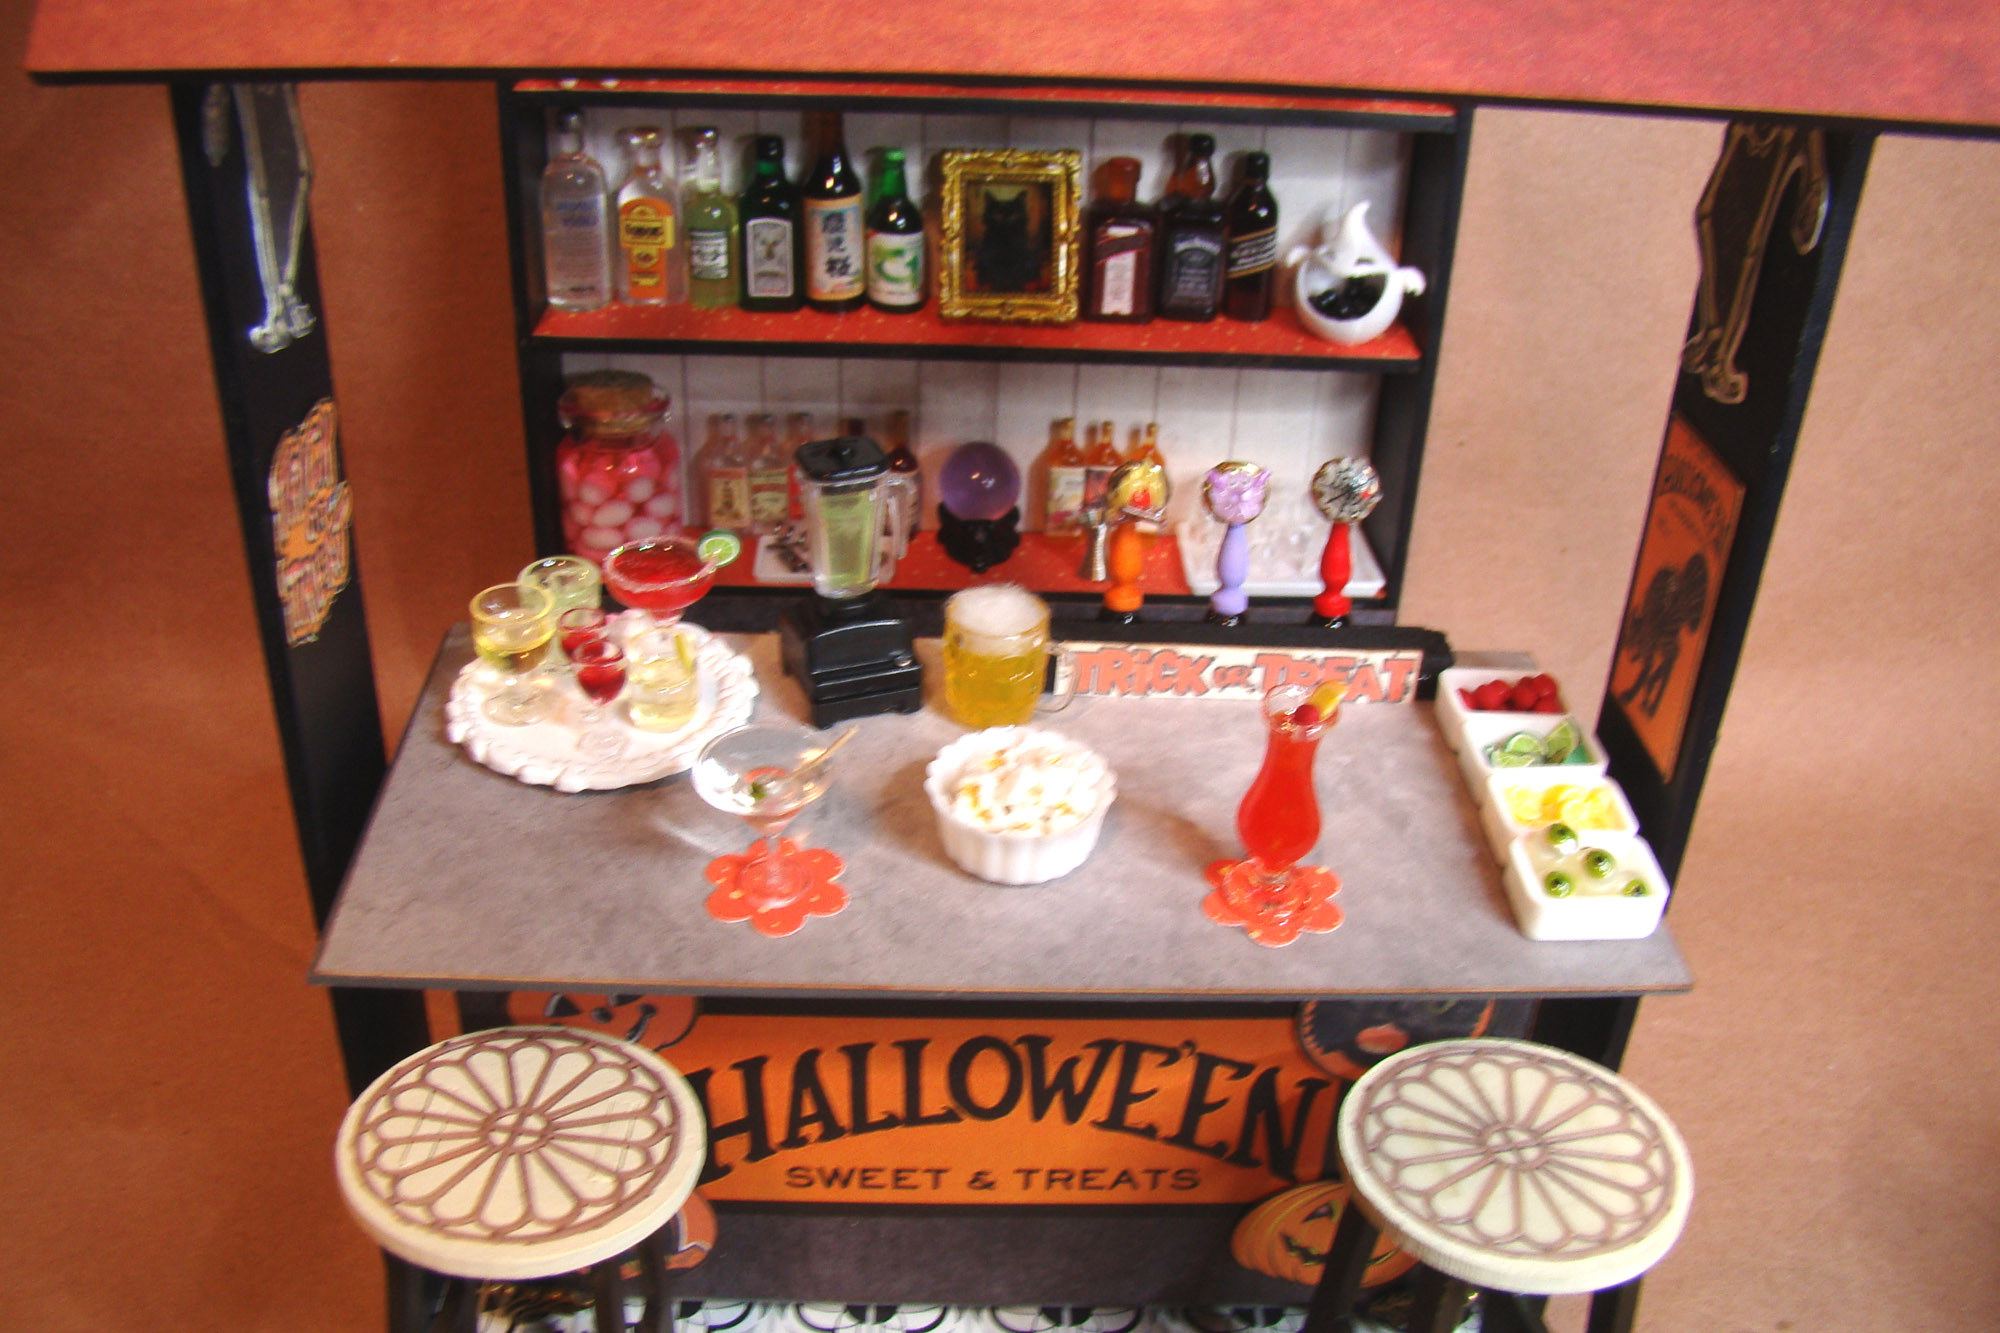
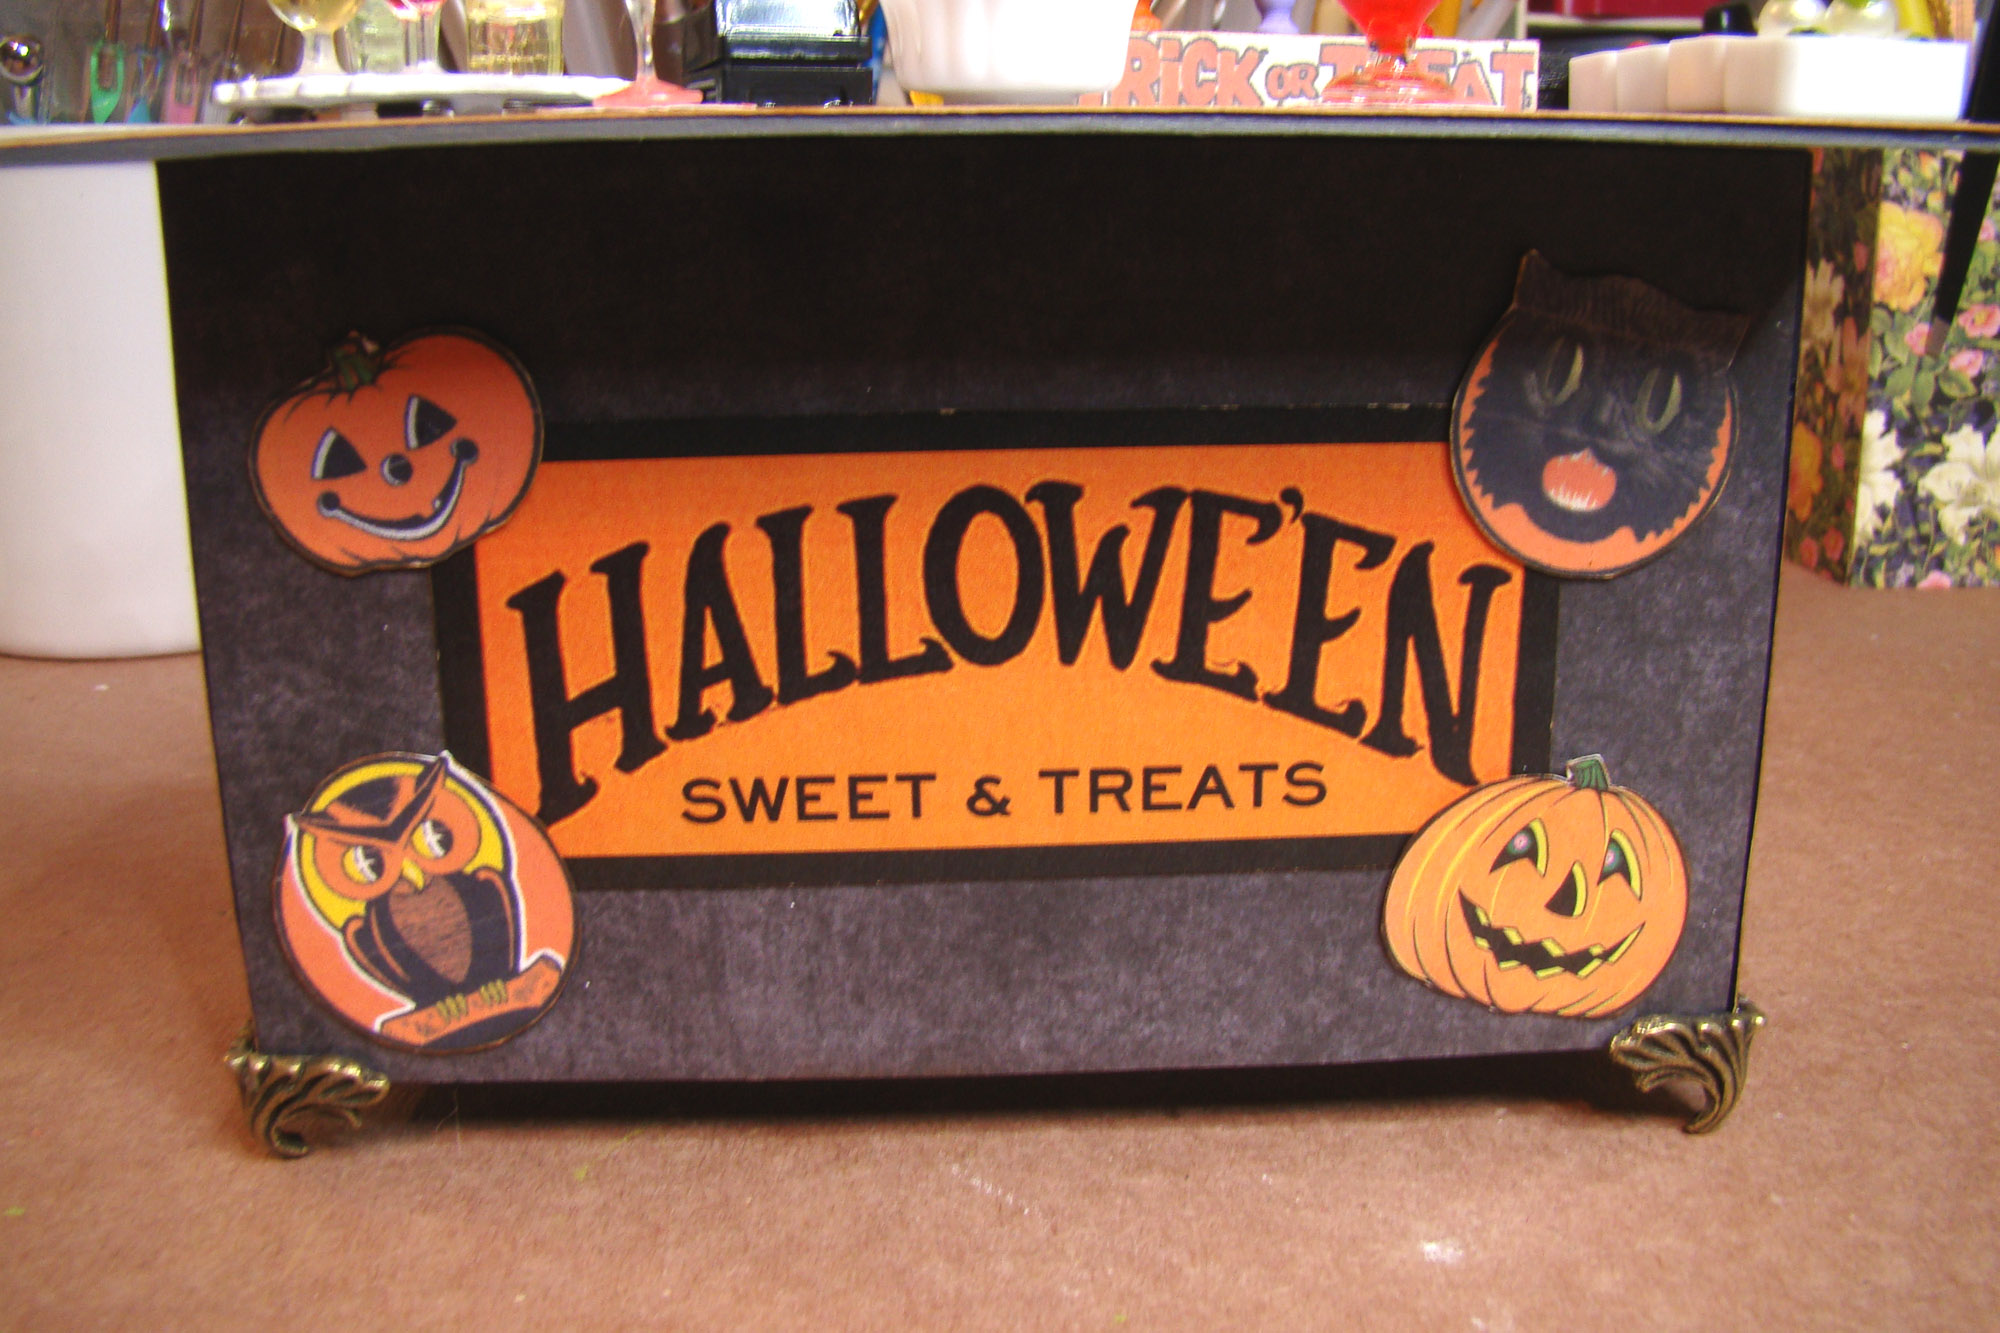
To start with I needed a front counter for pouring beer, mixing cocktails and serving customers. I raised up the 5 Inch Side Counter to barstool height on Small Metal Box Feet – Tree Bark and cut a 2.5 x 5.5 inch piece of chipboard for the counter. That got covered in a gray industrial-looking paper to represent a concrete countertop.

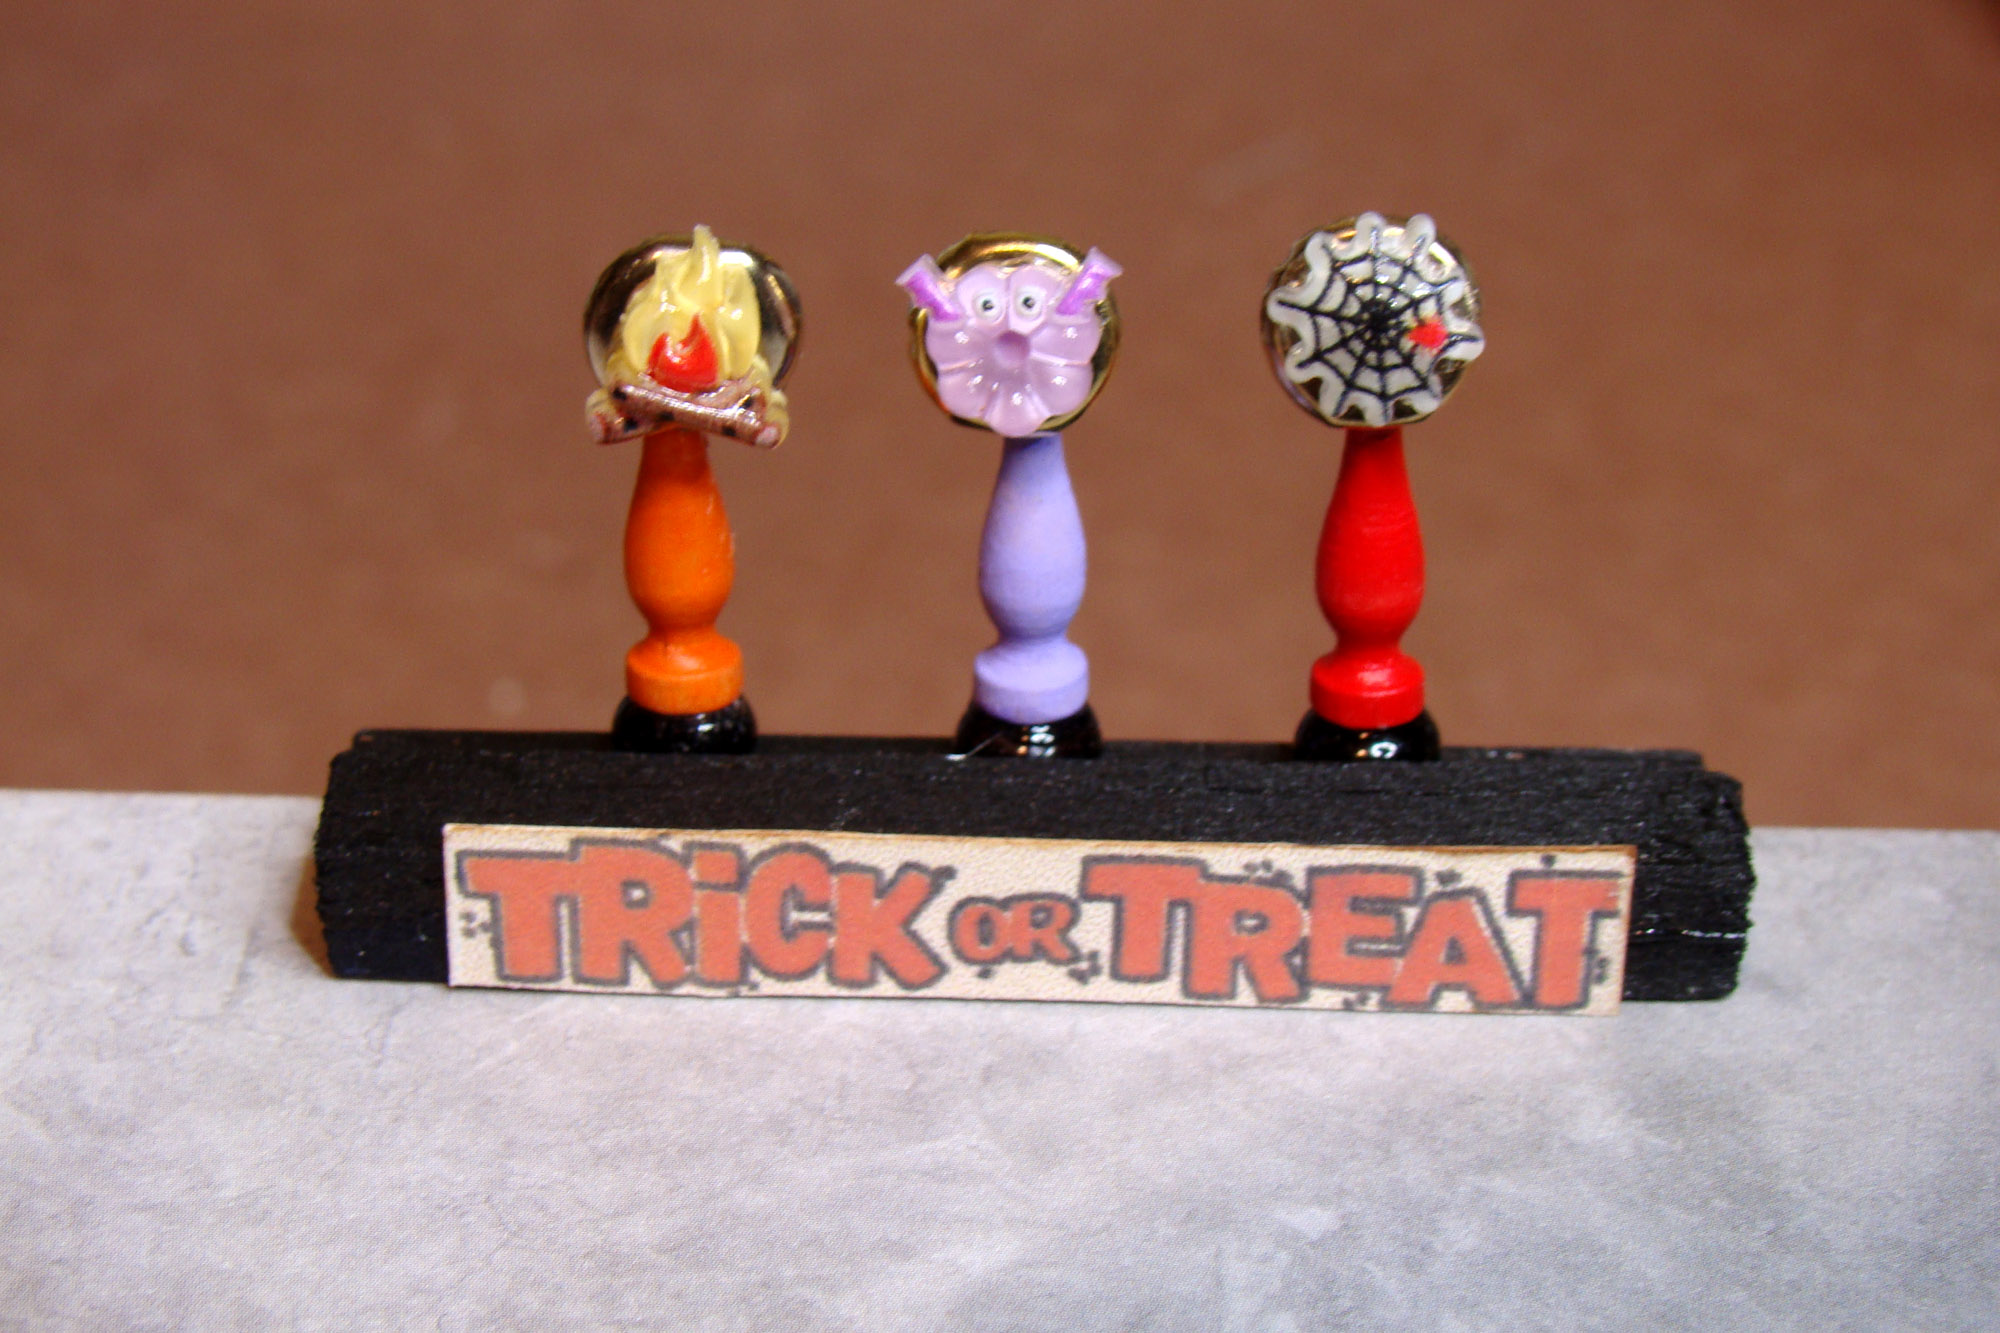
I knew I wanted to include a beer tap featuring an assortment of seasonal pours. I cut a few strips of balsa wood and painted those black. The tap handles are made from 14mm Wooden Spindles. Colorful tap toppers are made from the Tiny Halloween Embellishments Mix glued onto brass paper fasteners.

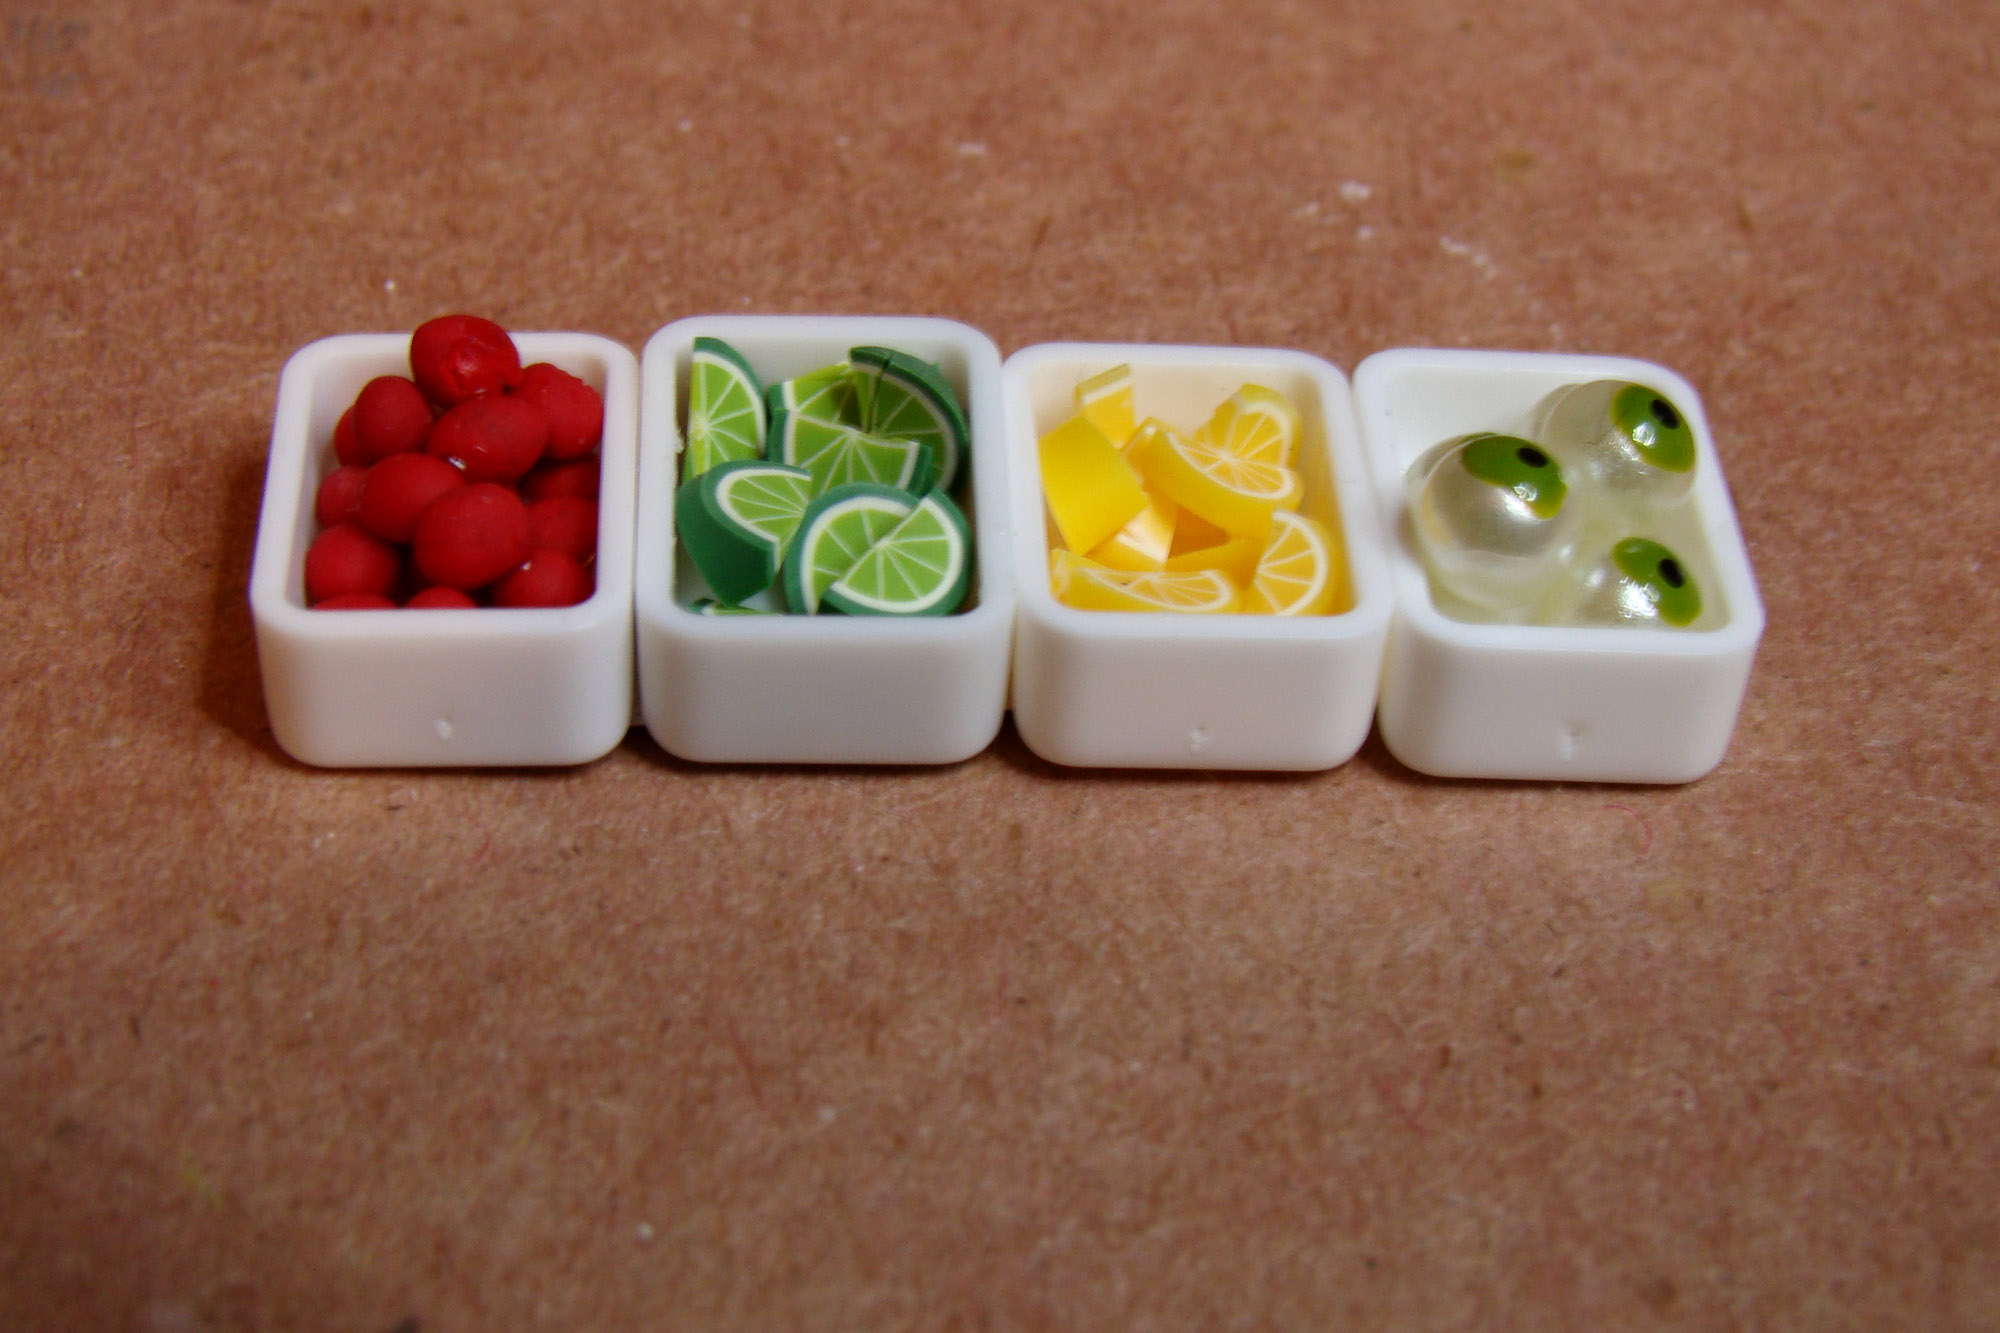
Cocktail garnishes were made from slices of Polymer Clay Lemon and Lime Canes and tiny balls of red polymer clay cherries. Since it’s Halloween, there are also some eyeball garnishes. Those are made from tiny pearls dotted with acrylic paint. The garnish container is made from Tiny Plastic Tubs glued side by side.

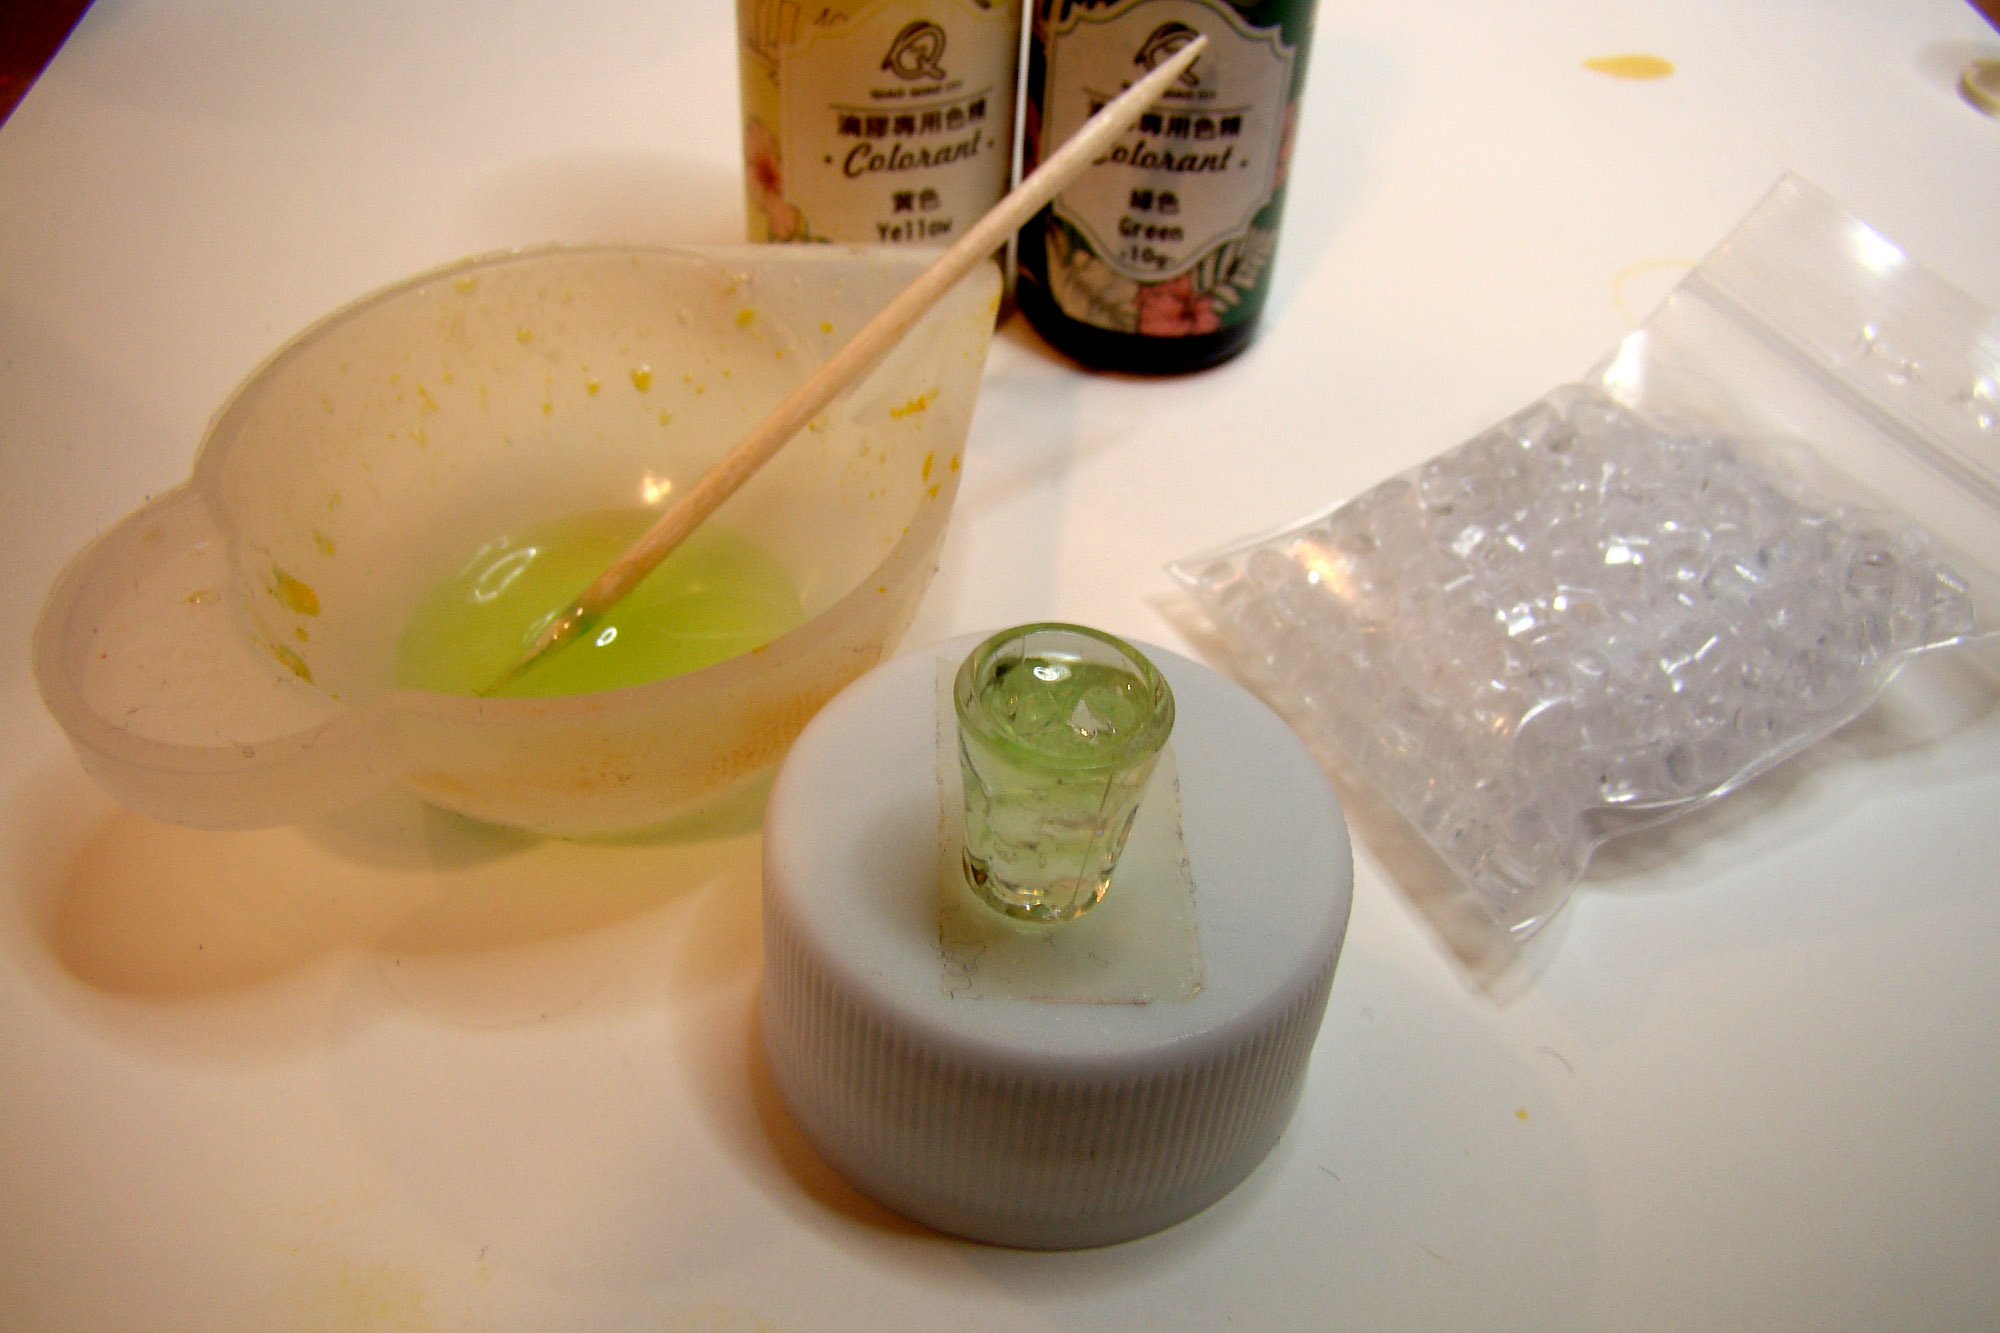
I spent a very fun hour in my craft room with resin supplies and an LED nail curing lamp whipping up tiny cocktails. For instance, here is a margarita made of light green resin poured over Miniature Ice Cubes into a Miniature Bistro Glass.

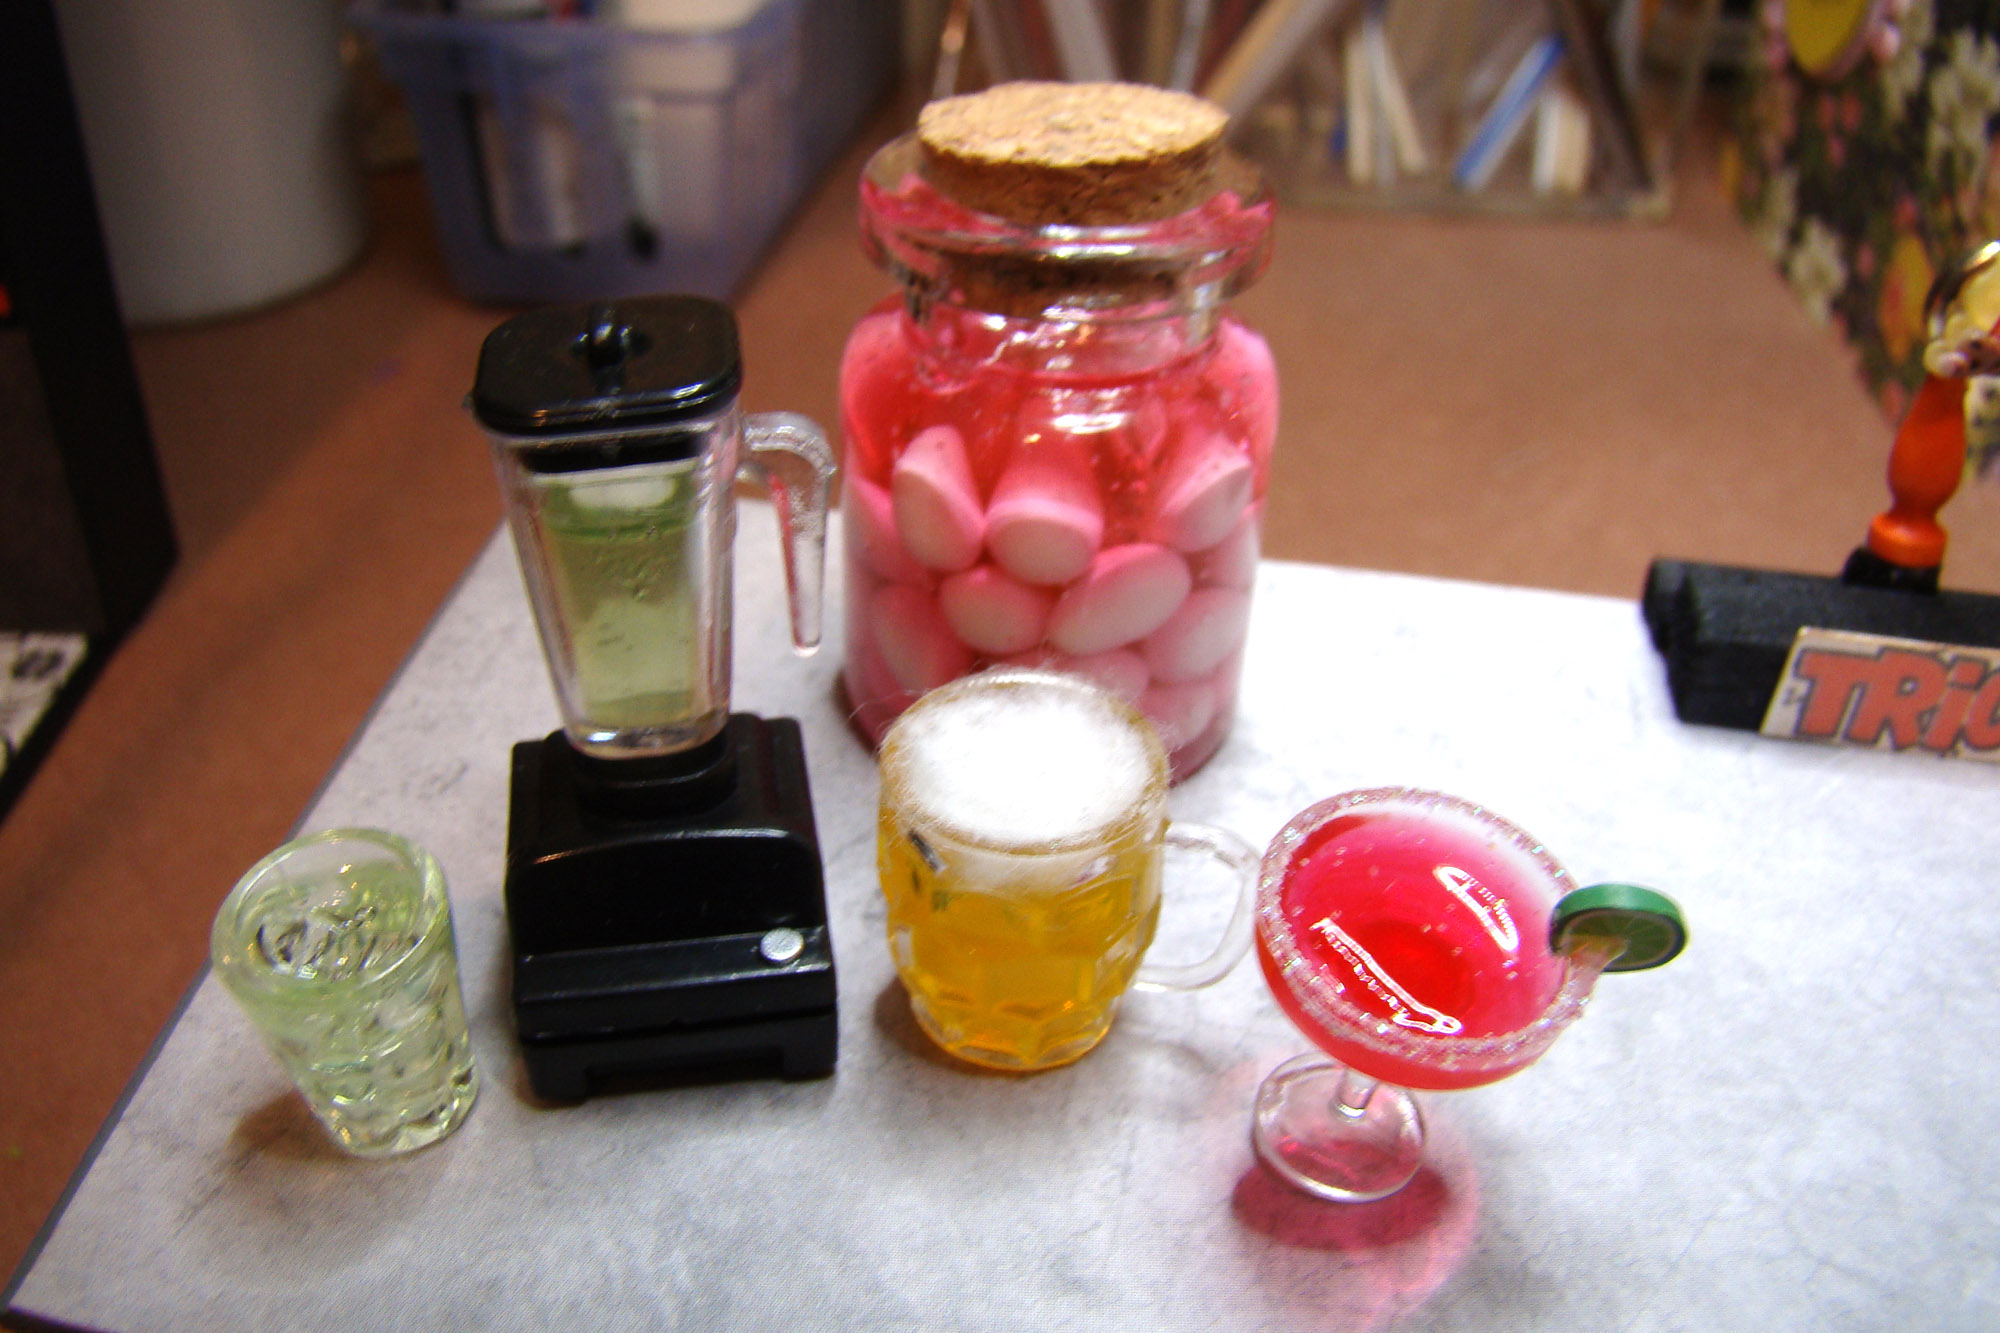
More of my resin adventures. The margarita sits next to the new Blender Kit it was poured from. There is an ice cold beer made of yellow resin in a Clear Beer Stein. The suds on top are some fluff from a cotton ball. The pink lemon drop martini on the right is pink resin poured into a mini coupe glass that was rimmed in super fine glitter and garnished with a slice of Polymer Clay Lime Cane. The Chunky 30mm Tall Bottle with Cork in the rear holds polymer clay eggs set in a pink resin because pickled eggs are a classic bar staple where I come from.

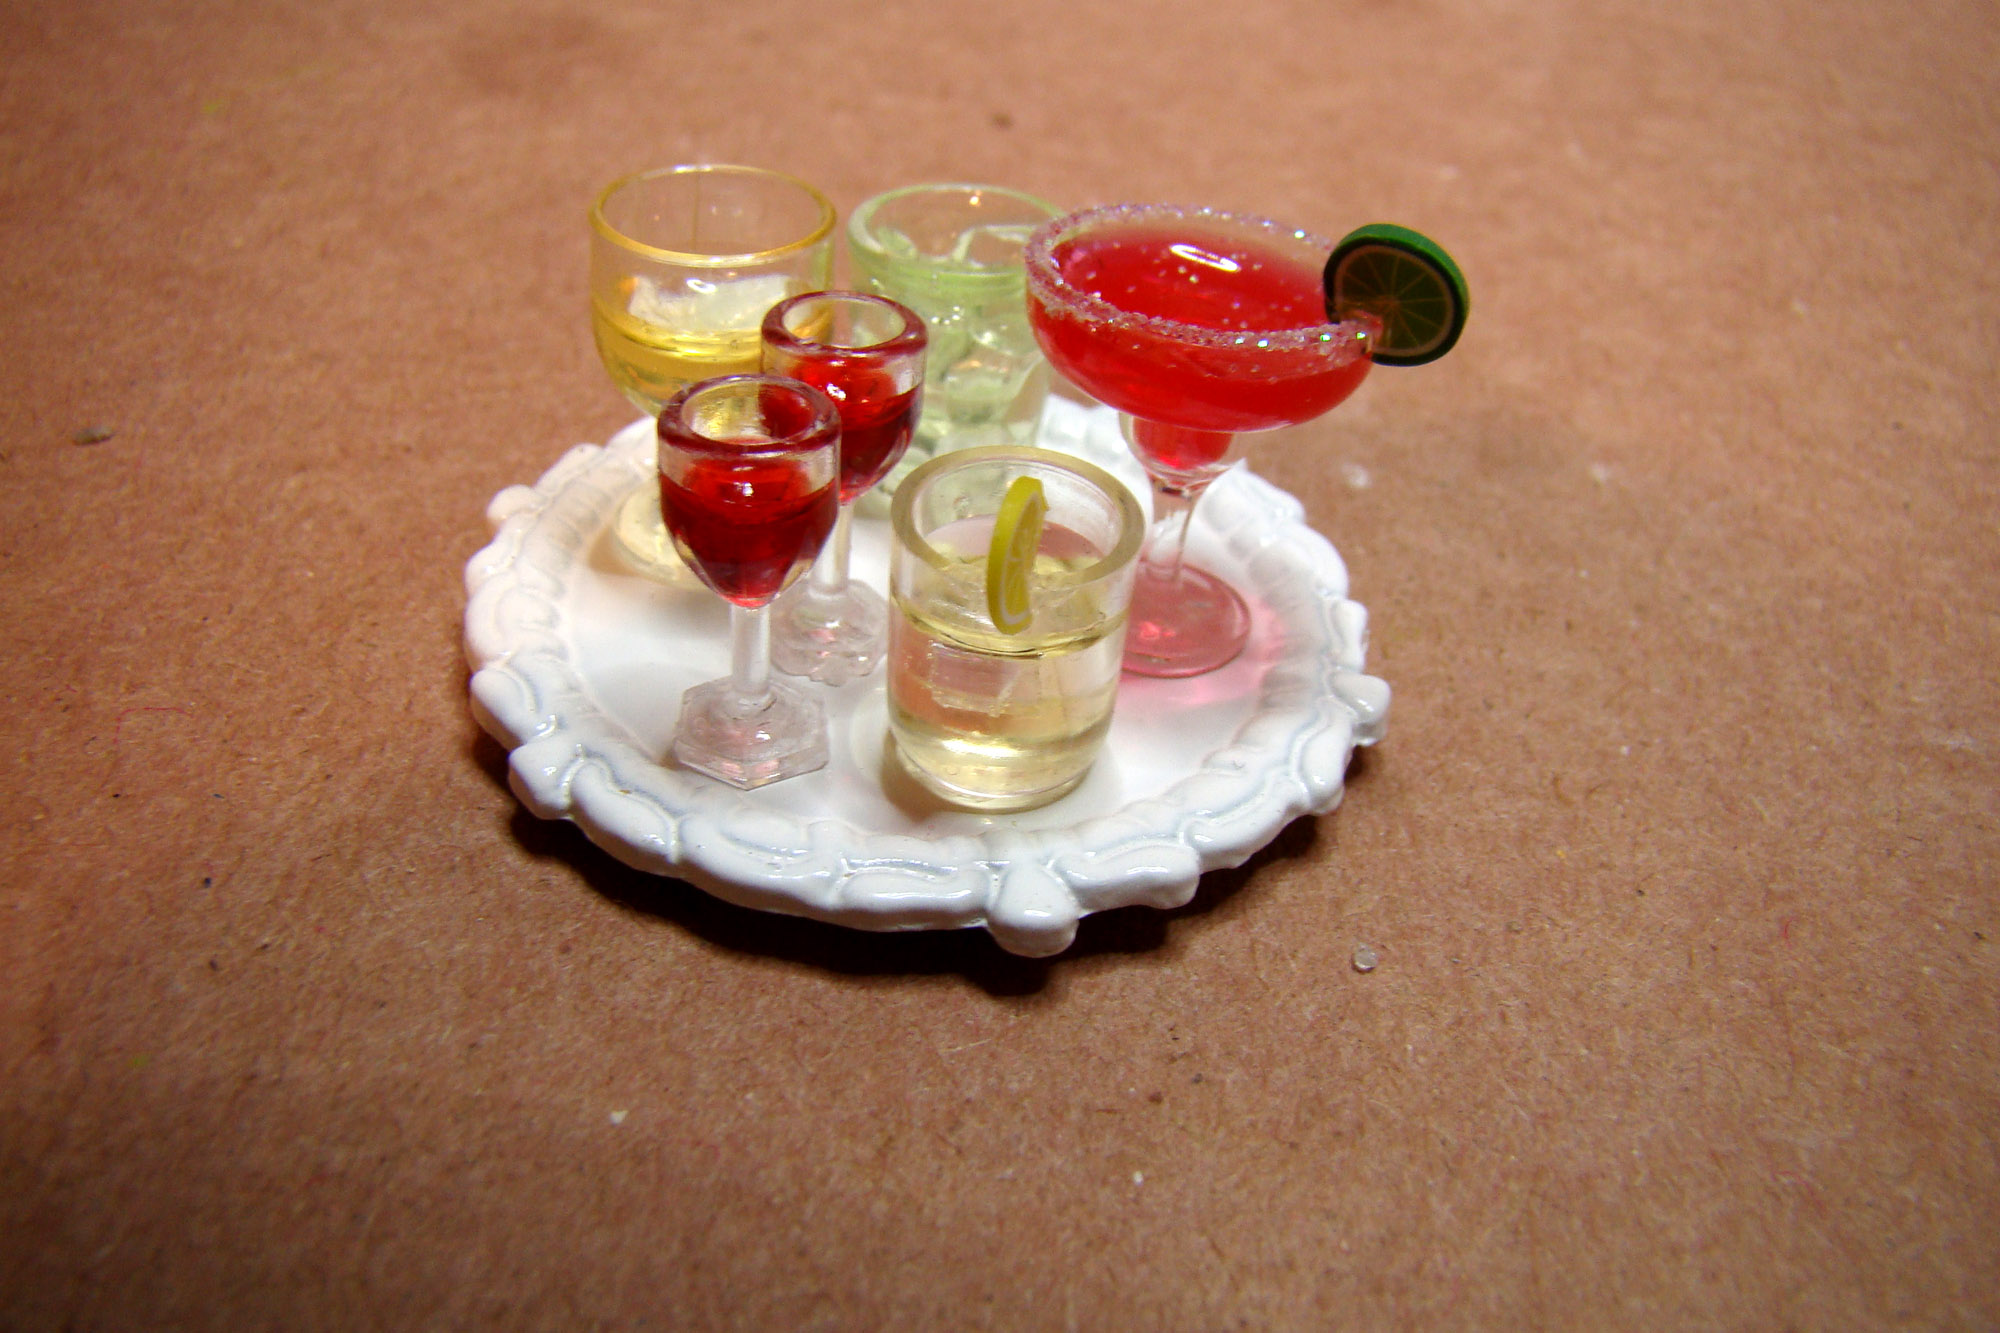
The margarita and pink lemon drop join glasses from the Red Wine Bottle & 2 Filled Glasses set along with a new Vodka Tonic and a glass of white wine I had in my stash. They all sit on a tray waiting for a cocktail waitress to pick up.

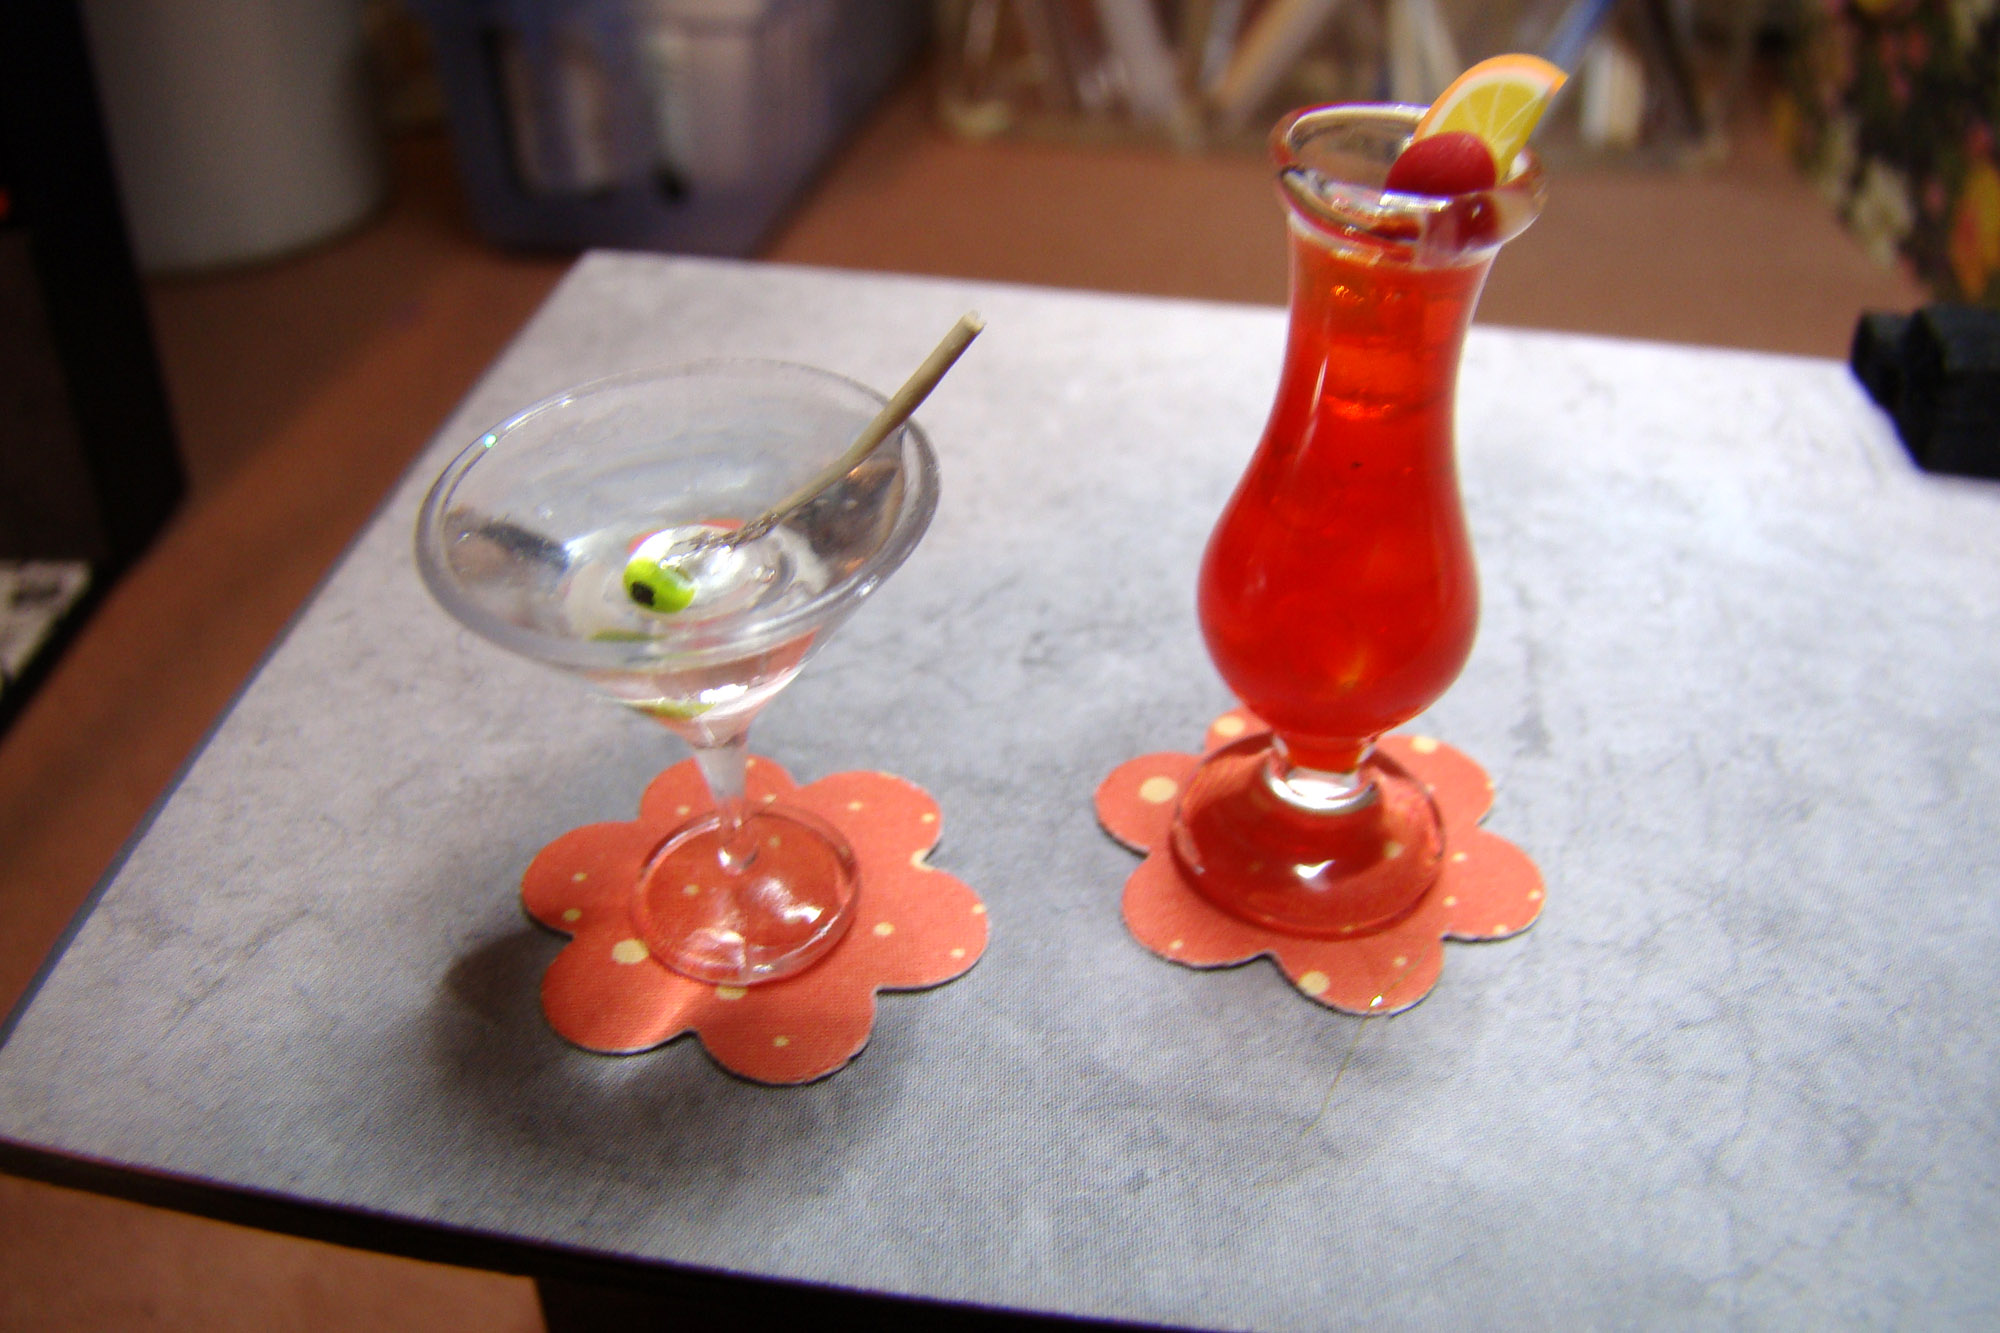
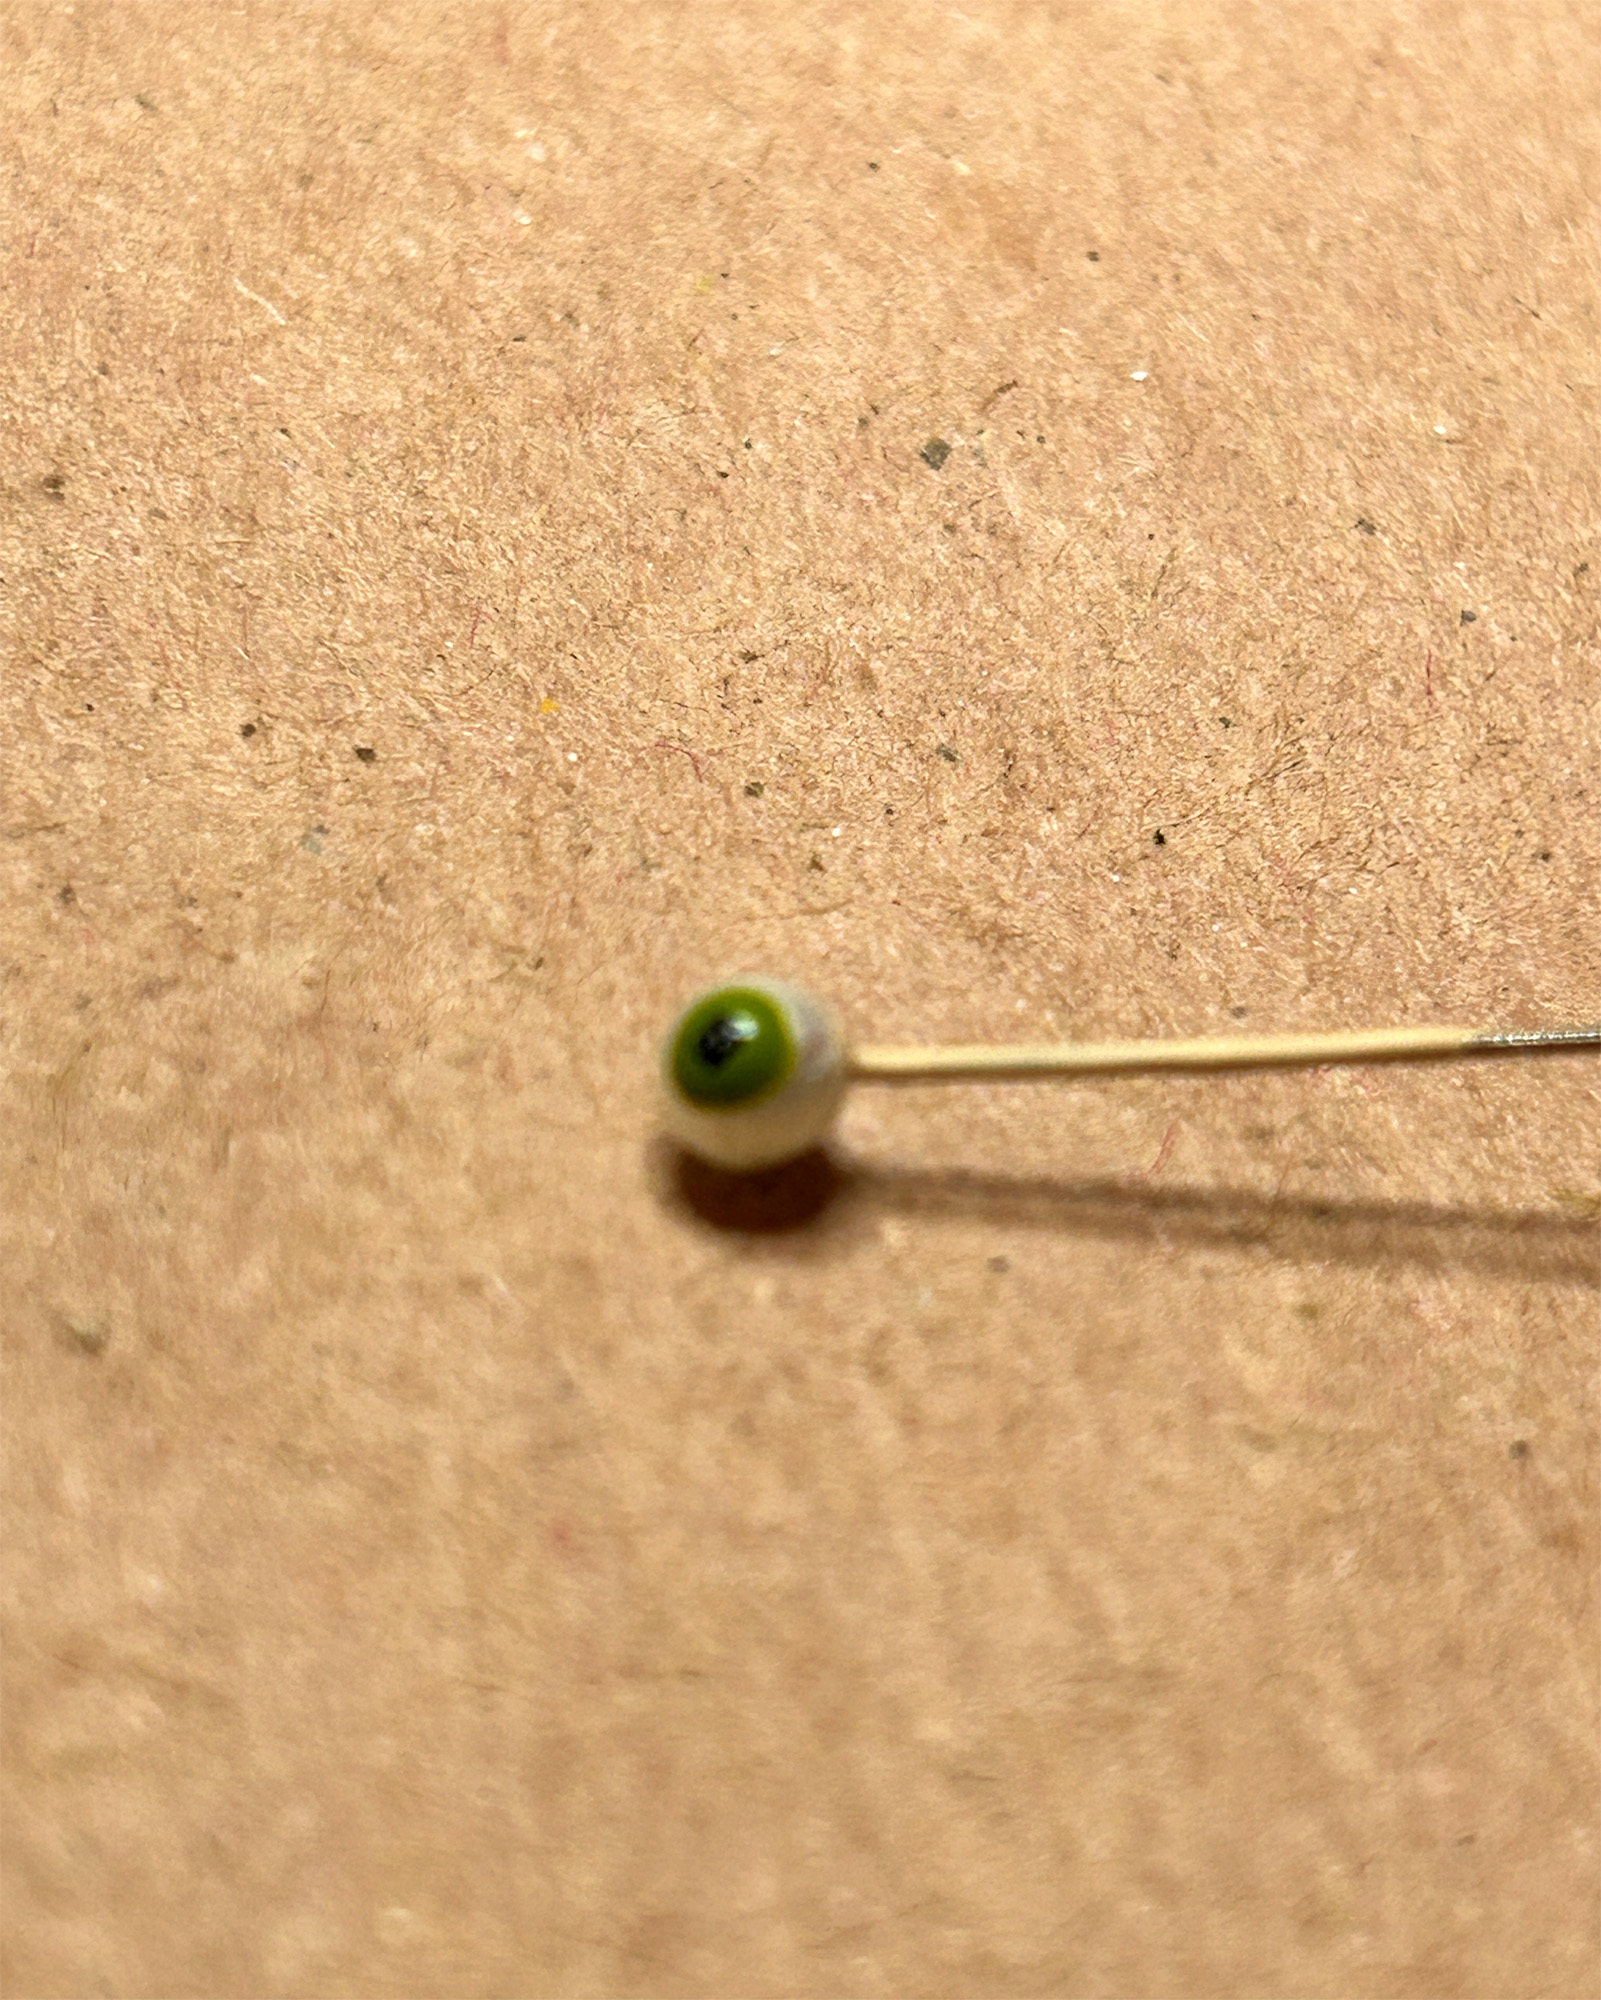
This spooky looking martini is clear resin in a Miniature Martini Glass garnished with an eyeball on a toothpick made from a painted pearl head straight pin cut to size.

The Glass Vase with Wide Base looks exactly like a hurricane cocktail glass to me so that’s what I made in it! I poured pink-orange resin over Miniature Ice Cubes and garnished with a poly clay cherry and slice of Polymer Clay Orange Cane.

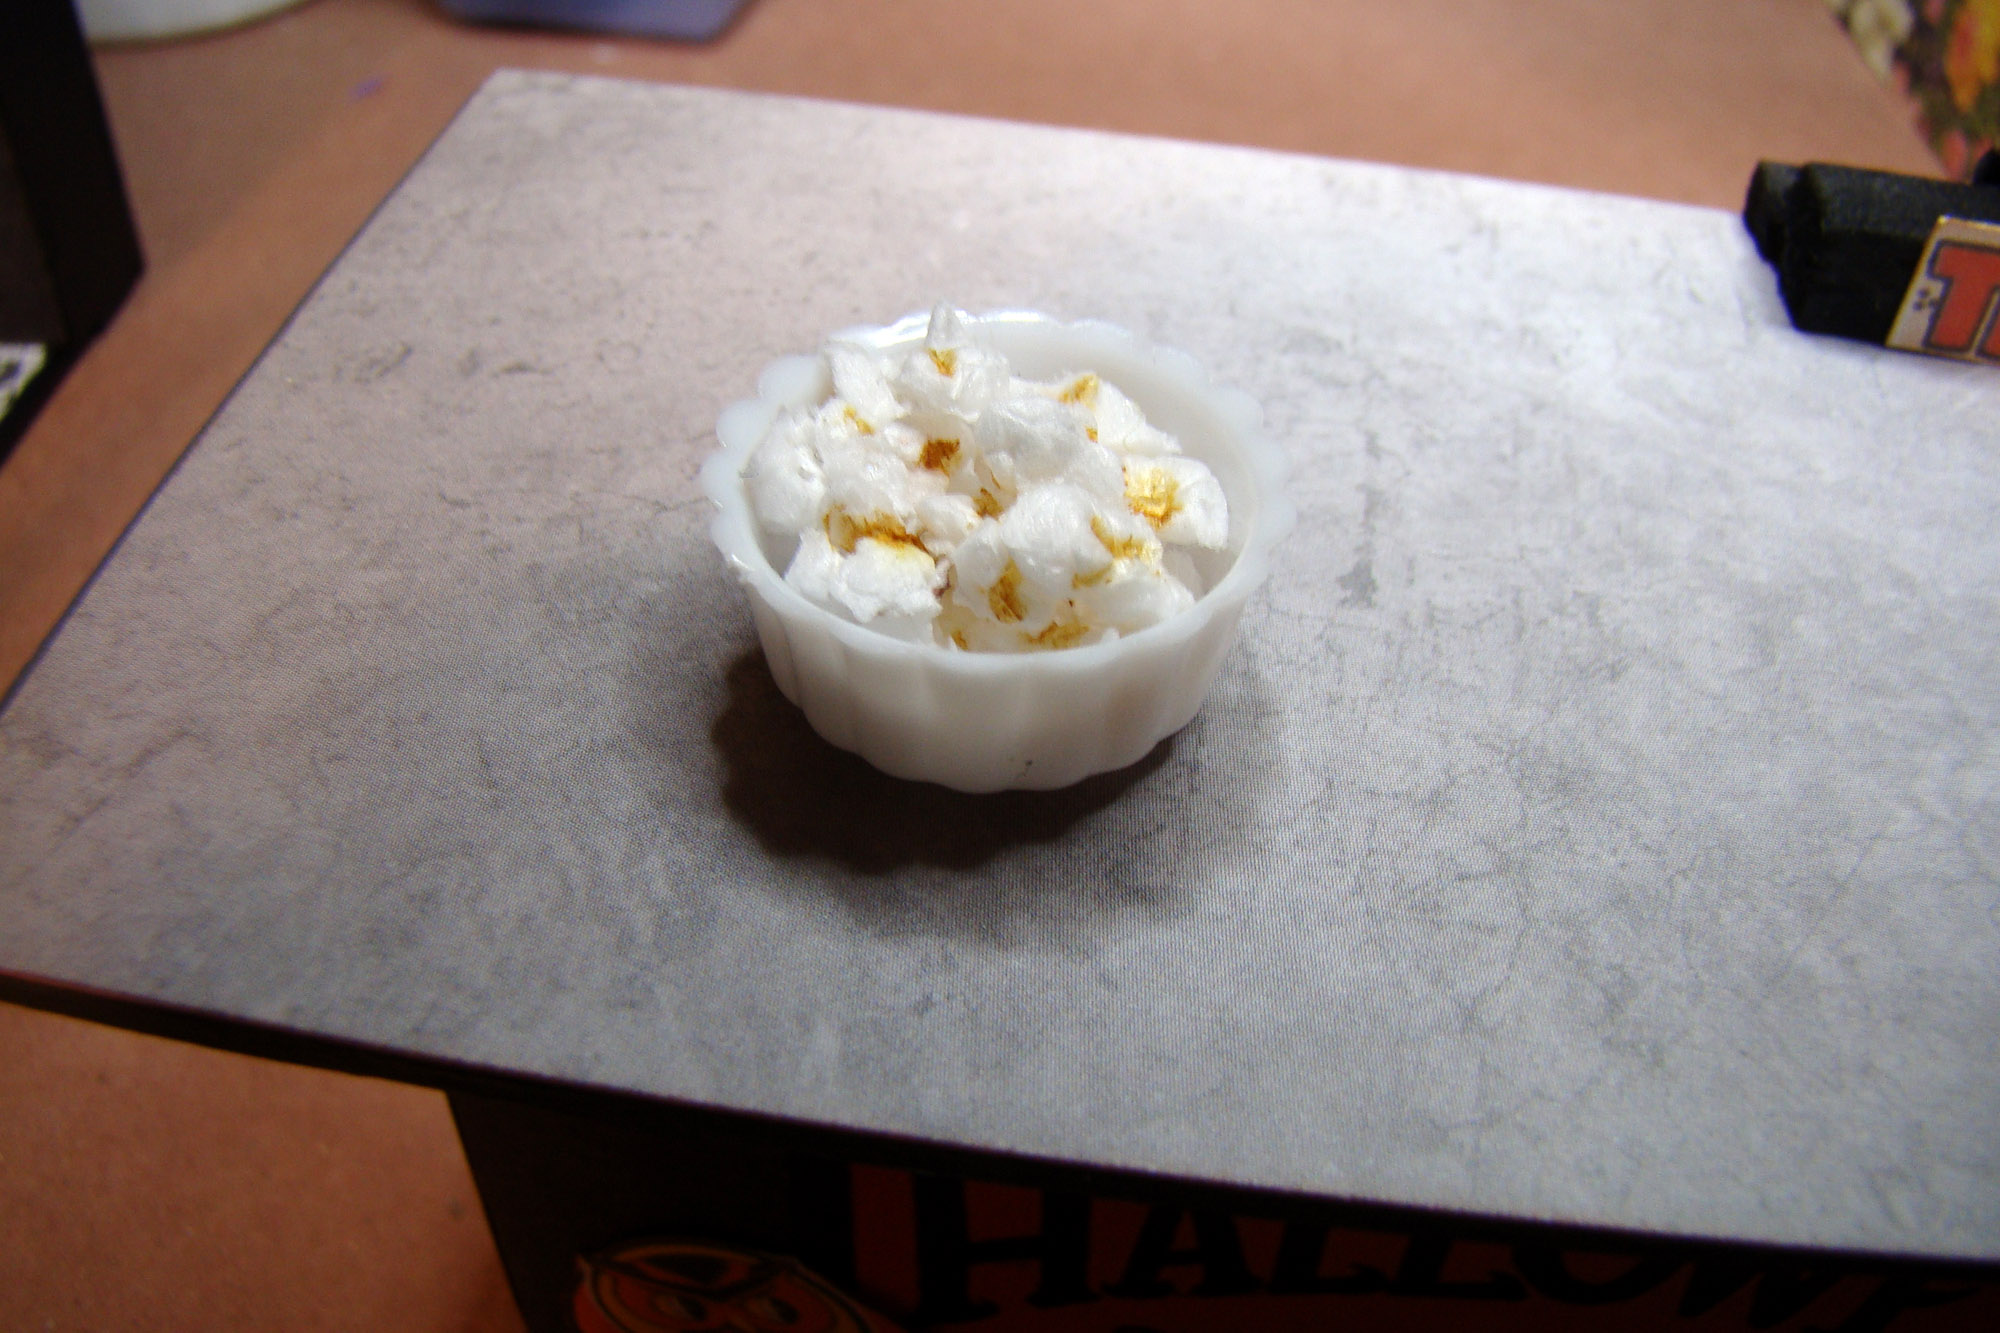
Every bar needs to serve salty snacks! I made popcorn by tearing up styrofoam and dotting the tiny foam balls with a brown sharpie. The popcorn is served in a bowl from the White Plastic Mini Serving Dish Set.

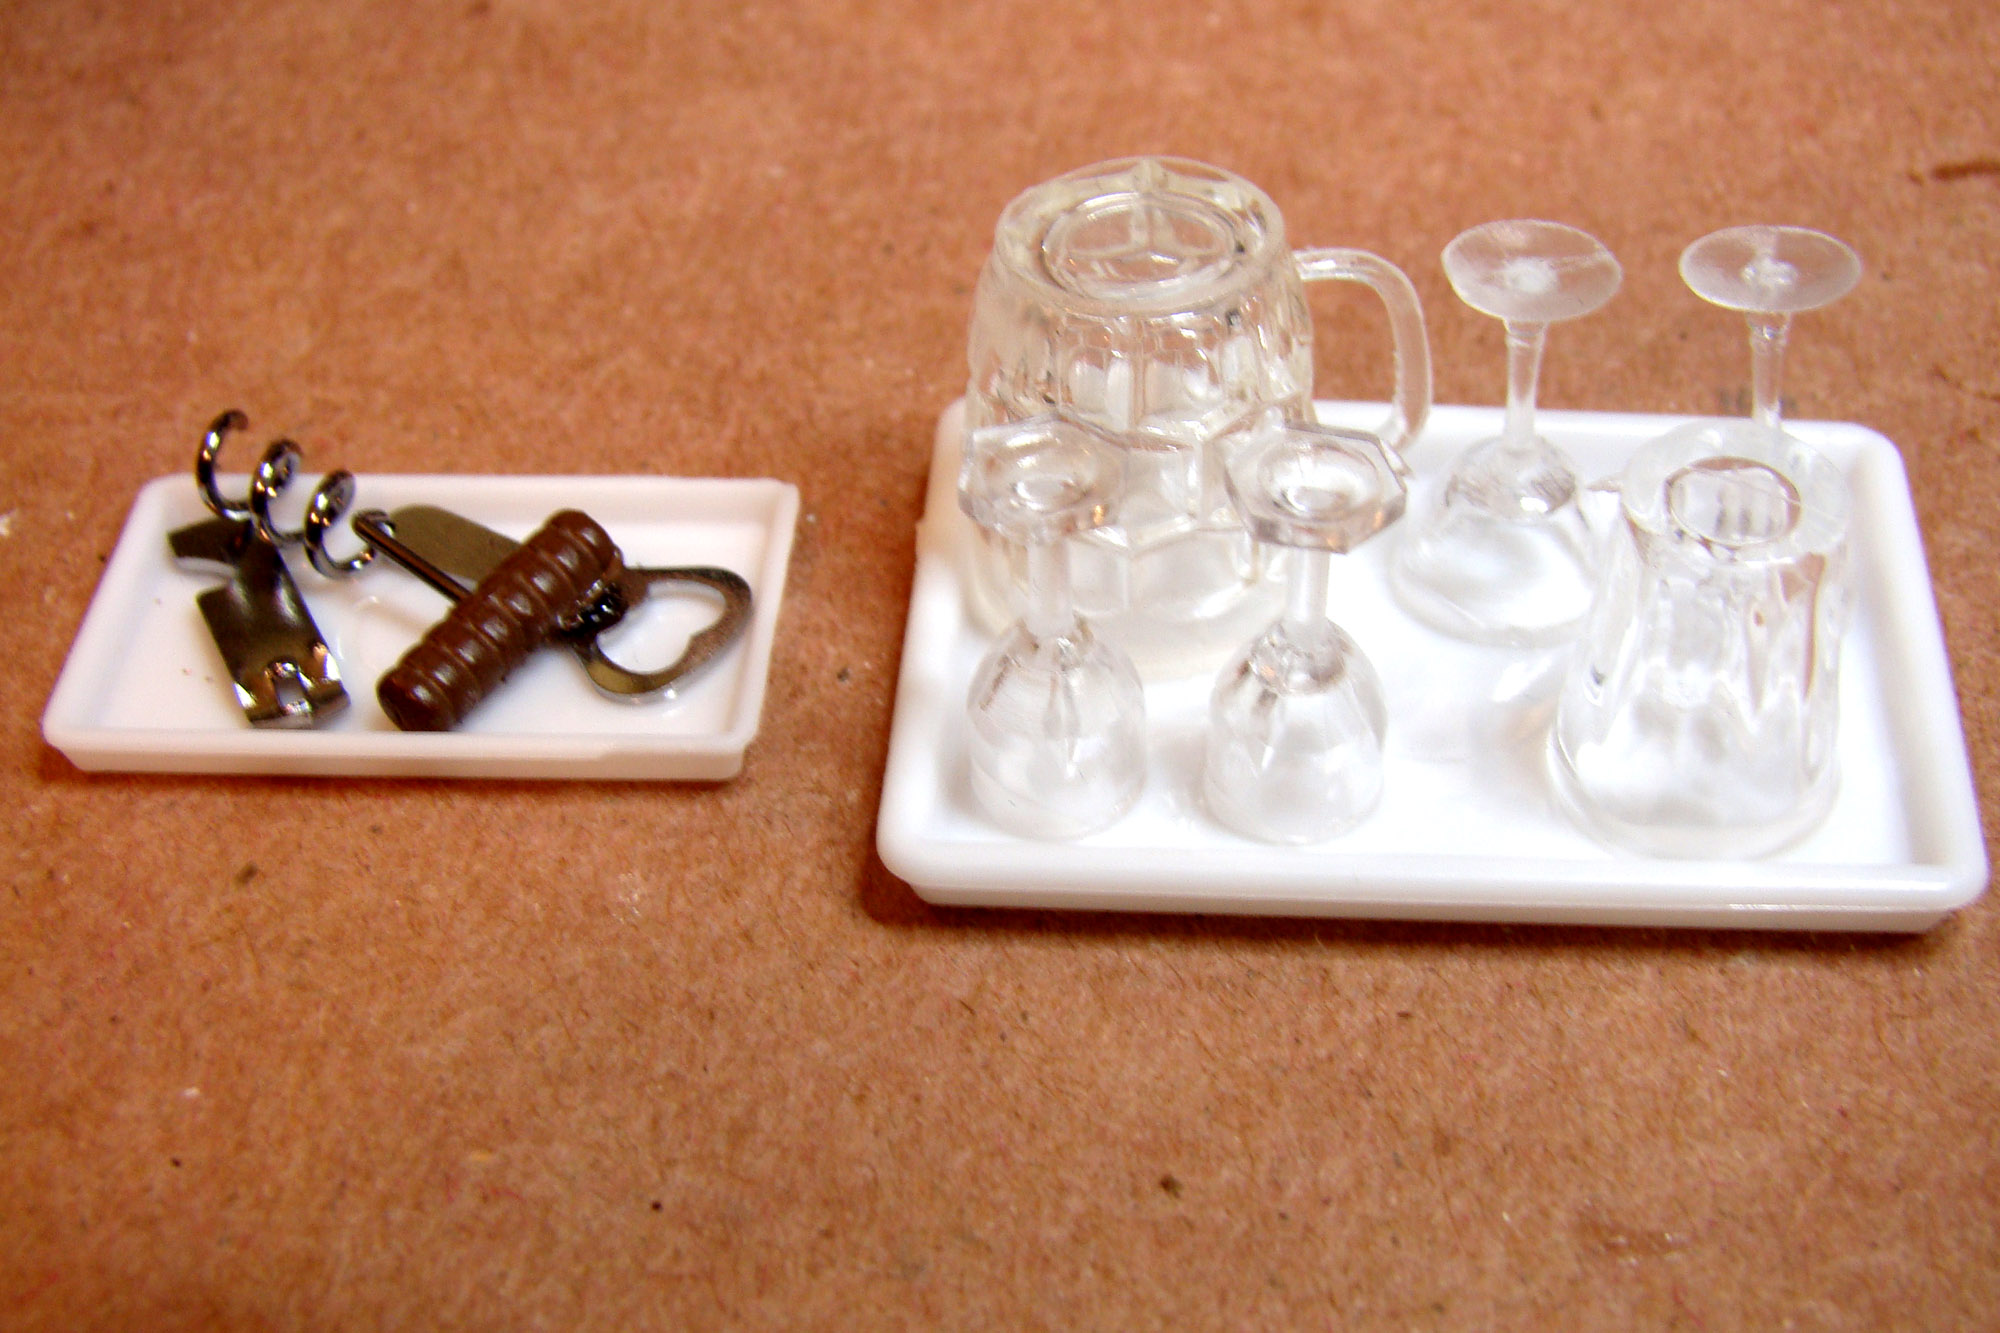
I also used pieces from this dish set to hold the Mini Corkscrew & Can/Bottle Opener Set as well as glassware that consists of a Clear Beer Stein, Empty Wine Glasses, Miniature Cocktail Glasses w Stems and another Mini Bistro Glass.

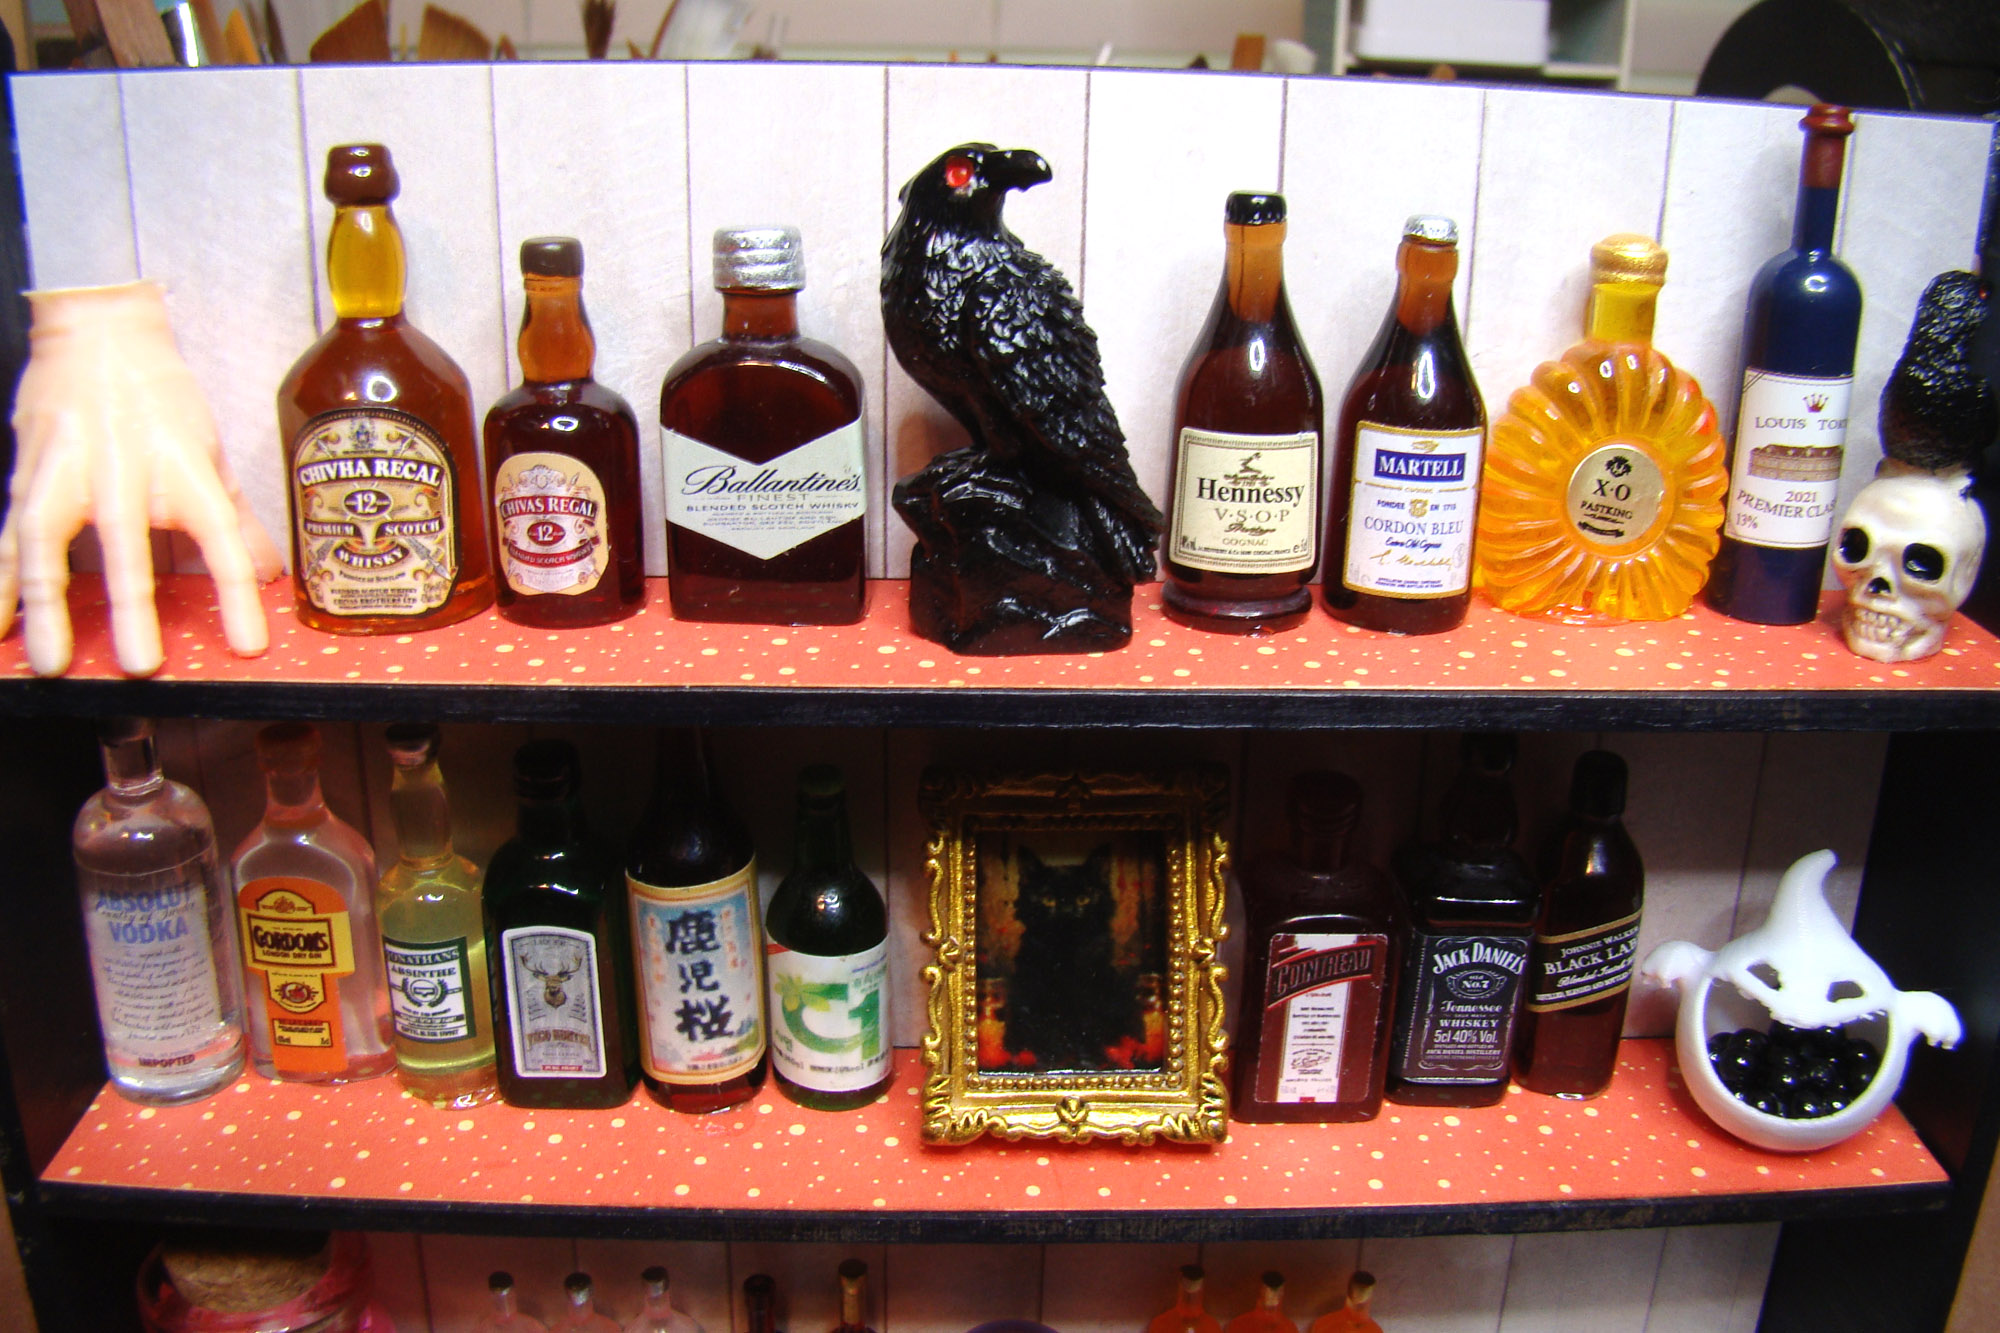
The top shelf holds the expensive stuff. Next to a Mini Thing Hand is a Large Whiskey Bottle with Label, Large Rectangular Resin Whiskey Bottle, 3D Raven Statue on Base, Resin VSOP Cognac Bottle, Tall Amber Cognac Bottle, Light Amber XO Cognac Bottle, Tall Red Wine Bottle with Label and a Resin Raven on Skull.

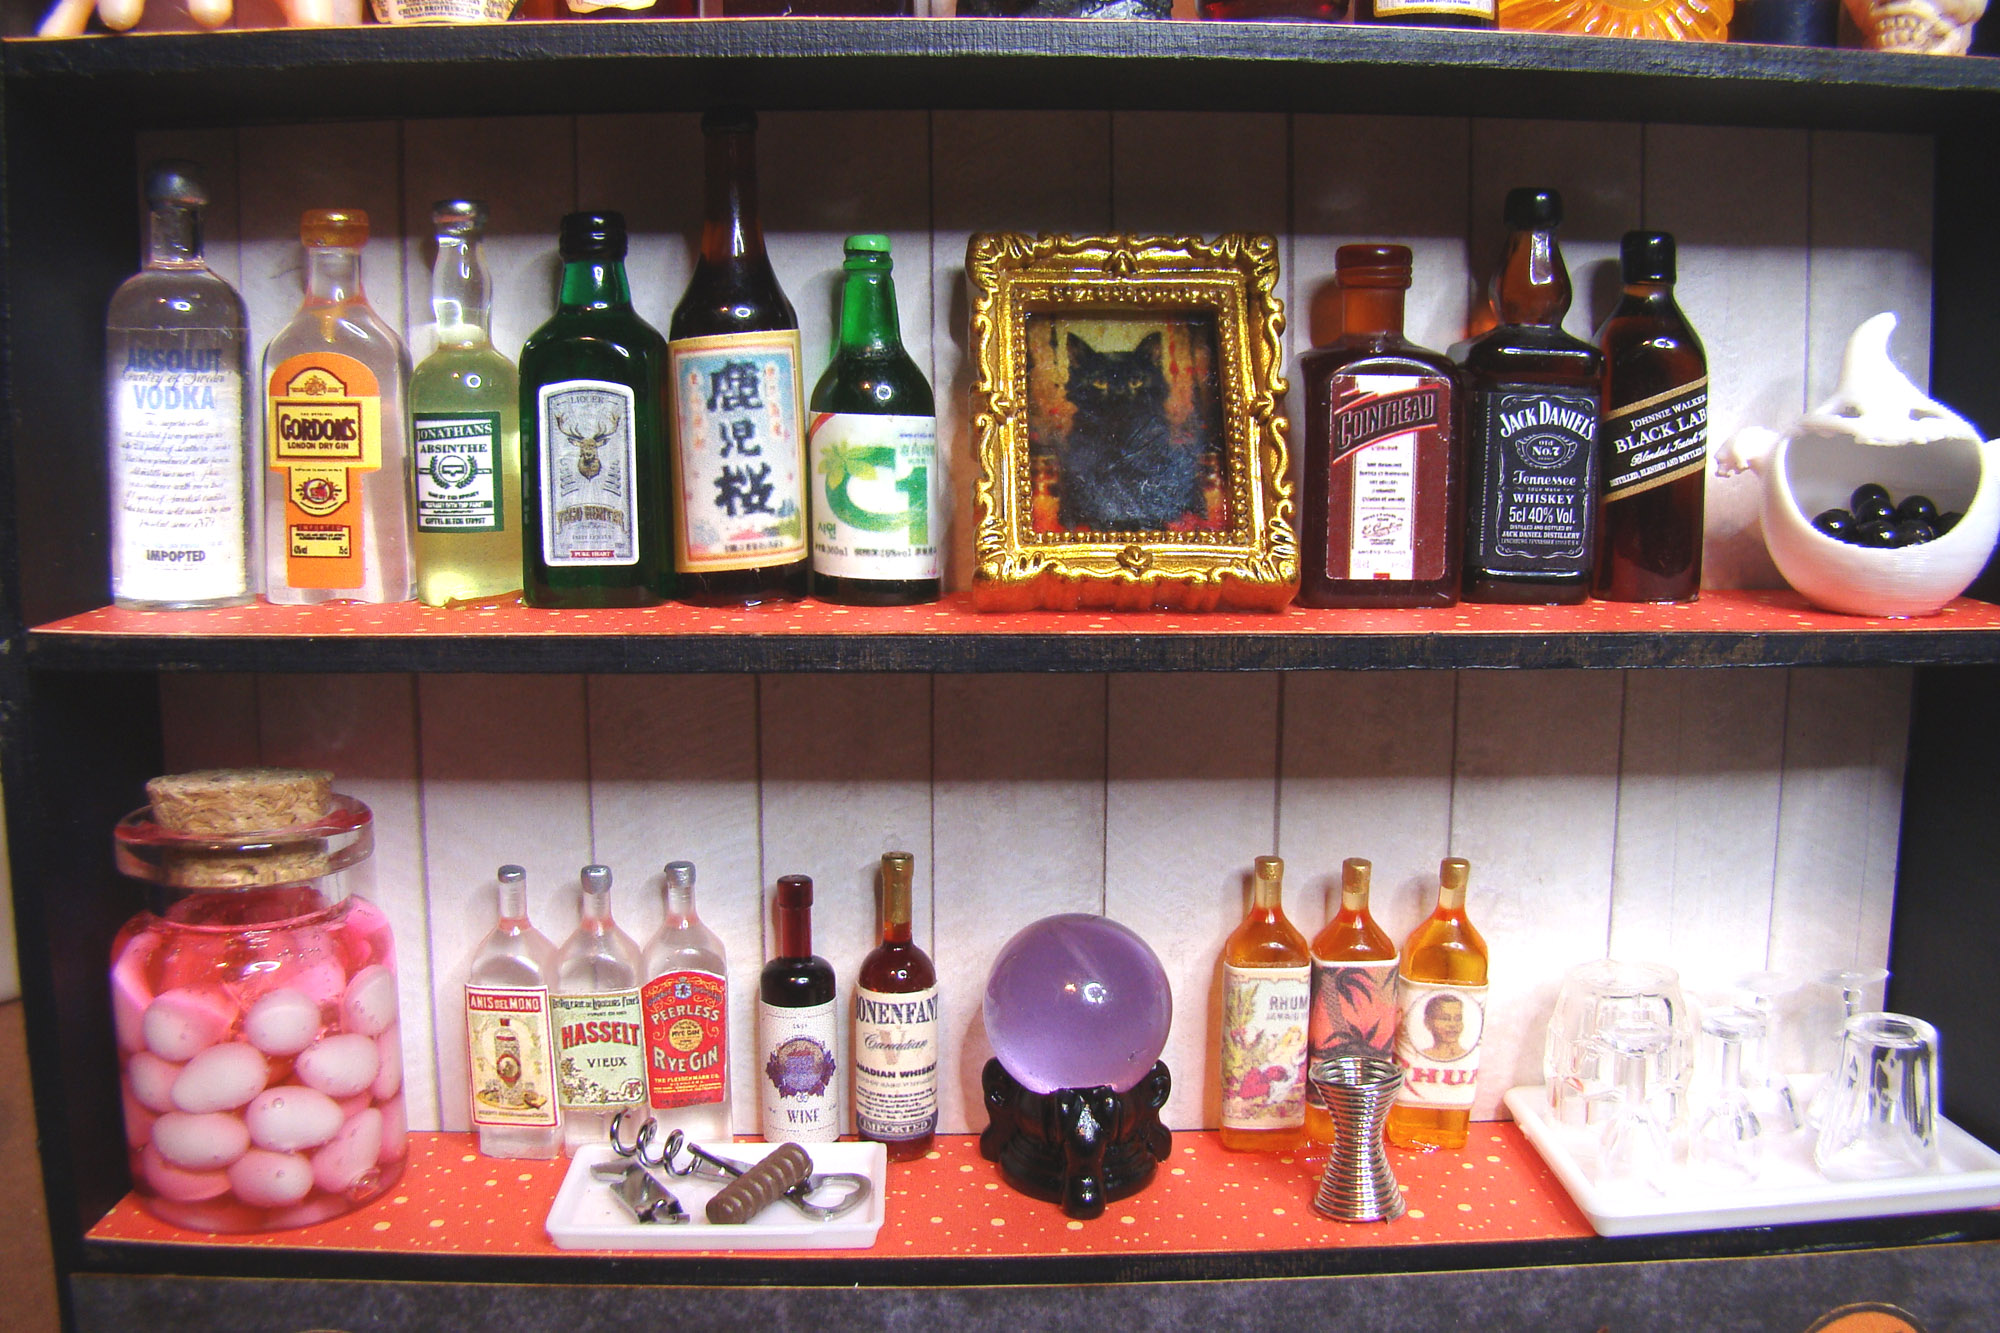
The middle shelf holds a Tall Resin Vodka Bottle, Clear Gin Bottle with Label, 30mm Tall Absinthe Bottle, Tall Dark Green Resin Bottle, Large Brown Sake Bottle and a Green Soju Bottle. That cute black cat painting in the center is one of the new 1 Inch Resin Halloween Framed Portraits. Then comes a 28mm Tall Square-Sided Red Resin Bottle, an Amber Whiskey Bottle, Square Sided Amber Resin Bottle then a Ghost Candy Jar filled with 3mm Halloween Mix Nonpareils Faux Candy.

Bottles for the bottom shelf were made from Miniature Gin Bottles and the Cafe Bottle Labels Half Sheet. Rum bottles are Miniature Tequila Bottles with labels from the Rum Bottles, Labels and Posters Collage Sheet. Next to the gin bottles are a Bonefant Canadian Whiskey Bottle and Red Wine Bottle. The center piece is a 22mm Tall Resin Crystal Ball on Stand. Next to that is a 12mm Spacer Bead or Jigger.

The final touch was adding a couple of Stools – 1 Inch Scale that I decorated.

I hope you’re inspired to grab some of these new bottles for a mini bar of your own! If you come up with yet another use for the versatile 6×6 Simple Market Stall I’d love to hear it. The wonderful supplies I used may be found right HERE.


Pixie & Pines: Enchanted Goods

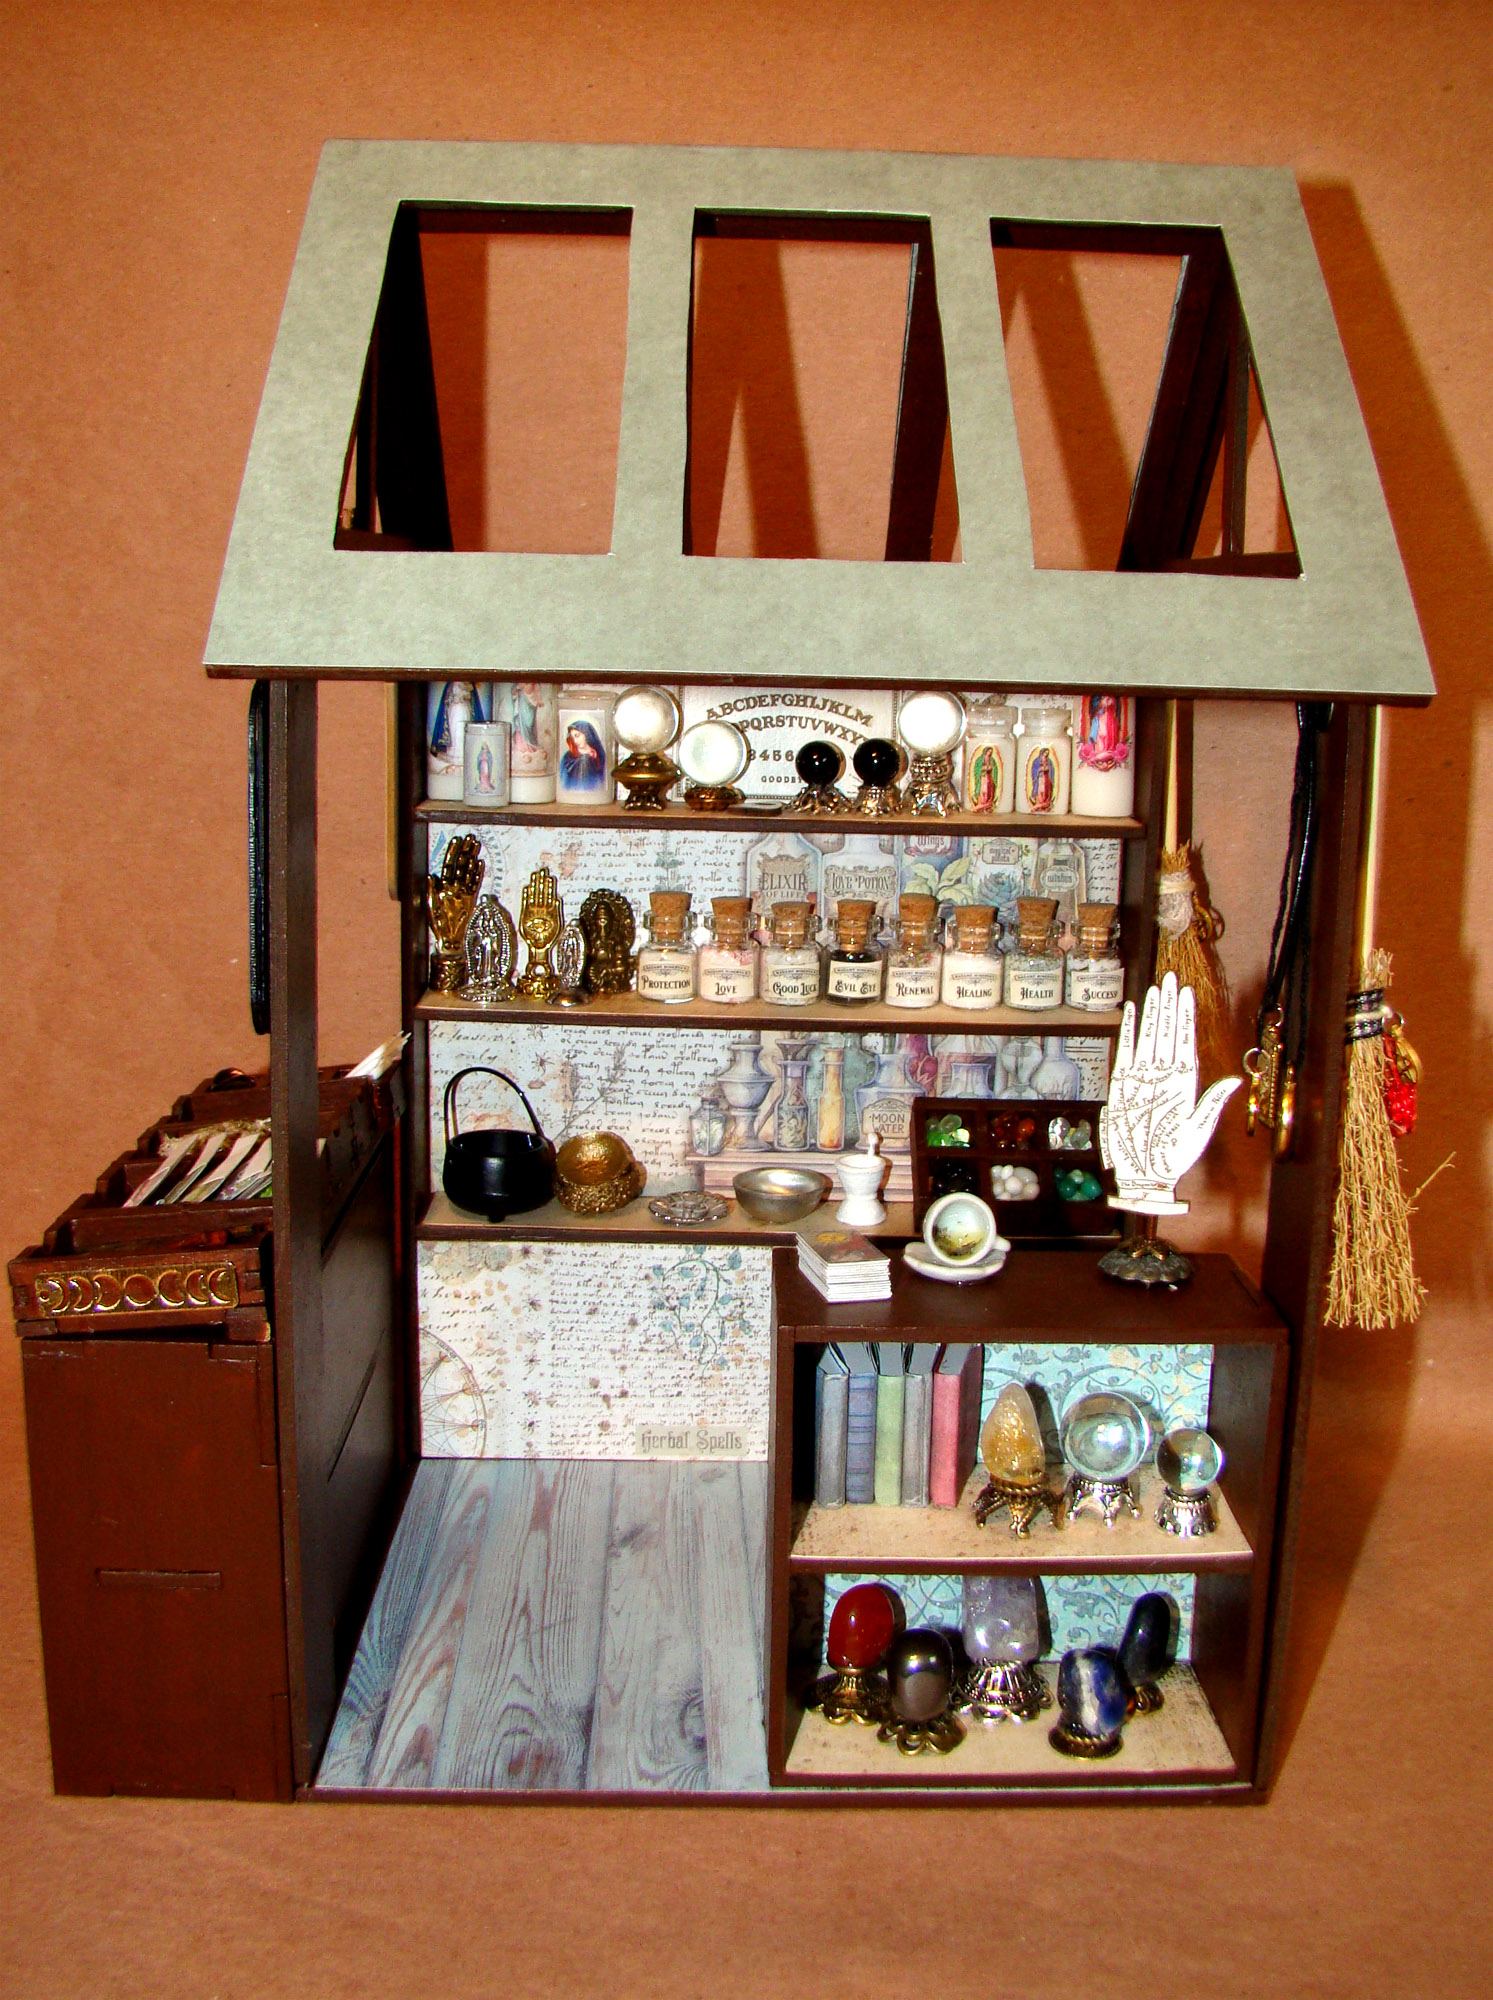
My last post covered the start of this little bazaar filled with enchanted merchandise. I shared a bit about how I assembled the new 6×6 Simple Market Stall and went over how I made the devotional candles. The project is complete now, let me take you through all the tiny magical wares found within.

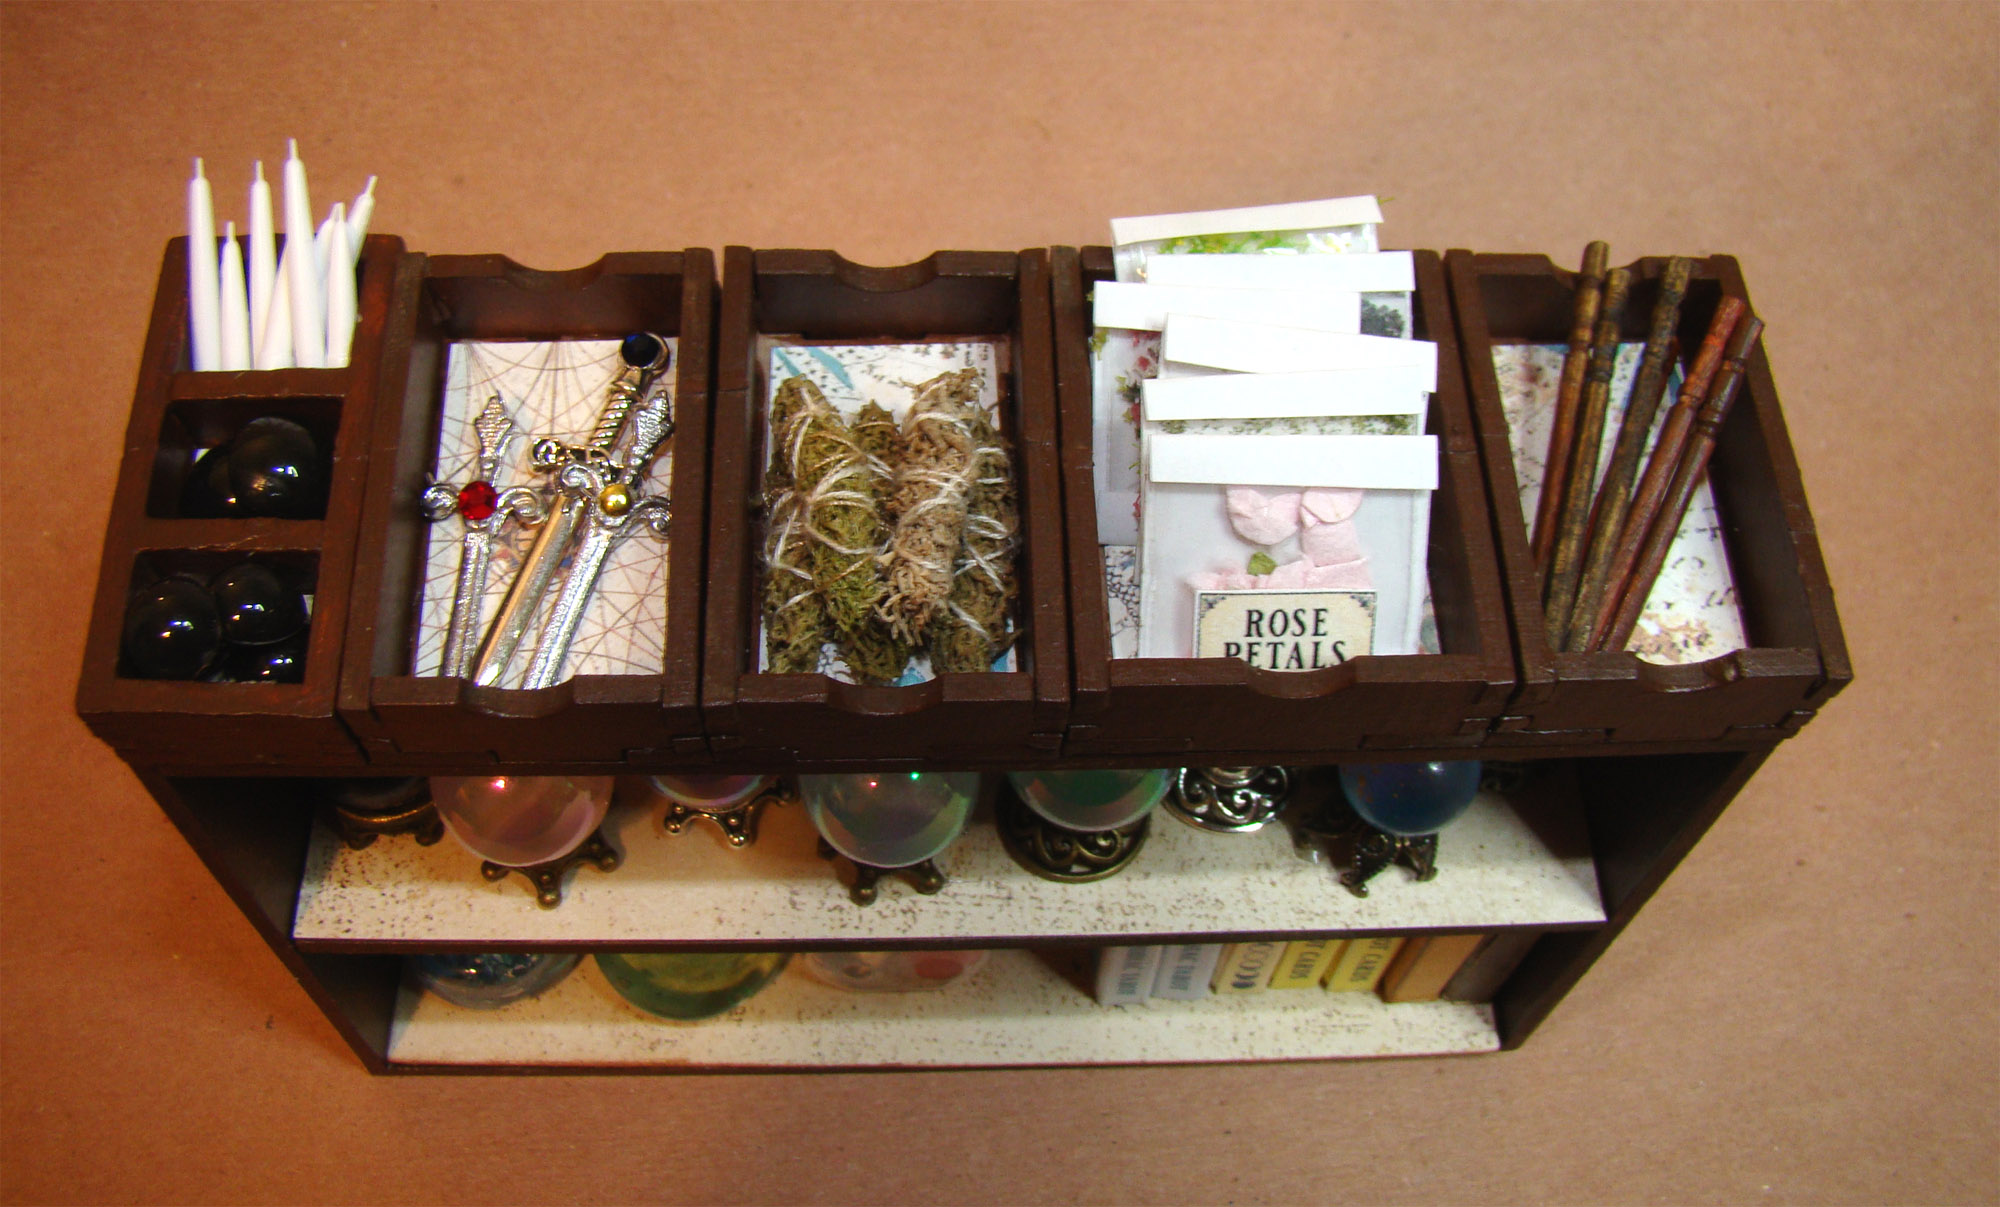
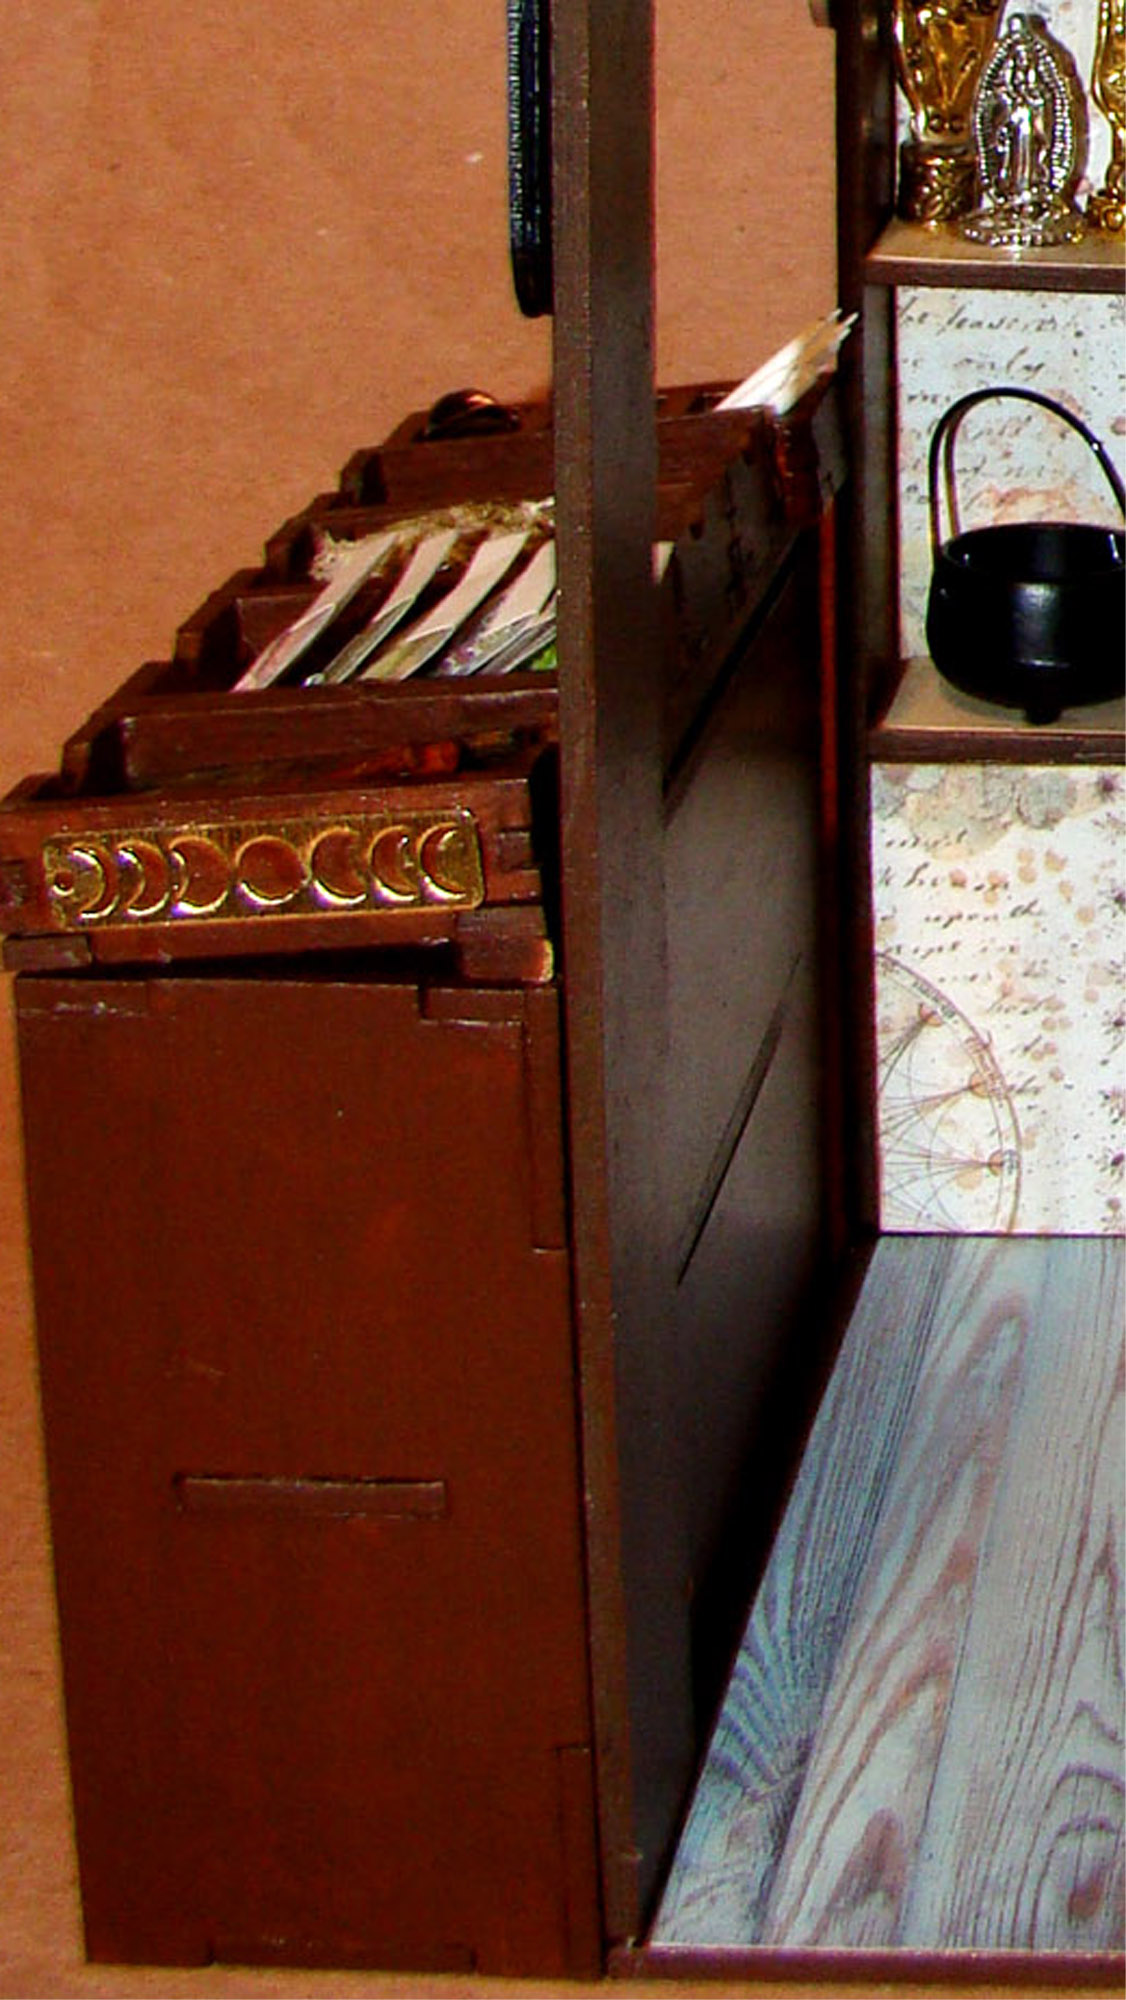
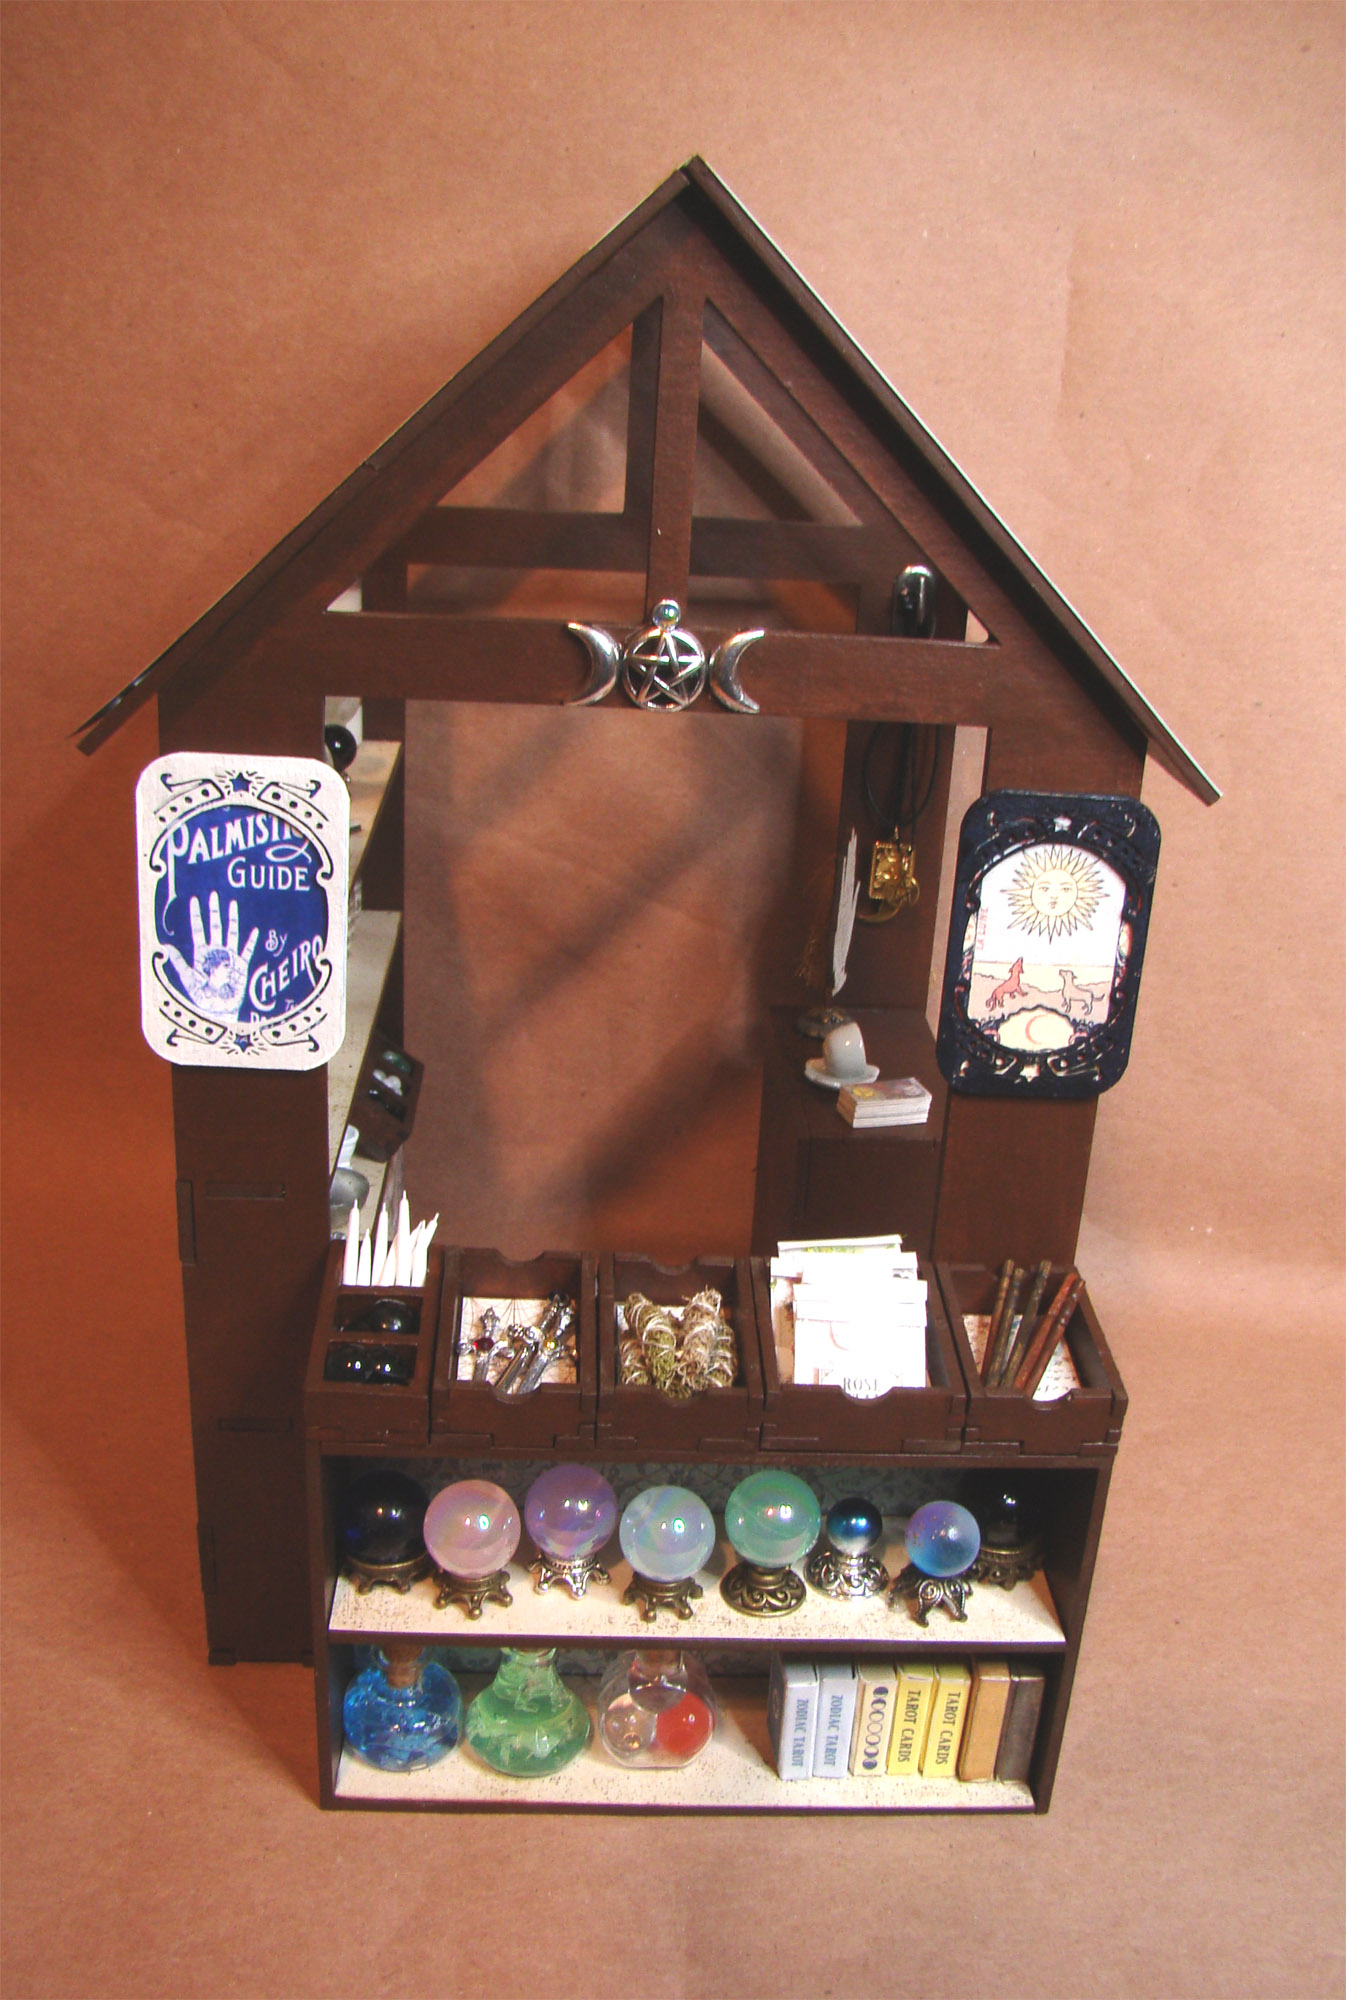
The side counter I gave you a preview of last week has a mix of Chunky Crates, Skinny Chunky Crates and a Chunky Seed box on top. I included a set of white candles and wands made from toothpicks.

The silver athames, or ceremonial knives, are a Sword or Dagger w Fancy Handle and a couple of Metal Letter Opener or Daggers embellished with tiny rhinestones.

The smudge sticks are made from bits of the Spring Green Lichen Mix that I shaped into a tight bundle and tied with string.

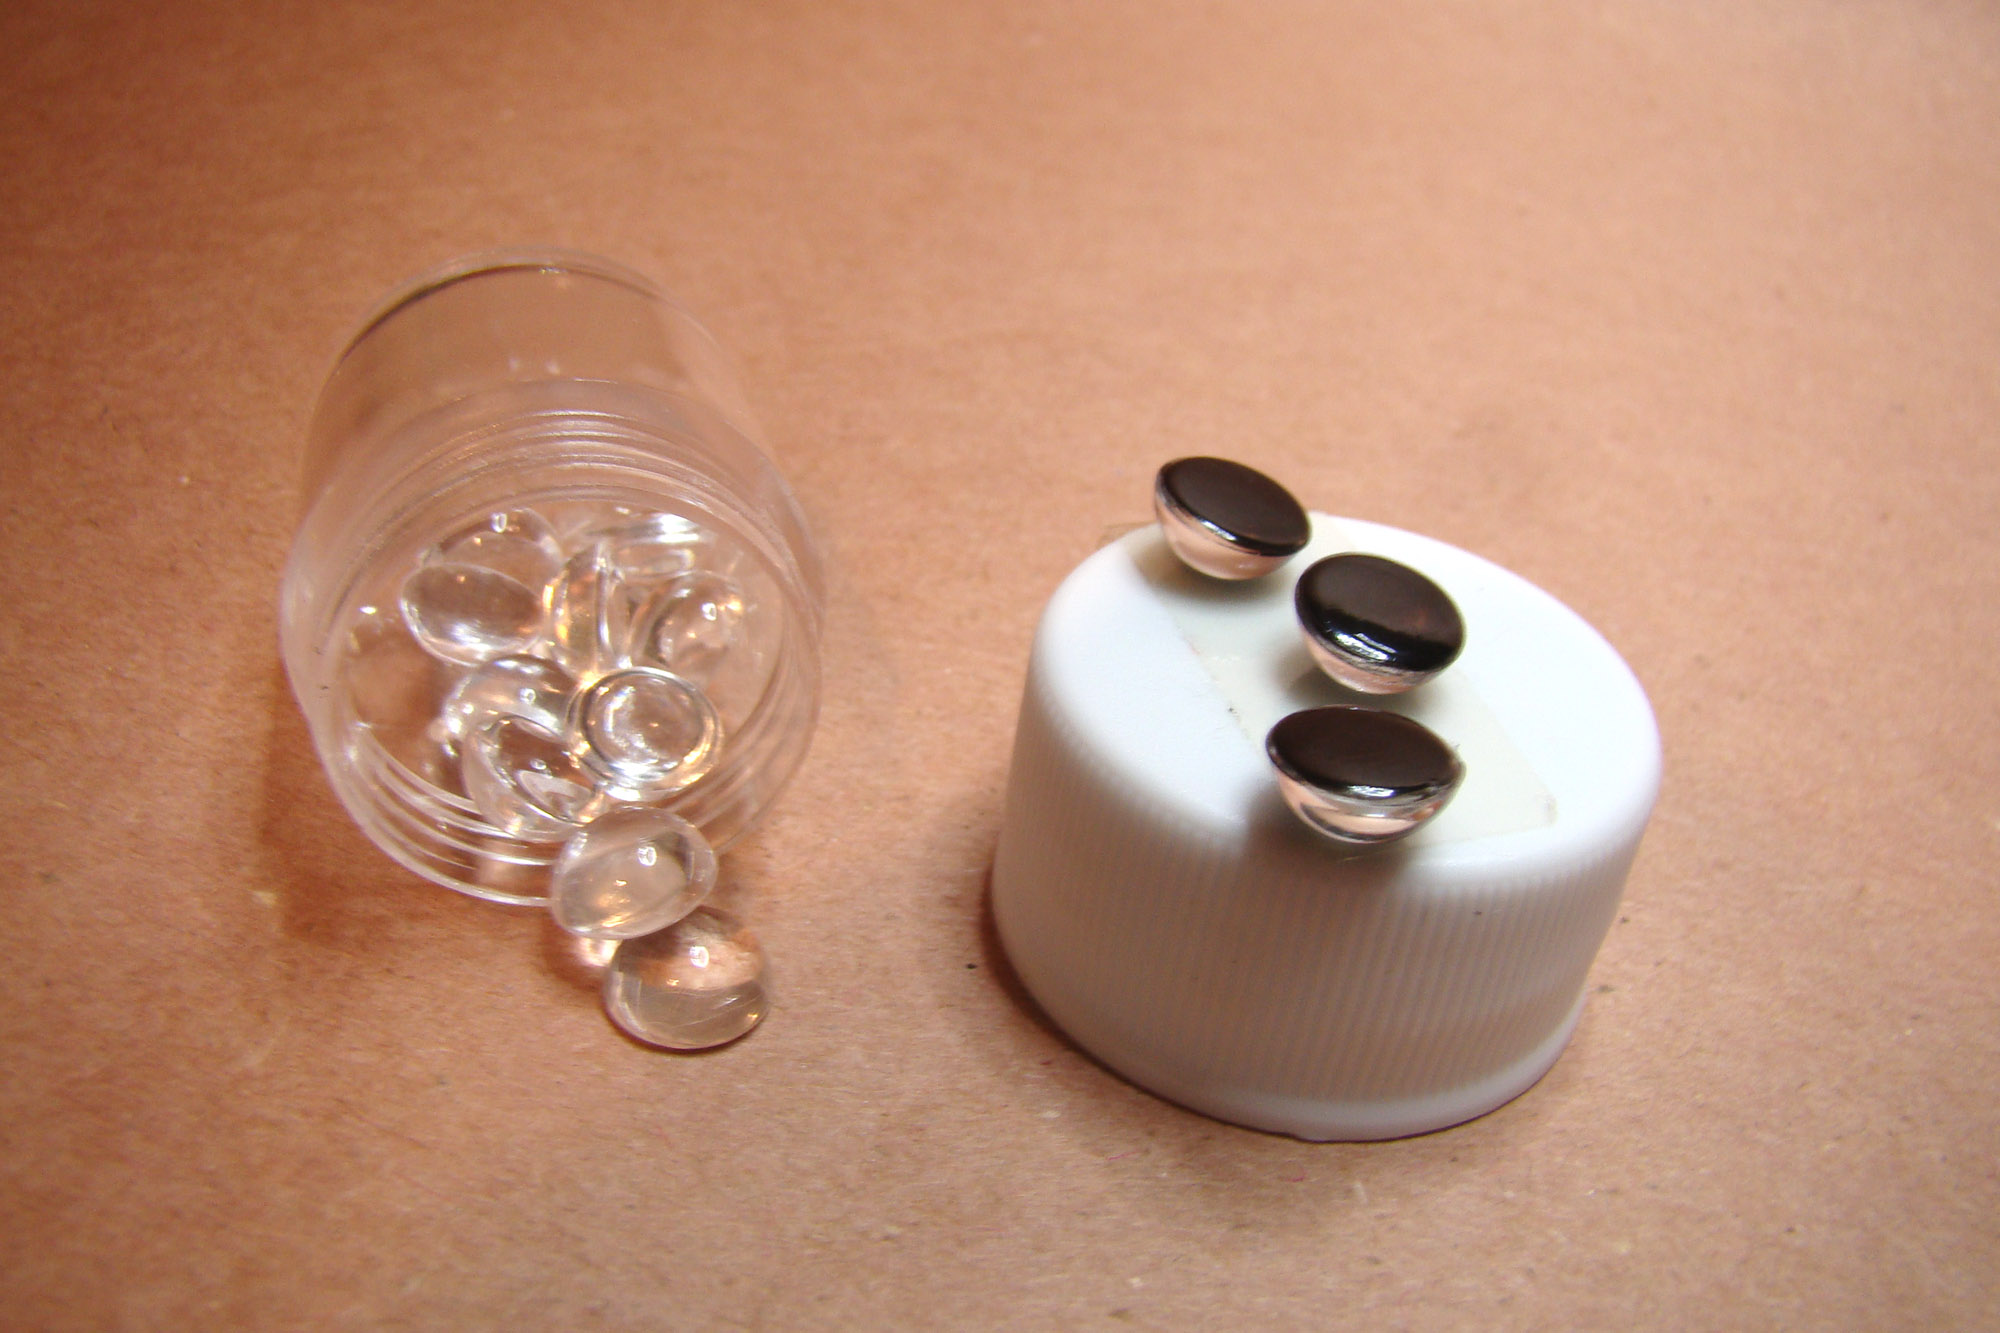
I made scrying mirrors for divination out of both 10mm & 14mm Glass Cabochons. I held them in place with double sided tape and painted the bottoms with black nail polish.

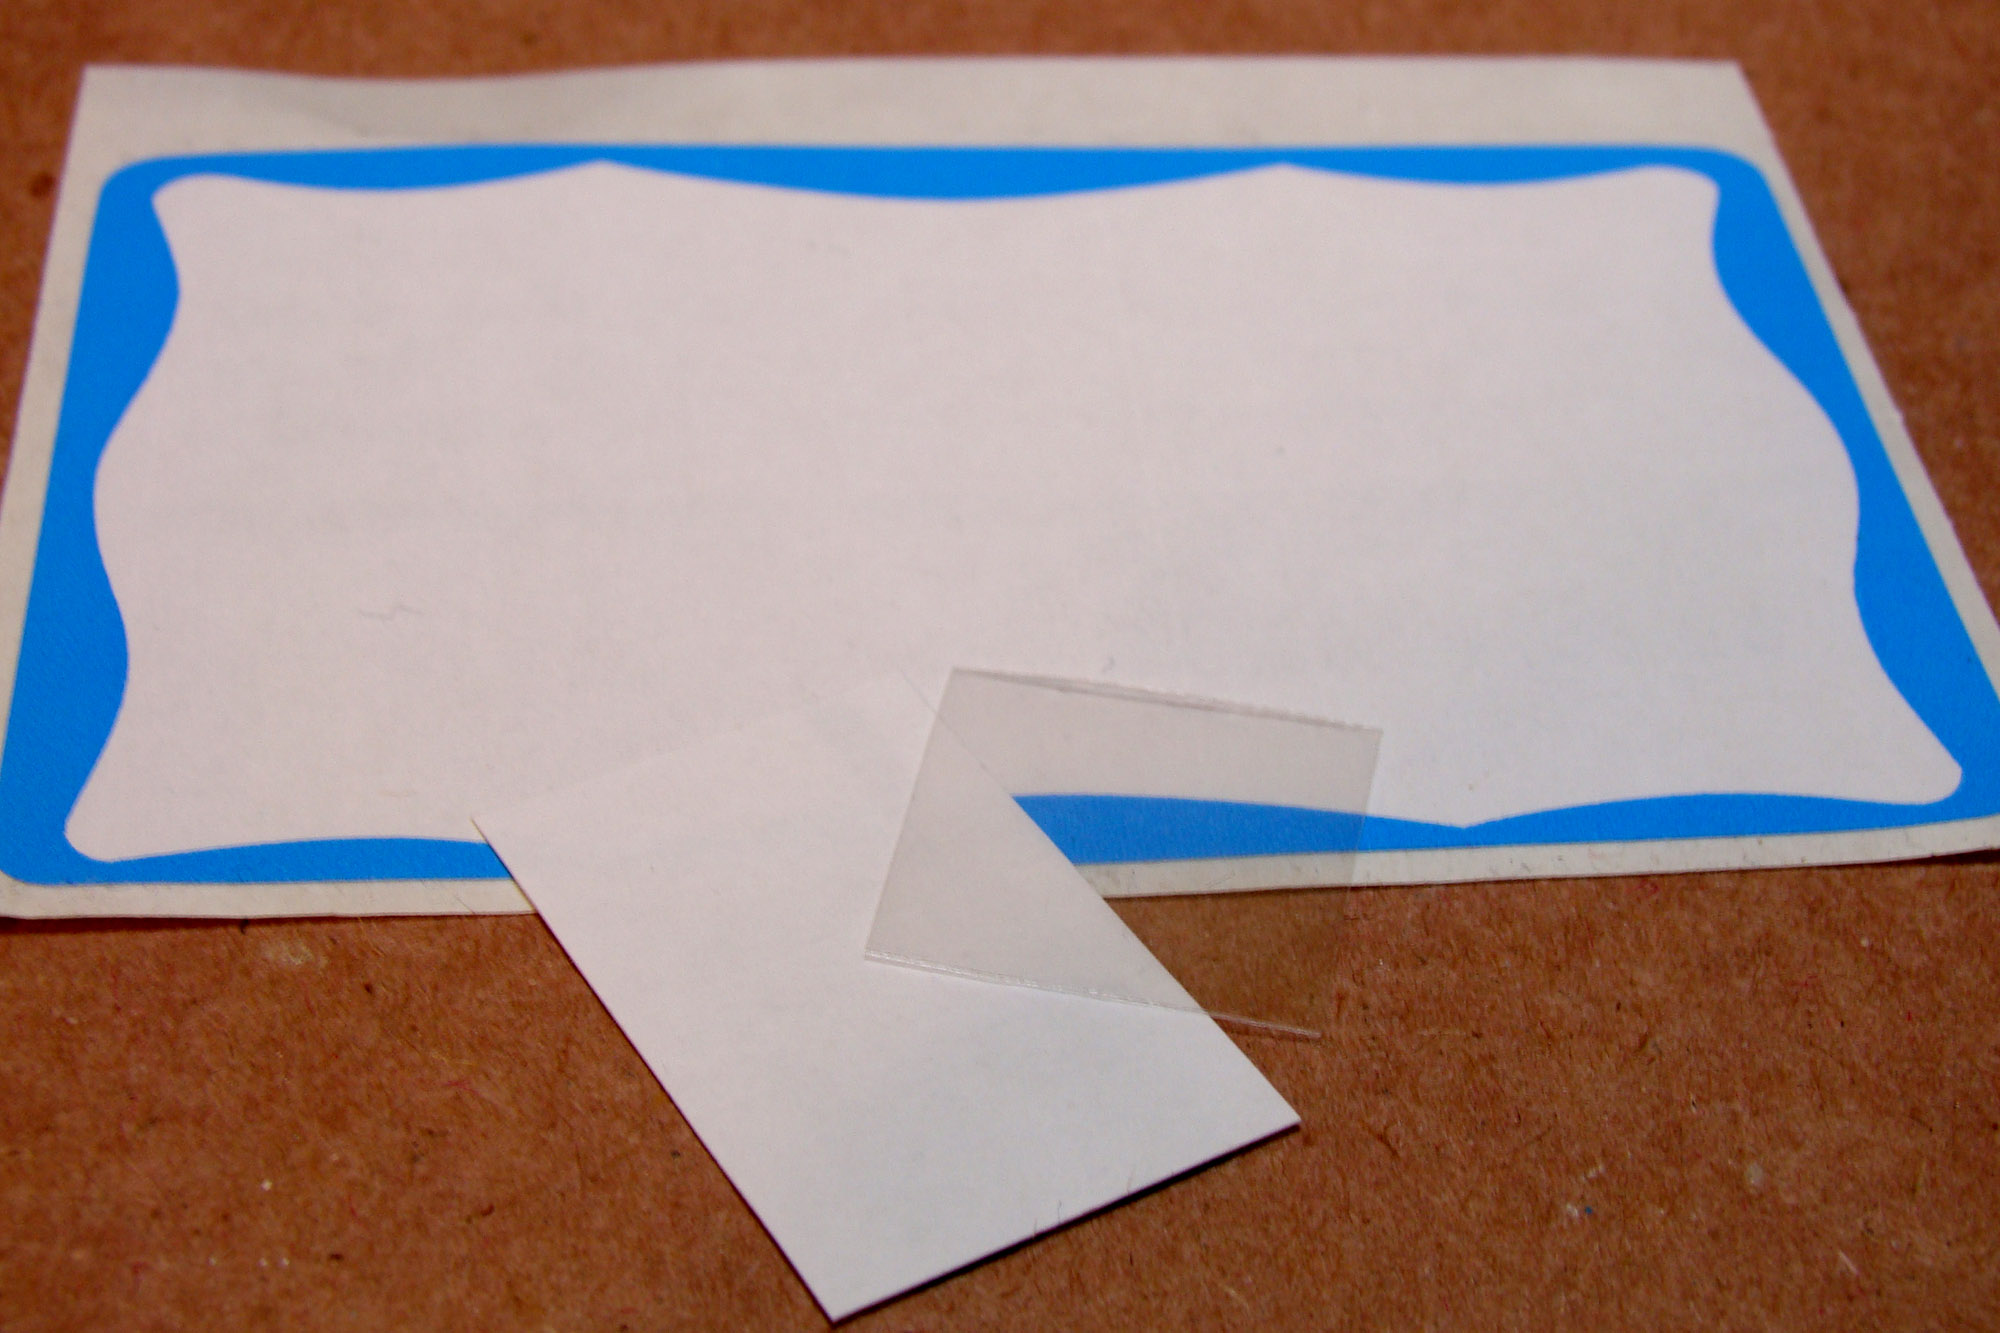
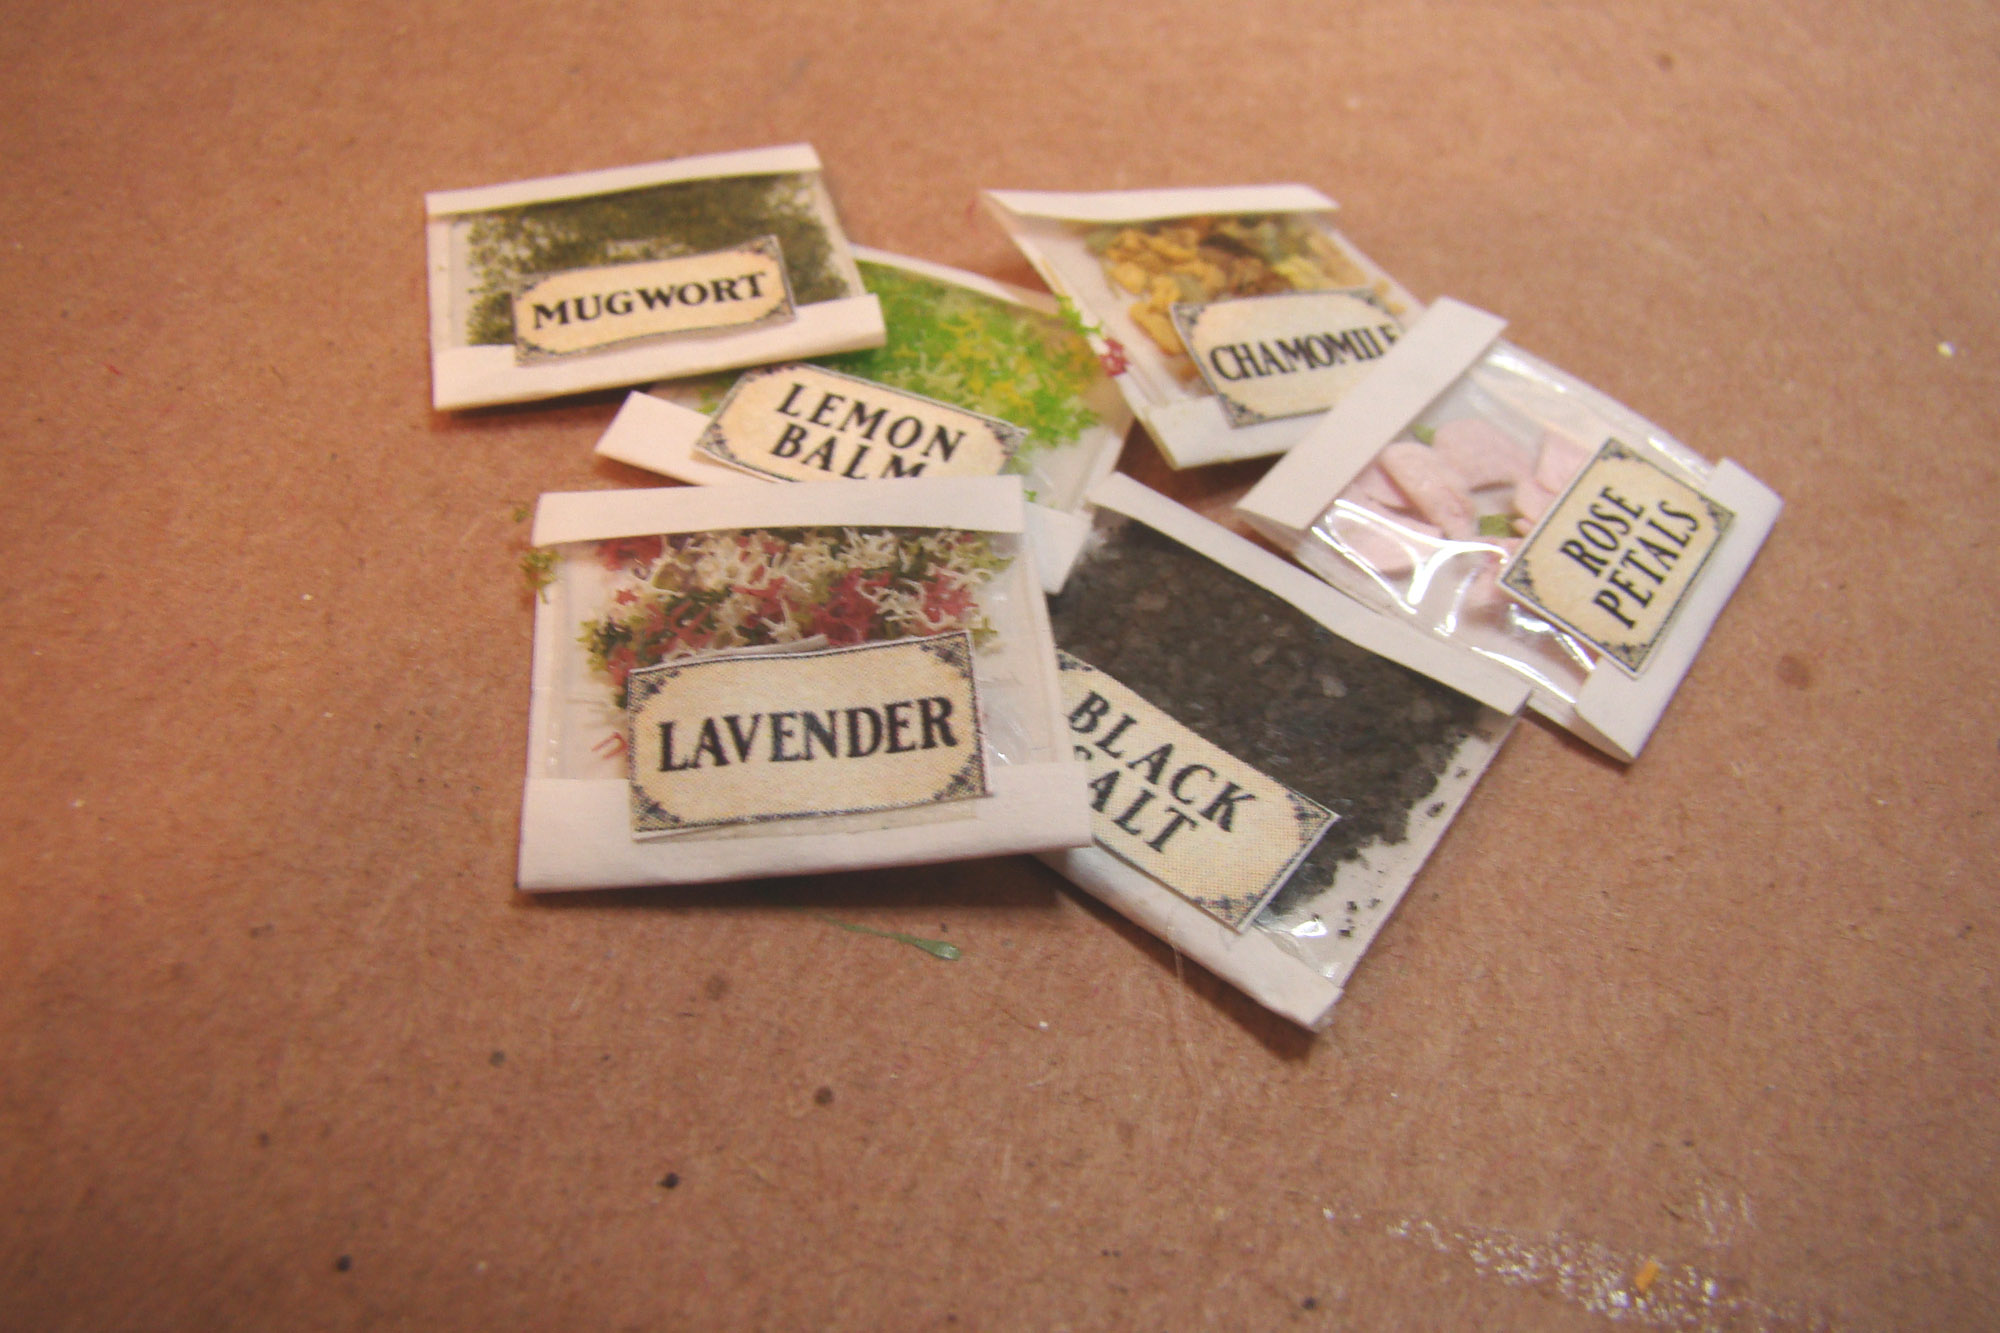
The herb packets were made by cutting ¾ inch slices from the new Narrow Cellophane Bags. The white backing is a ¾ by 1 inch section I cut from an adhesive label. The bottom of the label is folded up to make a pouch.

The packets are filled with assorted items like cut up bits of Soft Pink Roses, herbal tea and actual spices from my kitchen cabinet.

Once filled, the top gets folded over to seal the pouch and labels from the new Potions, Salts & Herb Labels Half Sheet were added. I love that this new collage sheet has both culinary and witchy herbs.

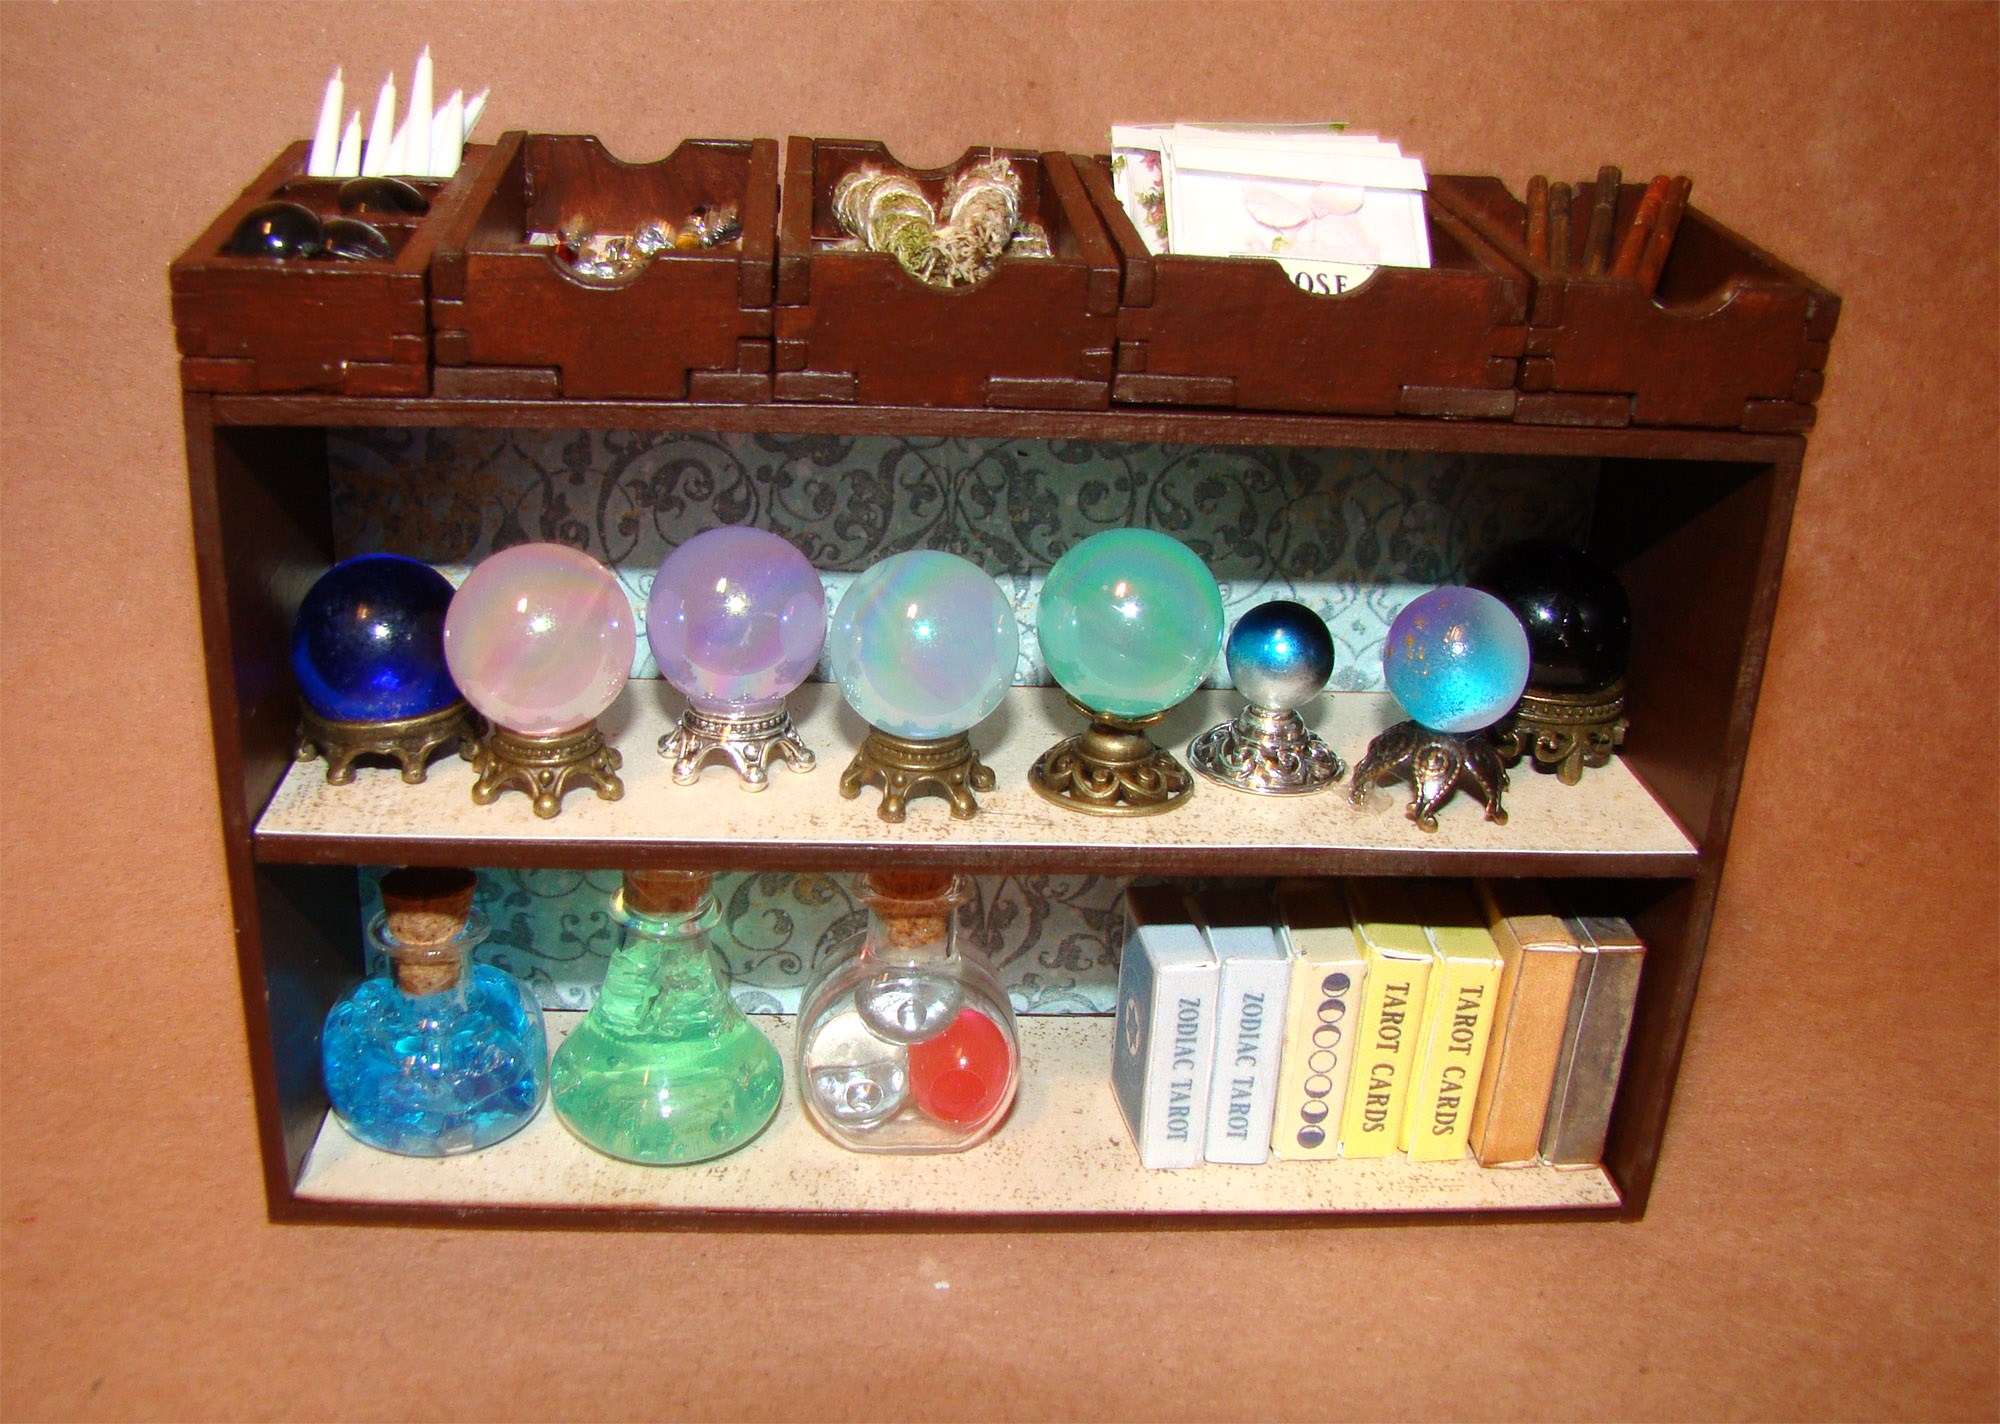
Inside this side cabinet are colorful crystal/gemstone spheres. They are a combination of 15mm Glass Marbles, 10mm Mixed Blue Pearl Marbles and Sky Blue Iridescent 11mm Glass Marbles. Those pretty pastel ones in the middle are actually 16mm Pastel Iridescent Round Beads.

Their stands are an assortment of Small Antique 3D Gold Crowns, Tiny Antique Bronze 3D Crowns, Tiny Antique Silver 3D Crowns, Round Bronze Filigree Bead Caps and a Round Silver Filigree Bead Cap.

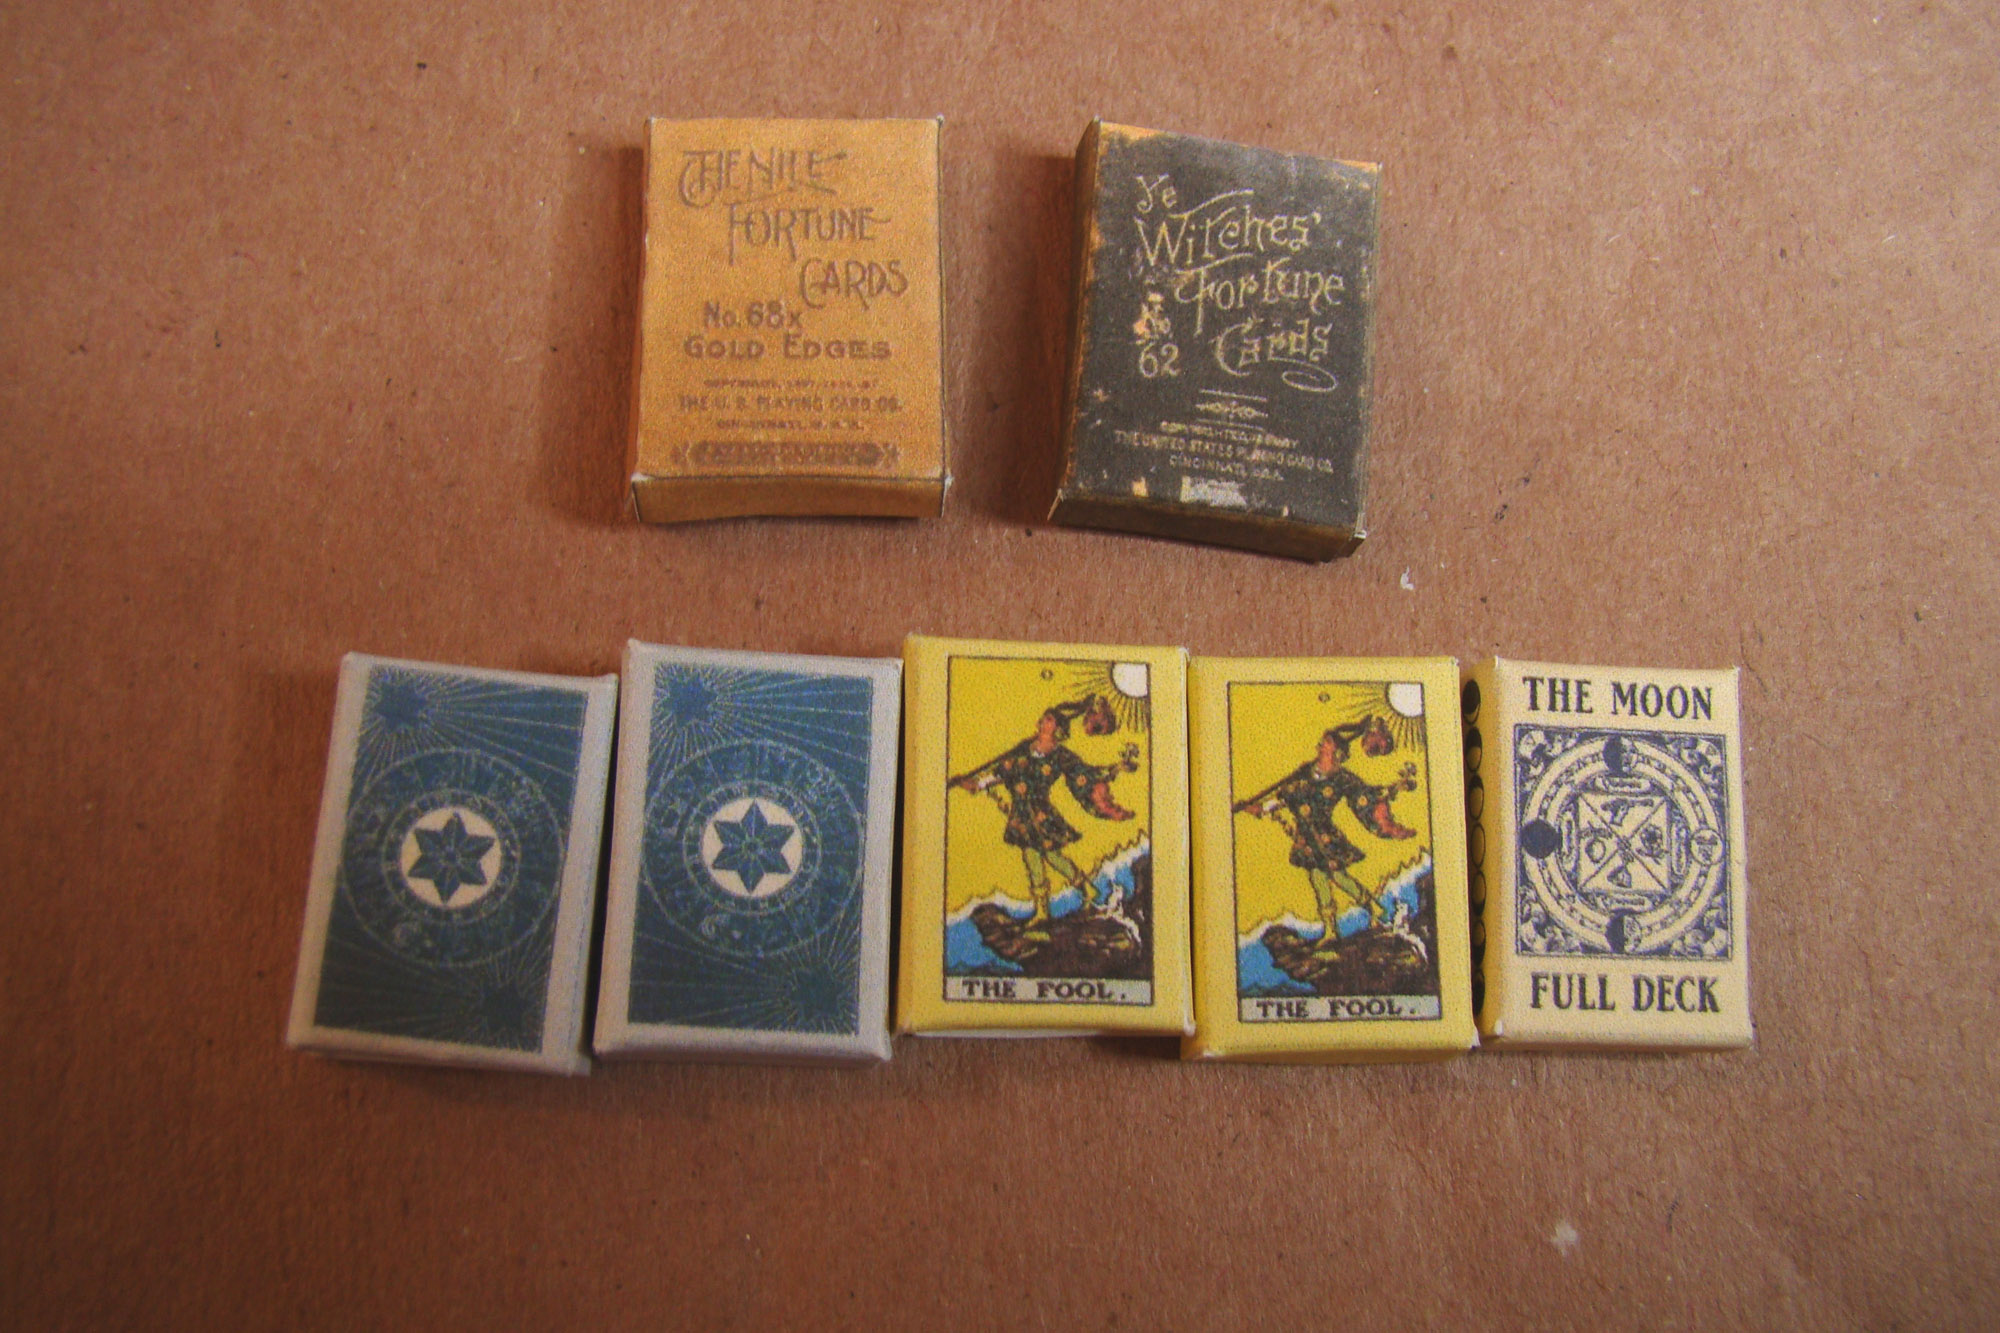
The bottom shelf holds some mysterious liquids made from water beads in the new 1 inch Flat Glass Bottle with Cork, Short Glass Inkwell Bottle with Cork and Glass Beaker with Cork. Next to those are various tarot decks I assembled from the new Tarot Boxes & Posters Half Sheet. They were printed on cardstock, scored and glued together. Easy peasy.

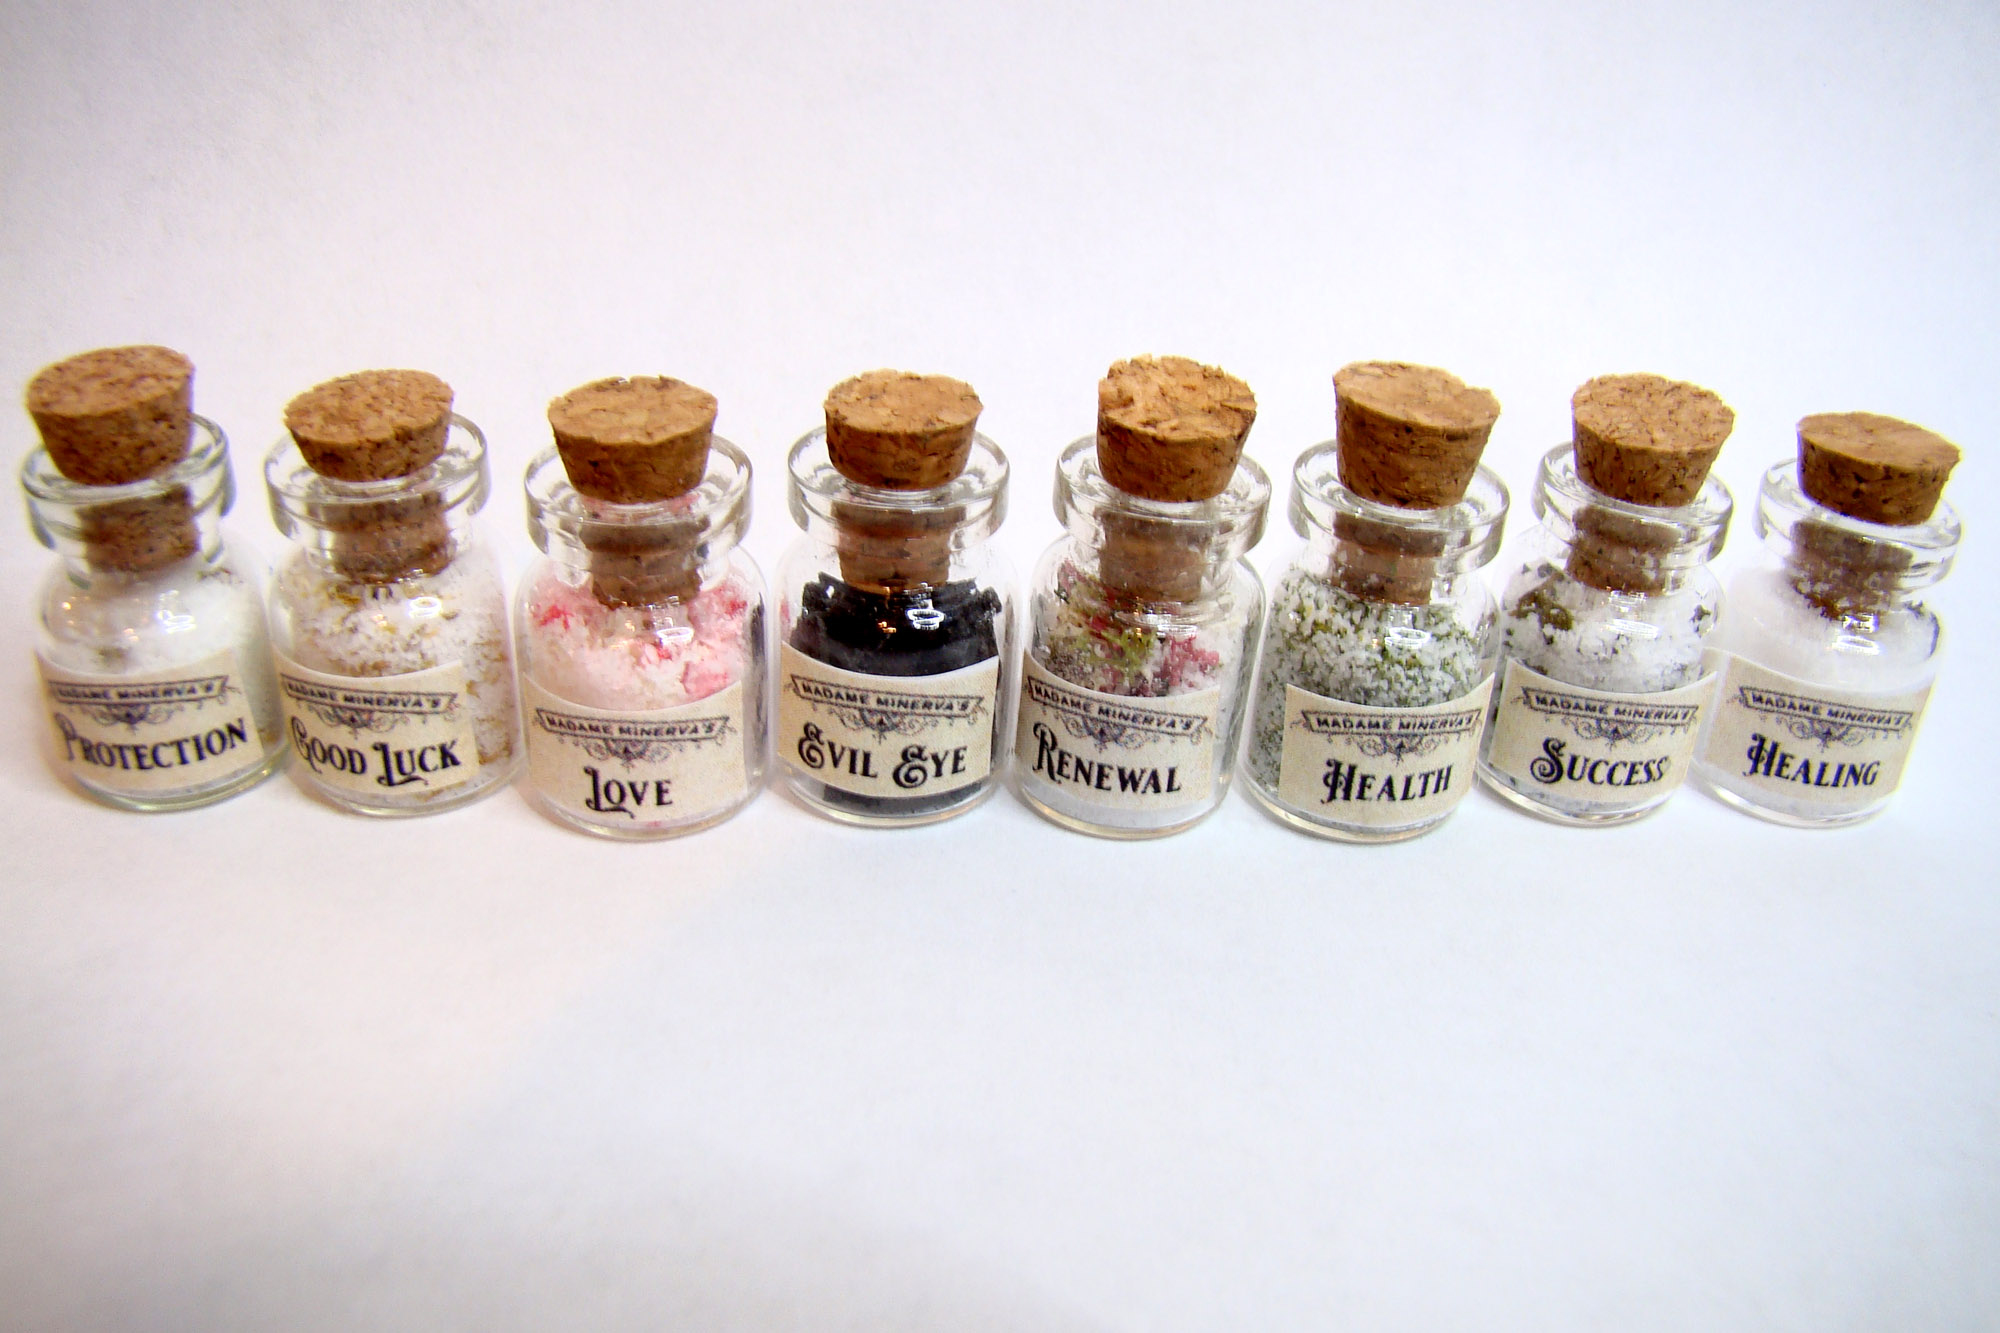
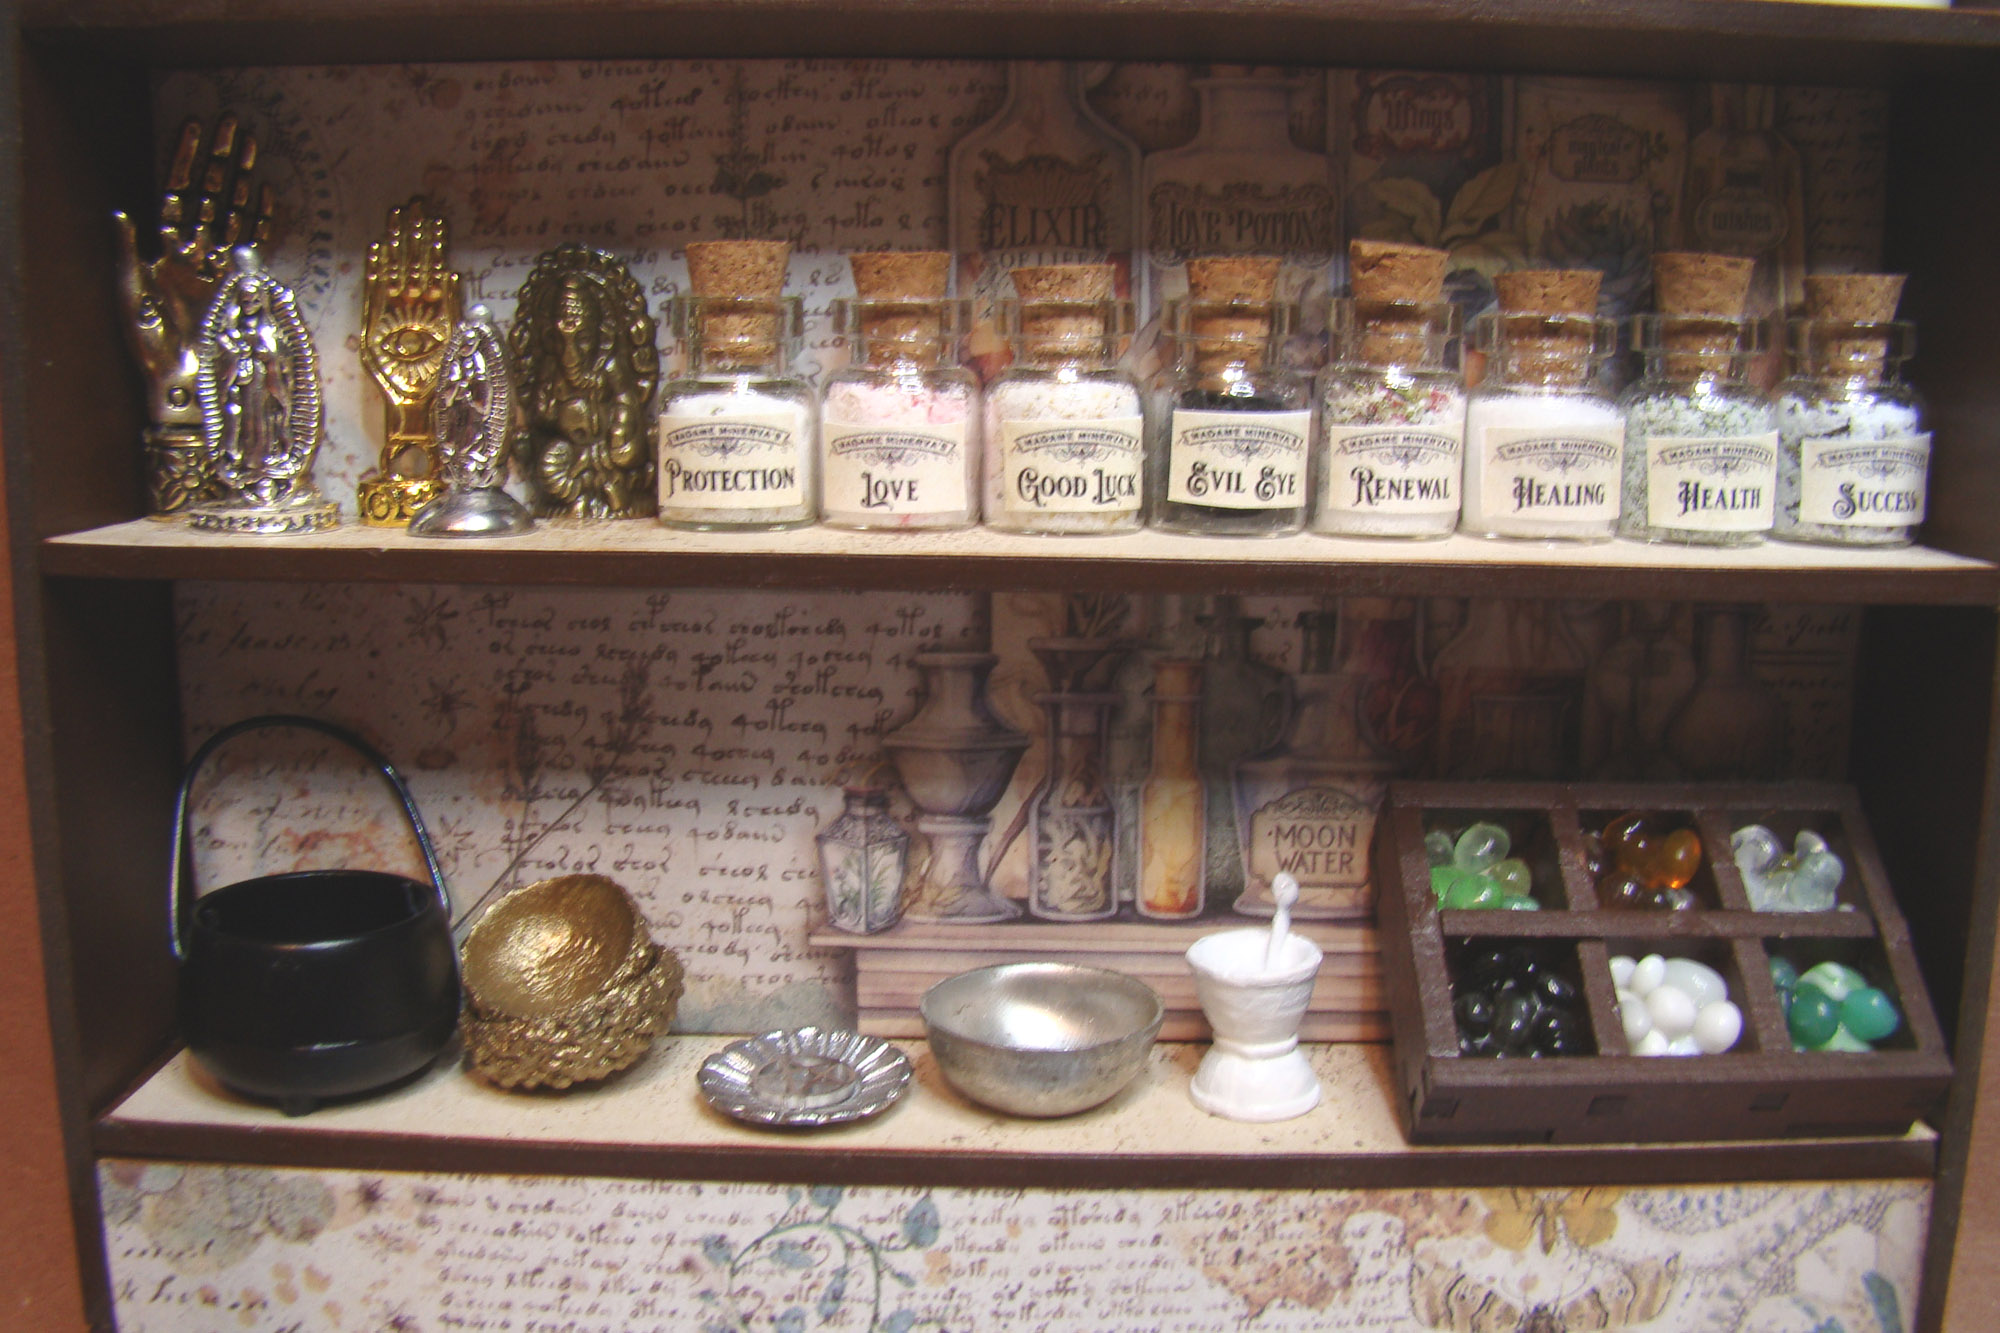
Back to the main structure, the middle shelf holds ritual bath salts in Even Tinier Bottles. They’re made from Soft Flake Snow mixed with all kinds of things like Green Turf Grass, Pink & White Flowerbed Mix, Violet Mini Blossoms Mix and a few things from my spice cupboard.

Labels showing each salt’s intention are also from the Potions, Salts & Herb Labels Half Sheet.

Next to those sits a set of ritual tools and statues for sale. Starting from the left are a Palmistry Hand Charm attached to an 8x8mm Large Hole Plastic Drum Bead next to one of the new Bronze Ganesha Pendants.

The offering bowls are made from Tiny Silver Pentagram Charms attached to the bottoms of a Metal Mixing Bowl and a Scalloped Metal Plate. The bronze ones are painted acorn caps. I painted a Metal Mortar & Pestle white and included a Mini Black Cauldron. The silver statues are Small and Large Lady of Guadalupe Spacer Beads glued to a 10mm Broad Bead Cap – Silver and a 12mm Fancy Antique Silver Rondelle. The one on the right is an Evil Eye Hand Charm glued onto a 10mm Antique Gold Embossed Donut Spacer Bead.

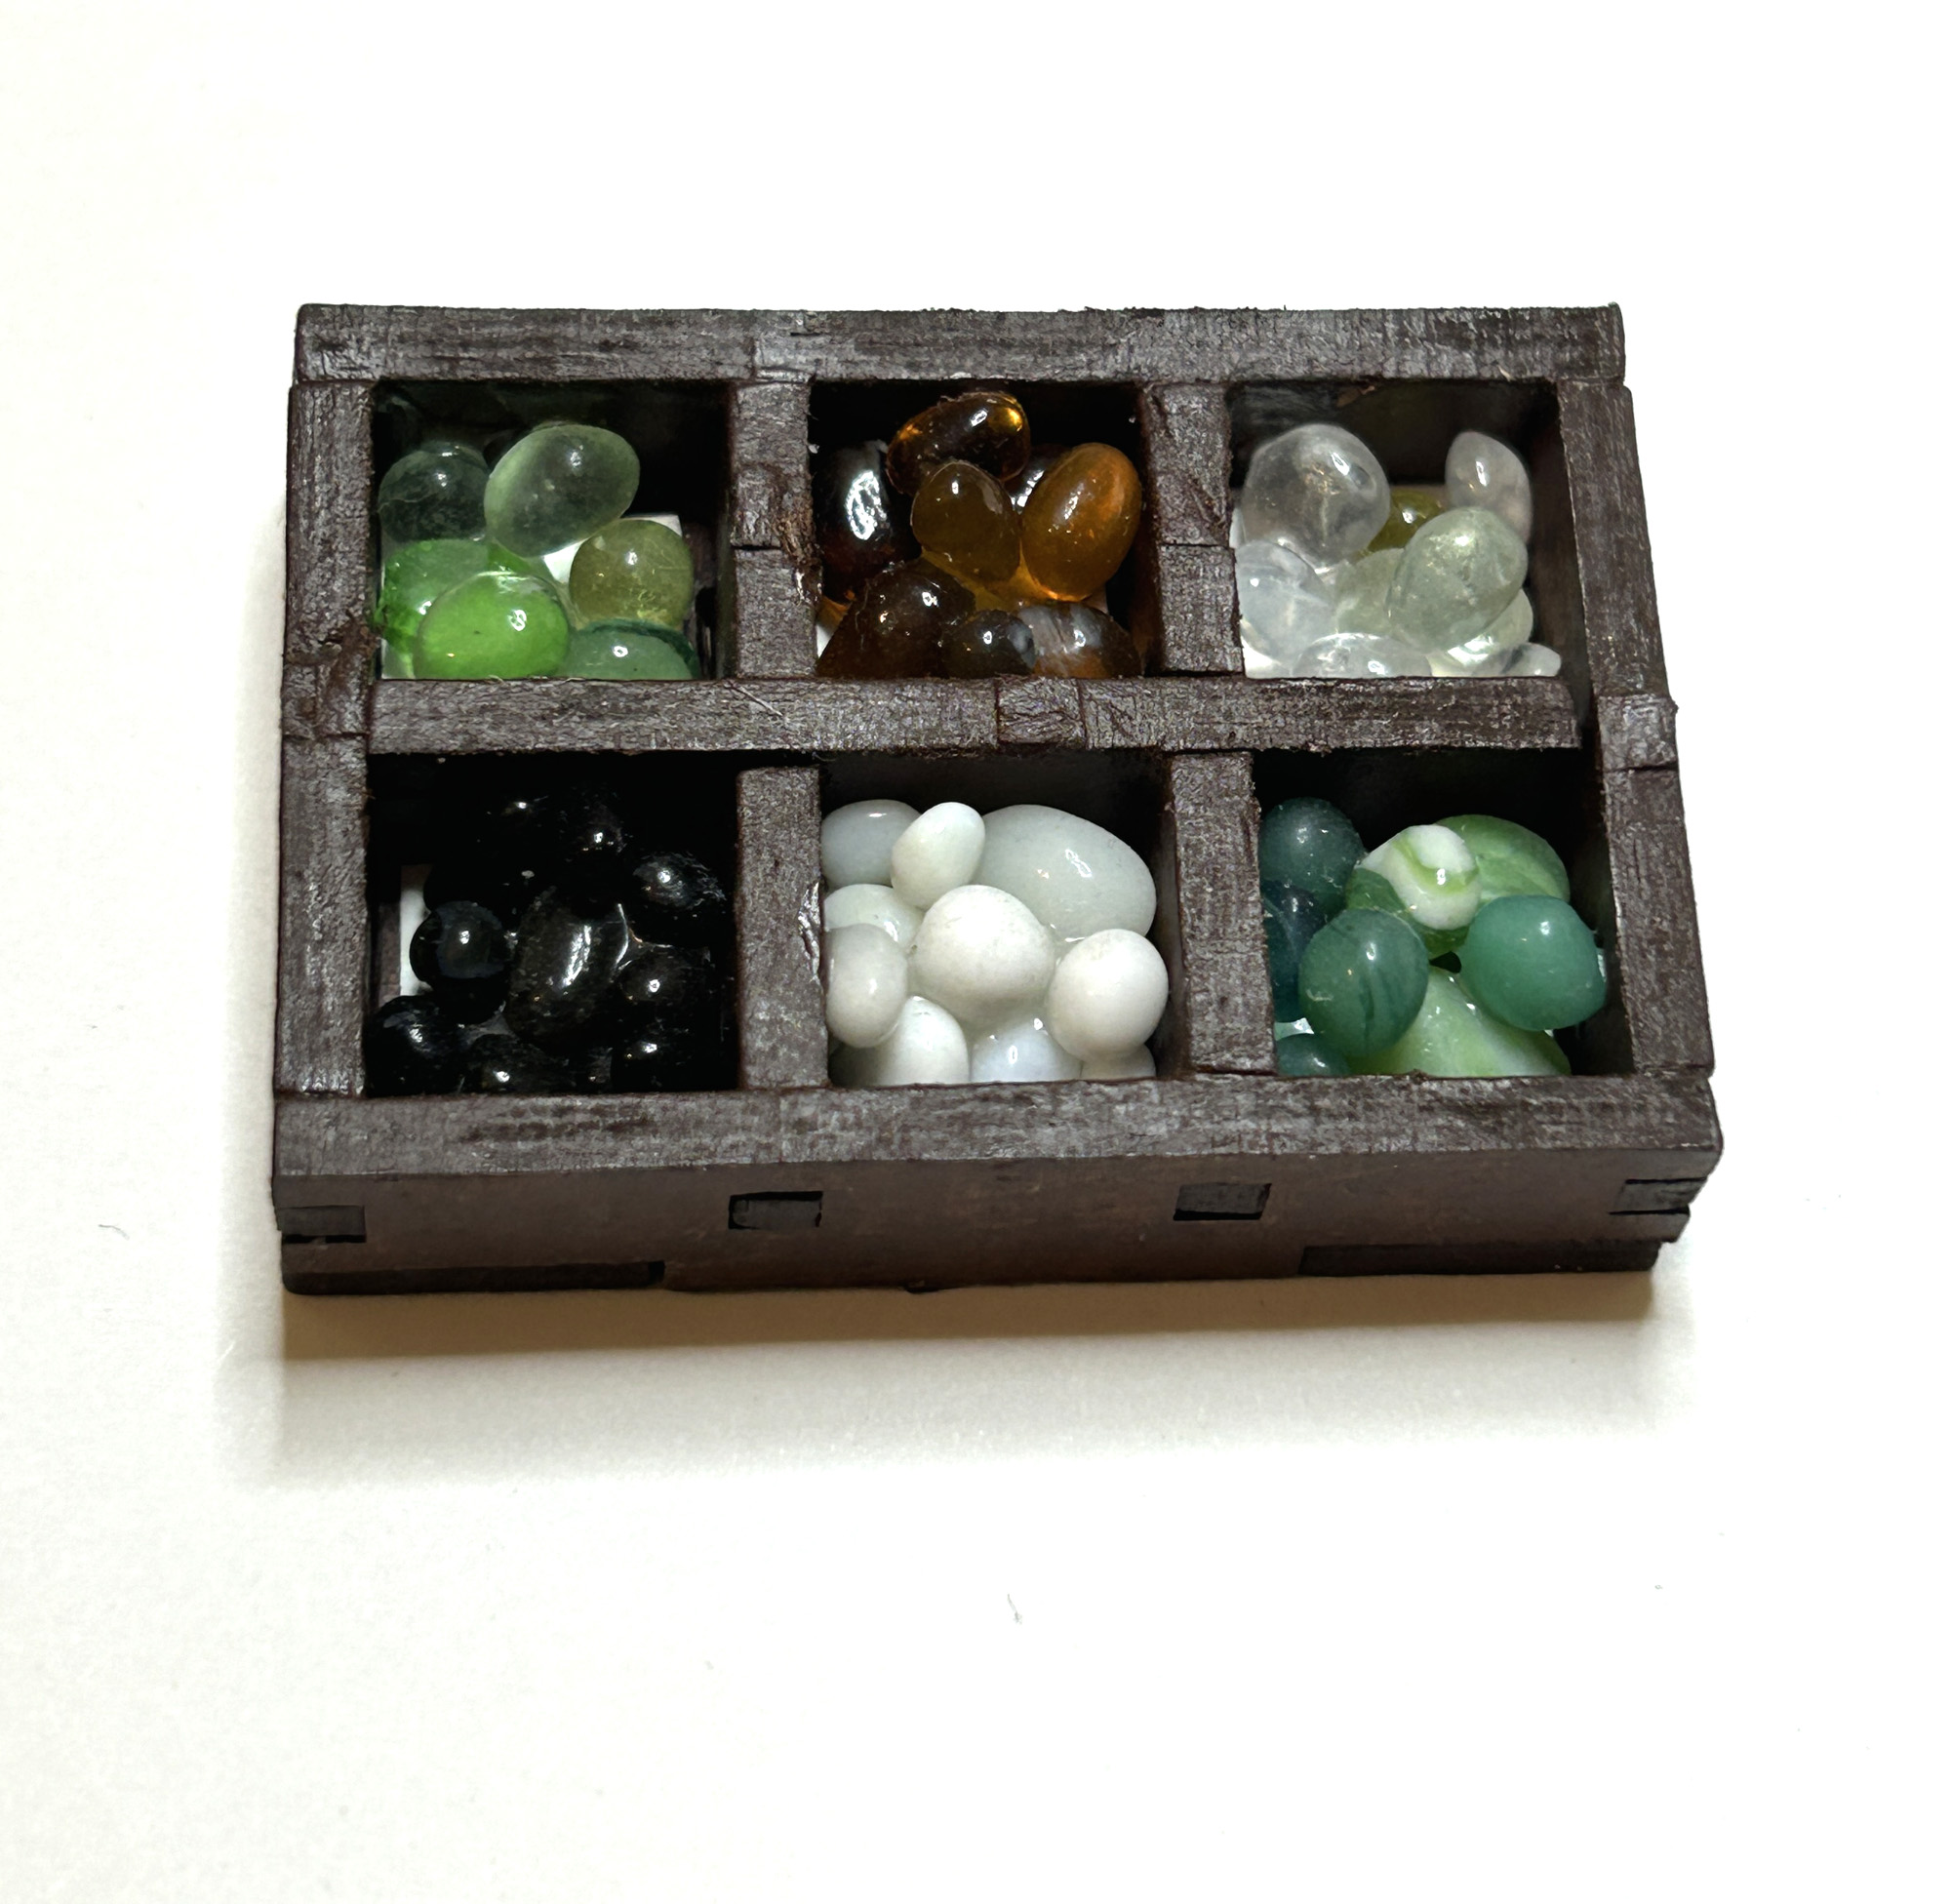
The little crystal display is made from a Chunky Seed Box. I picked through a jar of tiny pebbles to separate out the colors.

The front counter holds a sign advertising palmistry is available, it’s made from the Mystic Miniatures set. It’s glued to a toothpick and attached to a base made from Mixed Size Bronze Bead Caps. The tarot cards are cut from the wonderful Fortunes Told Collage Sheet. The tea cup is for tasseomancy or tea leaf reading. A White Ceramic Tea Cup & Saucer Set contains a bit of tea from my pantry set in resin.

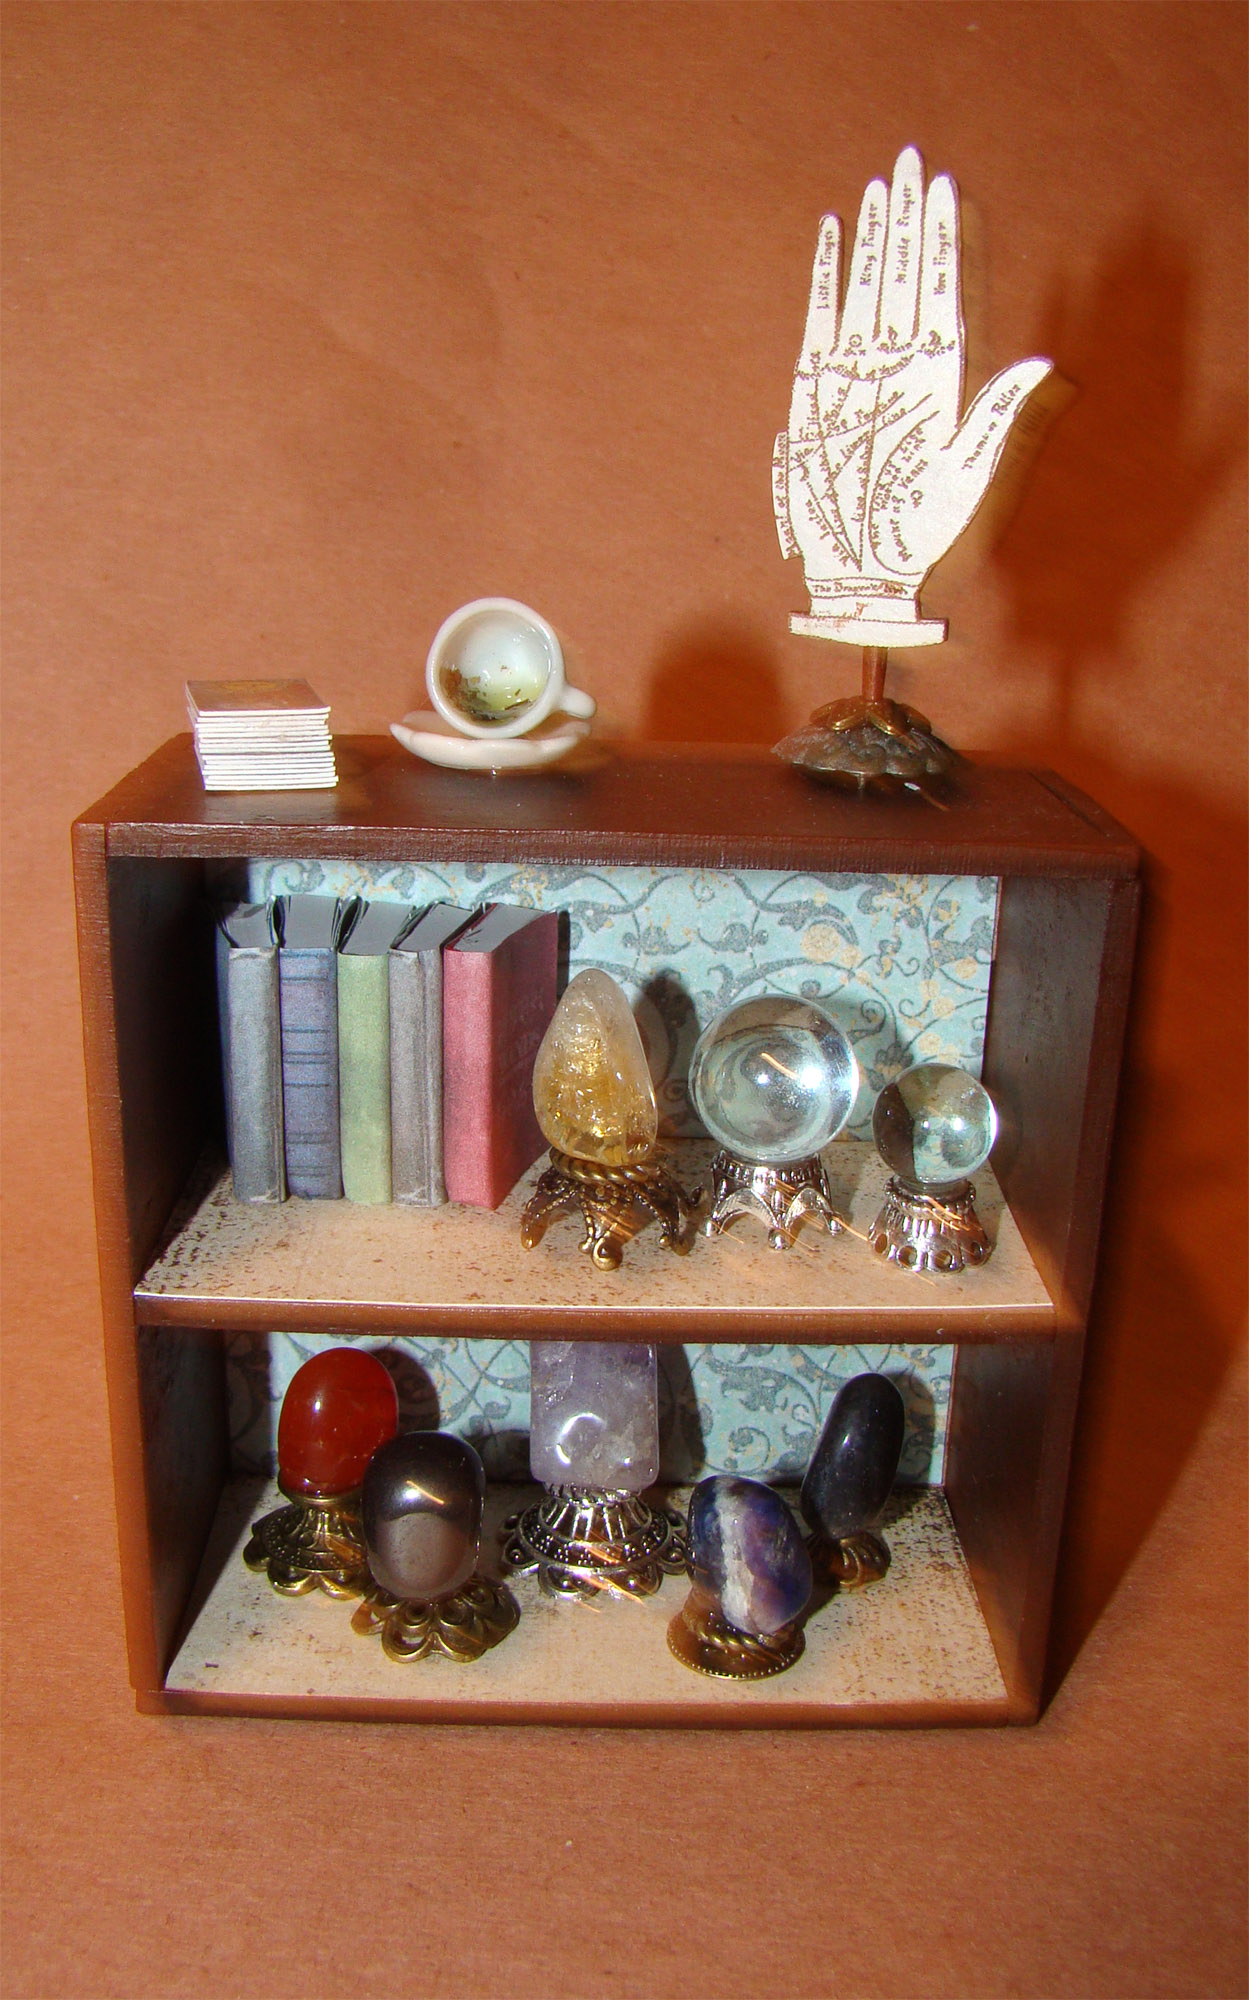
The top shelf holds a selection of magic books made from a Set of Miniature Books and the Fairy Godmother’s Cupboard Collage Sheet. Two more crystal balls and a mounted crystal specimen sit beside them.

The bottom shelf holds assorted crystal display stands. These are tumbled stones I’ve picked up over the years at gem and mineral shows. They are mounted on Mixed Size Bronze Bead Caps, a Round Bronze Filigree Bead Cap, Fancy Round Bronze Nail Heads, 12mm Flat Fancy Bead Cap – Bronze glued to a 10mm Antique Bronze Twisted Closed Ring and a Round Silver Filigree Bead Cap.

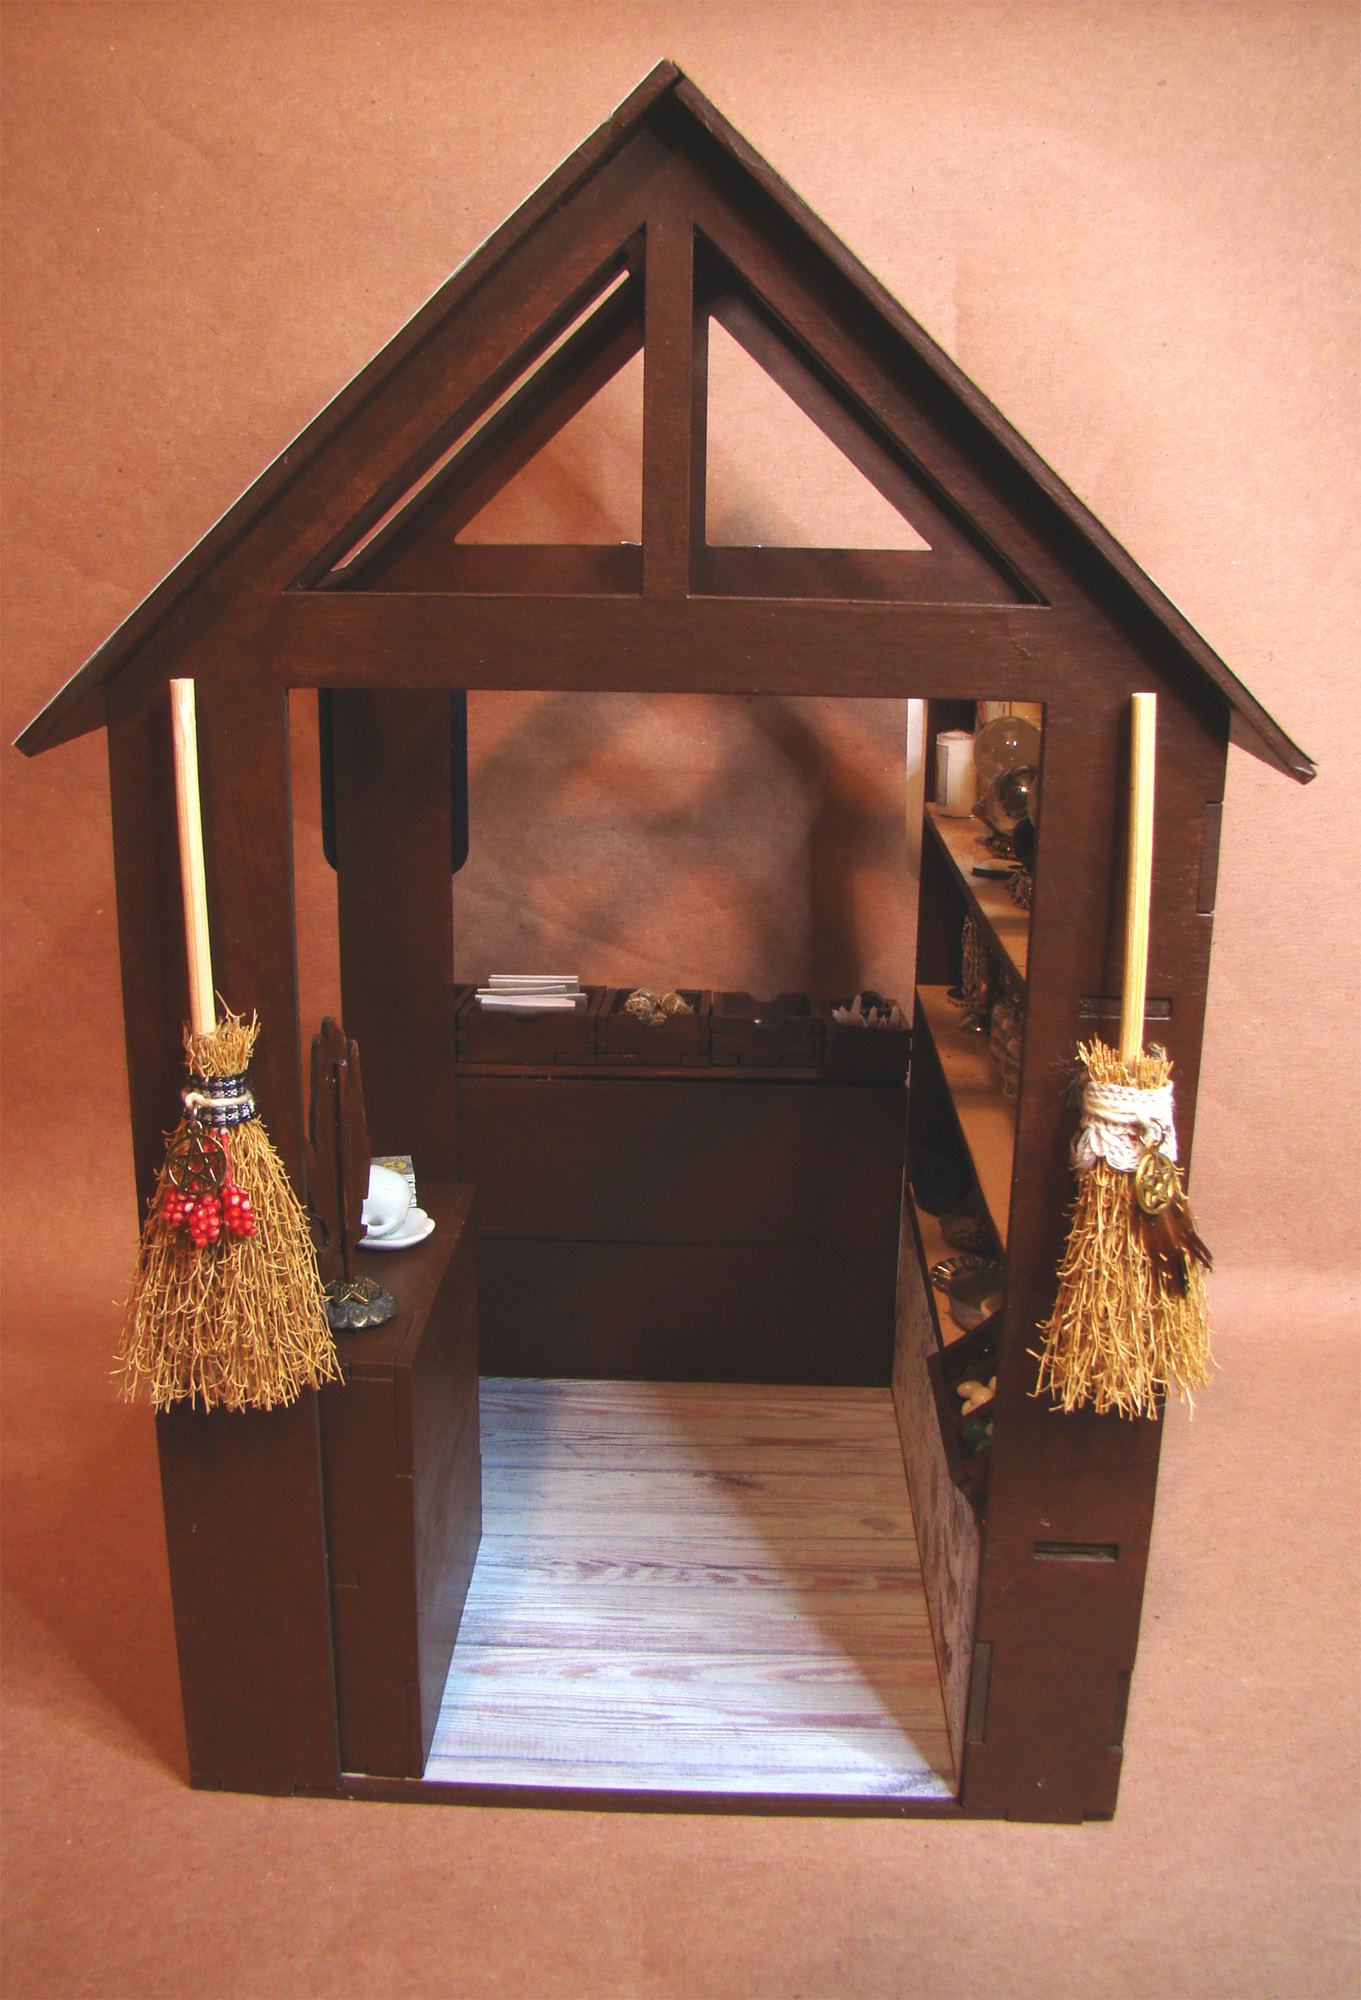
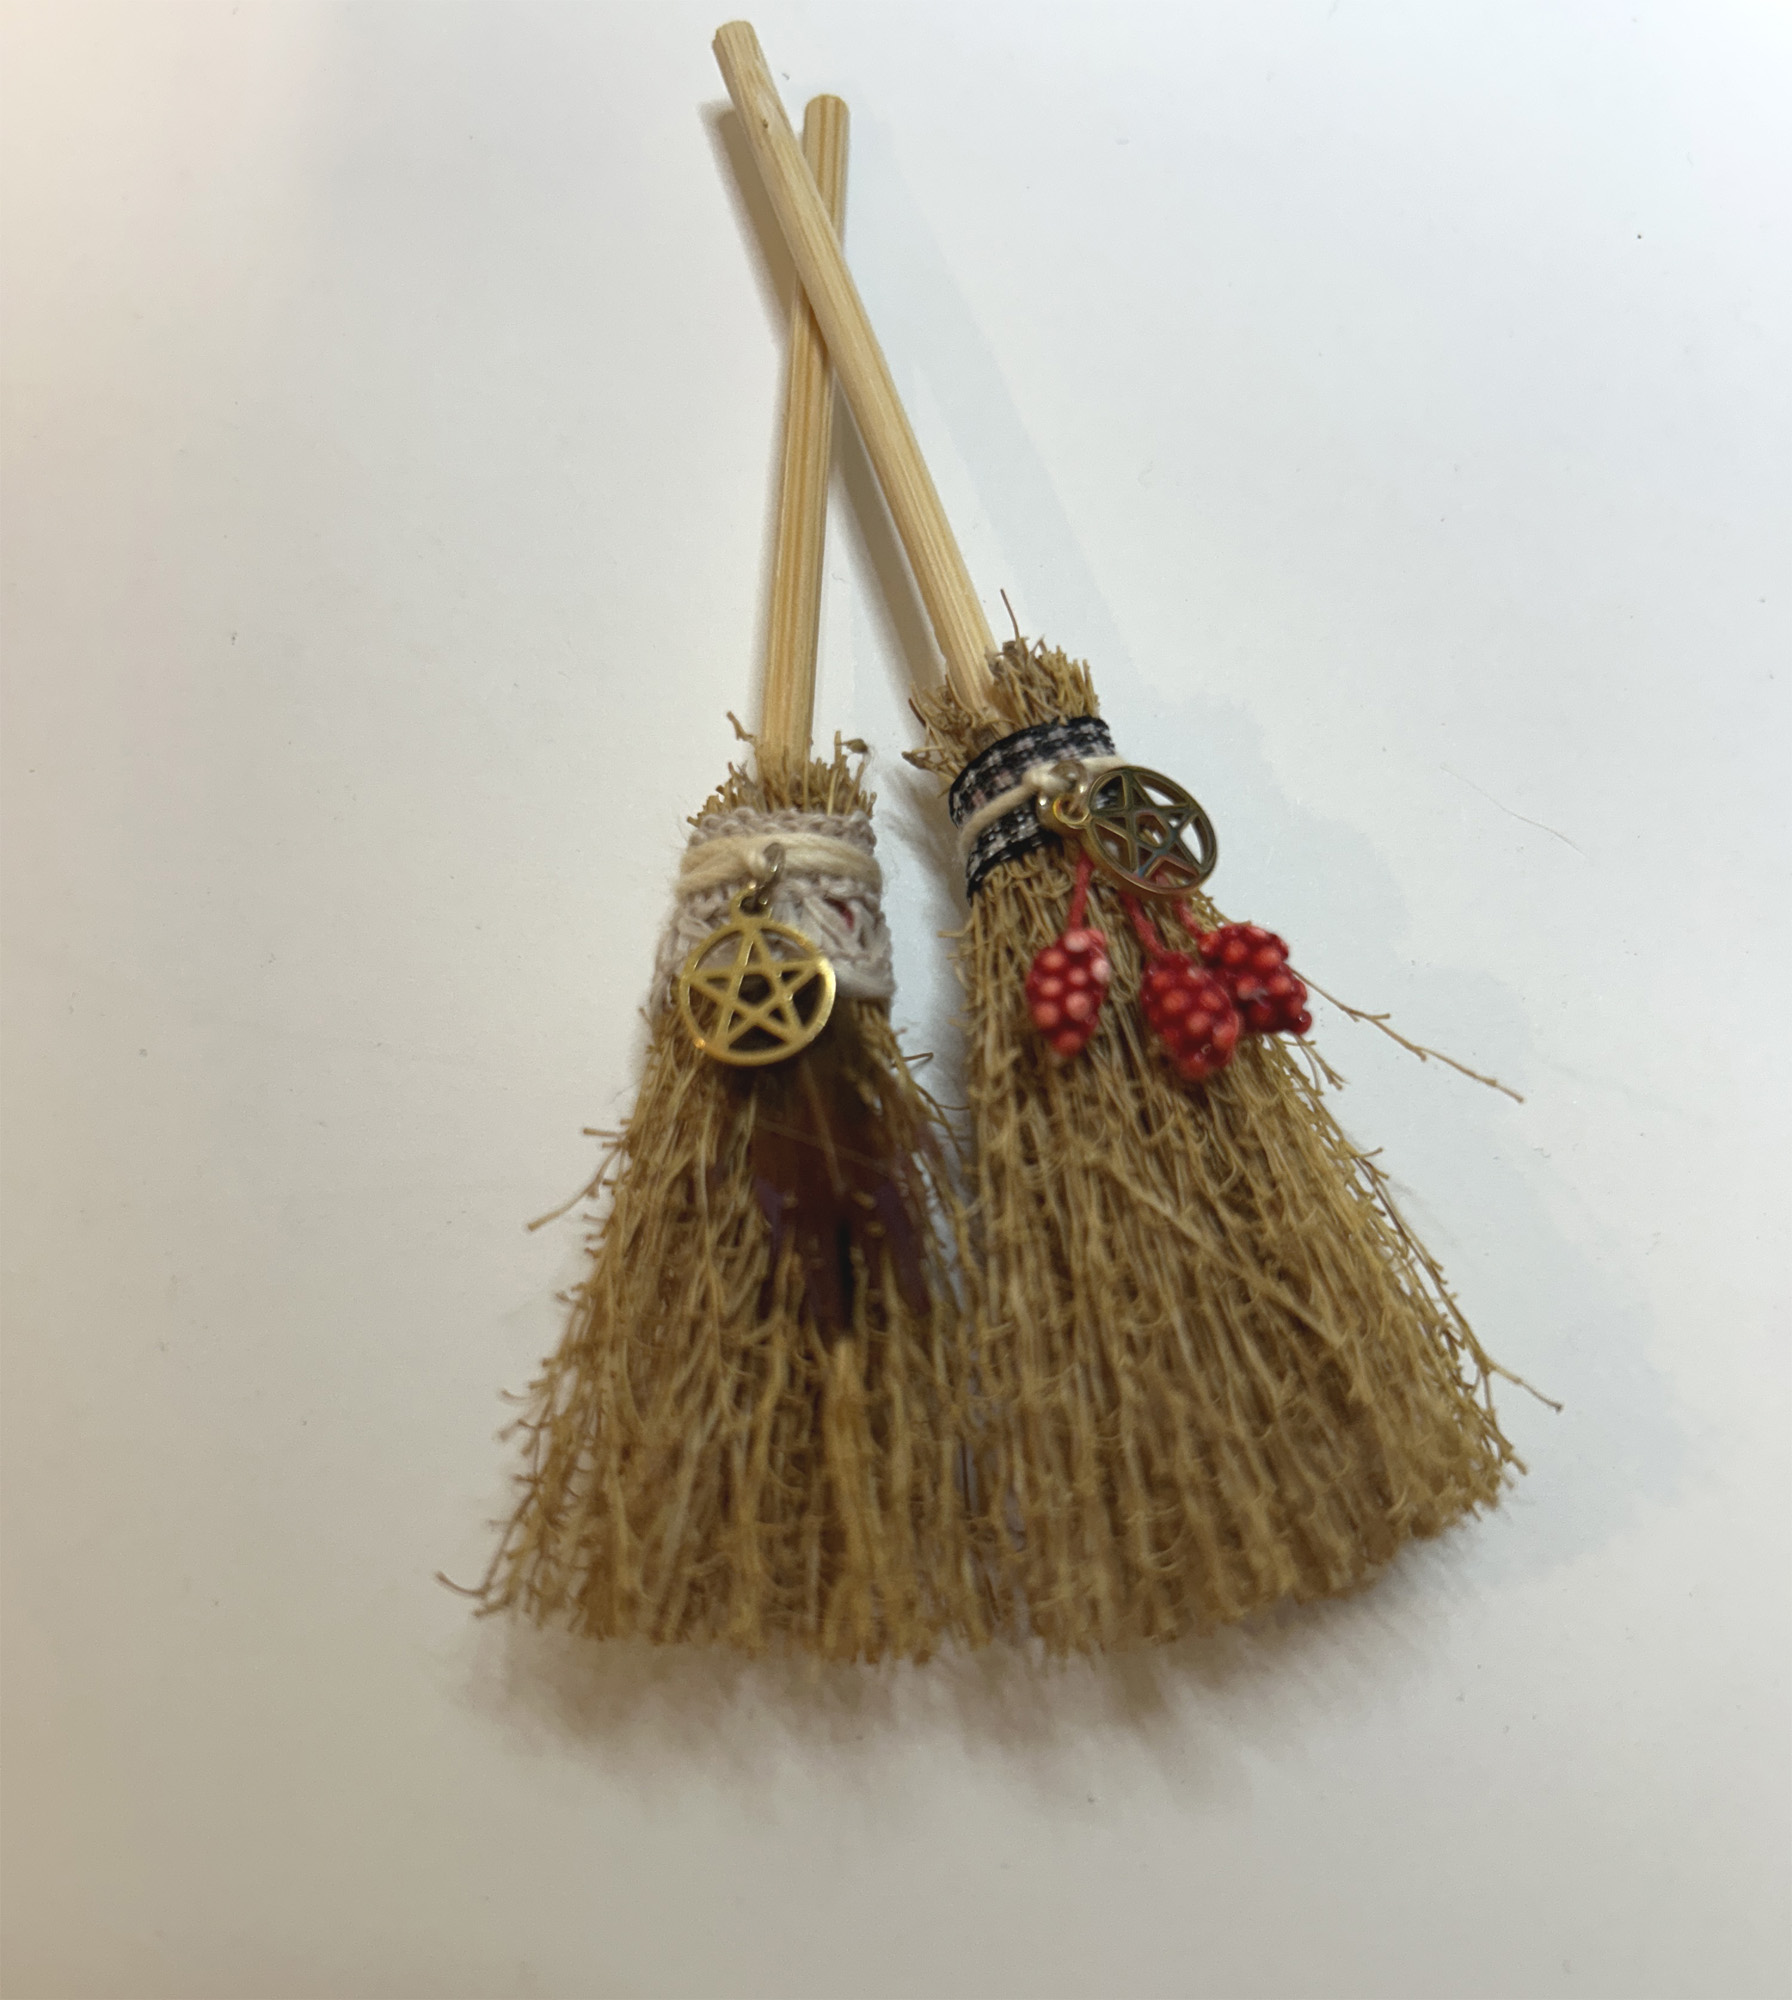
Besoms, or witch brooms, are fashioned from Miniature Rustic Brooms decorated with Tiny Gold Pentagram Charms, Fancy Red Holly Berries, Black and White Mini Gingham Check Ribbon and bits of trim and feathers.

They are hung on the right side of the open market.

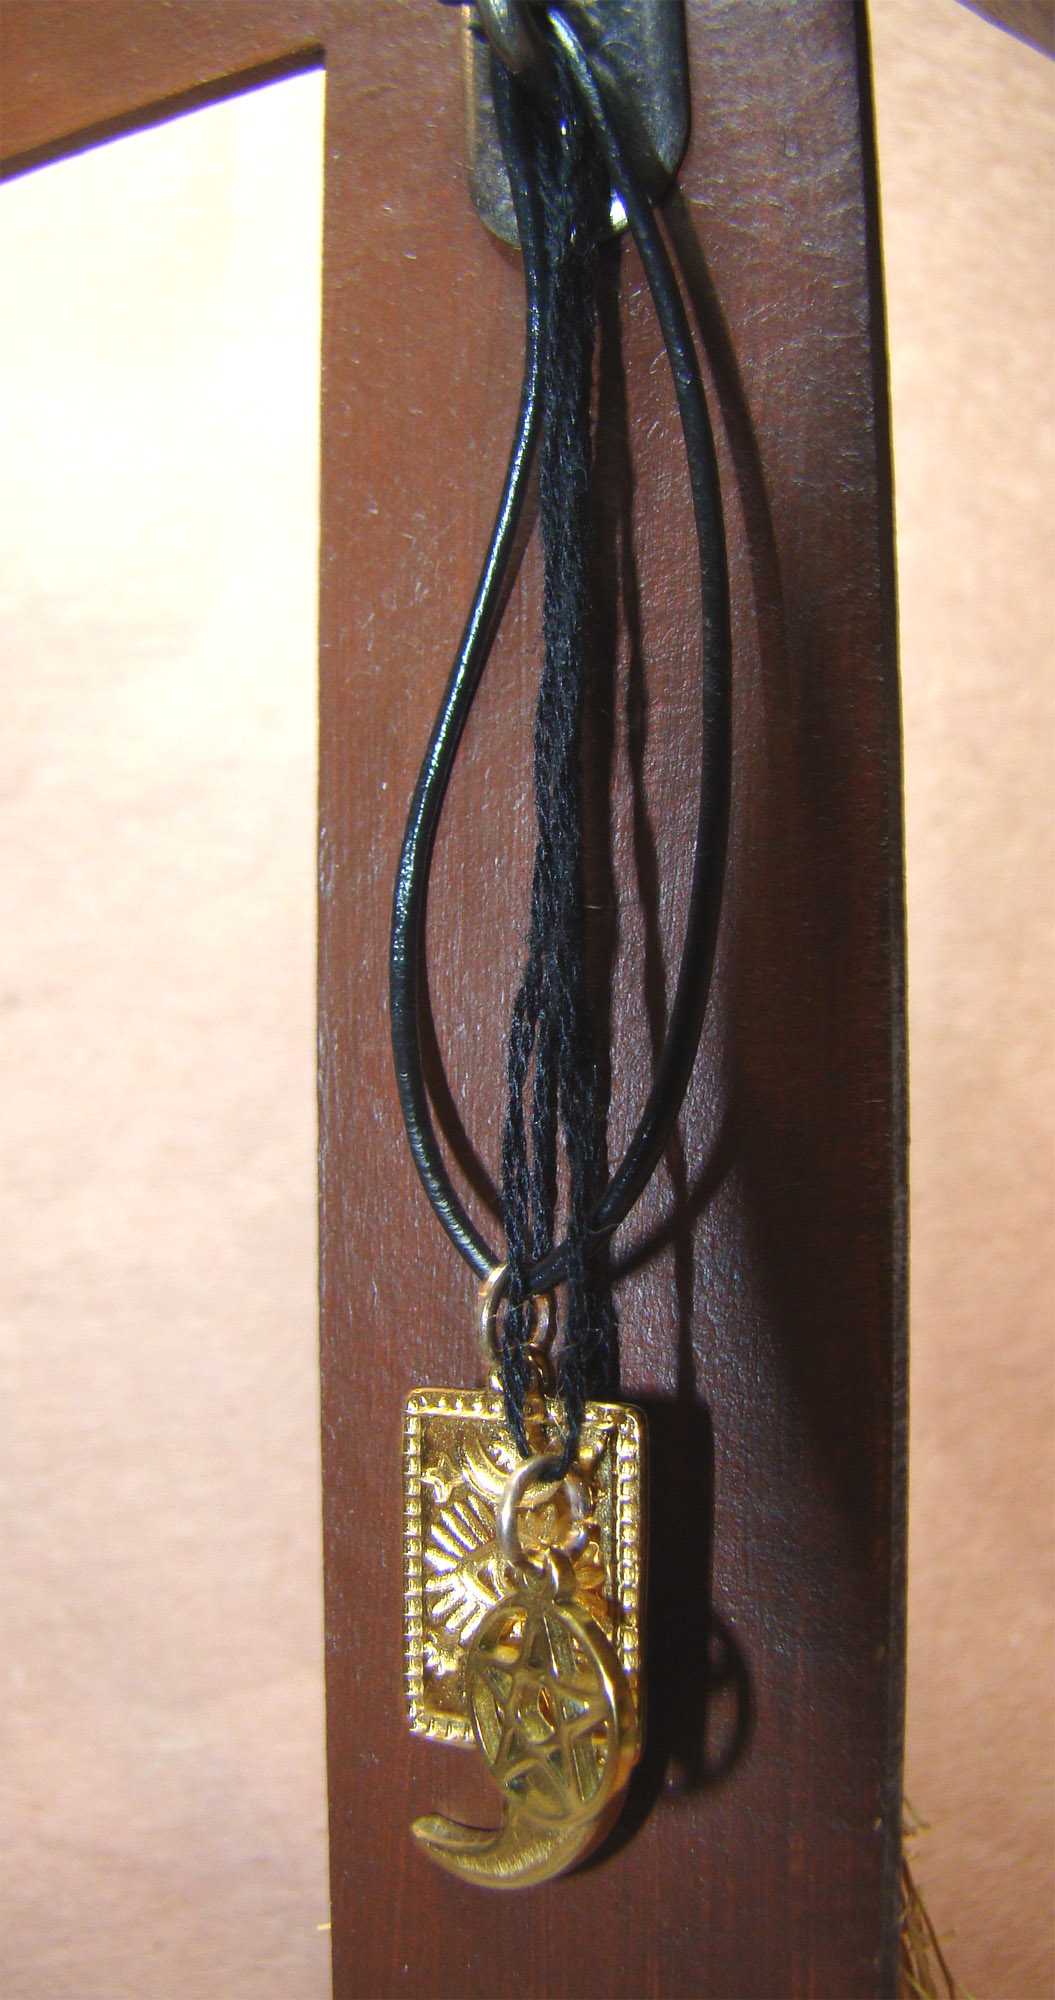
Magical jewelry hangs from the side support made from Tiny Gold Pentagram Charms, Gold Smiling Moon Crescent Charms and a Rectangular Eye & Moon Charm tied onto black cording.

One of the new Brass Phases of the Moon Pendants embellishes the side counter.

Posters are made from the Tarot Boxes and Posters Half Sheet set into Mini Stars Playing Card Frames. That’s a Silver Triple Moon Charm on the upper support.

I hope you’re inspired to make a magical market project of your own using some of these new things! The wonderful supplies I used may be found right HERE.
Vintage Halloween on Display

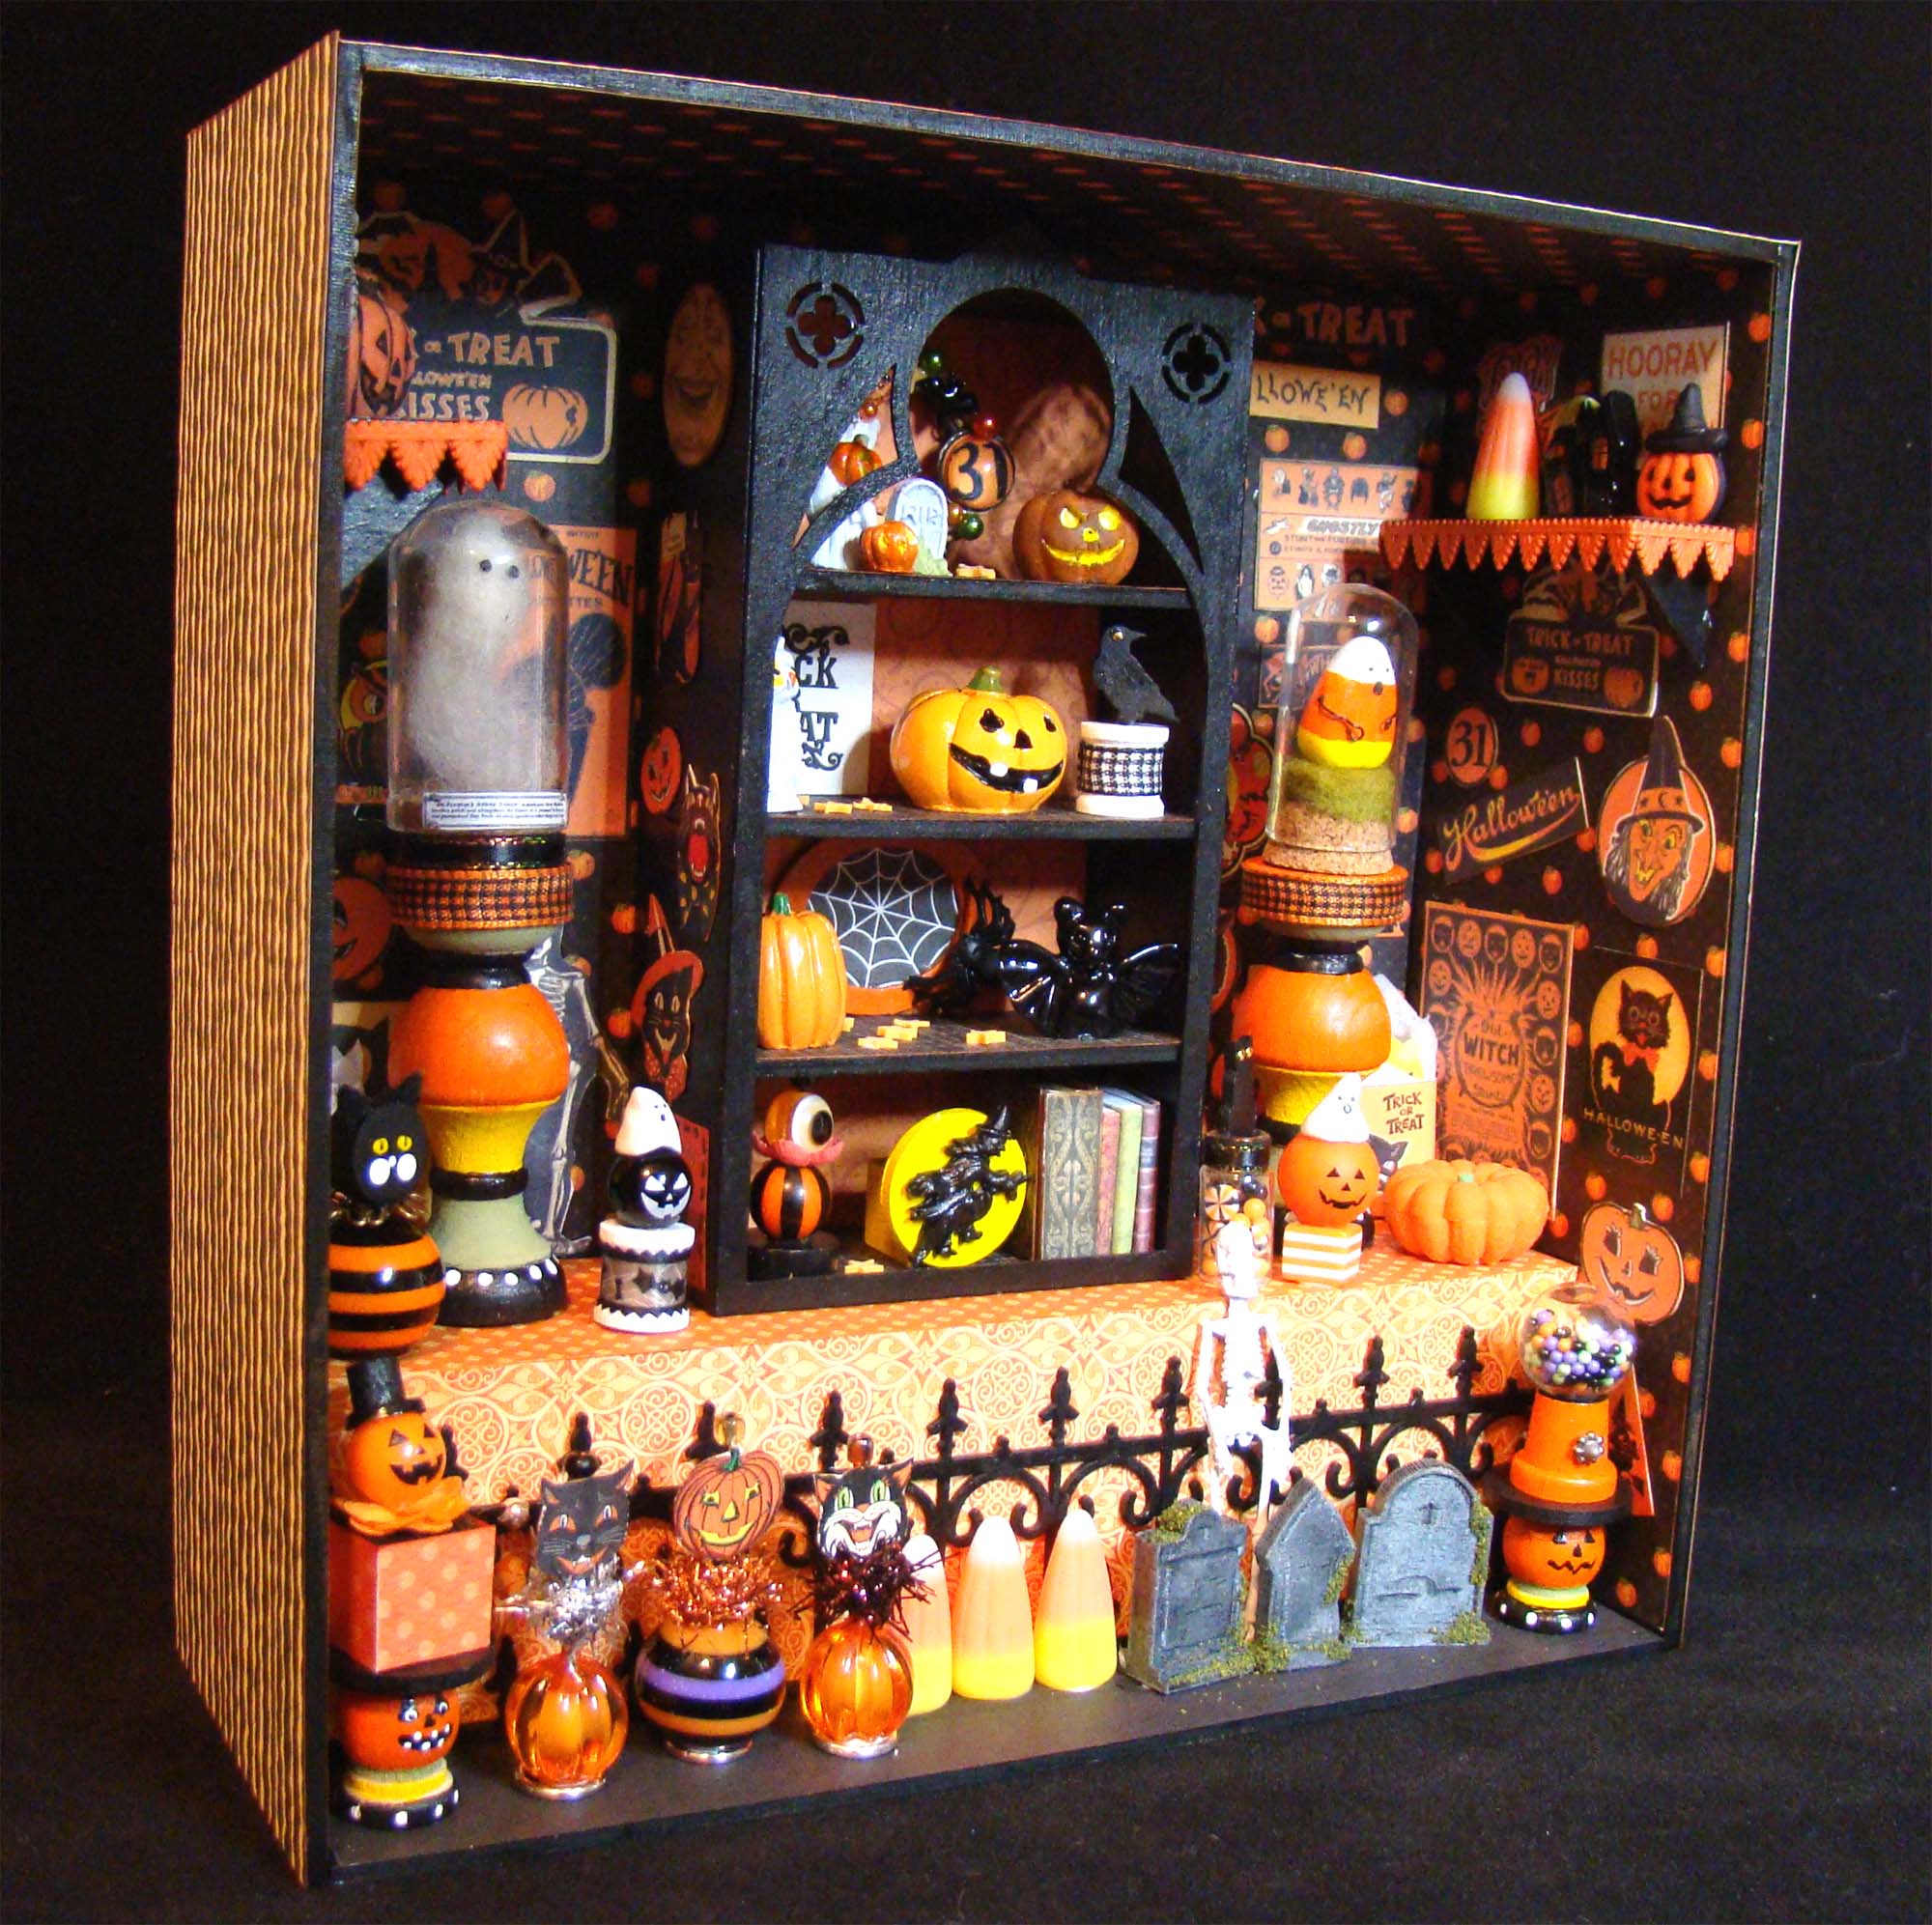
Who’s excited for Halloween? Speaking as someone who has more supplies for Halloween projects than any other holiday I can tell you the answer is me! I’ve been wanting to do a vintage Halloween display forever and finally made it happen with the help of quite a few new Alpha Stamps goodies, starting with the new 8×8 Shallow Room Box with Counter.

The room was papered in Graphic 45 prints from both their Happy Haunting and An Eerie Tale collections. I added vintage images cut from both the Retro Halloween Haunted House Trims and Halloween Market Signs & Props collage sheets.

The front of the 2 inch deep shelf was decorated with a Chipboard Gothic Border Trim painted black.

A Narrow Set of 1:12 Shelves was edged with Orange trim from the Halloween Dresden Borders Set. They added additional display space that I knew I would surely need. I actually had to make myself stop making tiny things as I was running out of space to put them!

Sitting on the left hand shelf are a Perched Owl Embellishment, a 20mm Happy Jack-o-Lantern Bead, and a Pumpkin Trick-or-Treat Bag Cabochon.

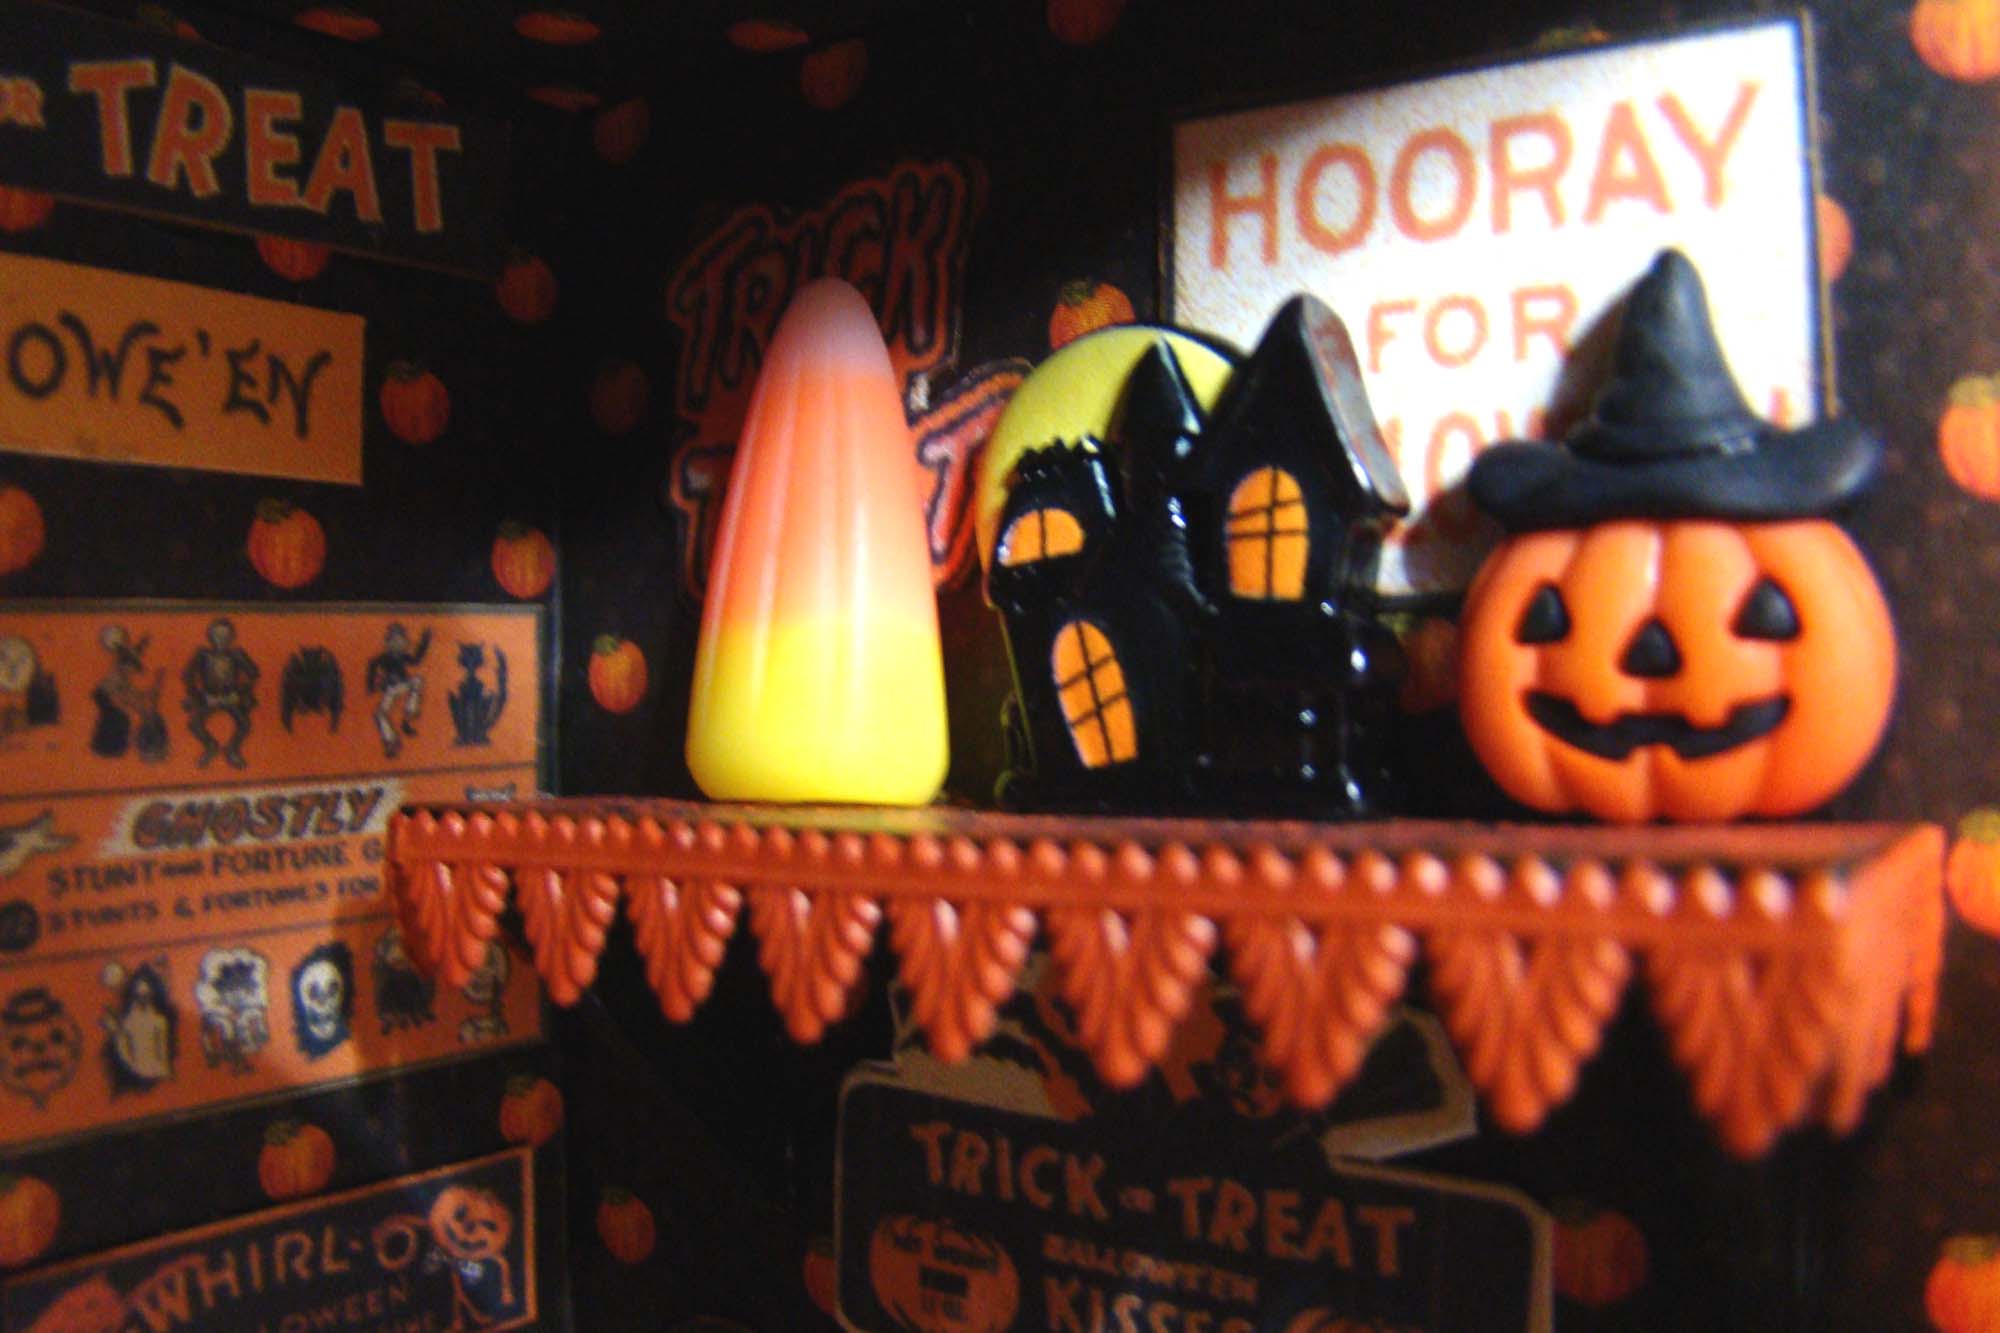
On the right you’ll find a Large Candy Corn (love these!), a Black Haunted House Cabochon, and a Jack-o-Lantern in Black Hat Button.

The addition of the new Short Bookcase with Gothic Facade provides a lot of extra space to showcase all sorts of tiny treasures. I painted it black and used the Dark Halloween 6×6 Paper Set for the rear wall and shelves. My favorite piece in the bookcase is a 1 Inch Mini Grapevine Wreath decorated with a Tiny Resin White Ghost, some Tiny RIP Tombstone Cabs, Tiny Smiling Jack-o-Lantern Cabs, Tiny Black Resin Bats, Mixed Color Acrylic Pearls, stars from the Black & Orange Halloween Polymer Clay Slice Mix and a ’31’ cut from the Retro Halloween Haunted House Trims Collage Sheet under a 12mm Round Glass Cabochon.

I made SO many little things for this project! Joining the wreath on the top shelf are a Metal Pumpkin Ghost and Metal Tombstone with Pumpkin. These little intricately detailed cast metal figures were cleaned with soapy water then painted with acrylic paints. I also made a Scary Jack-o-Lantern even more sinister with the addition of some yellow highlights.

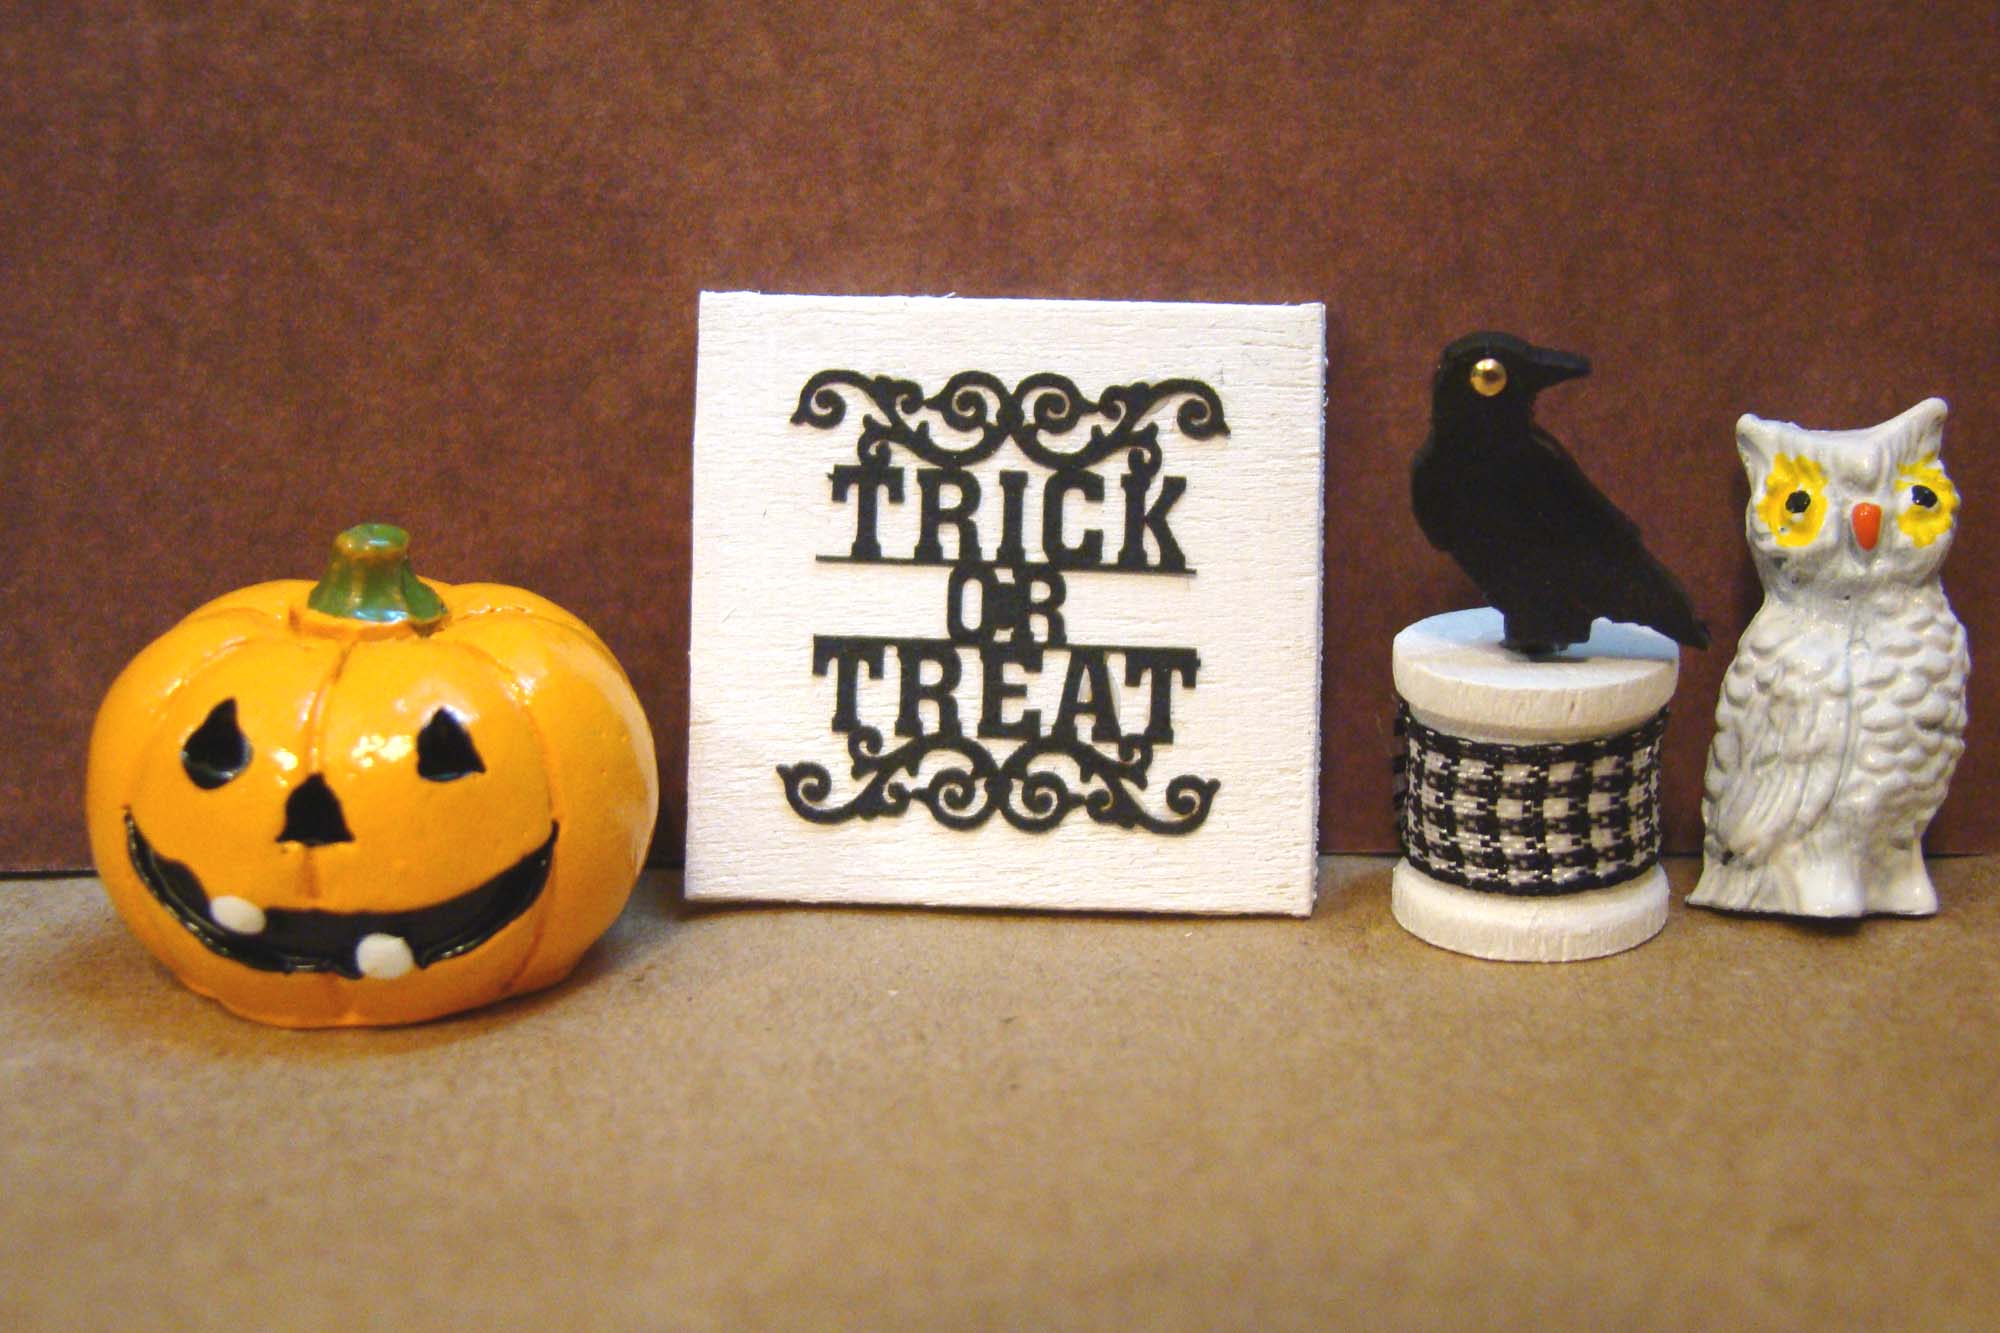
The next shelf holds a 3D Jack-o-Lantern alongside a little artwork made from a scrap of wood and a cutout from the Black Trick or Treat Lace Doilies Set. I painted a Chunky Little Wooden Spool white and embellished it with a snip of Black and White Mini Gingham Check Ribbon. It’s topped with a raven from the Halloween Bottle Toppers set. Rounding out this collection is a Standing Owl Figurine painted with acrylics.

The next shelf holds a Black Resin Gargoyle Bat, one of the Mini 3D Pumpkins – Set of 5 and a little piece of art made from a Mini Frame painted orange over a spiderweb from the Dark Halloween 6×6 Paper Set adorned with a Mini Black Spider.

The bottom shelf holds a little assemblage made by stacking a 10mm Orange, Black & White Striped Bead on top of 12mm Orange & Black Vertical Striped Bead. Those were threaded onto a head pin then glued onto a vintage wooden game piece.

I used both the Miniature Antique Book Covers Collage Sheet and Tiny Magic Books & Potions Labels Collage Sheets to cover a few of the Mini Books with Blank Covers. Those joined a Hidden Drawer Book Box – Tiny Size covered with images from the Fortune Teller Covers for Tiny Hidden Drawer Books Collage Sheet. A little bookend was made by painting a Large Flying Witch black and gluing her to a wooden disc which is supported behind by a 1/2 Inch Wooden Cube Block.

Here’s the finished bookshelf. It eventually got the Gothic Facade added to the front and a few stars from the Black & Orange Halloween Polymer Clay Slice Mix scattered about the shelves.

Flanking the bookshelf are two decorative tables made by painting Curvy Wooden Column Finials and dressing them up with a snip of Black & Orange Mini Gingham Check Ribbon at the top.
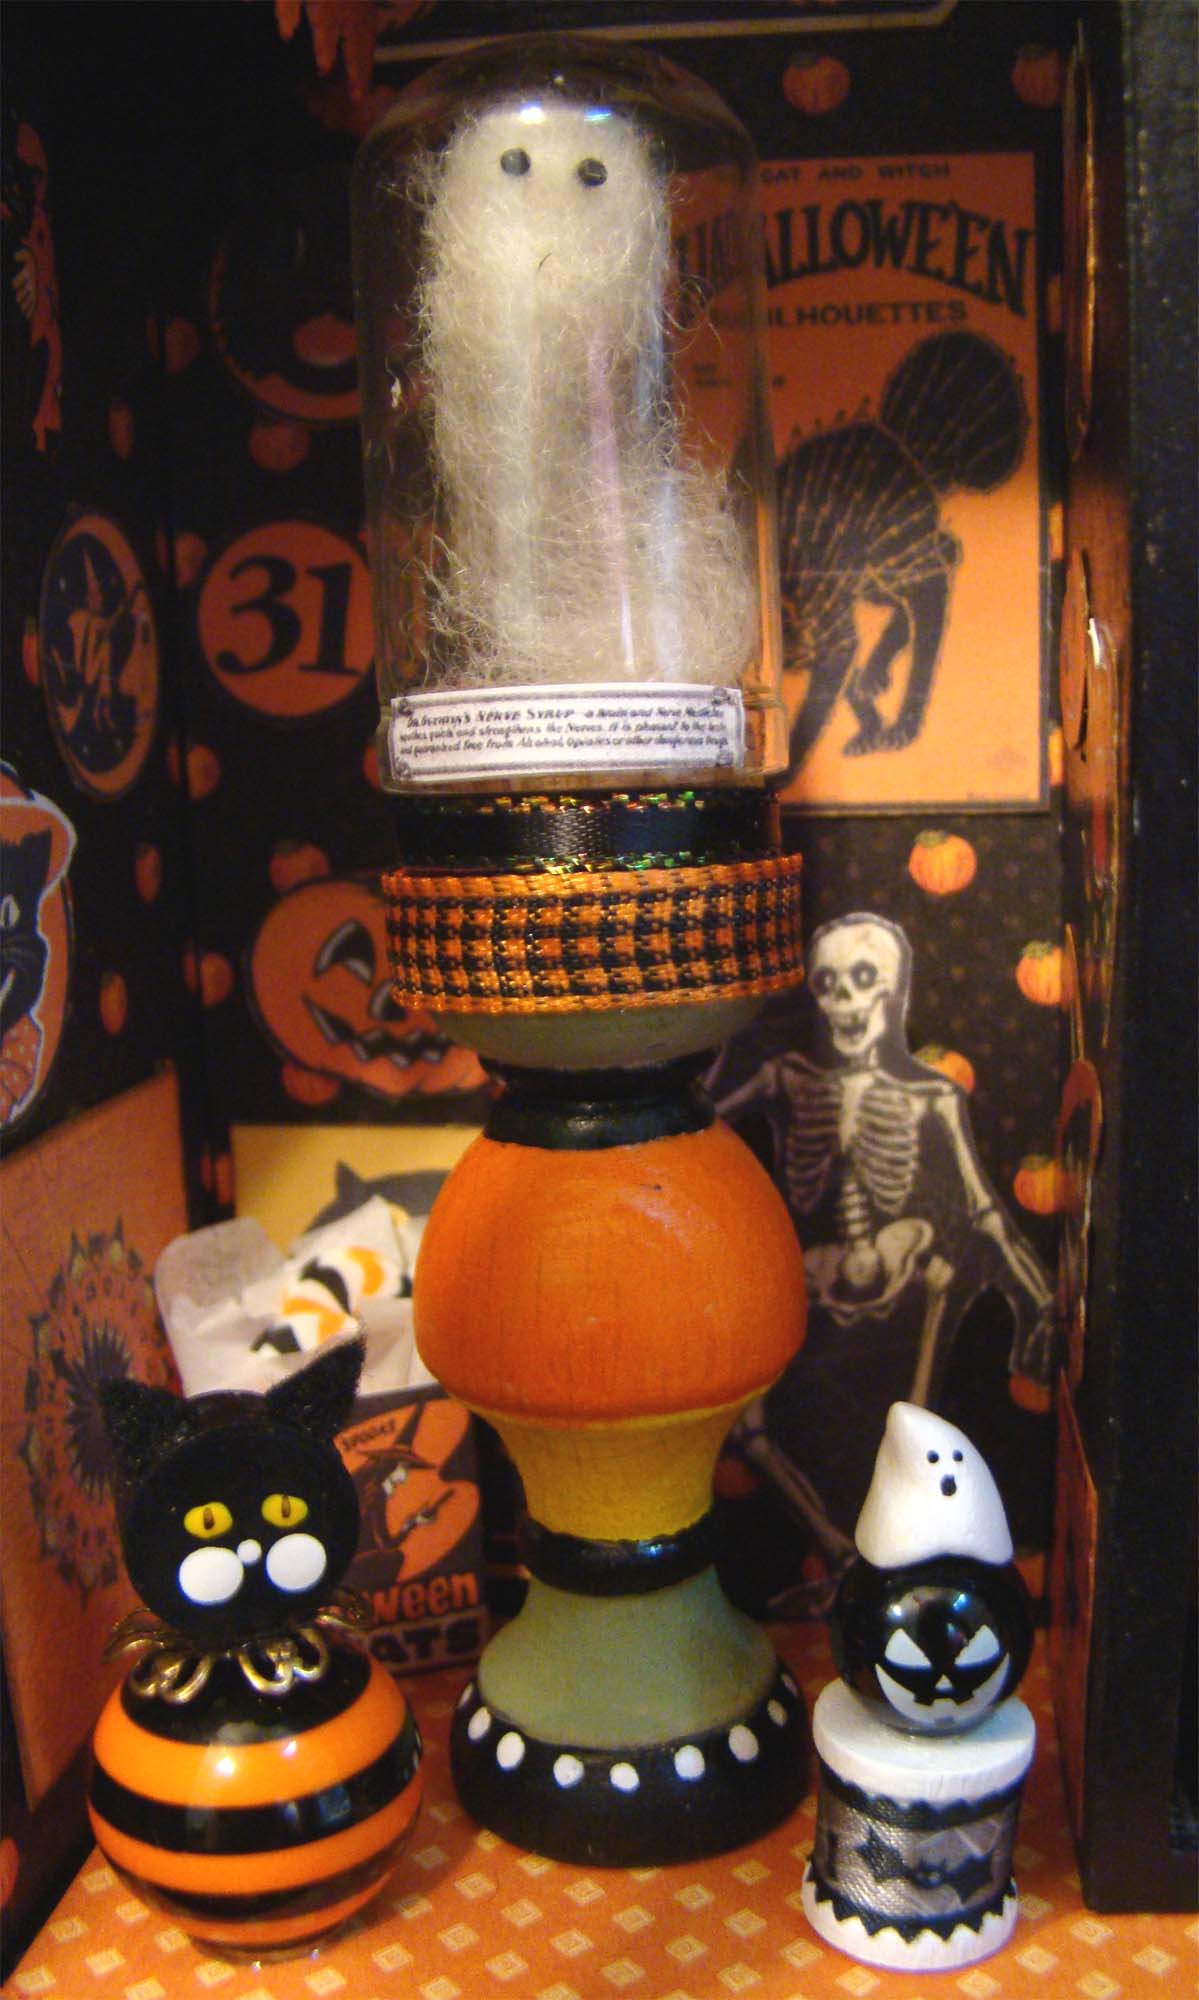
An ethereal ghost was felted from wool roving. It was captured under a Tall Glass Cloche with Cork Base. The label comes from the Tiny Magic Books & Potion Labels Collage Sheet. The other table displays a little candy corn guy I made from polymer clay and wire.

Little tables made from Small Wooden Finials topped with round wooden discs then painted for the season.
A gumball machine was made from a Tiny Wooden Flower Pot, an 18mm Round Glass Globe and filled with 2mm Halloween Mix Tiny Faux Candy. A jack in the box made from a 5/8 Inch Wooden Cube Block, some wire, jewelry findings, orange paper flowers that I took apart and an orange bead from the new Set of 12mm Jack-o-Lantern Beads. His hat is a slice of wooden dowel glued onto a paper fastener and painted black.

Some of the other little assemblages I made for this project include a 20mm Orange & Black Striped Bead topped with a cat head I painted on a wooden disc and topped with felt ears. Next is a Tiny Glass Bottle filled with 3mm Halloween Mix Nonpareils Faux Candy and a few of the Black, Orange & White Halloween Candy Polymer Clay Slices then topped with a black cat from the Halloween Bottle Toppers. Next is a 15mm Orange Jack-o-Lantern Silicone Bead sitting on a 10mm Orange & White Striped Cube Bead and topped with a polymer clay ghost hat I made. Another tops one of the 12mm Jack-o-Lantern Beads atop a Chunky Little Wooden Spool.

I made a few vintage Halloween wands from painted toothpicks topped with images from the Halloween Market Signs & Props Collage Sheet, topped with beads and a collar made from tinsel garland.

These got displayed between the jack in the box and more Large Candy Corn on top of 16mm Transparent Orange Pumpkin Beads and a 20mm Orange, Black & Purple Striped Bead.

I made a little graveyard with the new Set of Mini Resin Tombstones. I started with a base layer of black acrylic paint then dry brushed on both medium and light gray. The final step was to add Tacky Glue where I wanted moss to form using a toothpick then dipping it in Green Turf Grass.

The graveyard was joined by one of the new Tall Metal Skeleton figures I painted white.

I made treat bags from the Retro Halloween Bags Collage Sheet and tucked in candies from the Black & Orange Halloween Polymer Clay Slice Mix and the Black, Orange & White Halloween Candy Polymer Clay Slices.

One of the bags got tucked behind the captured ghost along with a couple of the little constructs I made for this project.

And here’s the other one sitting behind a Squishy Short Pumpkin.

Thanks so much for stopping by today. There are lots of new Halloween supplies to play with, I hope you are inspired to make something that makes you smile! You can find all the supplies I’ve used right HERE.
Design a site like this with WordPress.com
Get started