Another Book Nook

Here is my latest book nook, it’s based on a location in the Harry Potter  universe – Hogsmeade.  It features Honeydukes Sweets Shop, the Three Broomsticks Inn and Tavern and Madame Puddifoot’s Tea Room.  I might be hooked on these things, I already have my third one started.

Advertisement

Day Of The Dead Ofrenda

For the Day of the Dead I made an ofrenda, which is an altar on which a collection of objects is place during the Dia de los Muertas celebration.  You can get details over at http://gslcuts.blogspot.com/2018/11/miniature-day-of-dead-ofrenda.html

Moon Gazing Mouse Shrine

This little project is perfect for the season.  I made the little moon in our pottery studio.  The entire thing stands about 6 inches tall.  Details at

http://gslcuts.blogspot.com/2018/09/moon-gazing-mouse-shrine.html


Carnival Food Cart

Today on the Gypsy Soul Laser Cuts blog, I share how to make a miniature food cart loaded with fun carnival food. Check it out at http://gslcuts.blogspot.com/2018/06/carnival-food-cart.html

A Perilous Pet

Today on the Gypsy Soul Laser Cuts blog I share a tutorial on how to make this miniature greenhouse, home for a perilous bearded dragon.  Rawr!  If you’d like to see how it’s made, hop on over to http://gslcuts.blogspot.com/2018/06/a-perilous-pet.html

A Tiny Glitter Village

Here’s a happy little project I did for Gypsy Soul Laser Cuts.  We enjoy having a few winter decorations up for a month or two after the holidays.  I adore a glitter village but have no place to set one up so I decided to make one in miniature using the GSL Tiny Plant Table

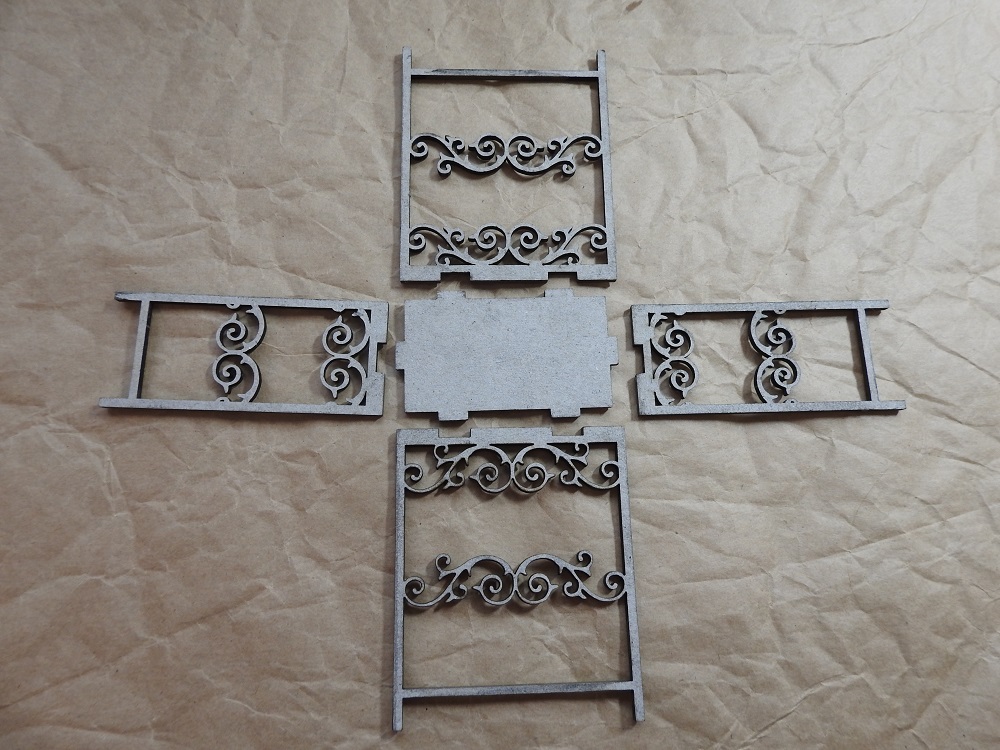
This one is so simple to put together, just 5 pieces!

I decided the stand should be white to enhance the snowy scene so gave  each piece a few coats of white acrylic paint on both sides then assembled the piece using tacky glue.

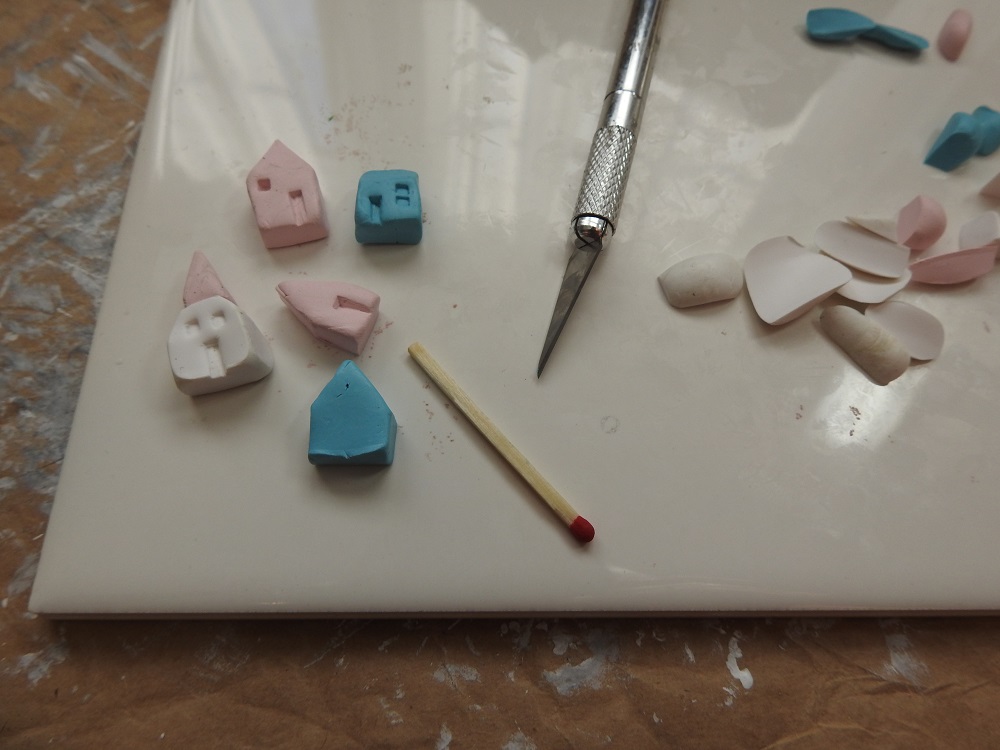
Using an X-Acto knife I cut tiny house shapes from polymer clay and used a square match to indent windows and doors before baking them off.

I also rolled out some cone tree shapes and dug out my stash of nail art supplies, aka polymer cane flower slices, to give the houses a bit of decoration.  You can find these in nail supply stores and on Amazon.

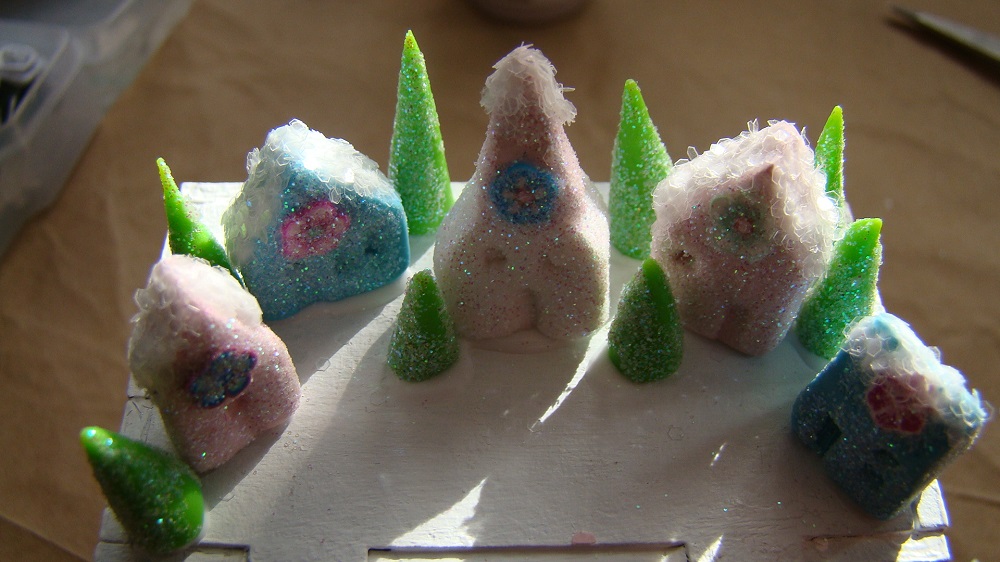
After baking, I applied a thin coat of tacky glue on each piece then tossed them into a container of superfine glitter to get them nice and sparkly. When the glue was dry, I added a bit of chunkier crystal glitter onto the rooftops for some sparkly snow.

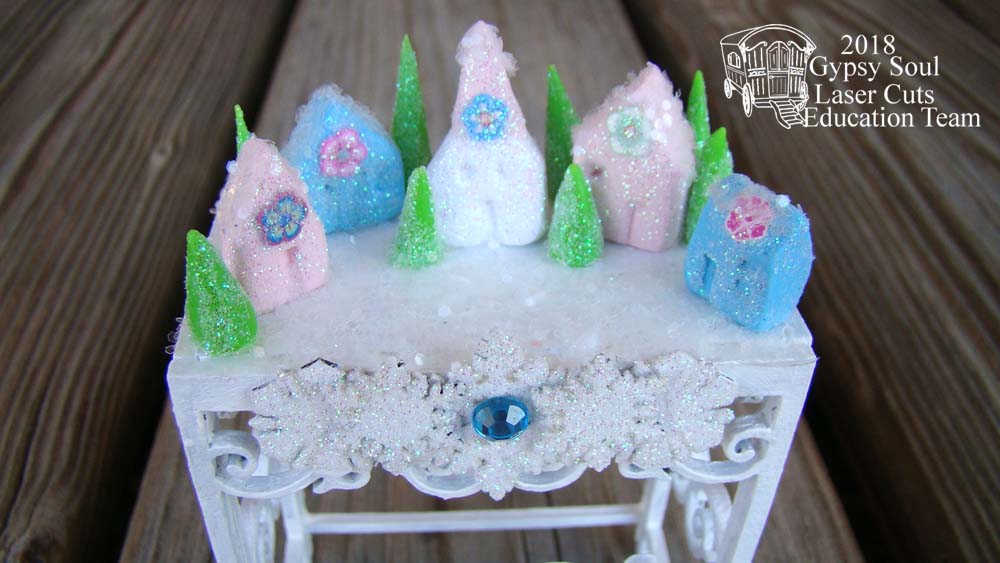
They were then glued onto the top of my assembled table to form a tiny village.


I wanted to make sure not to get glitter on the sides of the table so I used painter’s tape as a barrier before coating the village floor with a thick coating of tacky glue. Then came the fun part…. dumping a LOT of crystal glitter to make a thick blanket of snow!

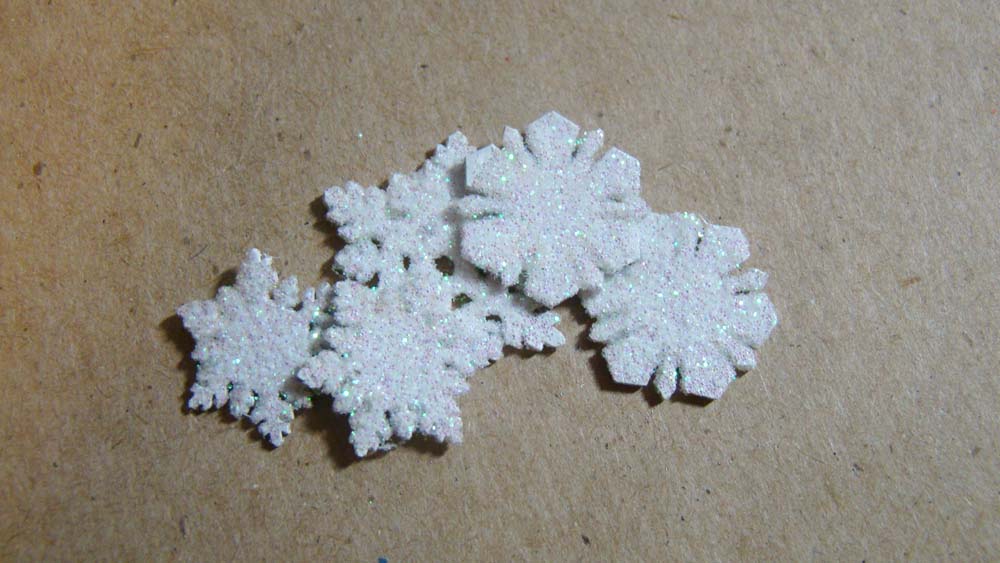
To finish the look, I used some of the GSL Snowflake Shape Set Minis as a decoration. I got white acrylic paint into the little crevasses using a soft bristled brush.

When the paint was dry, I applied a thin coat of white glue and tossed them into the same superfine glitter to give them some sparkle.

I glued them onto the front of the winter scene and finished it off with a bit of blue bling.

Once it’s fully dry, tap off the excess glitter and enjoy your winter wonderland!


Gypsy Soul Laser Items Used

Tiny Plant Table

Snowflake Shape Set Minis

Other Items Used

White acrylic paint

Tacky glue

Polymer clay

Polymer clay cane slices

Superfine glitter

Crystal glitter

Rhinestone

Painter’s tape

House Shrine Box For A Vacation Treasure

Well I have some exciting news… I’ve been asked to join a design team!  I am going to be posting a project twice a month on the Gypsy Soul Laser Cuts blog

For my first project, I was inspired to make a home for a pretty little religious statue I recently picked up on vacation in Valetta using the GSL House Shrine Box. It’s a really great size to show off lots of treasures and this one fits perfectly inside.


The first thing I do when I start a project is lay out all the pieces. This house shrine box is super easy to assemble and straightforward as to where the pieces fit together.


Before I glue anything in place, I cut my scrapbook paper. I use the front and back pieces as a template, which makes it easy to lay out exactly which parts of the paper I want to use.

Here’s everything cut out and ready to glue down.


I start by gluing the interior rear and side wall papers in place using a tacky white glue. I then glue the back, front, floor and side walls together. I use rubber bands to hold everything in place while the glue dries.

The base of my figurine is a little bit too wide to fit inside the shrine so I glue a domino for her to sit on. It’s the perfect height for her base. Around the domino, I glue a grassy green felt scrap into place to serve as the shrine’s flooring.

Shingles and roof come next. I used GSL Chipboard Shingles- Pointed to jazz up the roof.  I painted the shingle strips with brown acrylic paint then give them a thin wash of quinacridone azo gold paint. I painted the roof brown before gluing the shingles in place just in case any tiny section of it peeked through after I glued them in place.


Next I cut the shingles into 1 3/4 inch strips, which I then glued in place. This project required four of the shingle strips in all.


Once I glued my scrapbook paper on the outside shrine walls I was ready to get into my crafting flowers and embellish away.


She’s a beauty!

Stranger Things

If you are a fan of the Netflix show Stranger Things, you’ll 100% understand this little shadowbox I made for a friend.  If not, never mind.  🙂


My Cabinet Of Curiosities

I was super excited that I got a Gypsy Soul Laser Cuts French Millinery Cabinet kit for my birthday.  I immediately assembled and painted it then started planning what to display in it.  As it turns out, I’ve been collecting tiny awesome things my entire life.  I am over the moon with how it came out!

It’s my favorite thing I’ve ever made!

I’ve had the porcelain beaver since I was a teenager. I bought the crystal skull during our 25th anniversary trip to Asheville. I made the zombie display from an HO scale train figure. The green stone glows in the dark!  The shelf below has a glass rubber duck, a copy of the first Harry Potter book and a model of the Enterprise.

The shark’s tooth display on the wall was made from treasures I picked up on Daytona Beach when I was a kid. Below that is a metal pin from my first Prince concert during his Purple Rain tour. The jar on the left contains animal teeth, the one in the center is a realistic doll eye. The toad was purchased at Disney World the year it opened.

I love the metal box with a vintage sideshow poster. The fighter figurine is one I used often when playing D&D. The metal chocolate kiss was purchased during a visit to Hershey when I was 18.

The shelf on the right has a ouija board and a blue glass amulet I got in Greece. Of course, there’s a cup of black coffee.

The little box has black pyramid salt, a jar of preserved ladybugs, a Herkimer diamond crystal and a tiny sheep.

The feathers in this section include one from my favorite chicken Nugget and a hummingbird we found in our greenhouse. The jar has some of my kids’ baby teeth (sorry girls!)

I’ve had this brass diver’s helmet forever. The crystal ball is a marble set onto a silver bead.

Towards the back is a polished rock I set for my microscopy class at Georgia Tech, an animal jawbone given to my by a friend and a scarab I picked up in Cairo.

And of course there’s a jack o’lantern!


Save

Save

Save

Save

Christmas In July

This little hutch came from Gypsy Soul Laser Cuts.  It was easy to assemble and a lot of fun to work on!  The top shelf has a tiny Christmas tree, some porcelain mice I bought at Disney World when they first opened, a book of bedtime stories and a snowman snow globe I made out of polymer clay.  The middle shelf contains a jar of peppermints I made from poly clay, a tiny tea set, a tin of Christmas cookies and a JOY sign made from painted scrabble tiles.  The bottom shelf holds a glitter house village made from poly clay.  The della robbia spray has poly clay oranges and nail art fruit slices.

The drawer opens and contains miniature Christmas tree decorations, including lights, tinsel, icicles and ornaments.

The wreath is made from beads and nail art glitter.


Previous Older Entries