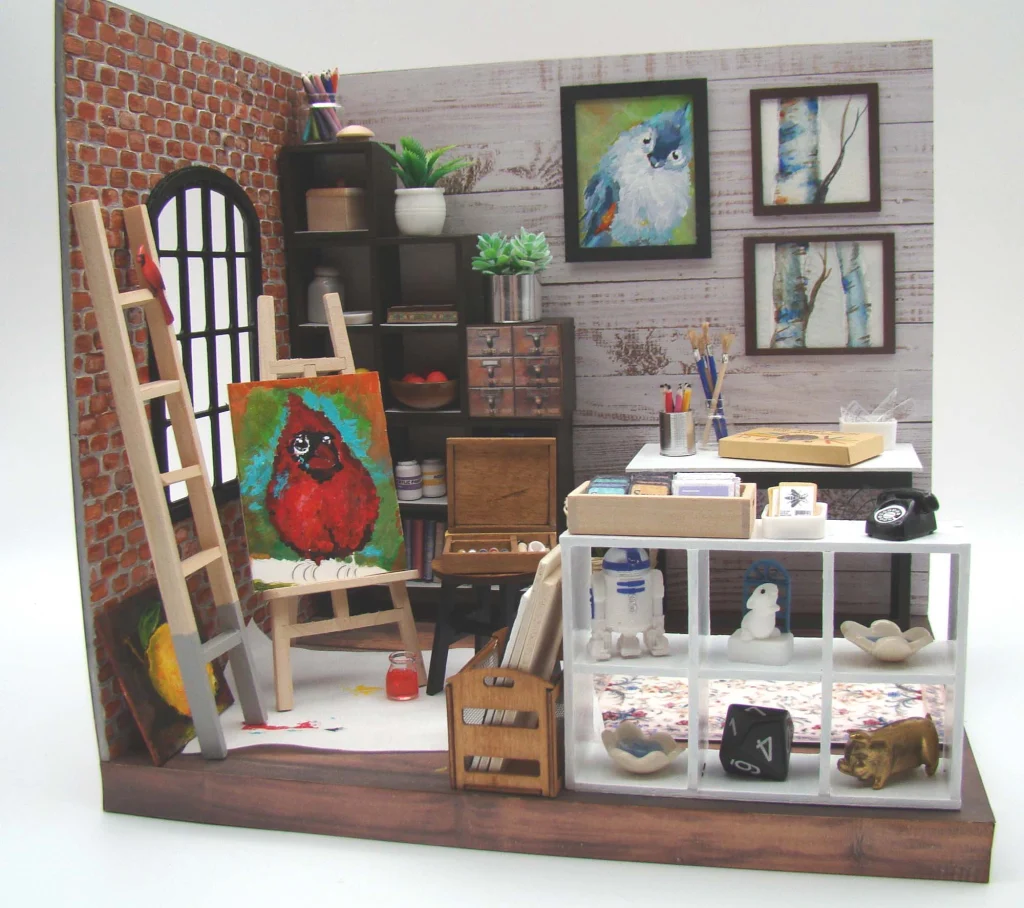
Artist Studio in Miniature

This image has an empty alt attribute; its file name is a0.jpg

I have a miniature art studio project for Alpha Stamps to share with you today, one that features a new corner room box and some fun newly arrived furniture and decorative pieces.

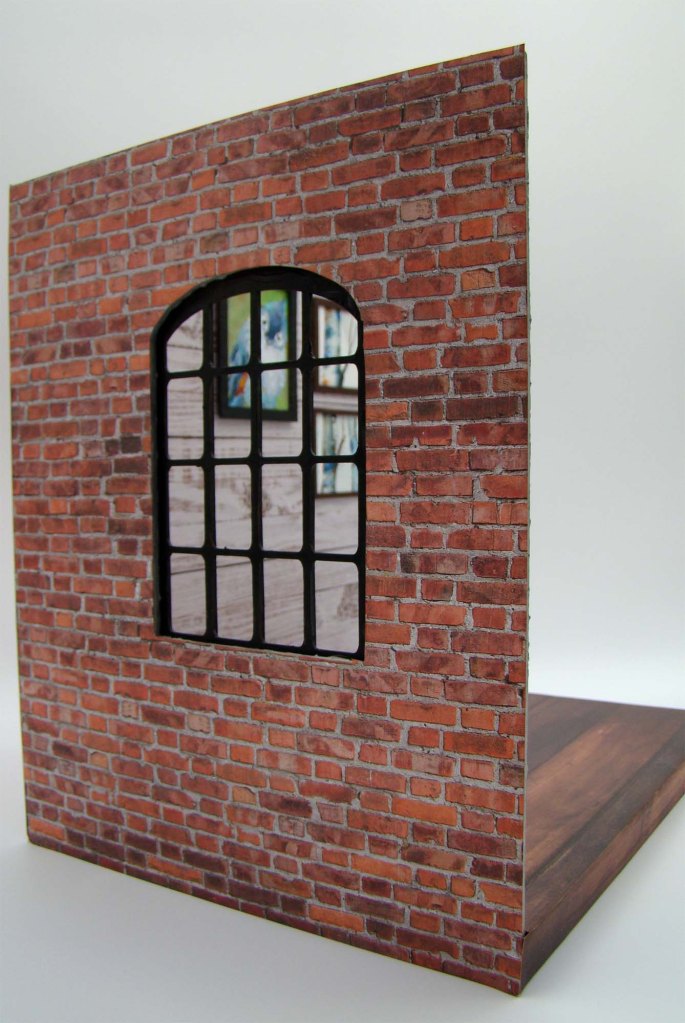
This little scene uses the 7 x 9 Corner Room Box with Window. Before starting any room box I dry fit it together to determine which side of each wall is interior vs exterior and mark them as such. I was going for a slightly industrial loft look for this studio so started by bricking the interior wall with the window in it. I covered the assembly tabs with painters tape then, working in sections, I used the same tape to hold a Small Brick Wall Stencil in place. The raised bricks were made using modeling paste, which I spread through the stencil openings with a palette knife. The stencil was carefully lifted off and rinsed with water and the wall was set aside for the paste to dry. After a few hours I moved the stencil to a new section to repeat this process.
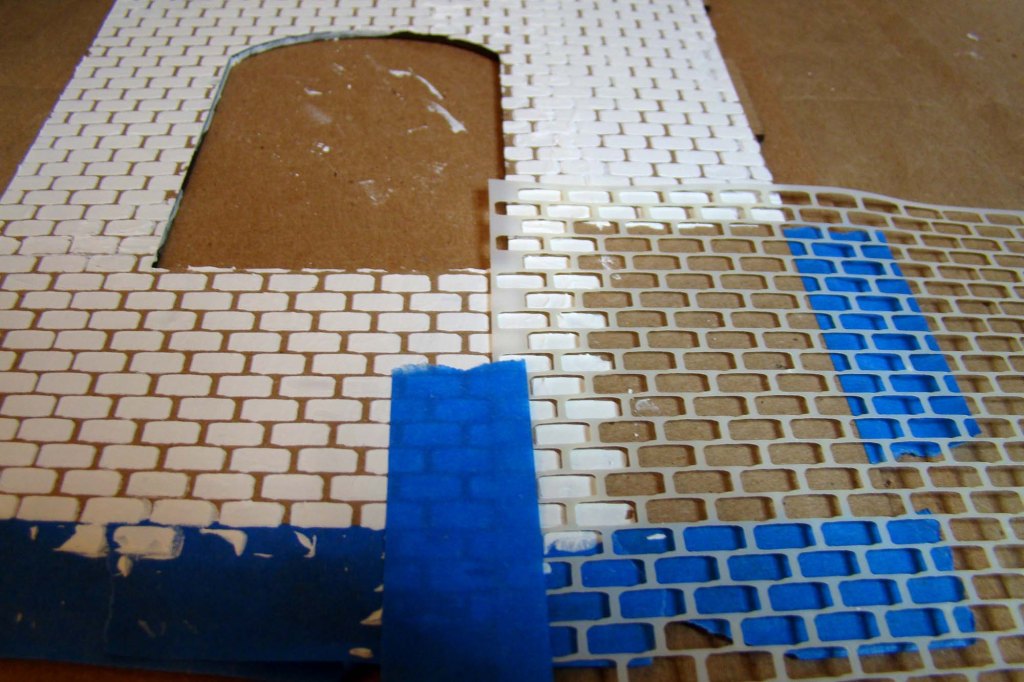
Once the bricks were completely dry I painted the grout using a light gray acrylic paint.
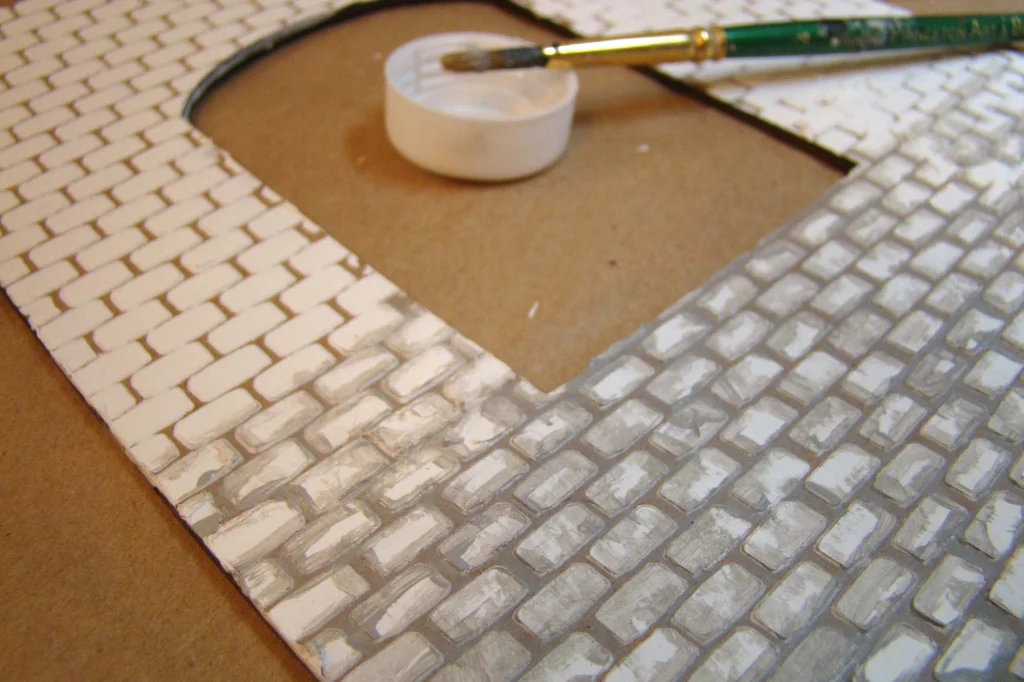
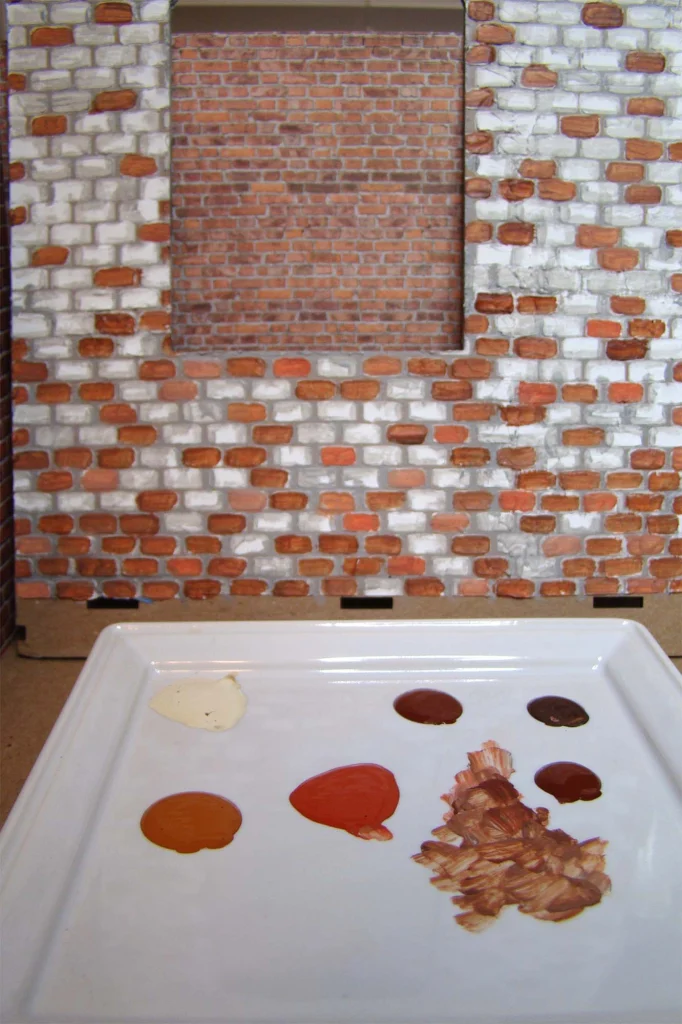
From there, I chose a combination of acrylic brick colors and just randomly painted and layered color on each brick until I was satisfied with the result. The small brick pattern you see in the background is a sheet of scrapbook paper I used for inspiration.
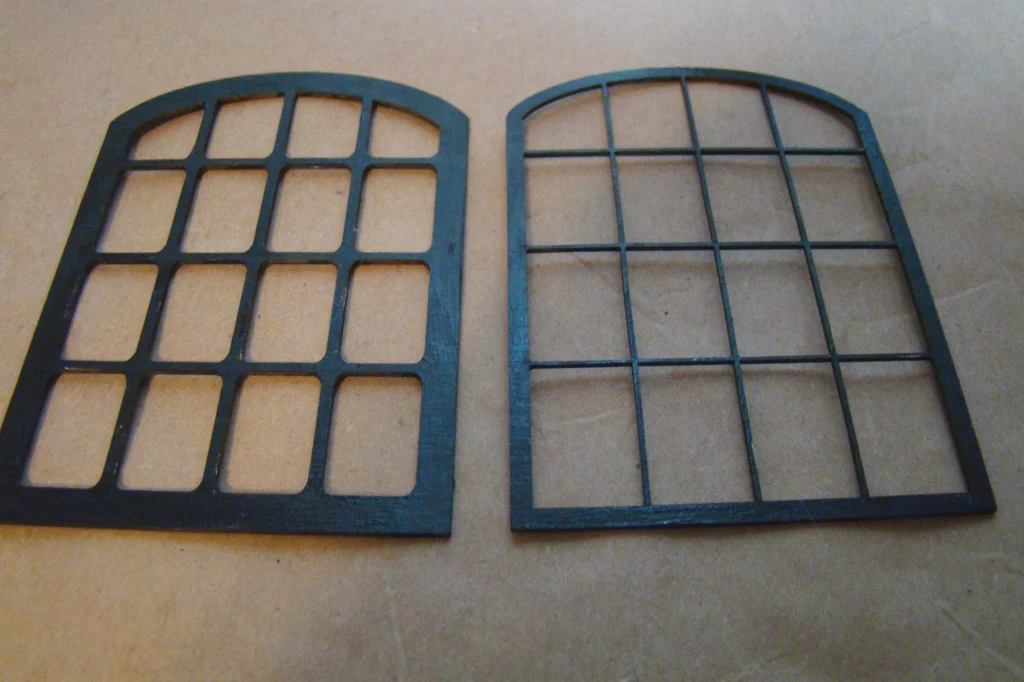
The Double Layer Window – Plain comes in two pieces. To fit with the industrial look both sections were painted black before gluing in place.
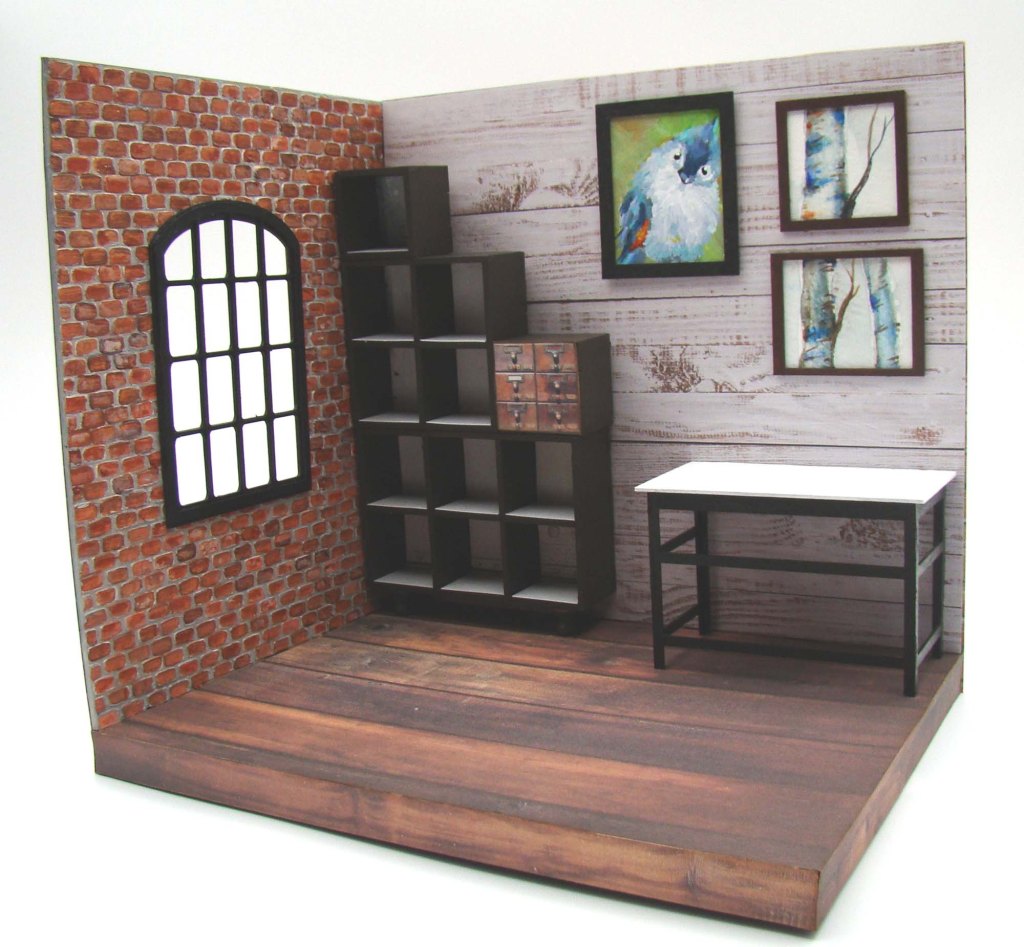
Love how the bricks came out! I wanted the rear wall of the room to have the appearance of shiplap so covered it with a light wood grain paper. The floor got an antique reclaimed wide plank look. Both are Wood Textures papers from Craft Consortium. The little bird painting is one I did for this project, along with the red bird and the lemon. The birch paintings come from a watercolor greeting card I painted years ago that was just cut down to size and framed with a couple frames from the Mini Frames Set.

Rather than stenciling the exterior walls I decided to use a one of the brick texture papers from Craft Consortium. Before assembling the room using tacky glue, I used the window wall as a template to cut the exterior building paper.
The furnishings for the art studio are some new pieces as well. Alpha Stamps carries a series of cubbies that can be stacked into a huge variety of configurations. I chose to use a Single Cubby (set of 2) plus a 4 Cubbies Square Block and a 6 Cubbies Rectangular Block for the display case. They were painted in a dark brown before being stacked and glued to each other. The rear wall and ‘floor’ of each cubby got a muted neutral paper to help show off the contents inside each cube. Since the single cubby comes in a set of two, I decided to reverse one of them and give it a faux drawer front using the new Cubby Faux Fronts Collage Sheet. There were SO many great options to choose from I had a hard time deciding!

The feet for the display case are made from Wooden Pushpin Box Feet – Set of 4 that were painted brown and glued onto antique brass jump rings I had in my stash.

The little open back shelf I painted white reminds me of an Ikea shelving unit. It was made from a 6 Cubbies Rectangular Block – Open Back. The Shallow Work Table is another new piece and I gave it an architect/drawing table look by painting the top white and the legs black.
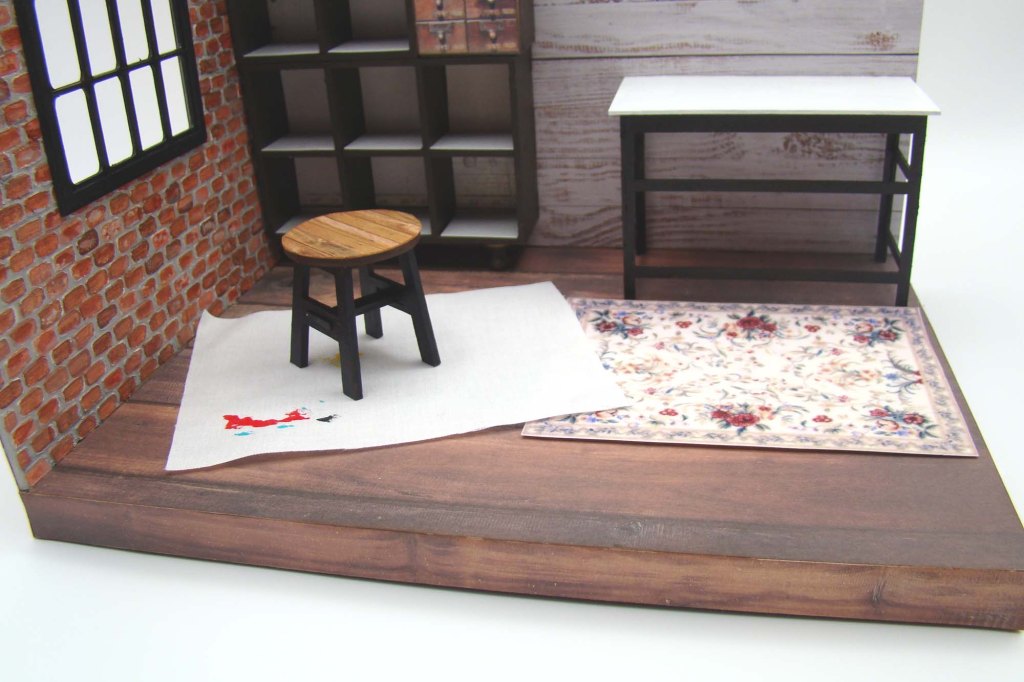
The pretty oriental looking rug came from the Aubusson Dollhouse Rugs Collage Sheet. I printed it on velour paper to give it a bit of a fuzzy feel. I also added a plain cotton drop cloth stained with a bit of acrylic paint. The stool comes from a Set of Stools – 1 inch scale. The legs were painted a dark blue and the top papered with a Honey Bee Home Essentials paper.
I of course used the Tiny Craft Room Labels Collage Sheet for a few practical accessories for the art studio. I had some miniature turned wooden bottles in my stash that I painted white and added gesso and acrylic paint labels to.

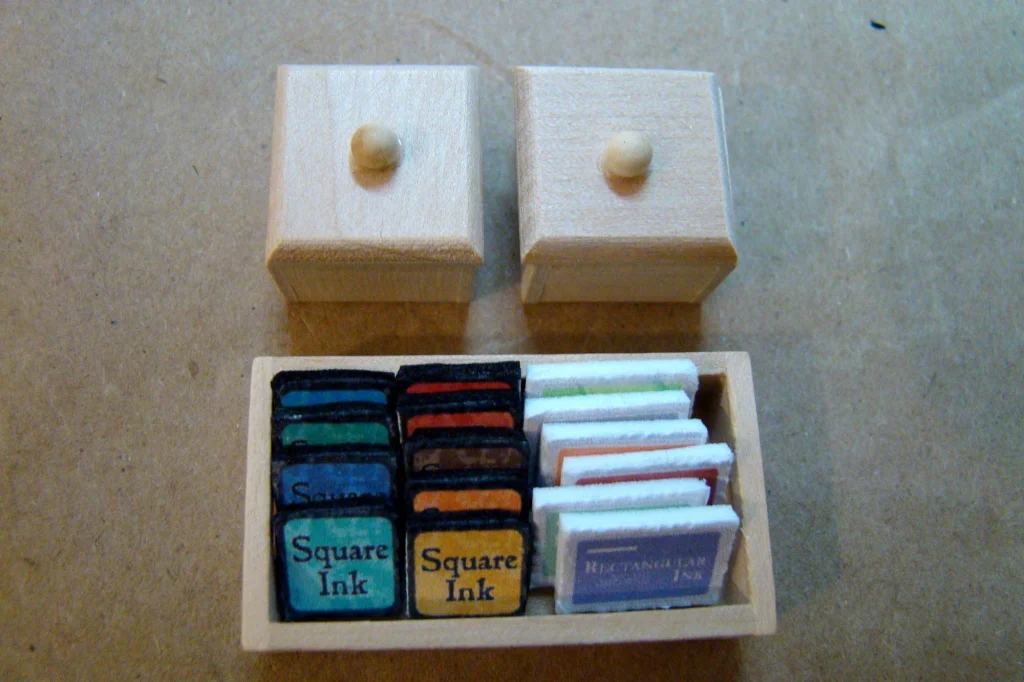
I glued stamp pad labels onto black and white foam sheets then cut them out. They fit perfectly into the tray from the Square Wooden Boxes with Lids in Tray. One of those cute boxes found it’s way into the cubby display case.
The Tiny Craft Room Labels Collage Sheet also has rubber stamp labels. Those got glued onto slices of flat wooden dowel that I stained with a wash of watercolor paint.

The finished rubber stamps were tucked into one of the Small Plastic Tubs – 19x15x5mm. a Taller Plastic Tub – 19x16x10mm was used to store the 4 Piece Mini Ruler & Triangles Set. The smallest Tiny Plastic Tubs – 15x11x5mm was fashioned into a little bunny shrine using with the addition of a Tiny Blue Fairy Window and a Tiny Resin Bunny Rabbit.

The stamps and inks sit on top of the open shelf along with a Mini Black Rotary Phone.

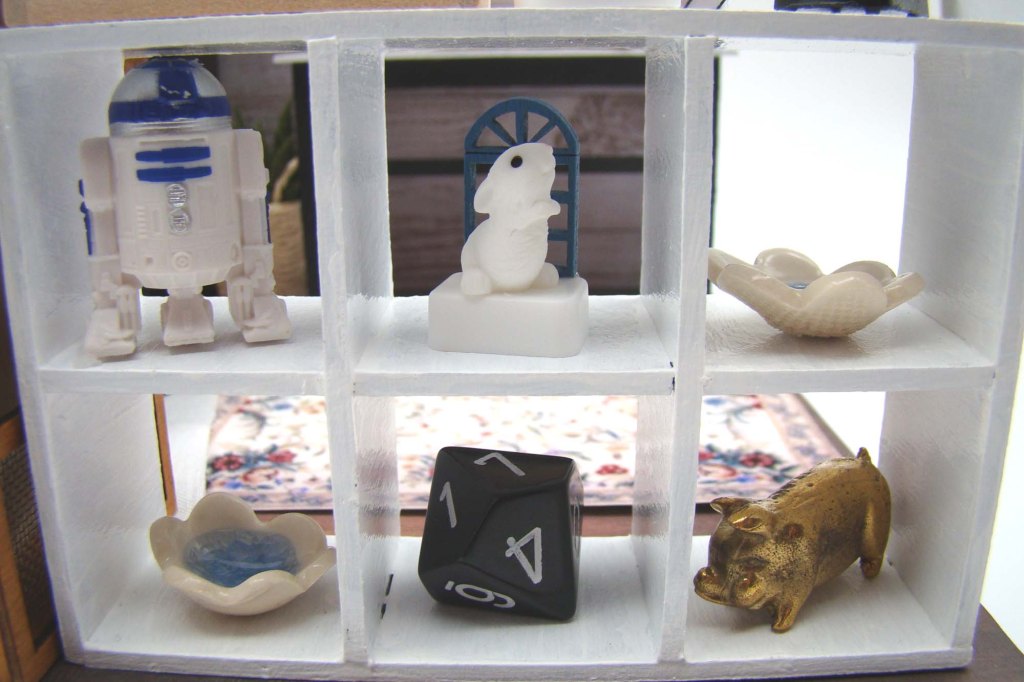
Inside the open shelves sit the mini bunny shrine as well as some pottery I made a few years back and some fun things from my stash.
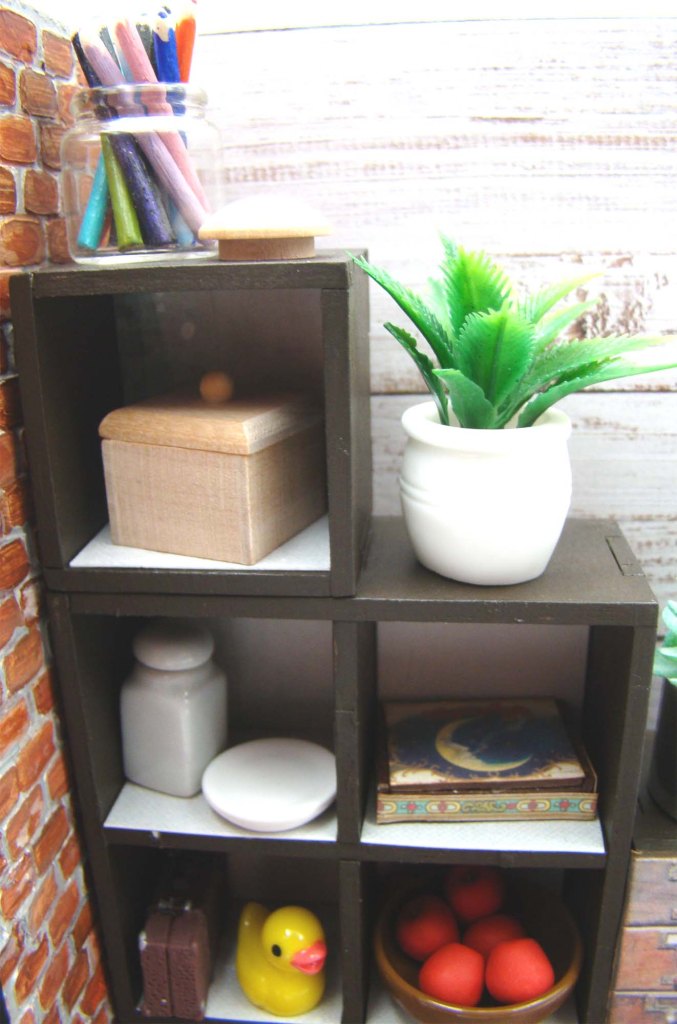
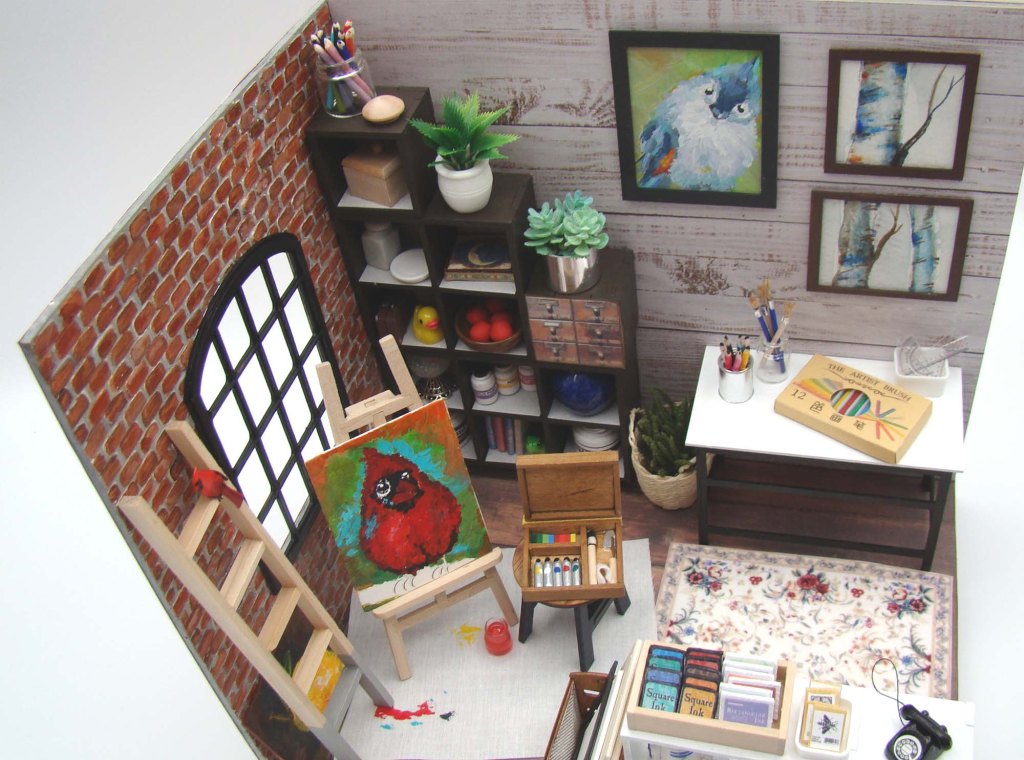
Now for a closer look at the cubby display. I used a Chunky Glass Bottle with Lid to house some colored pencils. Just below that is one of the Square Wooden Boxes that came with the tray and a Mini Potted Fern. There’s one of the Mini Succulents – Set of 3 just below it. The next level holds a Square White Canister with Lid and a Tiny Round Serving Plate. The cigar box was made from a Mini Cigar Box Set and the Mini Cigar Boxes Half Sheet. Below that are a 1 Inch Wide Mini Vintage Suitcase which I imagine holds art supplies for plein air painting outdoors, as well as a Yellow Baby Duck. The 28mm Brown Fruit Bowl next door is full of Red Apples – 1:12 Scale.
Below the duck is a snow globe I made from a hollow glass globe that holds Iridescent Water Bubble Microbead Mix mounted on one of the bead caps from the Mini Cake Stand Kit. You’ll also see one of the gorgeous Mini Colbalt Blue Vases and some Mini Books with Blank Covers that were covered with images from the Tiny Little Books Collage Sheet. Those are joined by a Small Green Frog. To the right of this display case sits a Two Inch Tall Wicker Basket filled with two Razor Grass Plants.

Sitting on top of the Shallow Work Table are the 4 Piece Mini Ruler & Triangles Set along with Miniature Crayons in Box and the Tiny Set of Pencils sitting inside a Metal Paint Can with Lid.

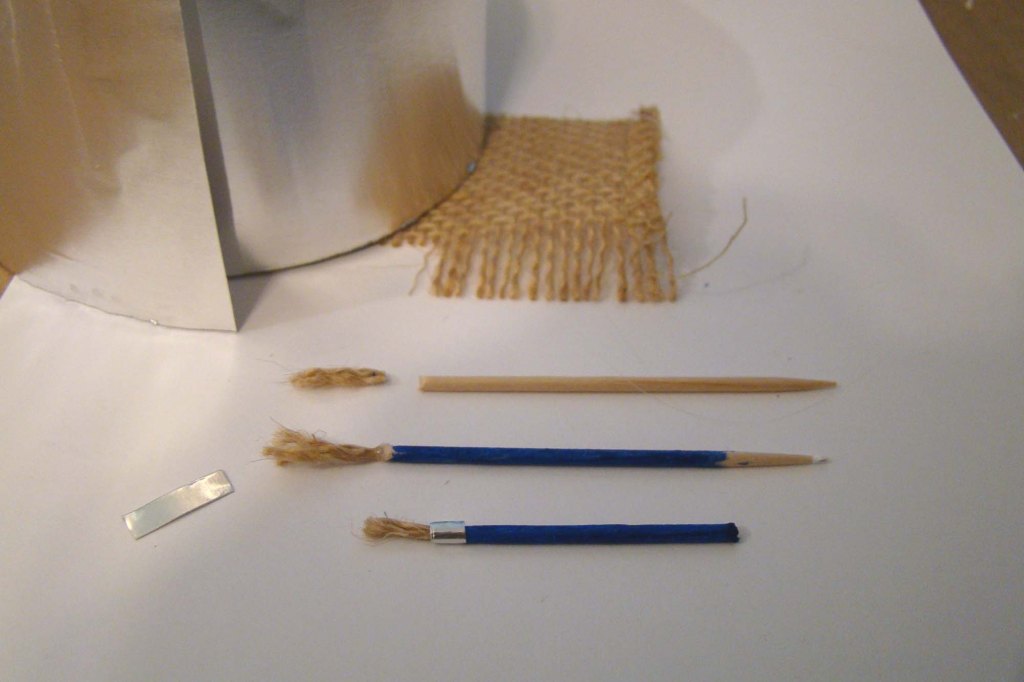
Those paint brushes sitting inside an Even Tinier Bottle were made from toothpicks, burlap fibers and a teensy bit of tin foil tape.
I painted the bottom of a Tall Wooden Ladder and added a cardinal brad for inspiration. The red bird painting on the Miniature Easel with Blank Canvases is a work in progress. There’s a Miniature Paint Set in Box sitting on the stool and the 15mm Tall Glass Jar on the drop cloth has some tinted resin in it to represent a paint brush rinse cup.

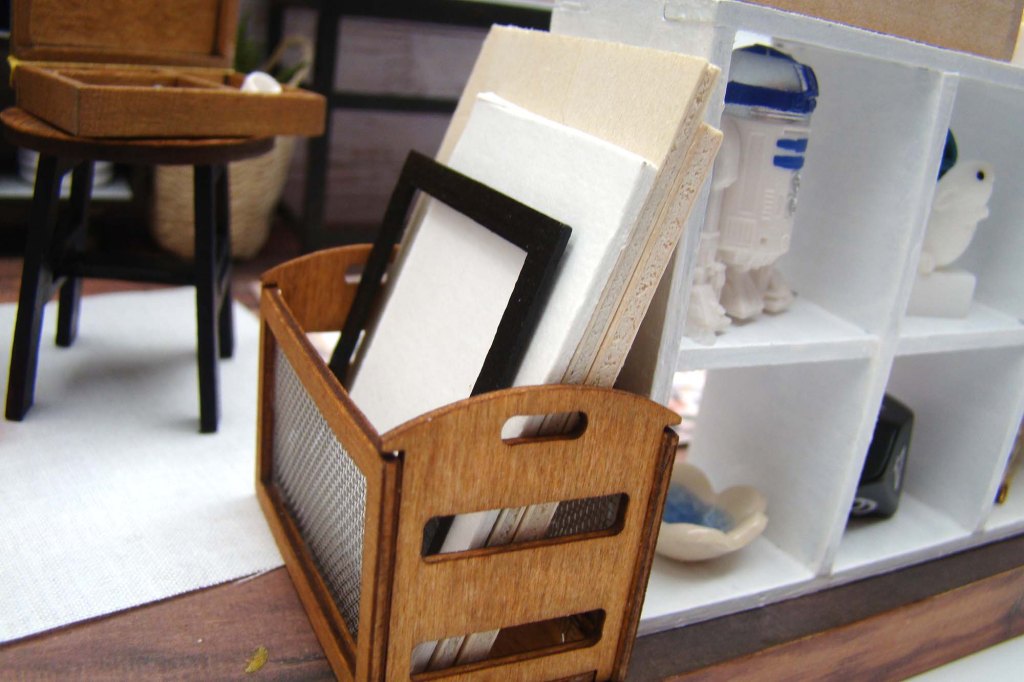
The Miniature Easel comes with two blank wooden boards. Those got tucked into a Wooden Storage Crate with Metal Screen Sides along with another Mini Frame and a scrap of mat board.
A bird’s eye view of the finished room.
A great big thank you to Alpha Stamps for having me again as a guest designer! You can find all of the wonderful products I’ve used right HERE

Link’s House

Every now and then I make something just for me. This is one of those somethings. We got a Nintendo Switch last Christmas and it has kept us entertained as we have been staying safe at home. My favorite game by far is The Legend of Zelda: Breath of the Wild. During Link’s adventures he discovers a house that is being torn down and would I like to purchase and fix it up? You bet! Here is my version of the finished home.

I gave the walls a rough plaster look with a thin layer of modeling paste.

The furniture was designed by me and cut with my Cricut. There are potions made from resin and a slice of fruit cake. Besides defeating monsters and machines, there is also cooking in this game.

Link uses his home to store extra weapons and shields. I made these from polymer clay and chipboard. The basket of fruits, mushrooms and vegetables in the storage box on the floor are cooking ingredients you gather in the game.

I made the table from craft sticks, the plates and food (goat butter and veggie cream soup) are made from polymer clay.

Majorca’s mask is also made from poly clay, so is the monster cake in the shelf below it.

Ya – ha – ha, you found me!

If you’re a fan of the game, you get it. If not… look at the cute little room I made!

Julia’s Kitchen

I have always admired accomplished women and Julia Child certainly embodies that description. She is known and loved worldwide. Her awards include 3 Emmys, 4 James Beard Awards, a Peabody, a National Book award and the Presidential Medal of Freedom.

She donated her Cambridge, MA kitchen to the National Museum of American History at the Smithsonian in 2001. It’s where her TV show was frequently filmed. I was inspired to make this homage to her favorite room, which she described as “the beating heart and social center of her household”.

The cabinetry, counter, butcher block and stove were all hand built by me to emulate the look and feel of the space to the best of my ability. I determined that the counters would be 3 inches high and 2 inches deep and got out my graph paper to see how much I could realistically fit into a Deep Open Front Room Box which is 10 inches wide by 10 inches tall by 5.5 inches deep. The pieces I designed were cut from medium heavy chipboard and everything was assembled using tacky glue.

This room box has a front piece that adds an additional 2 inch facade to the top of the structure. Here I am holding it in place to decide if I want to include it, along with the roof/ceiling of the structure. I eventually decided I wanted the room open so all of the miniature details could be easily seen. The floor is a sheet of DCWV Photoreal linen paper that I thought looked like 1950’s linoleum. The countertop is a woodgrain paper. The walls were painted with acrylics, the cabinet pulls are straight pin heads. The sink was molded from polymer clay.

The kitchen window has blinds that I made by cutting a section of a manila folder the same width of a 4 Panel Rectangular Window then scoring it into pleats. You can’t really see the sunny blue sky outside with the blinds on top but that’s OK… I know it’s there.

When I made the decision to leave the ceiling off of the room, that left me with these upper tabs to cover. My solution was to paper the exterior all the way to the top of the tabs then glue 0.2 inch square bamboo craft sticks to the top of the tabs. Below those I glued lengths of 3/8 inch width x 0.078 inch craft sticks which emulates a crown molding at the top of the room.

That pegboard was quite a project, and Julia had boatloads of it in her kitchen! I cut chipboard to the dimensions I wanted then gave it a coat of acrylic paint. I taped a sheet of ¼ inch square graph paper on top of it and poked all those little holes using a pottery needle tool.

After deciding where I wanted hangers in each peg board, I expanded those holes using a tiny drill and threaded straight pins that I bent at a 90 degree angle through them. The pins were taped in place right before I glued the peg boards to the walls. That kept them from shifting around.

Now for the fun stuff – decorating the space with some of the Alpha Stamps incredibly detailed kitchen miniatures!

The cat and artichoke artwork she displayed on her cabinets were reproduced and set into two of the Mini Frames Set. The planter on top of the cabinets holding yellow flowers is one of the Set of Miscellaneous Flower Pots that I washed well and painted with a few coats of acrylic paint.

Between the window and the cabinet I hung a couple of mini cookie cutters and a Large Strainer (which I adore). Below the window hangs a collection of knives.

The magnetic knife strip is made from a wooden craft stick painted silver. The black ones are from a set of Miniature Carving Knives. The red handled one at the top is from a set of Butcher Block Tools.

The poly clay sink was completed with a Sink Spigot with Faucets. It’s perfect! To the left of the sink you’ll see a Miniature Dish Rack that holds another tool from the Butcher Block Tool set, a Silver Muffin Pan, Metal Scoop and cup from the Mini Pitcher and Measuring Cup Set. Below the dish rack are shelves that hold a Vintage Mixing Bowl nestled inside the Rustic Green and Yellow Fruit Bowl Set. Below that are a Set of Metal Mixing Bowls.

The kitchen counter holds a bar of poly clay soap sitting in one of the dishes from a White Plastic Mini Serving Dish Set, a mixer, a Retro Silver Toaster, the Mini Wooden Spoon and Wire Wisk Set, some items from the Kitchen Utensils Set and a miniature rolling pin. On top of the butcher block sits a few of the Butcher Block Tools. The peg board holds a Copper Bundt Cake Pan, the Mini Ladle Set, a Spatula and more of the Utensils Set.

Julia’s kitchen table is a rectangle of chipboard with a Set of Wooden Table Legs glued to the bottom. The yellow tablecloth is a piece of cotton that I dipped in a glue/water mixture that was draped and allowed to dry. I made the fruit basket and bananas from polymer clay.

The pegboard above the stove stores pot lids from my stash, a Meat Cleaver Charm, Mini Working Scissors and the whisk from the Mini Wooden Spoon & Wire Wisk Set.

The little shelf holds a White Canisters Set, a jar of mustard I made from a turned wood blank and the most adorable Salt and Pepper Set I’ve ever seen.

The stove holds a Copper Tea Kettle and some copper pots and pans I had in my stash. The peg boards between the stove and cabinets hold the Mini Cast Iron Frying Pan Set, some Copper Bundt Pans and more pots and pans from my stash that are similar to these copper and silver sets.

This project was truly a labor of love and a chance to stretch my artistic abilities. HERE is the supply list of the all the great kitchen miniatures that made this project possible.

Miniature Halloween Market Stall

I have another project for Alpha Stamps today, one that is perfect for the season. This little stand works perfectly for a Halloween sweet treats market booth. I could see using this piece for so many different projects – a hot chocolate stand, Christmas market stall, farmer’s market stand, bakery pop-up, the possibilities are endless!

I started this project by making a platform from a House Ornament Base and a Small Brick Wall Stencil. After stabilizing the stencil with painter’s tape, I applied texture paste with a palette knife.

Once the paste was dry, I painted the entire surface with an off white acrylic paint which would become my grout color.

From there, I just randomly layered different shades of brown and orange paints onto the raised bricks.

The entire thing was finished during a crafty skype with a friend.

The market is made from a Small Rectangular Niche with Shelves. It comes with a front, back, niche and two little shelves (I only used one for this project). I painted the niche walls black and glued the sides in place. All of the paper I used in this project came from the Alpha Stamps October 2020 Halloween Market Kit.

Here is the assembled niche along with the market front wall.

The niche needed a bat shelf so made one out of one of the Chipboard Bats Set and a small section of bass wood. Sitting on the shelf are some jars I made from Amber Glass Beads, round head pins and some tiny bats that were included in the October kit.

It looks great glued in place.

Also included in the niche are some mini resin jars, Tiny Wrapped Gumballs, Red Apples, jars of microbeads & bats and dishes of polymer clay candy slices.

The jar of green bats was made by sifting through the Dark Polymer Clay Halloween Slice Mix. The jar lid was made from a metal bead and head pin.

The Market Stall Niche Add-On has a floor, facade, counter and two small connector pieces. Here is the floor covered in striped paper and the facade which has an Orange Pumpkin Border.

The counter is a chipboard box that gets folded up and glued together. I chose to paint the top black and paper the sides with this great bat paper.

This market of course needs a cauldron. I painted a Metal Cauldron with black nail polish after giving it a good wash with soap and water. It came out nice and shiny!

To fill the pot, I made eyes from the Eyeballs Collage Sheet and some 10mm Round Glass Cabochons. So creepy!

For the counter top I painted a couple of Tiny Wooden Bowls and filled them with more polymer clay slices.

The candied apples are made from green polymer clay that got some brown and red chalk highlights after it was baked off. A toothpick stick was glued in place and they were dipped in a mixture of red acrylic paint and Glossy Accents.

Cotton Candy was made from tiny bits of roving inside a small cellophane bag. They are hung from tiny clothespins that I decorated and glued in place onto one of the stall supports.

When my girls were little, we used to decorate blown eggs for Halloween. That inspired me to make some in miniature from polymer clay. They are displayed in a small basket on top of Mini Easter Basket Grass. I’ve set it on top of a decorated One Inch Wooden Block.

I used a Mini Sandwich Board Set to make a sign showing some of the treats for sale.

I hope your holiday brings you lots and lots of full sized sweet treats. Happy Halloween!

You can find all of the wonderful Alpha Stamps products I used HERE.

Alice In Wonderland Spool

Alice1 Alice2 Alice3 Alice4 Alice5 Alice6 Alice7I am co-organizing an altered spool theme swap on craftster.org.  It means you receive a partner’s information along with five different themes they enjoy.  You choose a theme and decorate a spool to match.  My partner had Alice in Wonderland near the top of her list so I was inspired to make a tea party.  The base of the spool has a white rabbit, a ‘drink me’ potion, an “I’m Late” pendant,  Alice playing cards, a key and keyhole and lots of flowers and ladybugs.  Alice holds a timepiece on the top of the spool.  The ‘Curioser and Curioser’ locket opens up to display the Cheshire Cat and White Rabbit.  I made the cake and macaroons out of polymer clay.  She was a lot of fun to make and I got to give it to my partner in person when she came for brunch this morning.  Fun times!

Patchwork Halloween Project Bag

This slideshow requires JavaScript.

Here is a project bag I made for my friend Lora for a Halloween swap we’re doing.   It can be used to keep a crochet or knitting project intact while in progress, or for a million other things. I took some in-process photos and decided to write a tutorial for it.

If you hover your pointer over the photo slideshow, you can pause it to review the photos. 

The first thing I did was cut out forty eight 2.5 by 2.5 inch squares, then laid them out how I thought they looked best. 

I started sewing the squares together in rows of four with a 1/4 inch seam allowance.

Once one row was completed, I ironed the seams, set it aside, and went on to the next row.

When I had all the rows completed, I stared sewing them together with the same 1/4 inch seam allowance.  It came together pretty fast!

I chose linen for my accent fabric at the bottom of the bag, but you could use most anything.  I cut a piece of linen 3 1/2 by 14 1/2 inches and pinned it to the bottom of my patchwork piece.  Another 1/4 inch seam and it’s attached.

I gave it a hand embroidered detail by doing a running stitch with six strands of orange embroidery floss right along the seam I just completed.

Next it’s time to turn your large rectangular piece into a tube which will form the sides of the bag.  Just fold it in half with right sides together and sew a 1/4 inch seam up the edges.  Press the seam open when you’re done.

Using a compass, draw a 7 3/4 inch diameter circle on a piece of paper then cut it out. This  will be your template for the bottom of your bag.  Pin the paper circle to the linen fabric and cut out the circle.  Pin the linen circle to the bottom of the tube.

Sew the round bottom to the sides of the bag with a 1/4 inch seam.  Clip the curve every half inch.

The lining is really similar to the process you just followed to make the exterior of your bag.  Cut a piece of lining fabric 11 by 24 1/2 inches and sew up the short side into a tube.  Cut another 7 3/4 inch circle, pin it right side together to the bottom of your tube and sew it on with a 1/4 inch seam  Clip the curve.

For the drawstring case, cut a piece of fabric 2.5 by 25.5 inches and iron a 1/4 inch seam along one of the long edges.  Turn both of the short ends over 1/4 inch, then another 1/4 inch run a seam down the middle to give the drawstring opening a finished edge. NOTE: the drawstring used in this project was actually 1.5 by 24.5 inches and I decided for future projects, I would increase the width in order to make it easier to sew.

Place the lining inside the exterior bag.  The wrong side of your lining should be touching the wrong side of your patchwork piece.  Now it’s time to attach the drawstring case along the top of the patchwork piece.  With right sides together, pin the un-ironed edge of your drawstring case to the outside of your bag.

Sew the drawstring case on using a 1/4 inch seam.

The final thing you need to do is to fold the drawstring case over and hand stitch the ironed edge to the lining.

Thread a drawstring and you’re done!  This project won a second place ribbon at our county fair!