Alpha Stamps recently announced a few new tiny dollhouse options and I couldn’t wait to get my hands on them! One is a Quarter Scale Dollhouse that stands just under five inches tall and the other one is an even smaller version that has holes on each side so you have the option of turning it into an ornament. I started with the smaller of the two, a Quarter Size Dollhouse Ornament. This one is included in the November Kit along with some awesome things you can use to decorate the interior with.

It’s a cute little thing that is ¾ inch deep once it’s assembled with a bit of tacky glue.

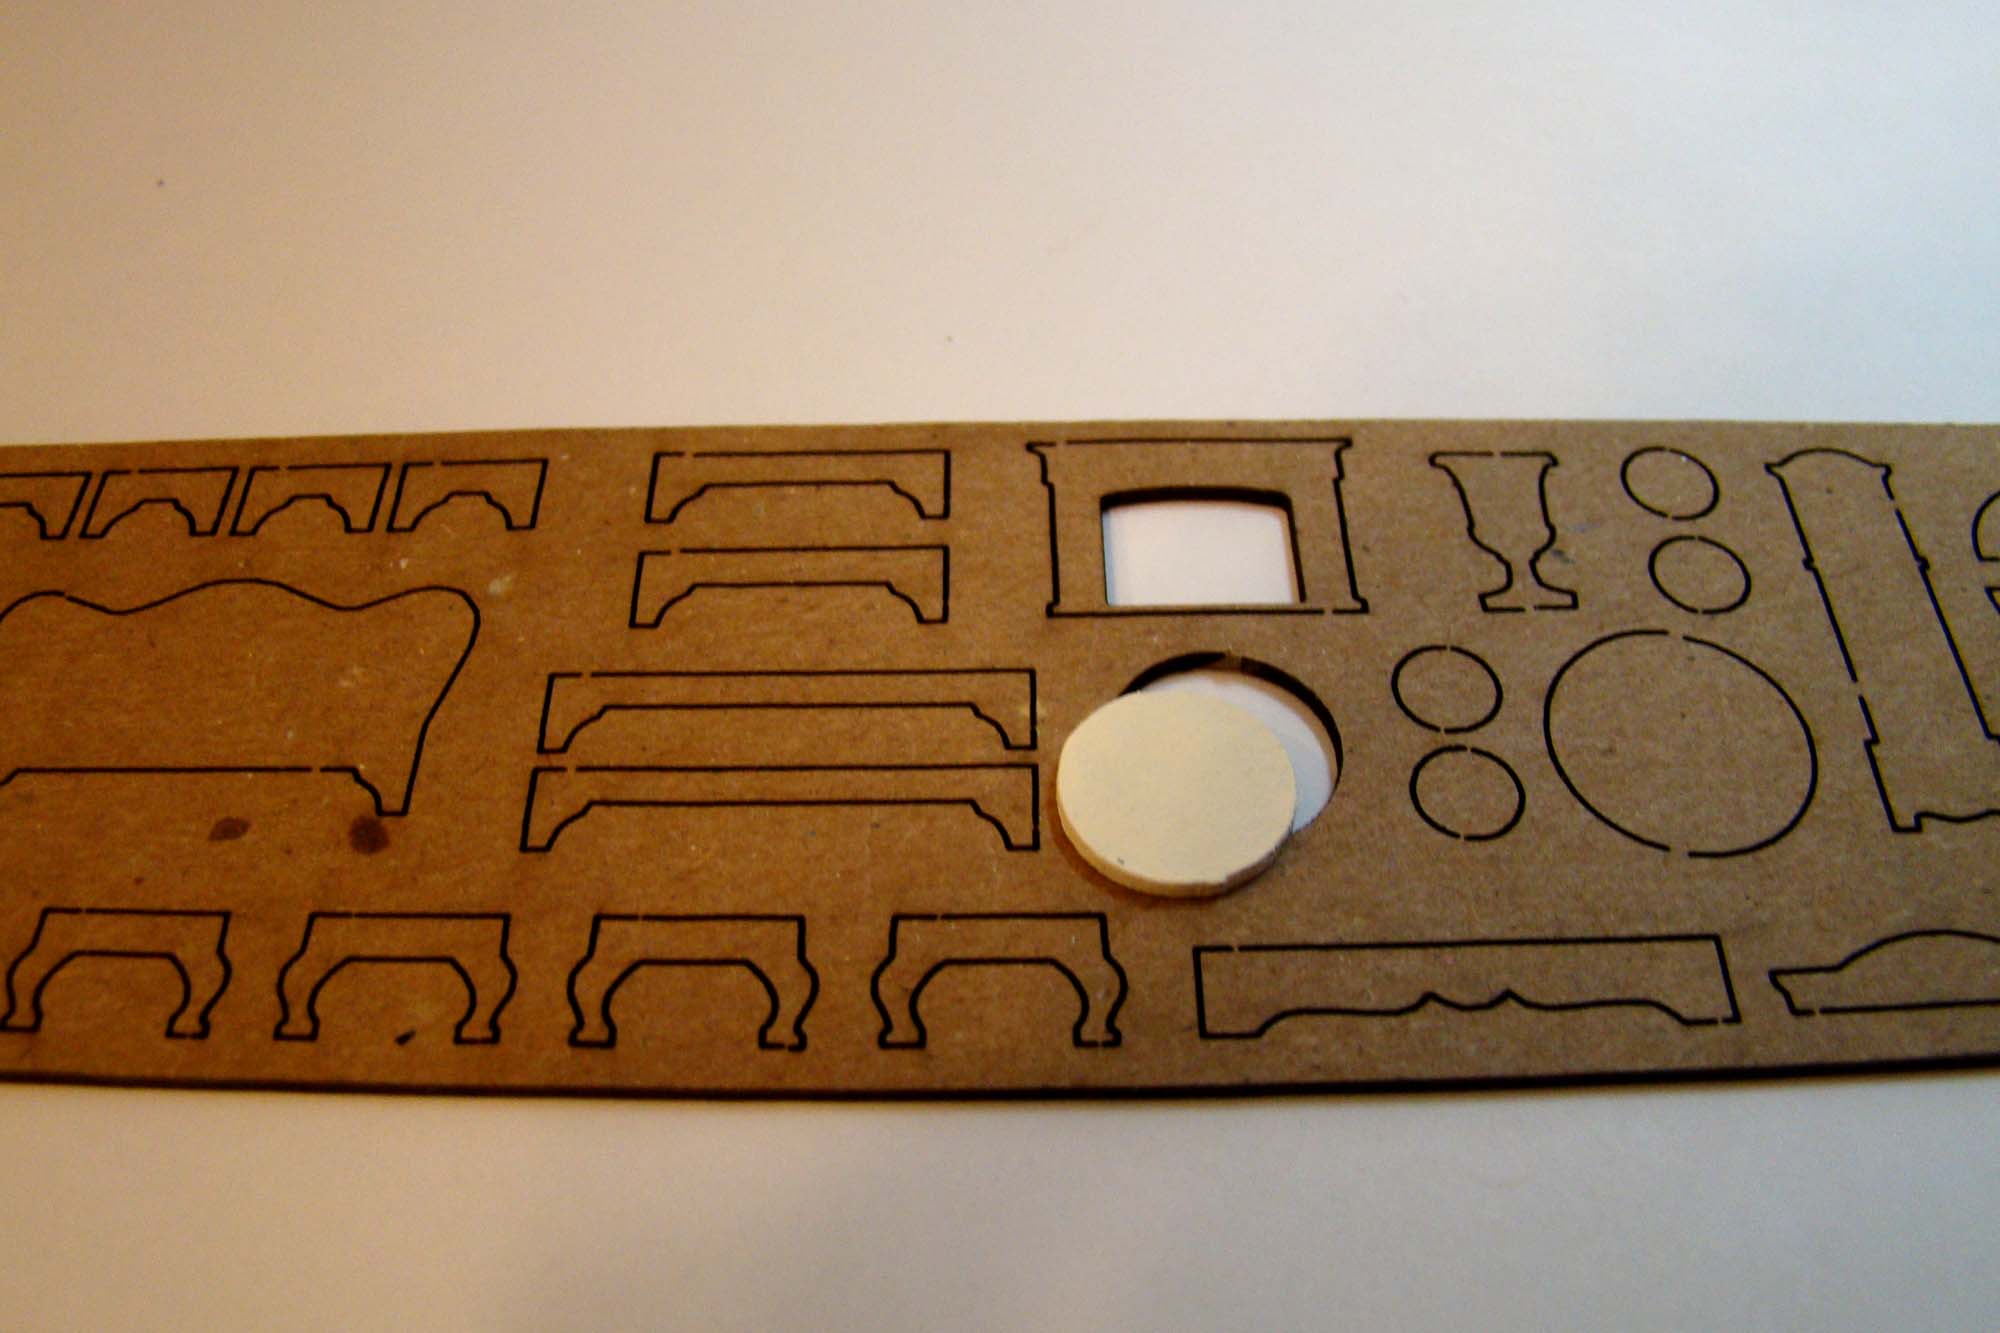
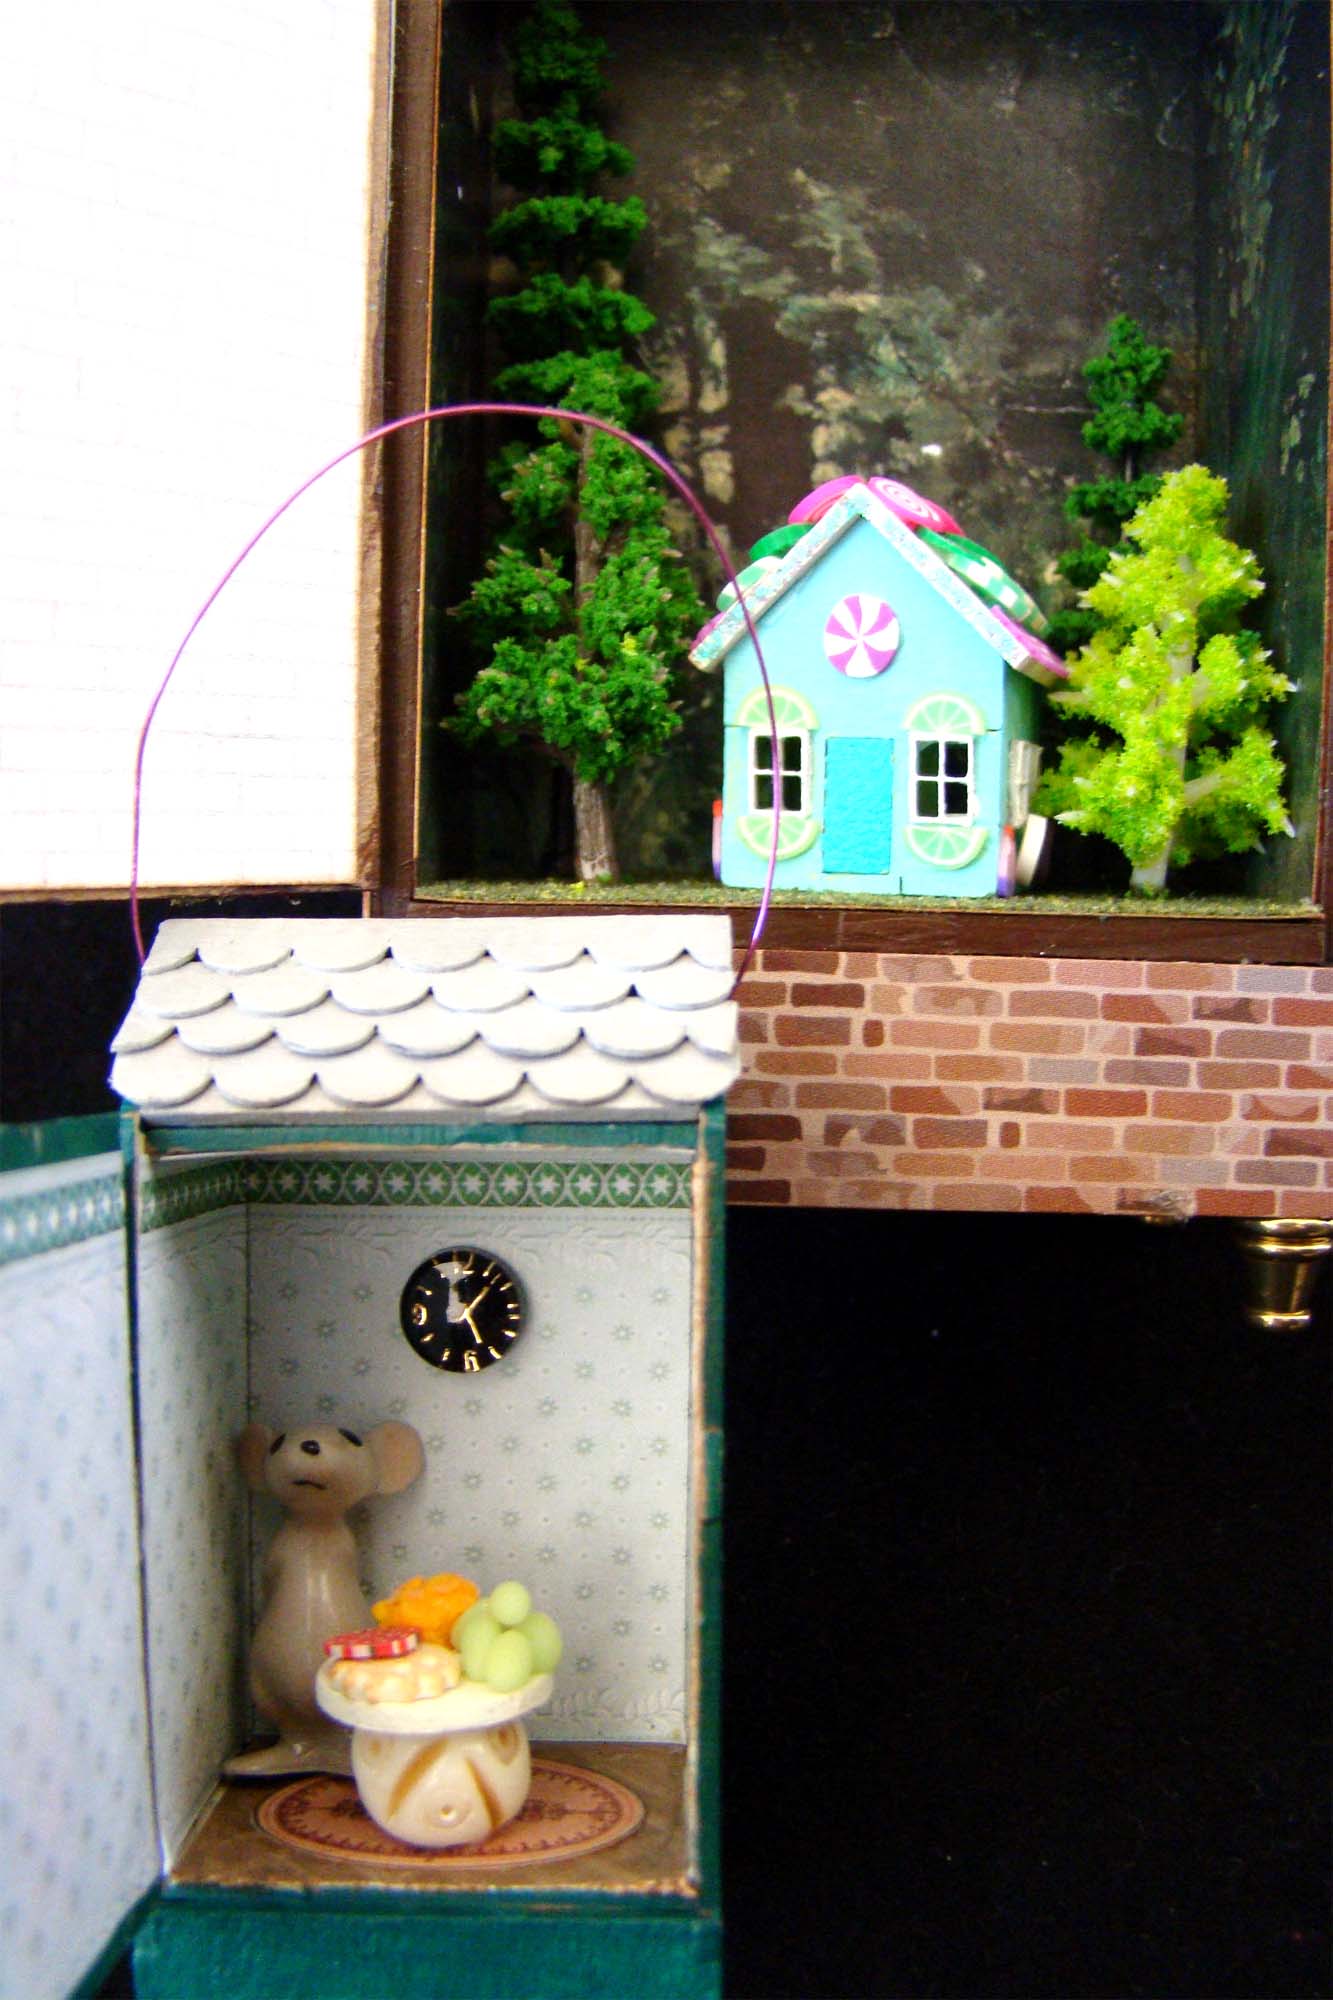
The kit comes with this Quarter Scale Dollhouse Furniture Half Sheet which includes this little wallpaper/flooring combo that fits perfectly inside the dollhouse when folded. It also included an oval rug image that I couldn’t resist.

I got out my smallest paint brush and painted the window frames and door frame overlay with ivory acrylic paint. The building’s exterior was painted a deep green. For the windows, I shrunk one of the images from the Stained Glass Digital Set Download then printed duplicates and glued them in place. This digital set has 29 images to choose from, each one prettier than the last.

I used something new (for me) to attached the building’s front to the main structure of the dollhouse – hinging tape. It’s a white tape with water activated glue. I cut a little piece to the size I wanted, scored it then set it in place. It was then painted over to match the green of the building.

The November kit also comes with this chipboard set of Tiny Flat Furniture Shapes for making little furnishings. Sooo many possibilities with these things. I knew I wanted to feature a few ‘treats’ inside the ornament so chose a little table top that got painted ivory.
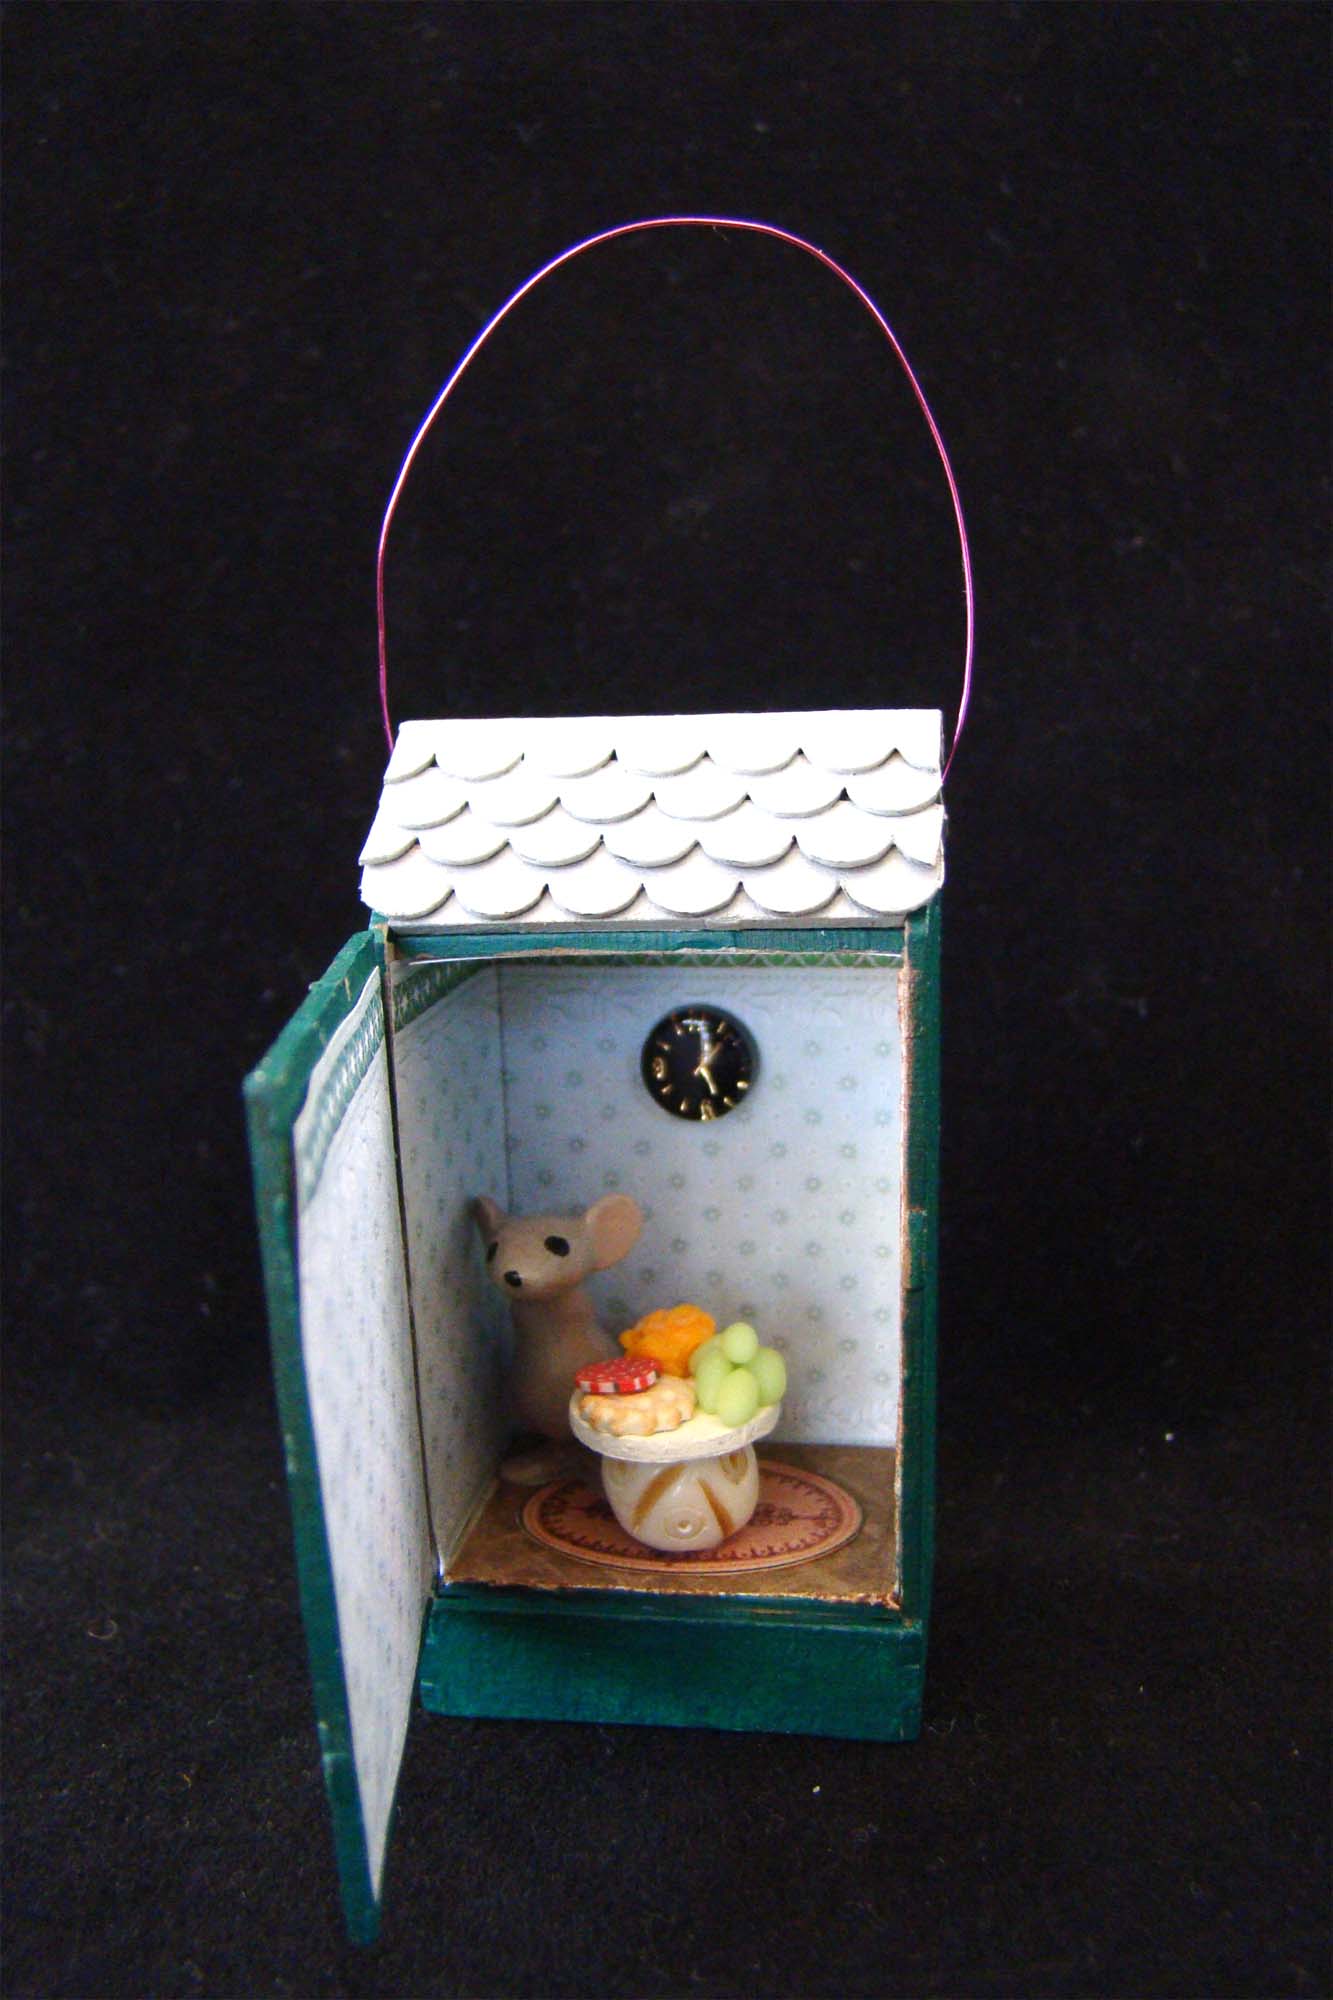
The kit ships with a few wooden blocks/rounds included that you could use as a table base but I had this single carved bead in my stash that matched perfectly. I set the table with a chunk of cheddar cheese and a cluster of white grapes made from polymer clay. I made a cracker using the Mini Silicone Biscuits and Bread Mold and topped that with a slice of pepperoni from a polymer clay cane. Charcuterie anyone? Stop by for a snack!

I attached a wire loop before gluing down the two roof sections. It was finished with the installation of Tiny Scalloped Shingles. I added the smallest little 7 mm Resin Clock Cabochon (another kit item) and a tiny porcelain mouse to welcome you home.
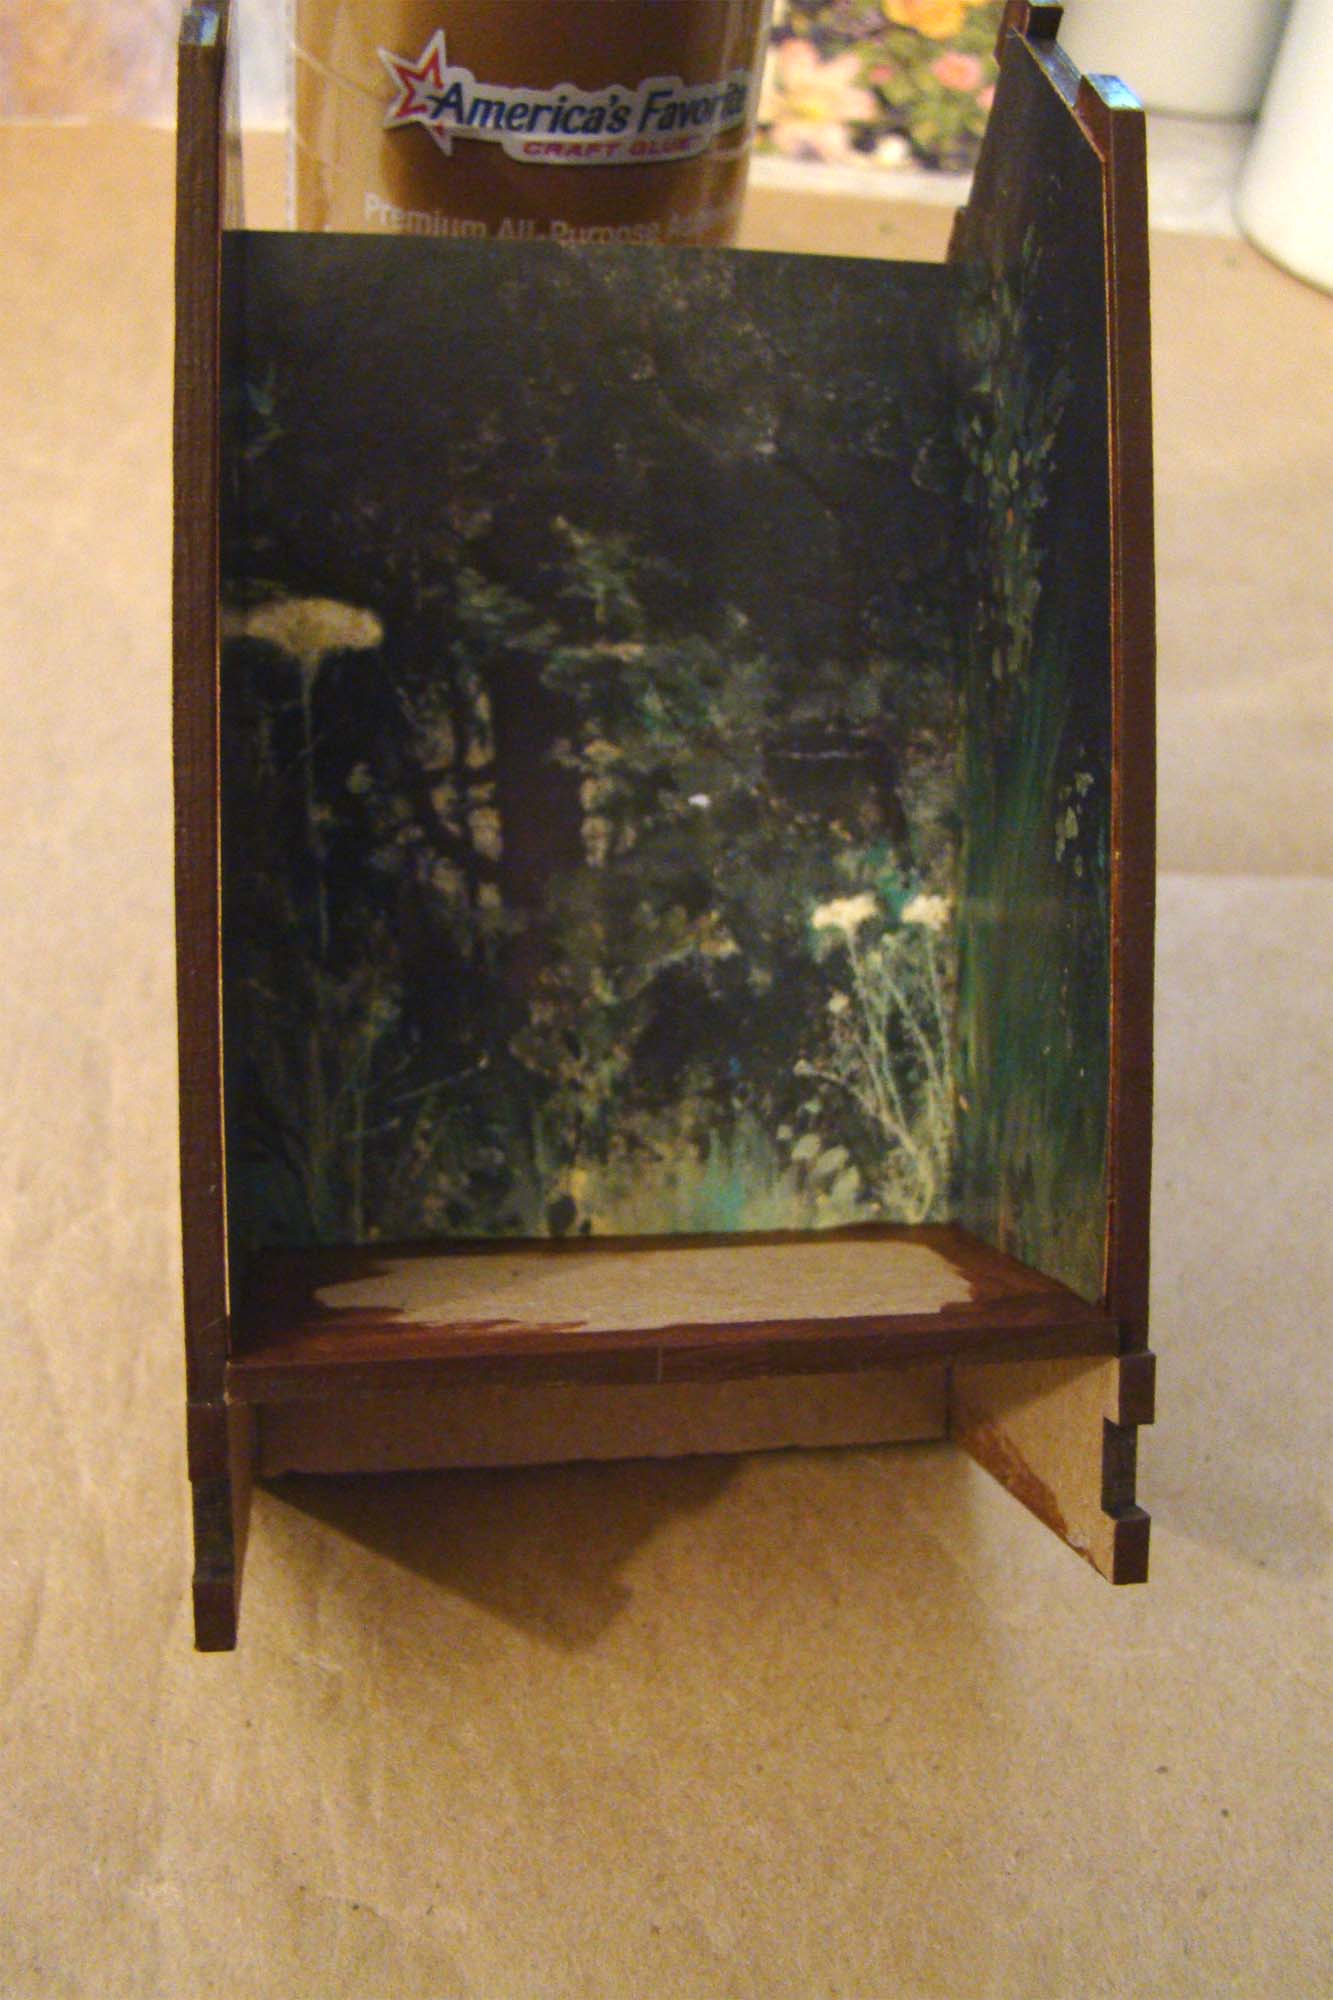
Next up is the Quarter Scale Dollhouse. Here are all the pieces laid out ready for assembly. On the left side of this photo you’ll see the horizontal piece that acts as a divider so you can get two floors inside the structure. I wanted to use the entire height of the dollhouse interior so set that piece aside.

The interior was going to feature some sort of dark woods. This Meeting the Wolf Collage Sheet has the perfect gloomy feel. I cut around the Red Riding Hood image (sorry, Red!). The side walls were cut using the dollhouse walls as a pattern before assembling the structure.
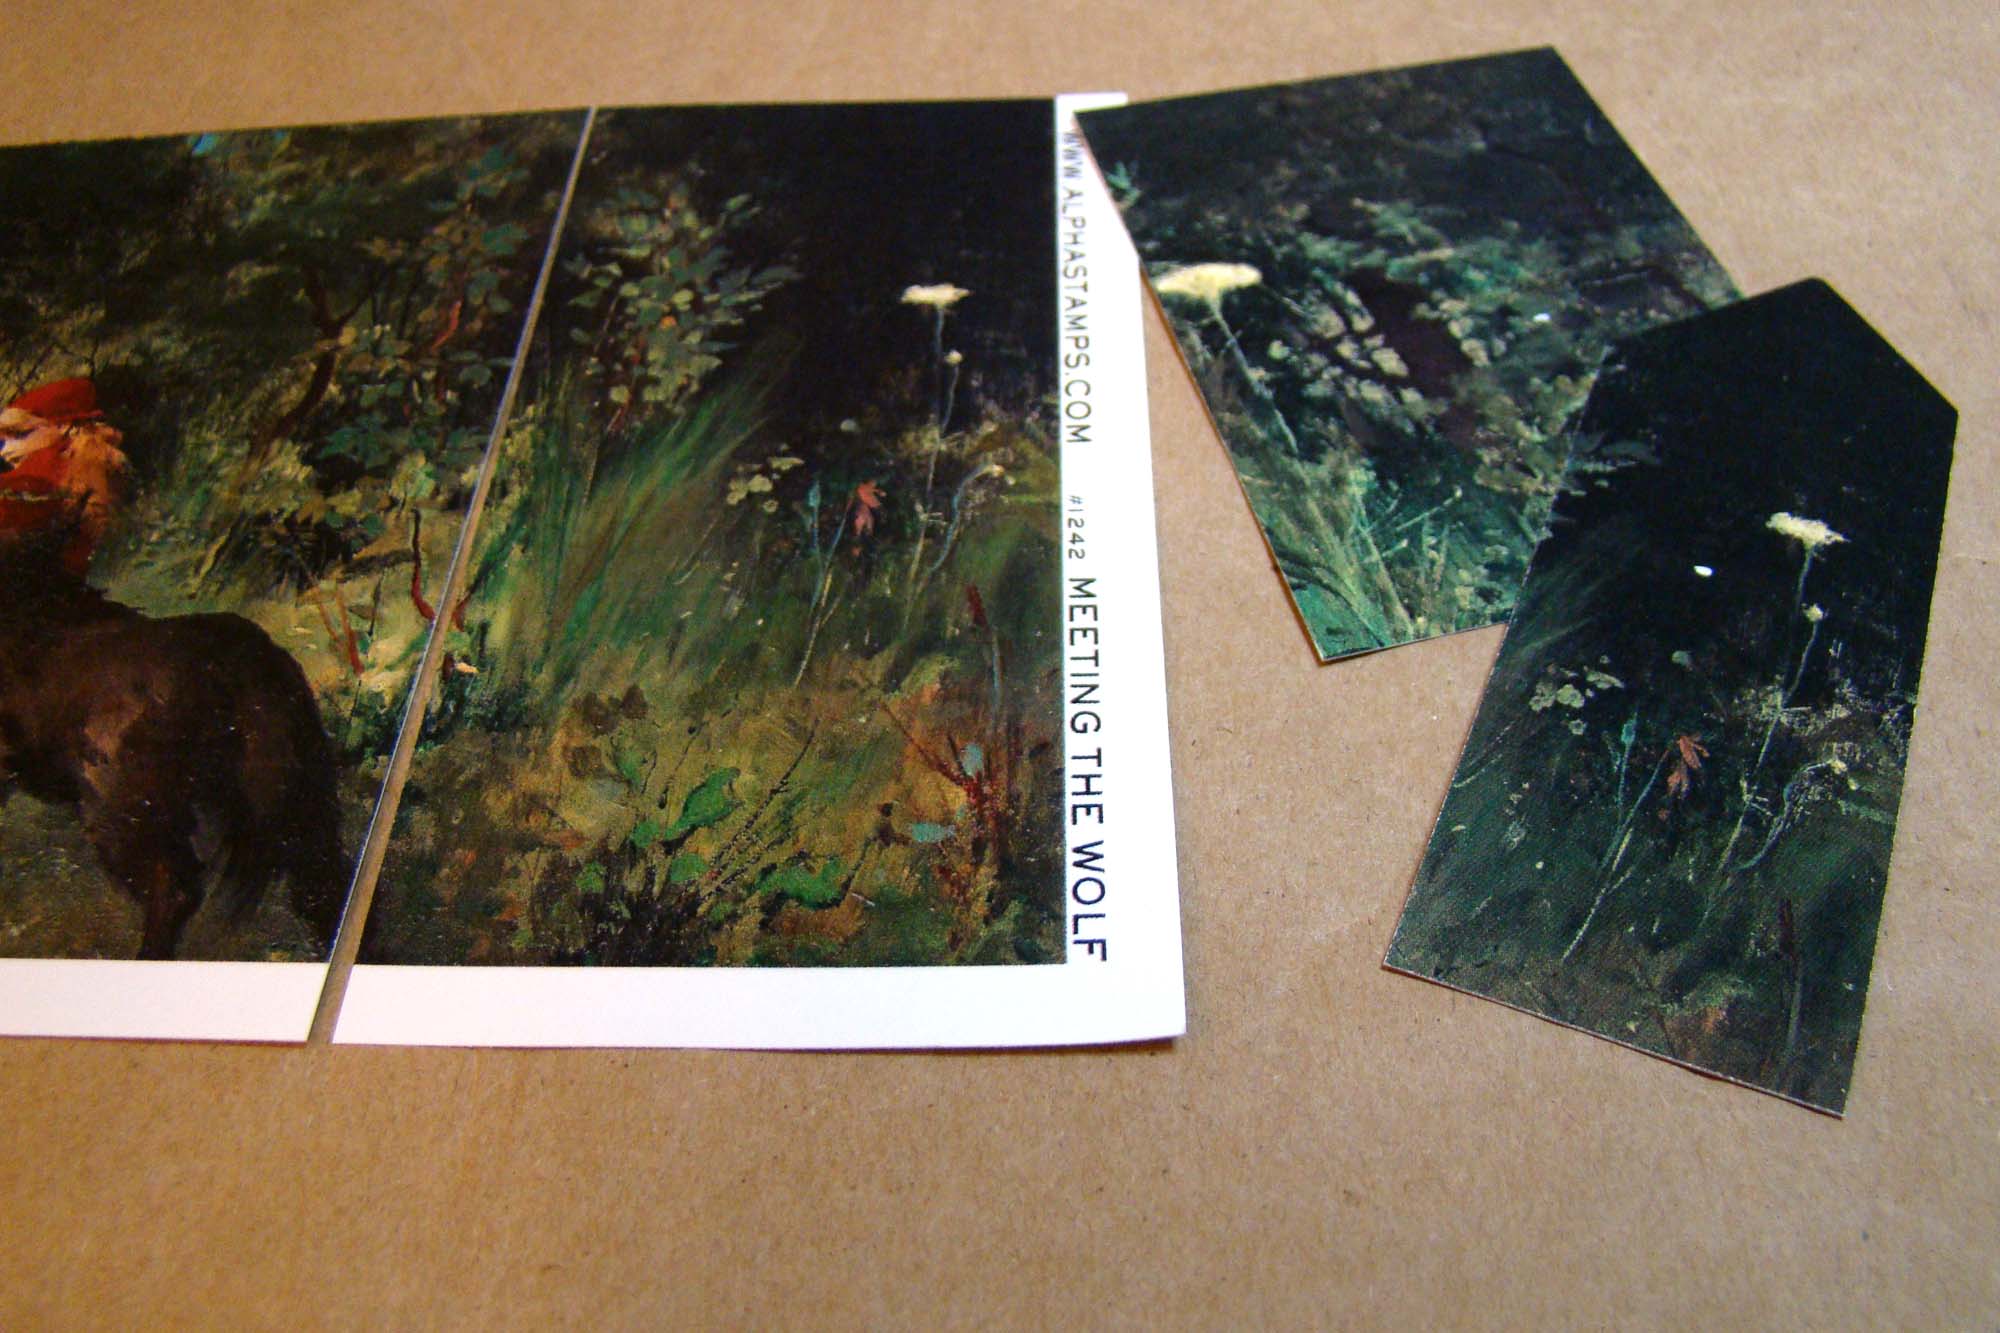
Looks pretty gloomy to me! All of the structure’s edges were painted before assembly.
The front of the dollhouse has three facade strips with windowpane and doorframe cut outs. I used a brick paper from Honey Bee Stamps Home Essentials for the exterior. The window openings were marked using the facade strips as a template. The openings were then cut using an x-Acto knife.
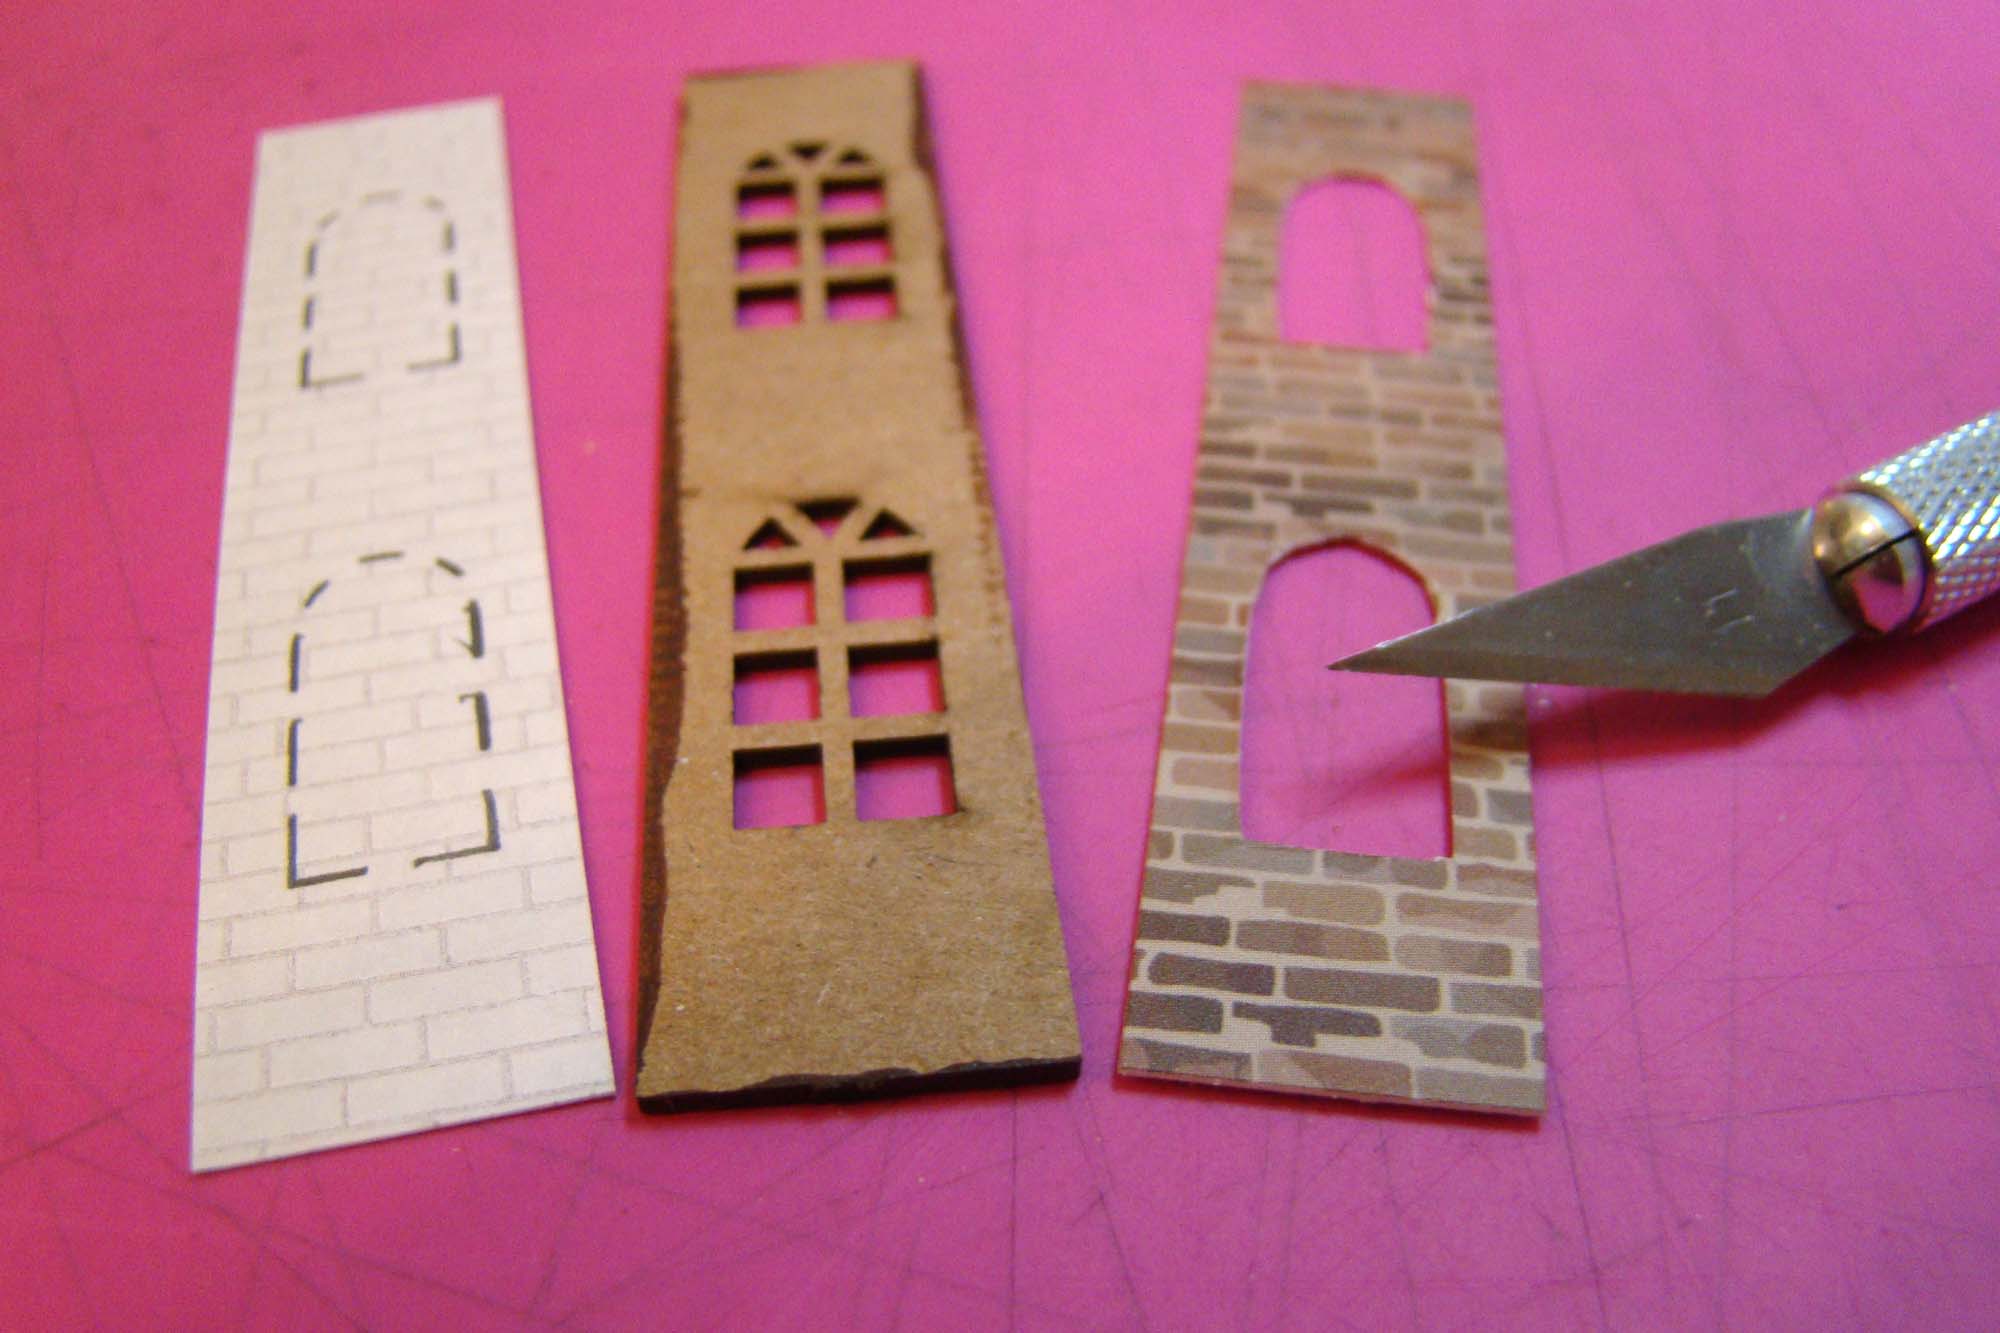
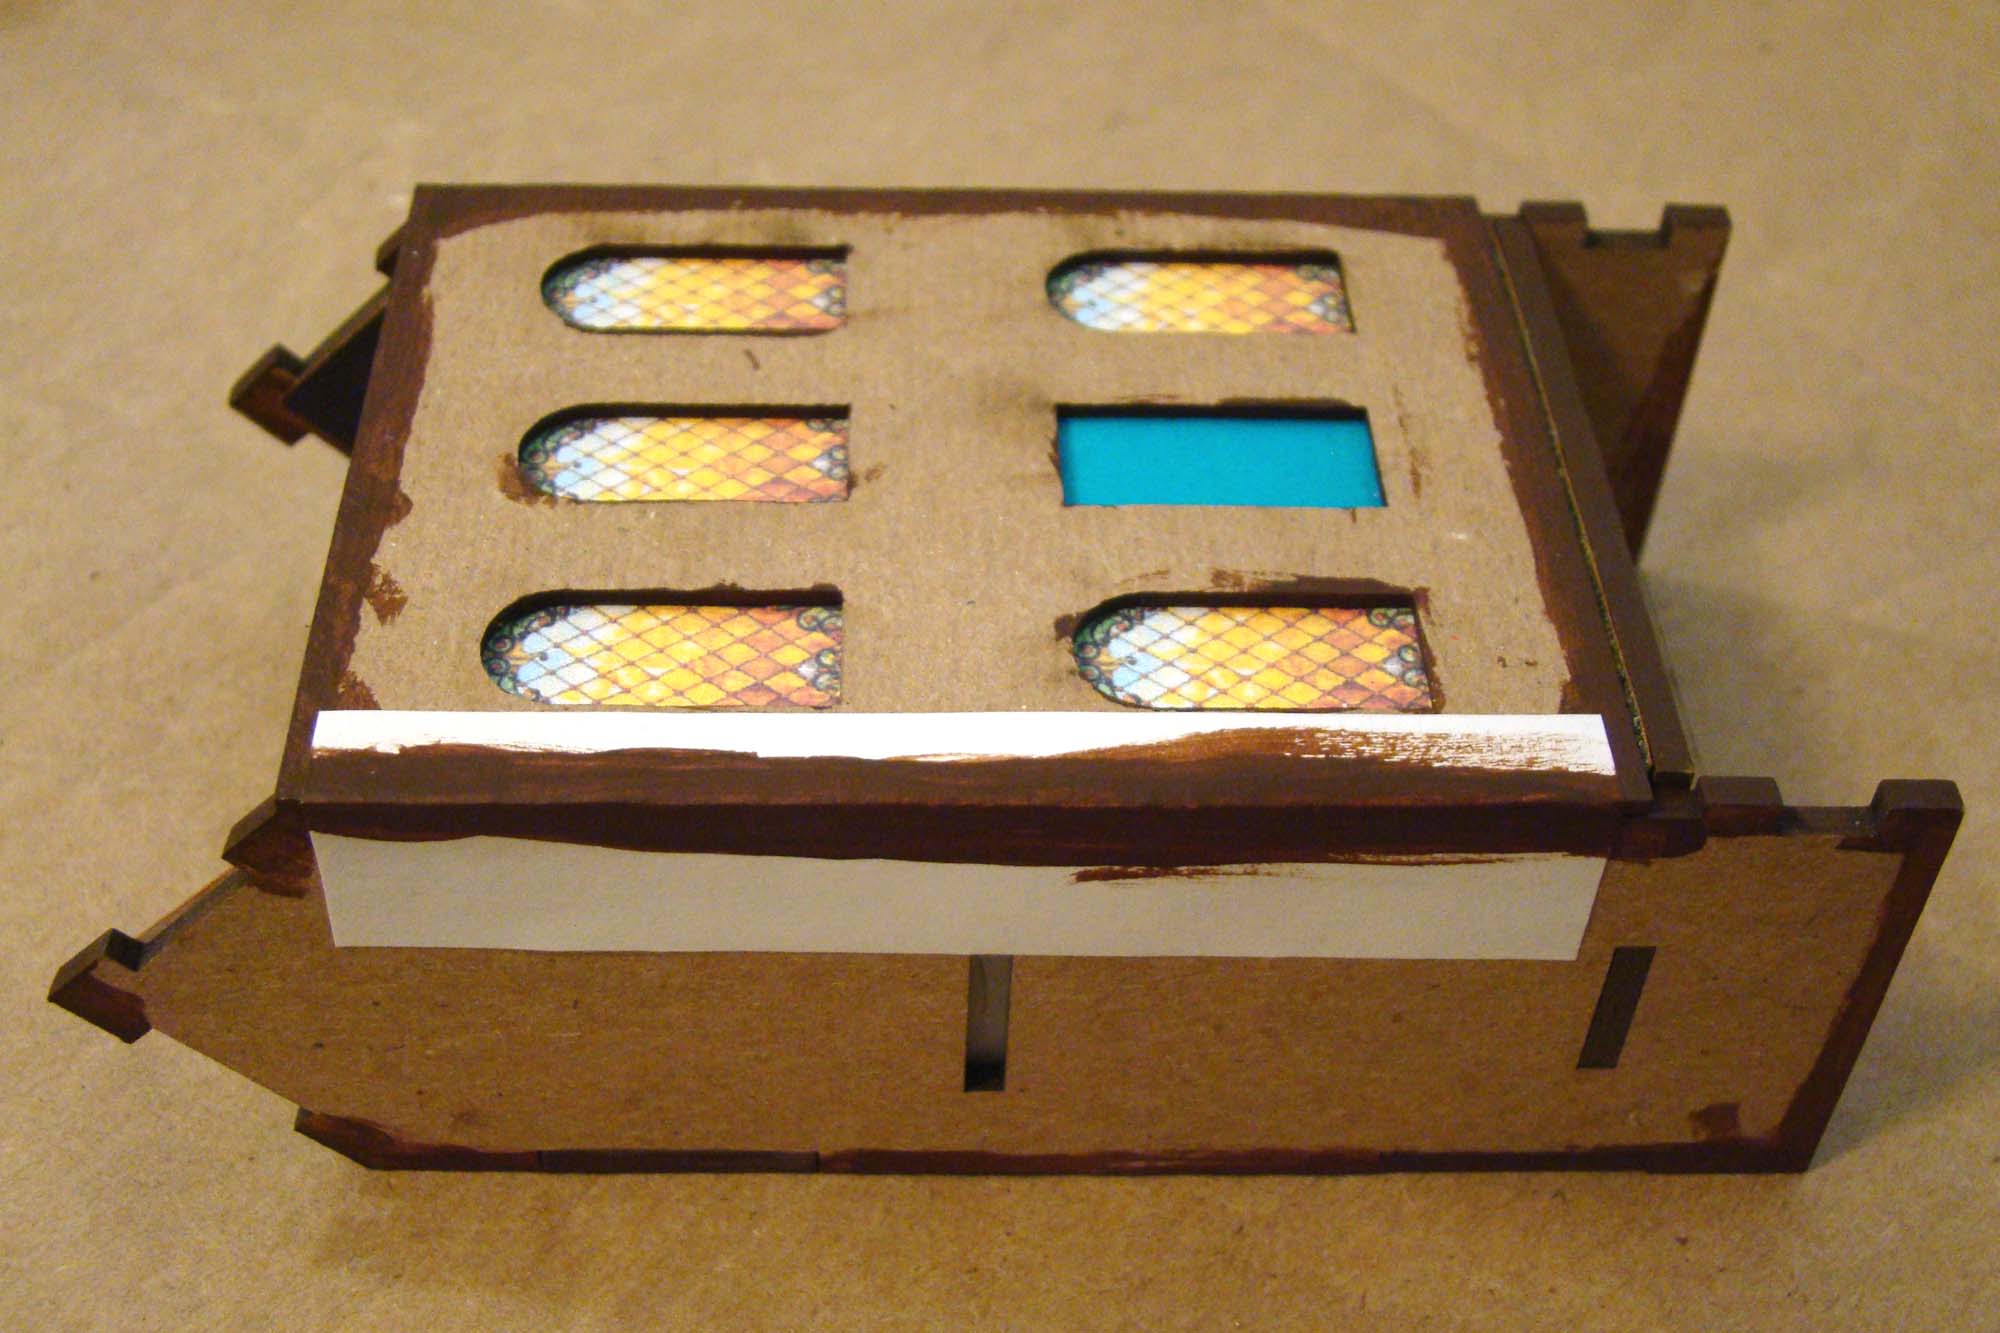
I painted the window grilles (yes, I had to google what those things are called) black and chose a really pretty yellow/orange image from the same Stained Glass Digital Download Set as before. The front of the building comes together like a layer cake. The structure front has the stained glass images showing through the window. This is topped with brick paper that has the window openings cut out, then the papered facade strips. Before all those layers get glued down….

I attached the front of the building to the side using my new best friend hinging tape. I cut a piece to the size I wanted, scored it, glued it in place then painted the fold brown so it would blend in. Love love love those stained glass windows!
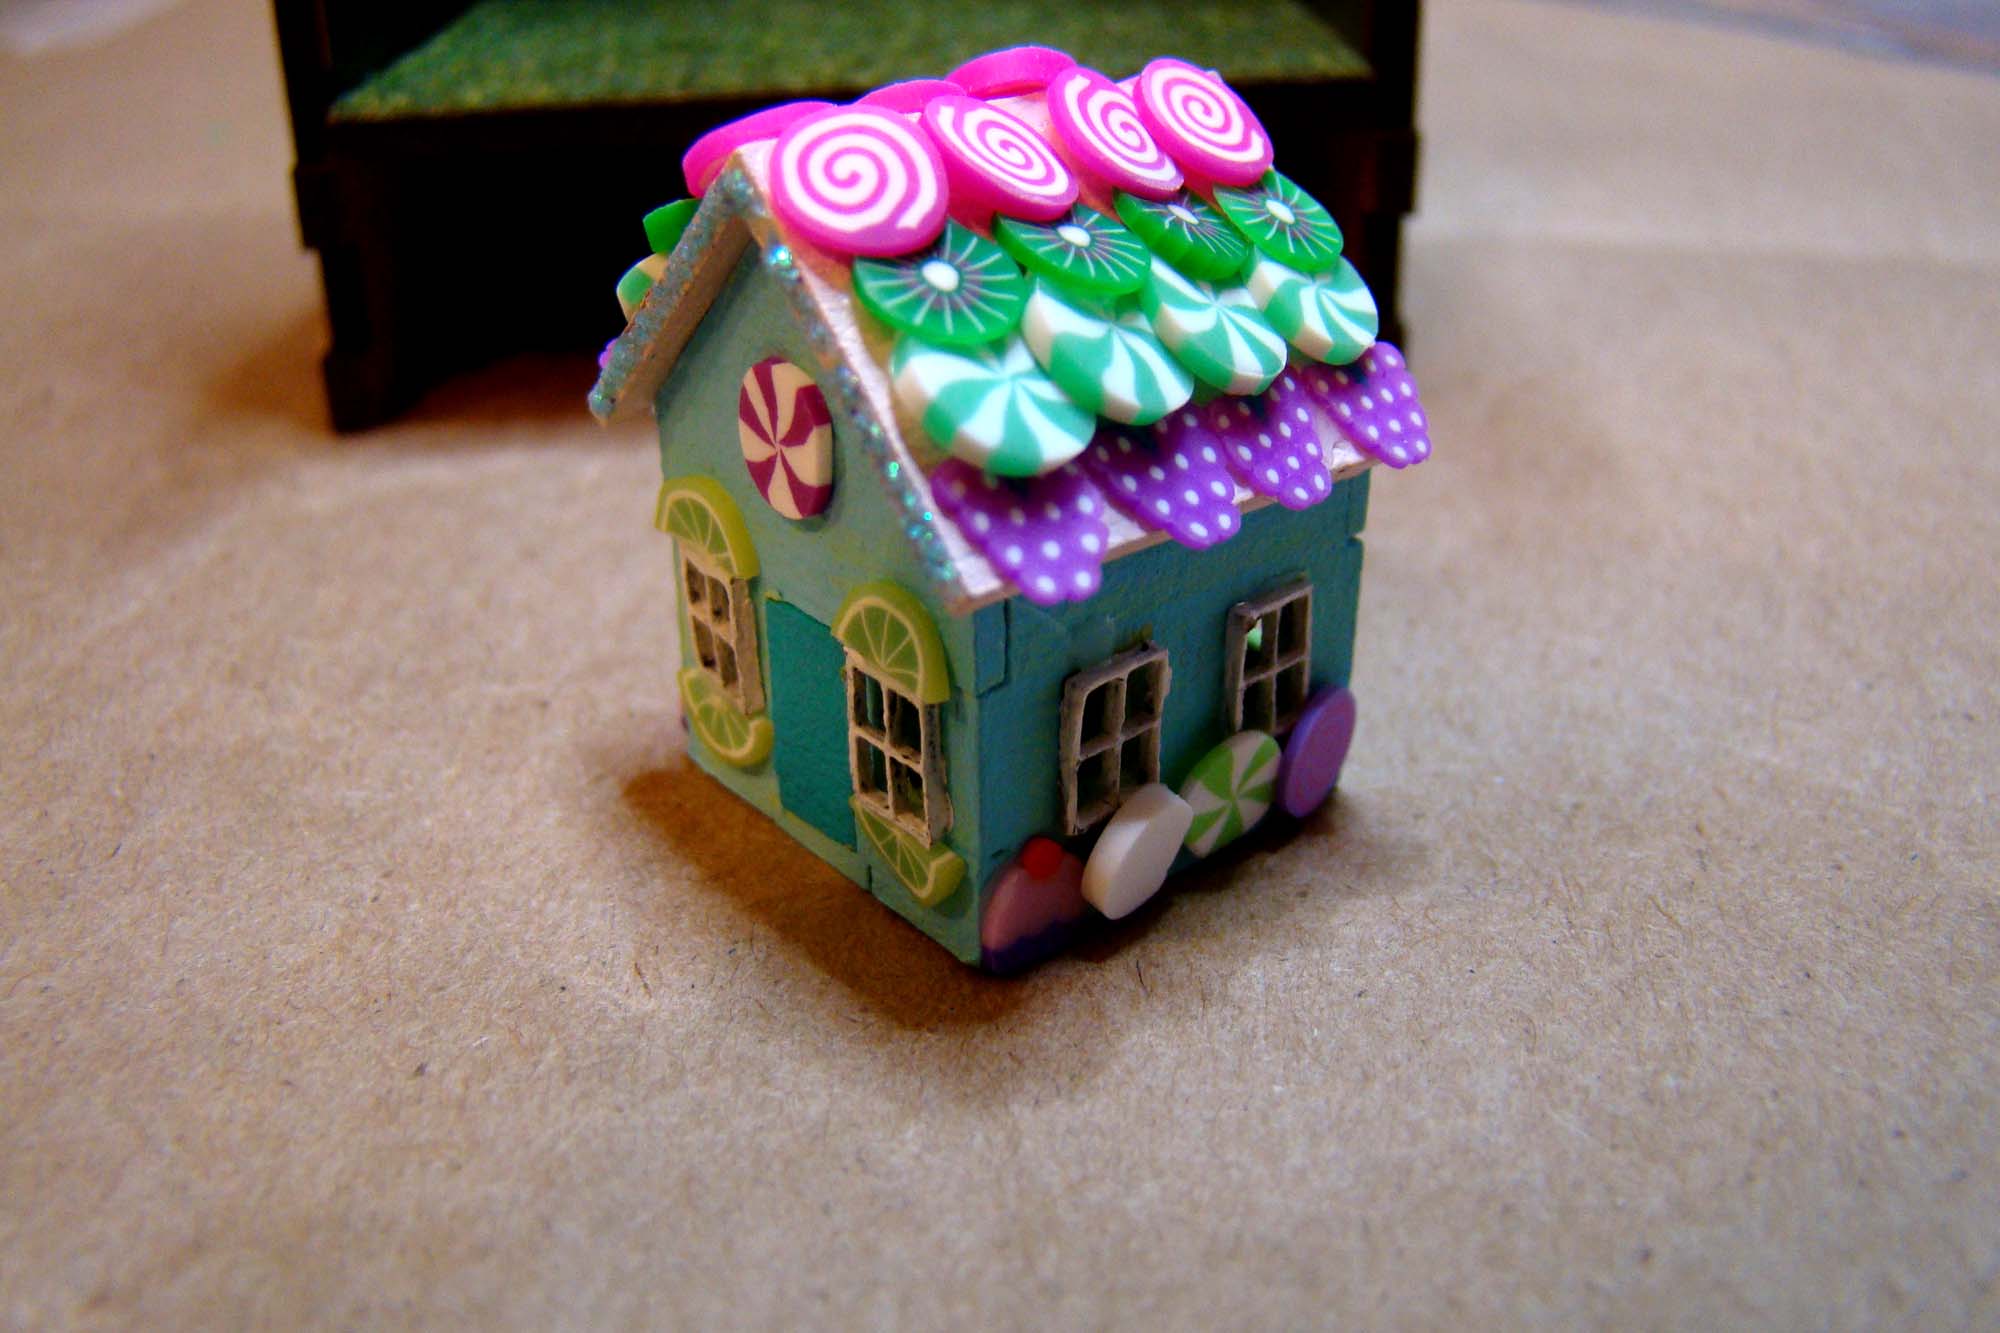
The hardest thing about the 1:12 Gingerbread House was choosing the colors I was going to use. These little things are so fun and satisfying to decorate.

For embellishing the finished house, I pulled from the Mixed Fruit Polymer Clay Slice Mix, the Polymer Clay Cakes Slice Mix, the Minty Cool Christmas Polymer Clay Slice Mix and a few slices of a Polymer Clay Lime Cane. The roof is trimmed with Stickles Sea Glass glitter glue.

I look forward to making a few of these little gingerbread houses every Christmas and finding new settings to place them in.
The Quarter Scale Dollhouse includes a set of door and window frame trims, those all were painted ivory. The roof was finished with more of those Tiny Scalloped Shingles. Final details include a Narrow Cabinet Door Handle and a set of Raw Brass Box Feet Cones.

The gloomy woods were completed with a section of mini green grass mat for the ground and a few model train trees for the forest.
Happy Holidays and thanks for stepping by! You will find all of the pretty little things I used for these projects right HERE.


