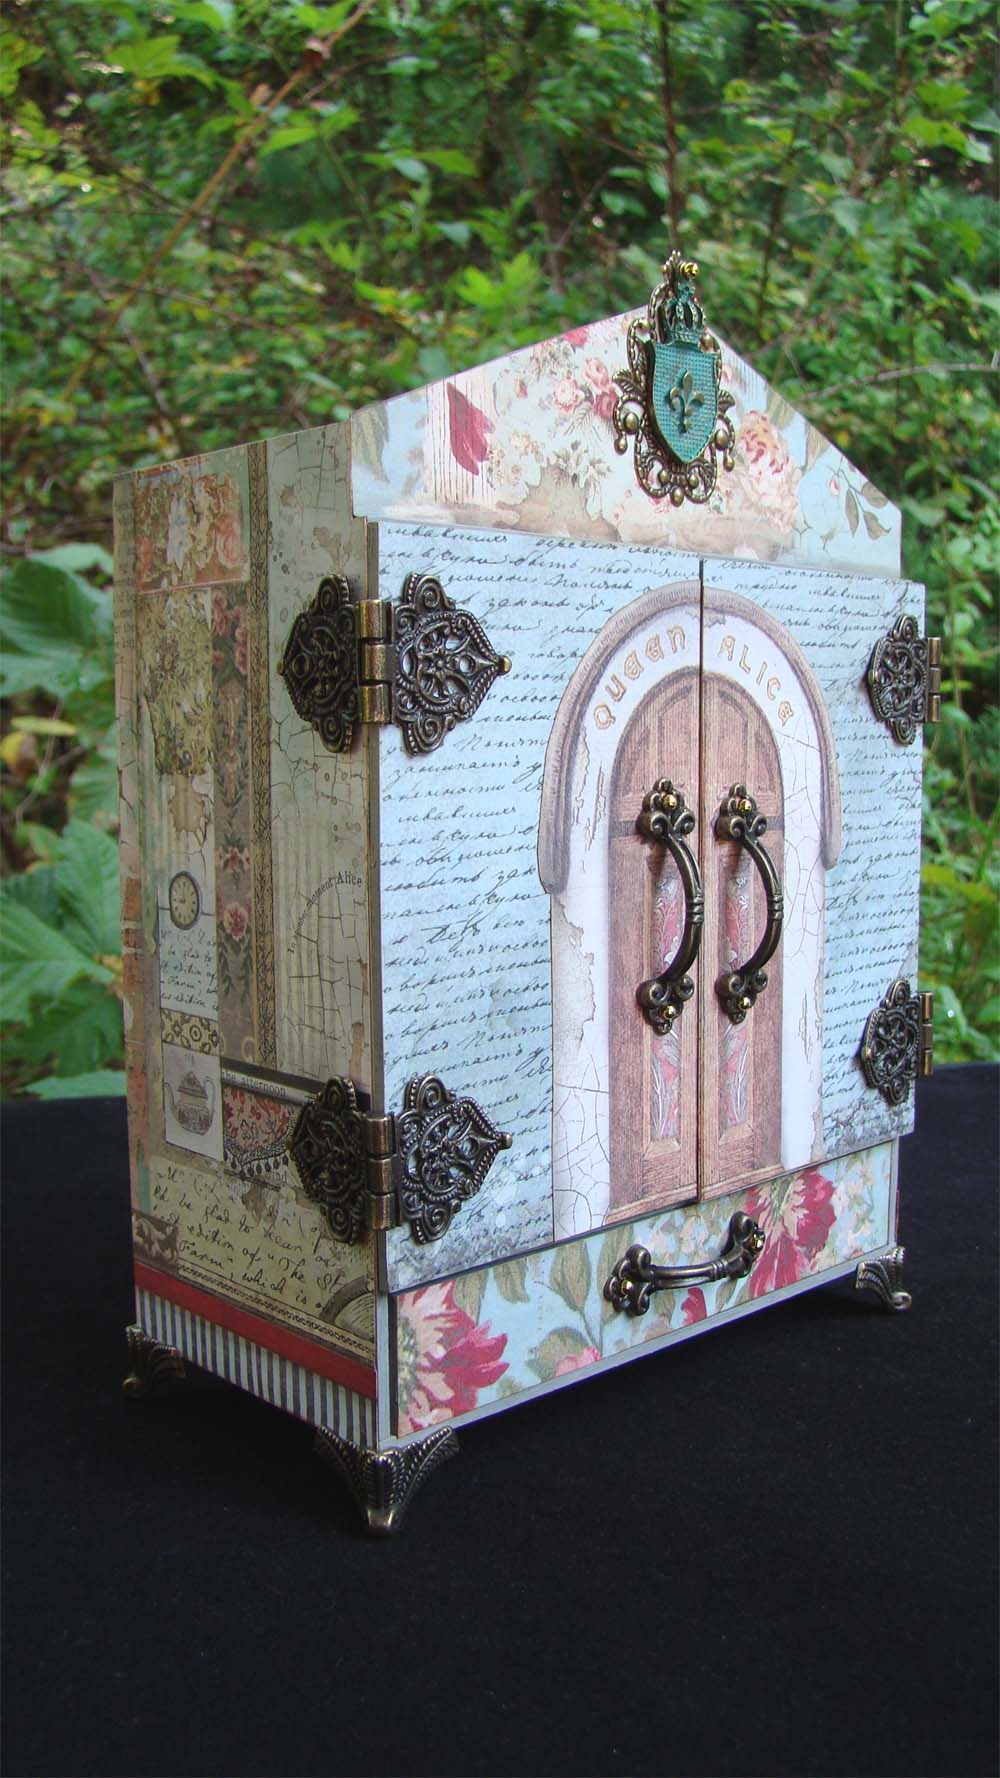
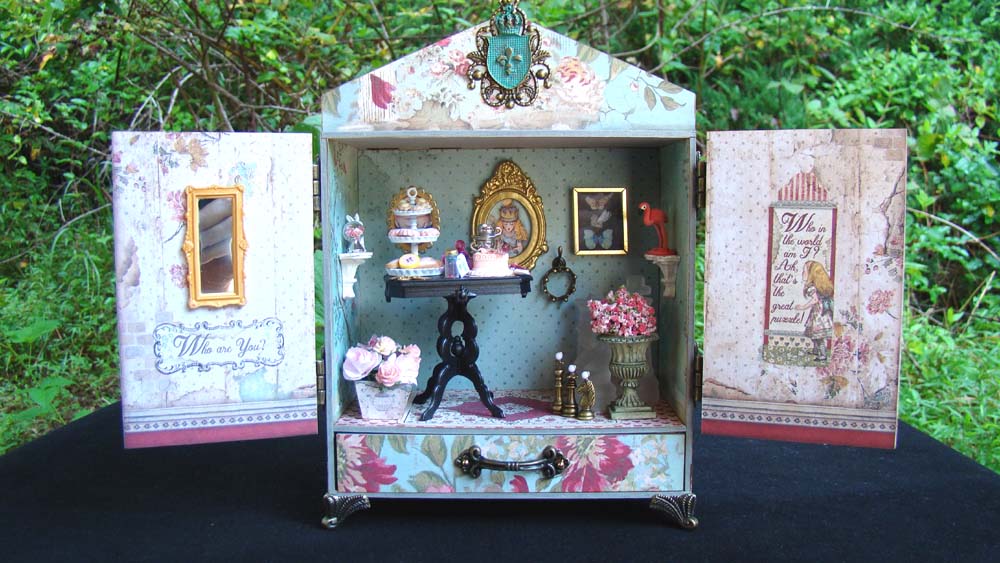
I have a pretty little project for Alpha Stamps to share with you today that features Stamperia’s new Alice Through the Looking Glass papers. There are so many gorgeous papers in this collection I had a hard time choosing which ones to use. The base for this project is a House Shrine with Doors – Medium, the perfect vessel to set a Queen Alice scene inside.

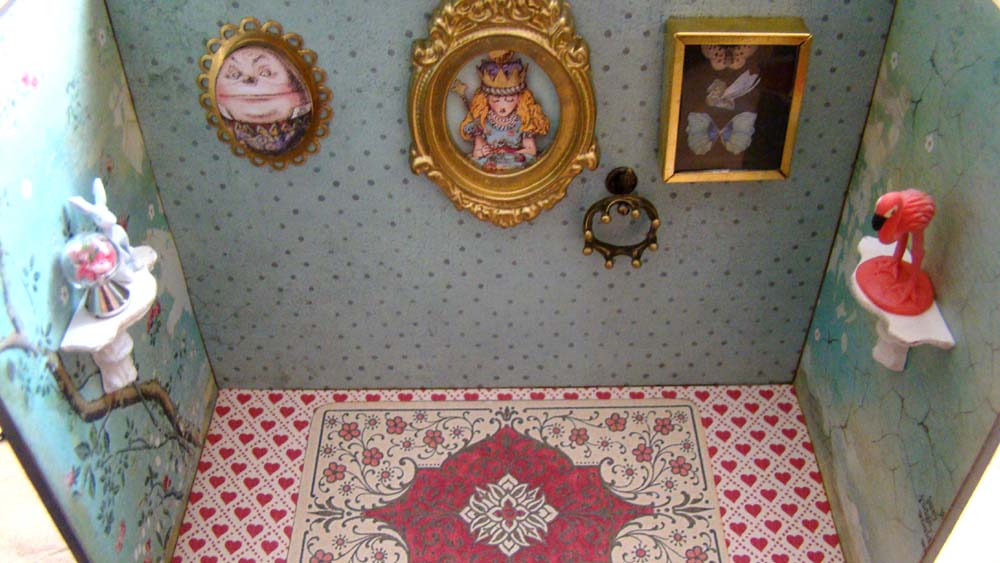
Open the doors and you’ll see I used a Victorian Table Kit – Black I set all kinds of goodies on and filled the walls and floor with as many tiny treasures as possible.
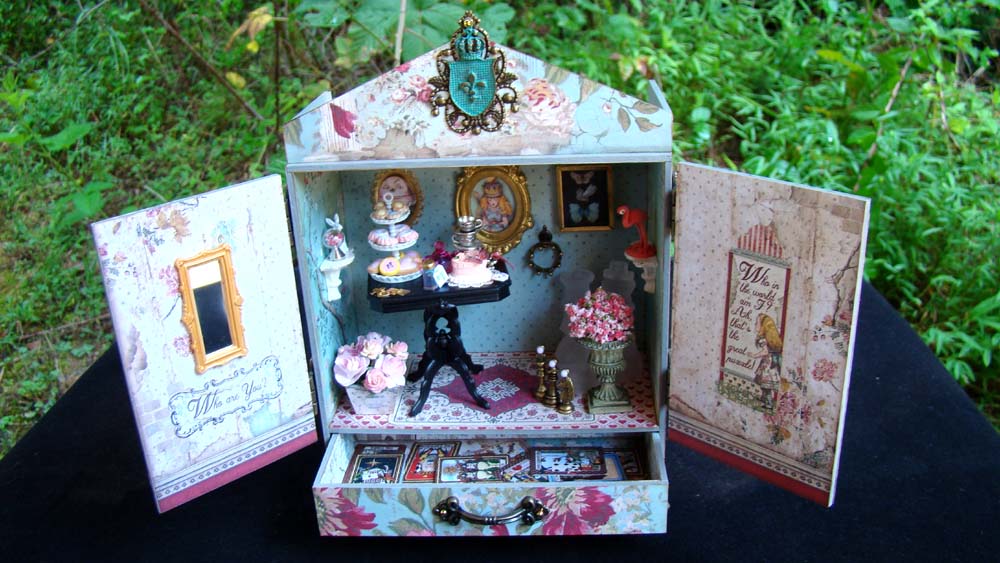
I fussy cut a few of the winged creatures from the Alice paper to display in a Mini Metal Shadowbox. It came with a bright red removable velveteen lining that I replaced with a gray suede paper. Super simple to use the original red as a template.

I placed a Plant with Pink and Fuchsia Flowers inside an Antique Garden Urn as decoration. Before I set it in place, I snipped a few of the flowers and dropped them inside a 1cm Clear Glass Globe that got mounted on a spiked cone brad. When finished, it looks like a little floral snow globe.

It was glued onto a Triangular White Shelf Bracket along with a Standing White Rabbit Charm. These shelves come in a set of two, the other one received an adorable Micro Mini Flamingo. Also shown here is the stack of cups I made for the table by gluing three Silver 3D Teacup and Saucer charms together.

I love the Queen Alice image, and framed her overlooking the scene. Her crown hangs below her painting where it’s ready to grab and run.
The Victorian Table Kit basically snaps together, it was so easy to assemble! I hand made a few of the treats on the Tiered Cupcake Stand.

Here is a quick look at my cookie-making process. I used a Mini Silicone Mold – Biscuits and Bread to make tiny cookies out of paperclay. Once those were dried, I painted them with acrylic paint and rubbed the edges with a bit of brown soft pastel. The icing was made by mixing liquid polymer clay with soft pastels to color it then baked on the cookies for 5 minutes at 265 degrees to set it.

The little pink bouquet of paper flowers is being visited by an acrylic butterfly nail charm (I also landed one on the Pink Heart Cake with Roses).

These gorgeous Fancy Filigree Hinges were attached using E6000 glue. I glued them to the doors, let that set, then glued them to the sides of the shrine.

This little shrine includes a drawer that I filled with cards cut from a Mini Alice Tarot Half Sheet.

I hope you enjoyed this visit through the looking glass with Alice. You’ll find all of the supplies I used HERE


Aug 18, 2021 @ 14:15:02
It’s so sweet. Every detail is just in the right place. The glass globe with the flowers inside seems like it’d work for a Glinda bubble in another miniature too.
Aug 20, 2021 @ 15:01:20
O. thats quite lovely connie\
> Connie posted: ” I have a pretty little project for Alpha Stamps to > share with you today that features Stamperia’s new Alice Through the > Looking Glass papers. There are so many gorgeous papers in this > collection I had a hard time choosing which ones to use. The base for > ” > >
Mar 15, 2022 @ 11:19:40
Connie,
Do you have cutting instructions for the papers?
Mar 15, 2022 @ 12:03:22
Hi Rita, I used the Alice Through the Looking Glass 12×12, 8×8 and Backgrounds pads for this project. As I recall the rug in the interior was a special cutout from the 12×12 paper pack as was the Queen Alice on the front of the shrine. Everything else was pretty much choosing what papers I thought would look good on all the parts of the shrine. I measured everything and cut to size. The papers in this series are all so pretty it was hard to choose which ones to use. If you have specific questions, fire away.