Come for Holiday Brunch!

I love it when holiday baking time comes around. It’s the perfect excuse for having friends and family over for brunch. That was my inspiration for this Christmas morning buffet spread, which features gobs of fun new products from Alpha Stamps.

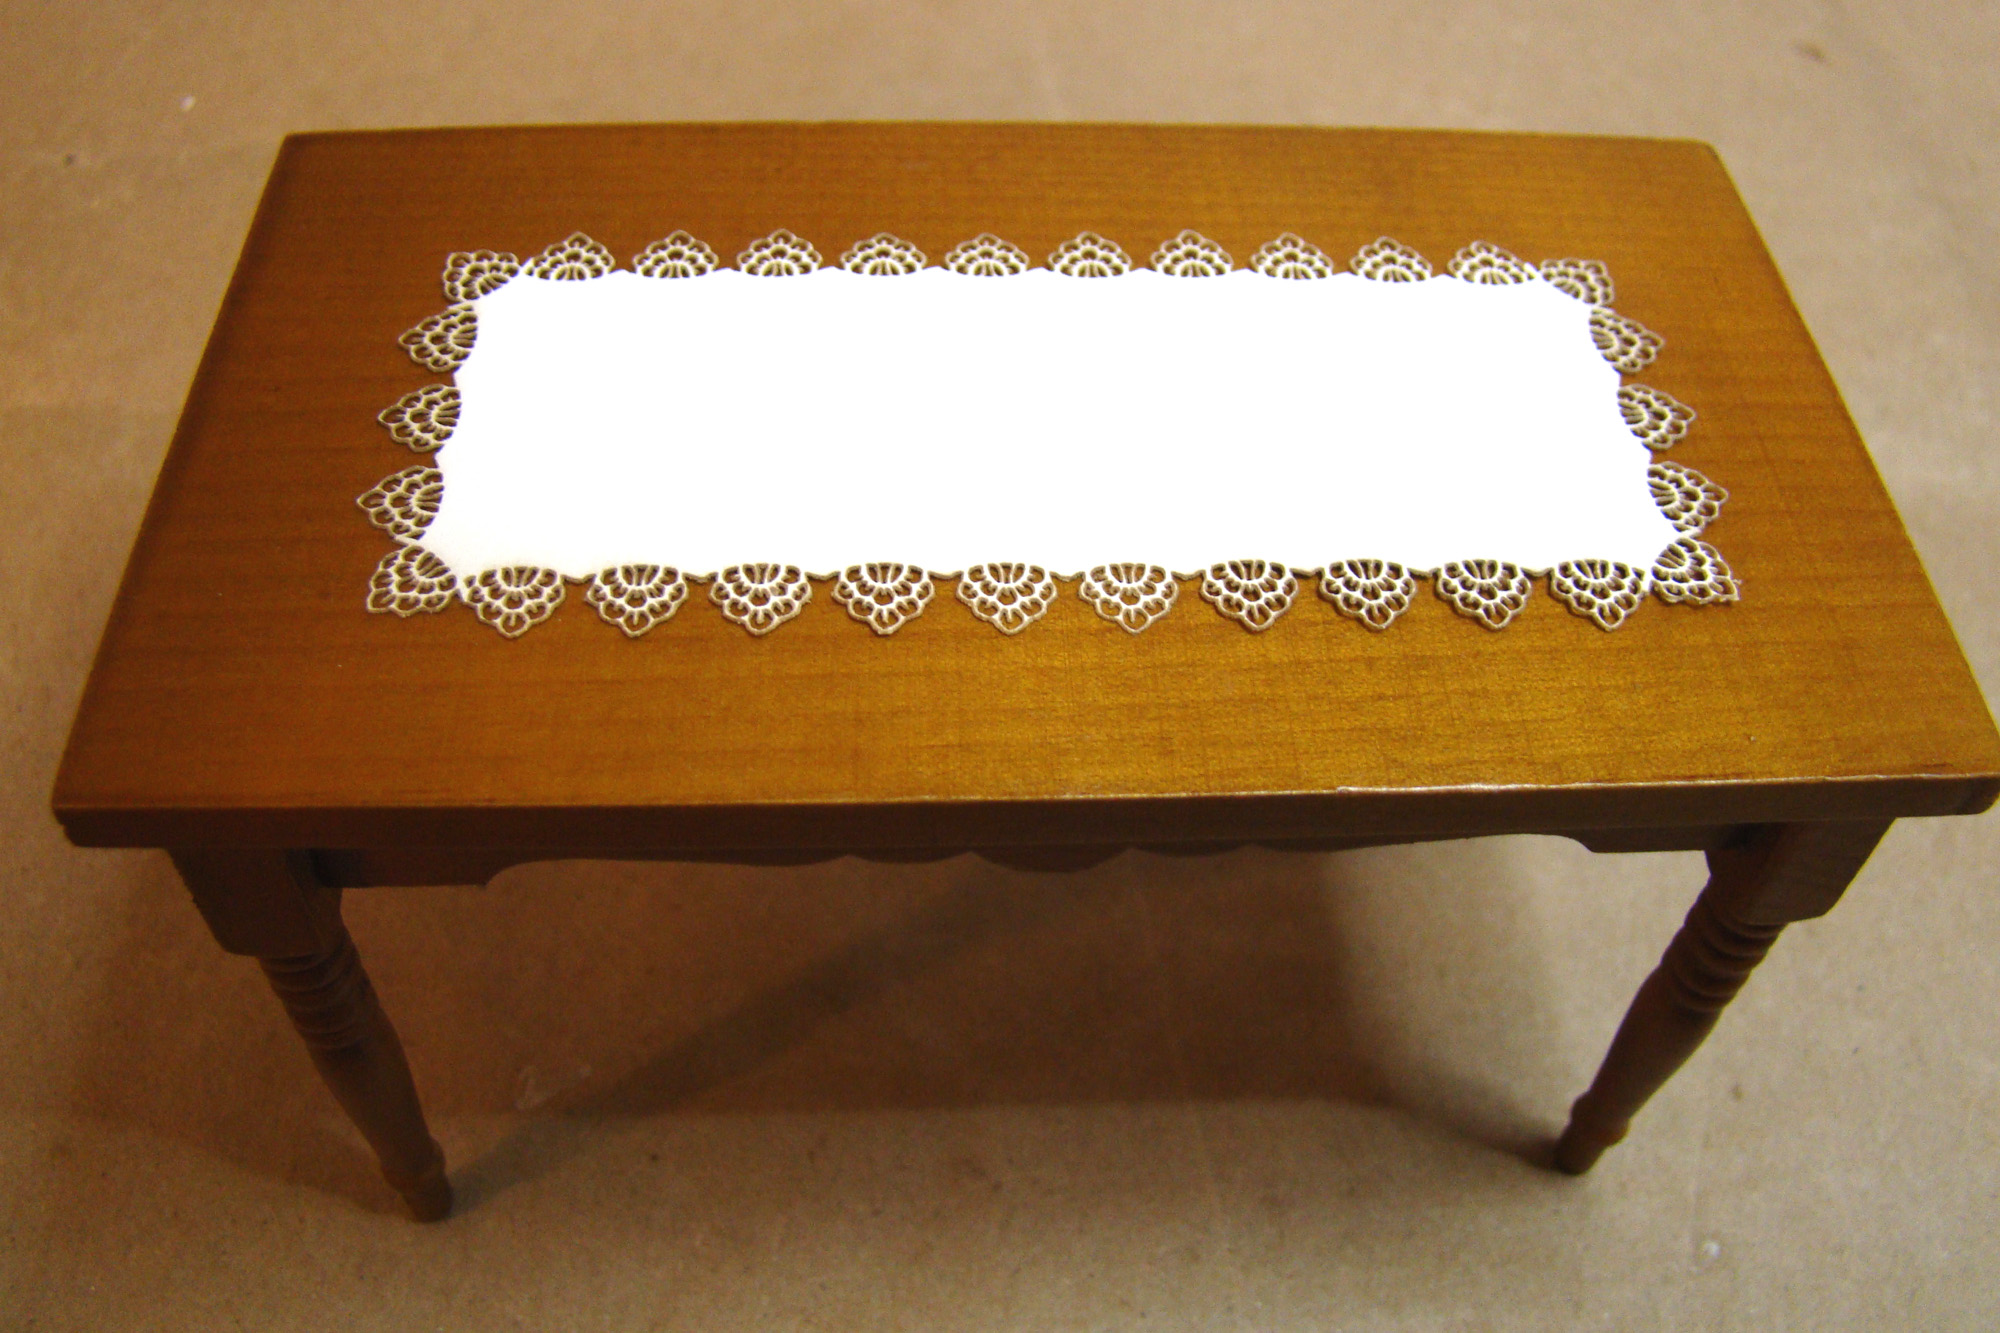
The foundation for this sweet feast is the new Walnut Finish Dining Table which is topped with a 1:12 Table Runner in white. There’s also a red option if that suits your project better.

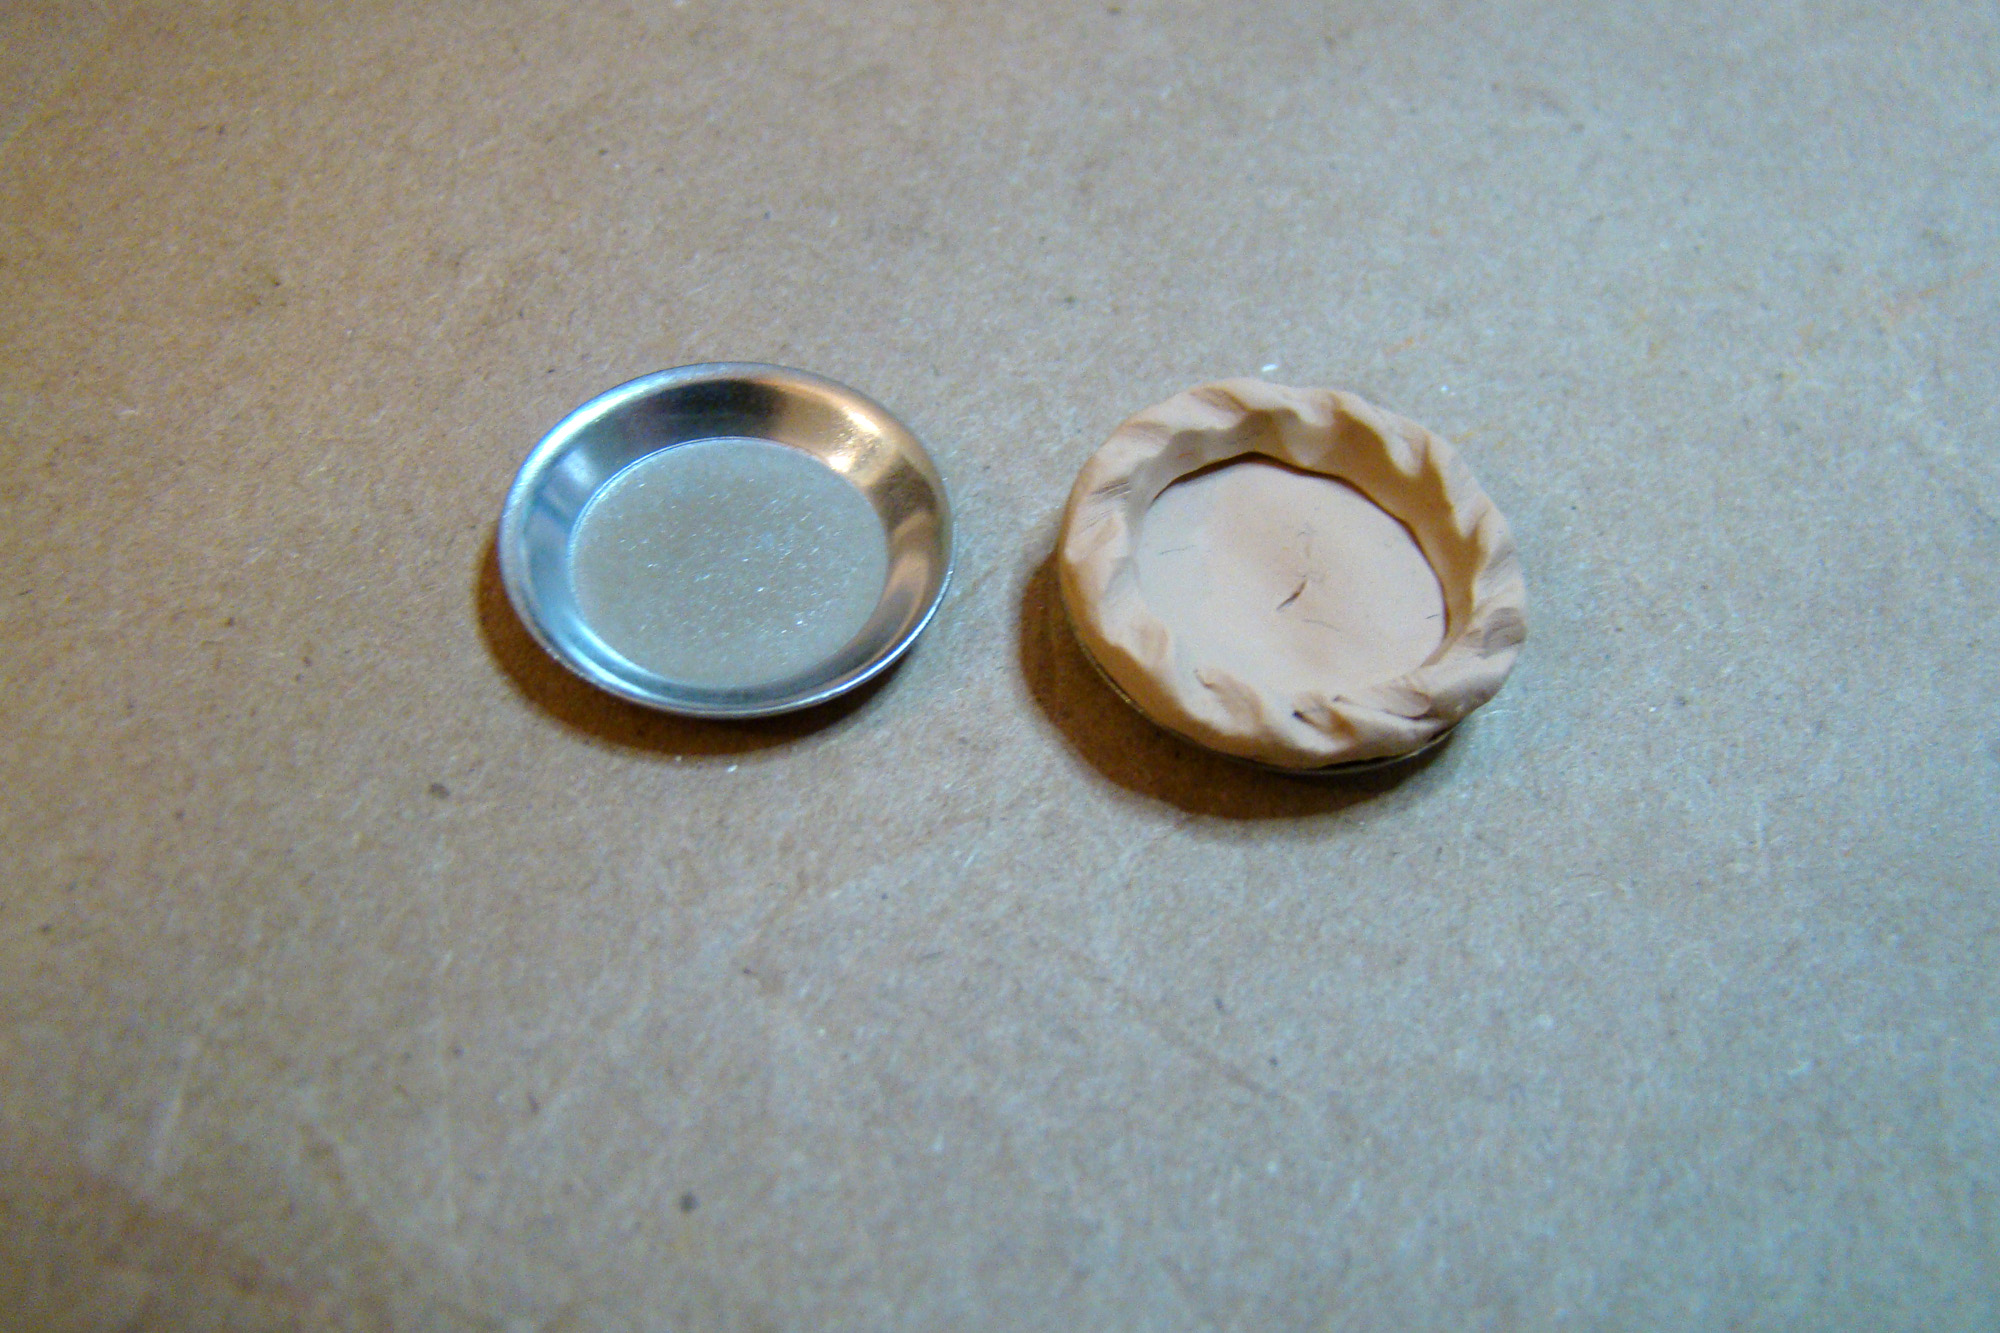
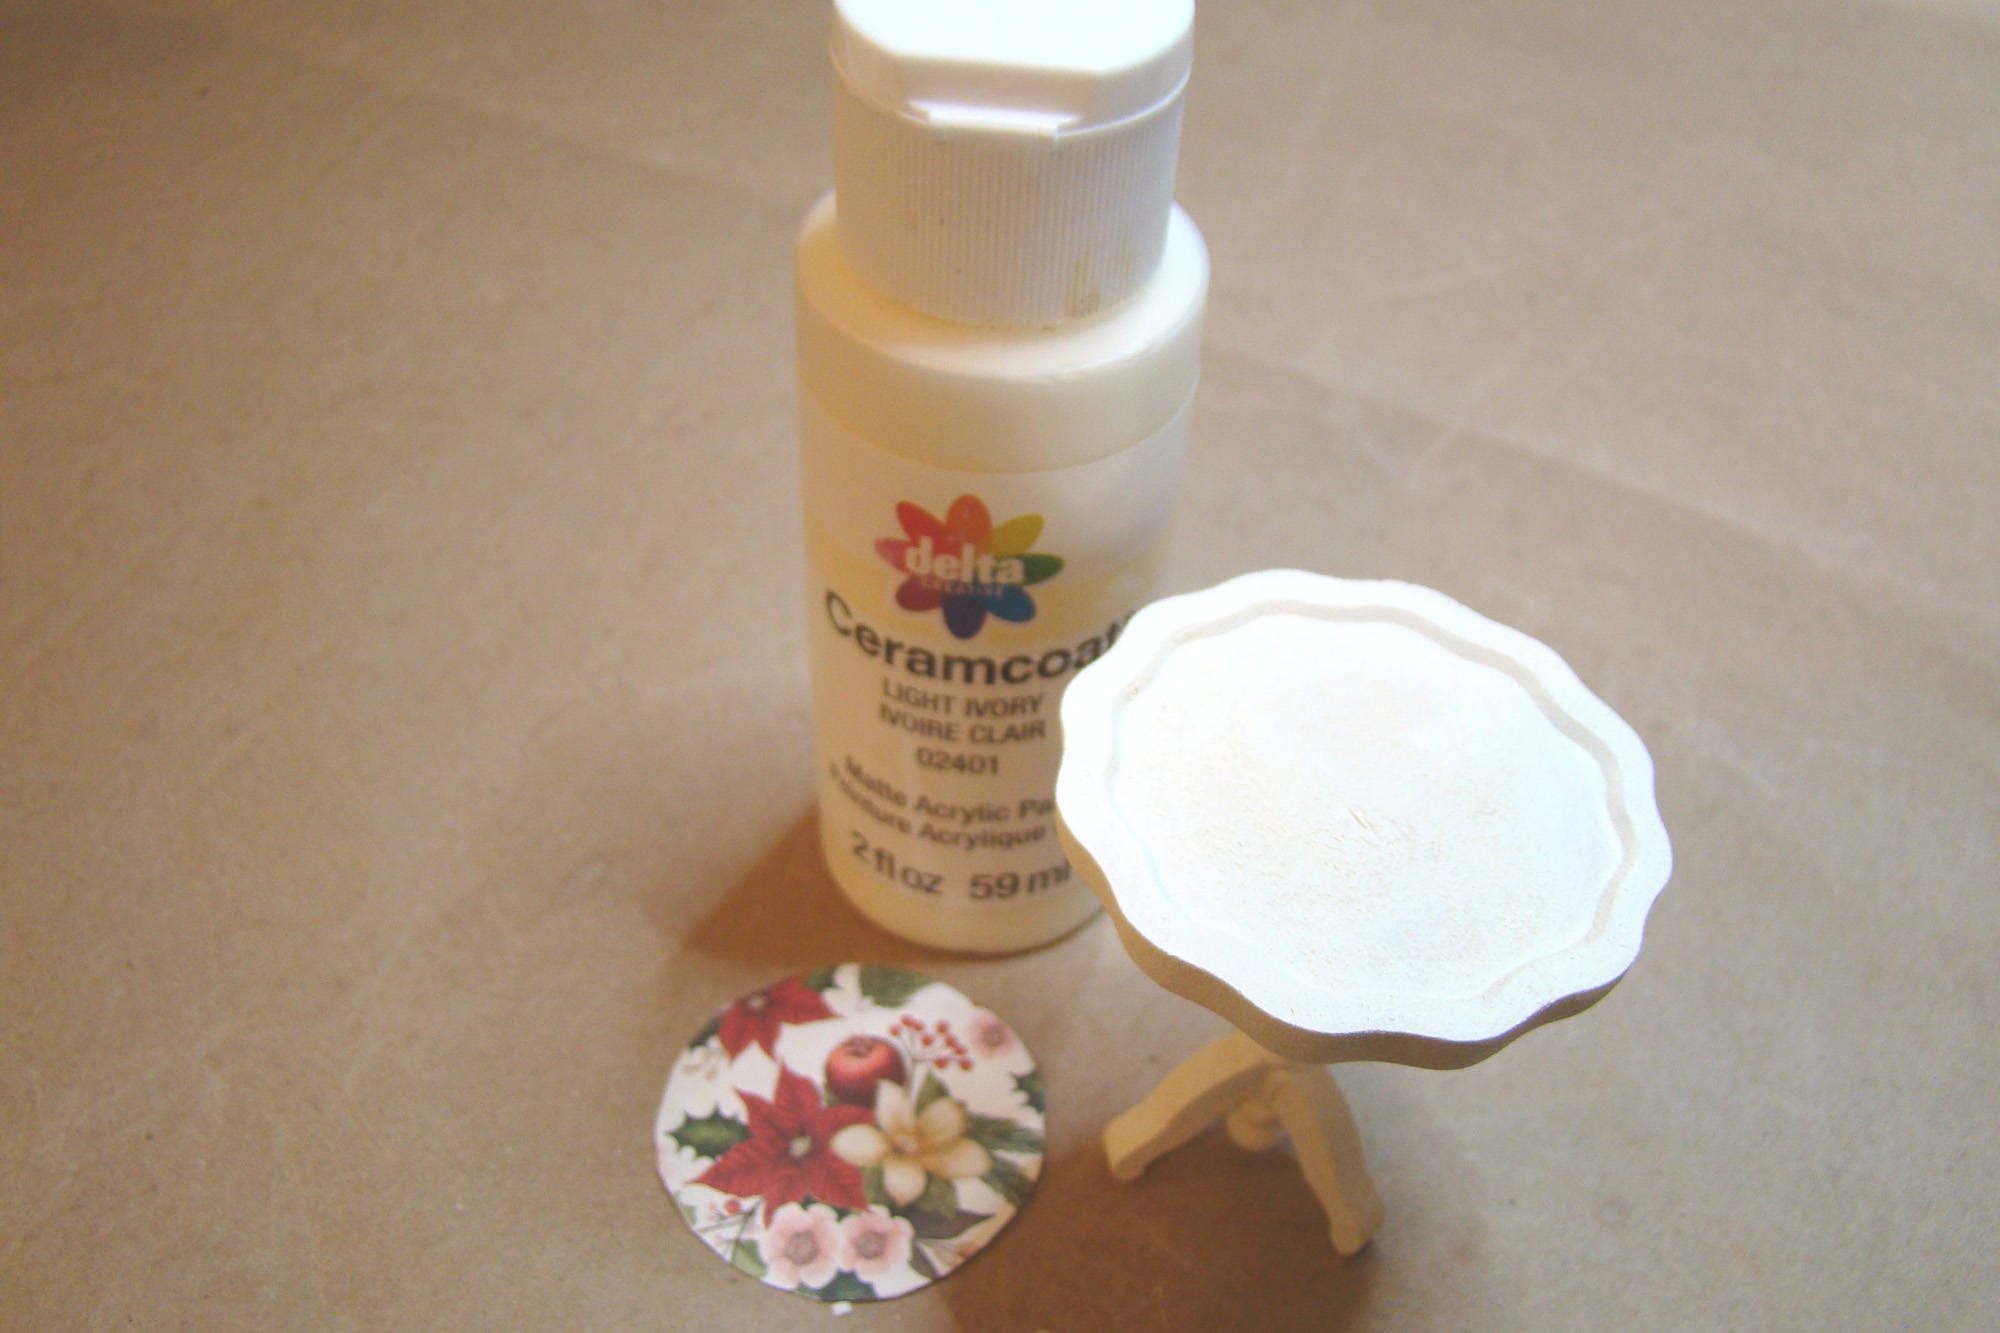
Since I wanted to include more than would fit on the main dining table, I opted to include a side table as well. I used an Unfinished Pie Crust Table that was painted a light ivory color and inset with a holiday image cut from a sheet of Christmas scrapbook paper.

On top of this smaller table I set a candy dish made by painting a cast metal Xmas Tree Candy Dish red after giving it a good scrub in soapy water to get rid of any mold release residue that might remain. Inside the dish are some of the new Christmas Peppermints Polymer Clay Slice Mix which remind me of those Starlight Mints my grandma used to always have on hand. There are also some red Mixed Color Acrylic Pearls – 3mm that remind me of cinnamon red hot fireballs. Yum!

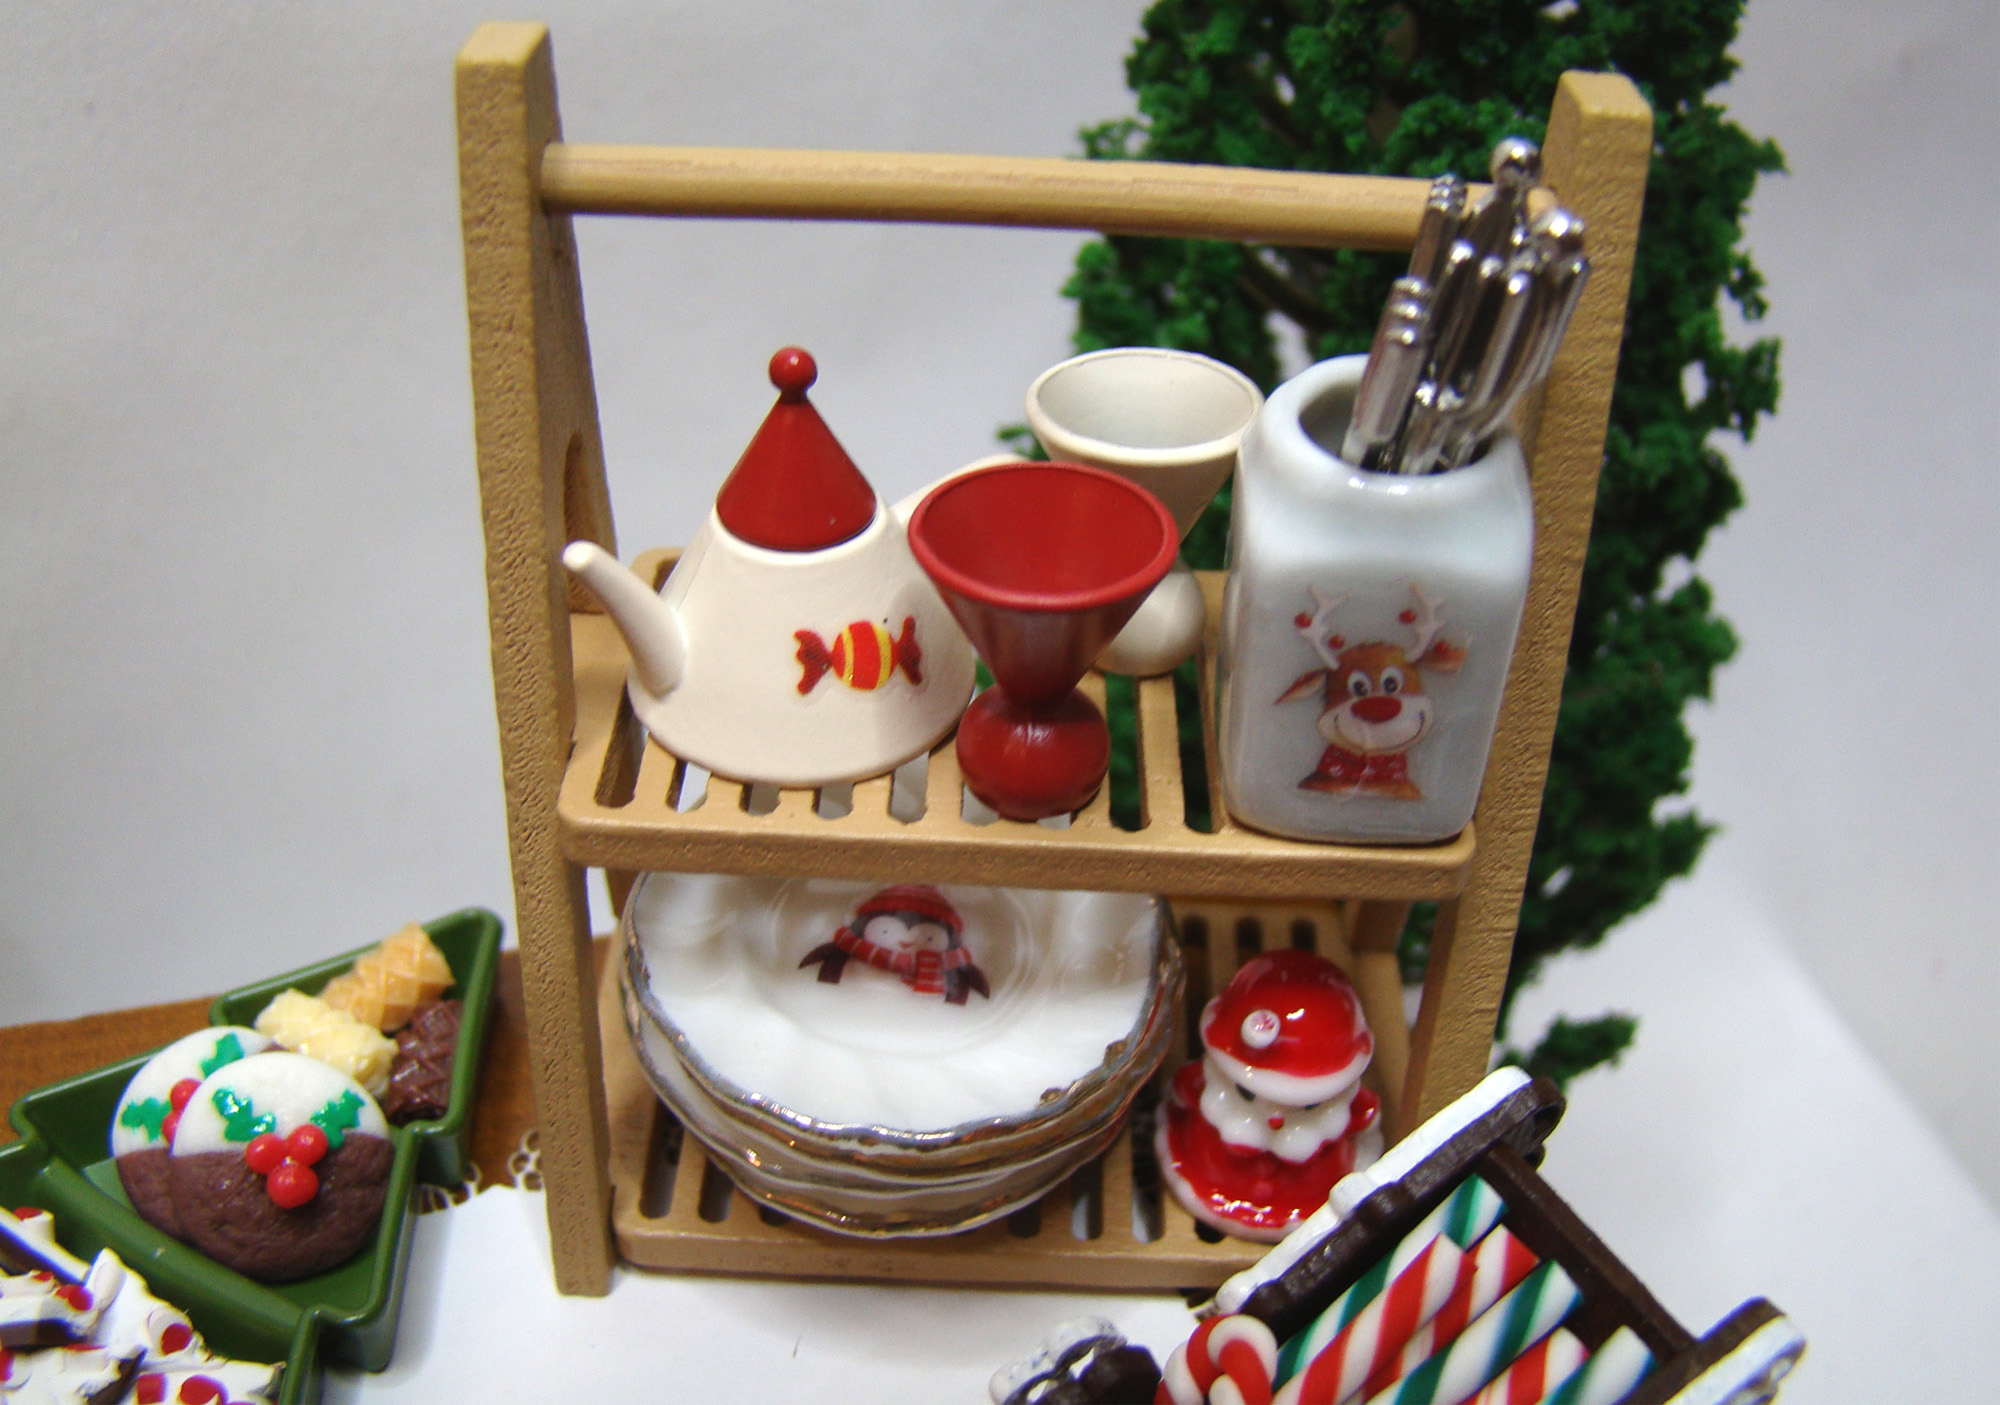
For serving, I decorated two of the new White Coffee Cups with Gingerbread Tiny Christmas Stickers. The stack of Gold Edged White Fluted Plates got images from the Retro Santa & Penguin Tiny Christmas Stickers, as did the Square White Ceramic Canister with Lid. Using nail stickers is a simple way to make tableware fit for any occasion.

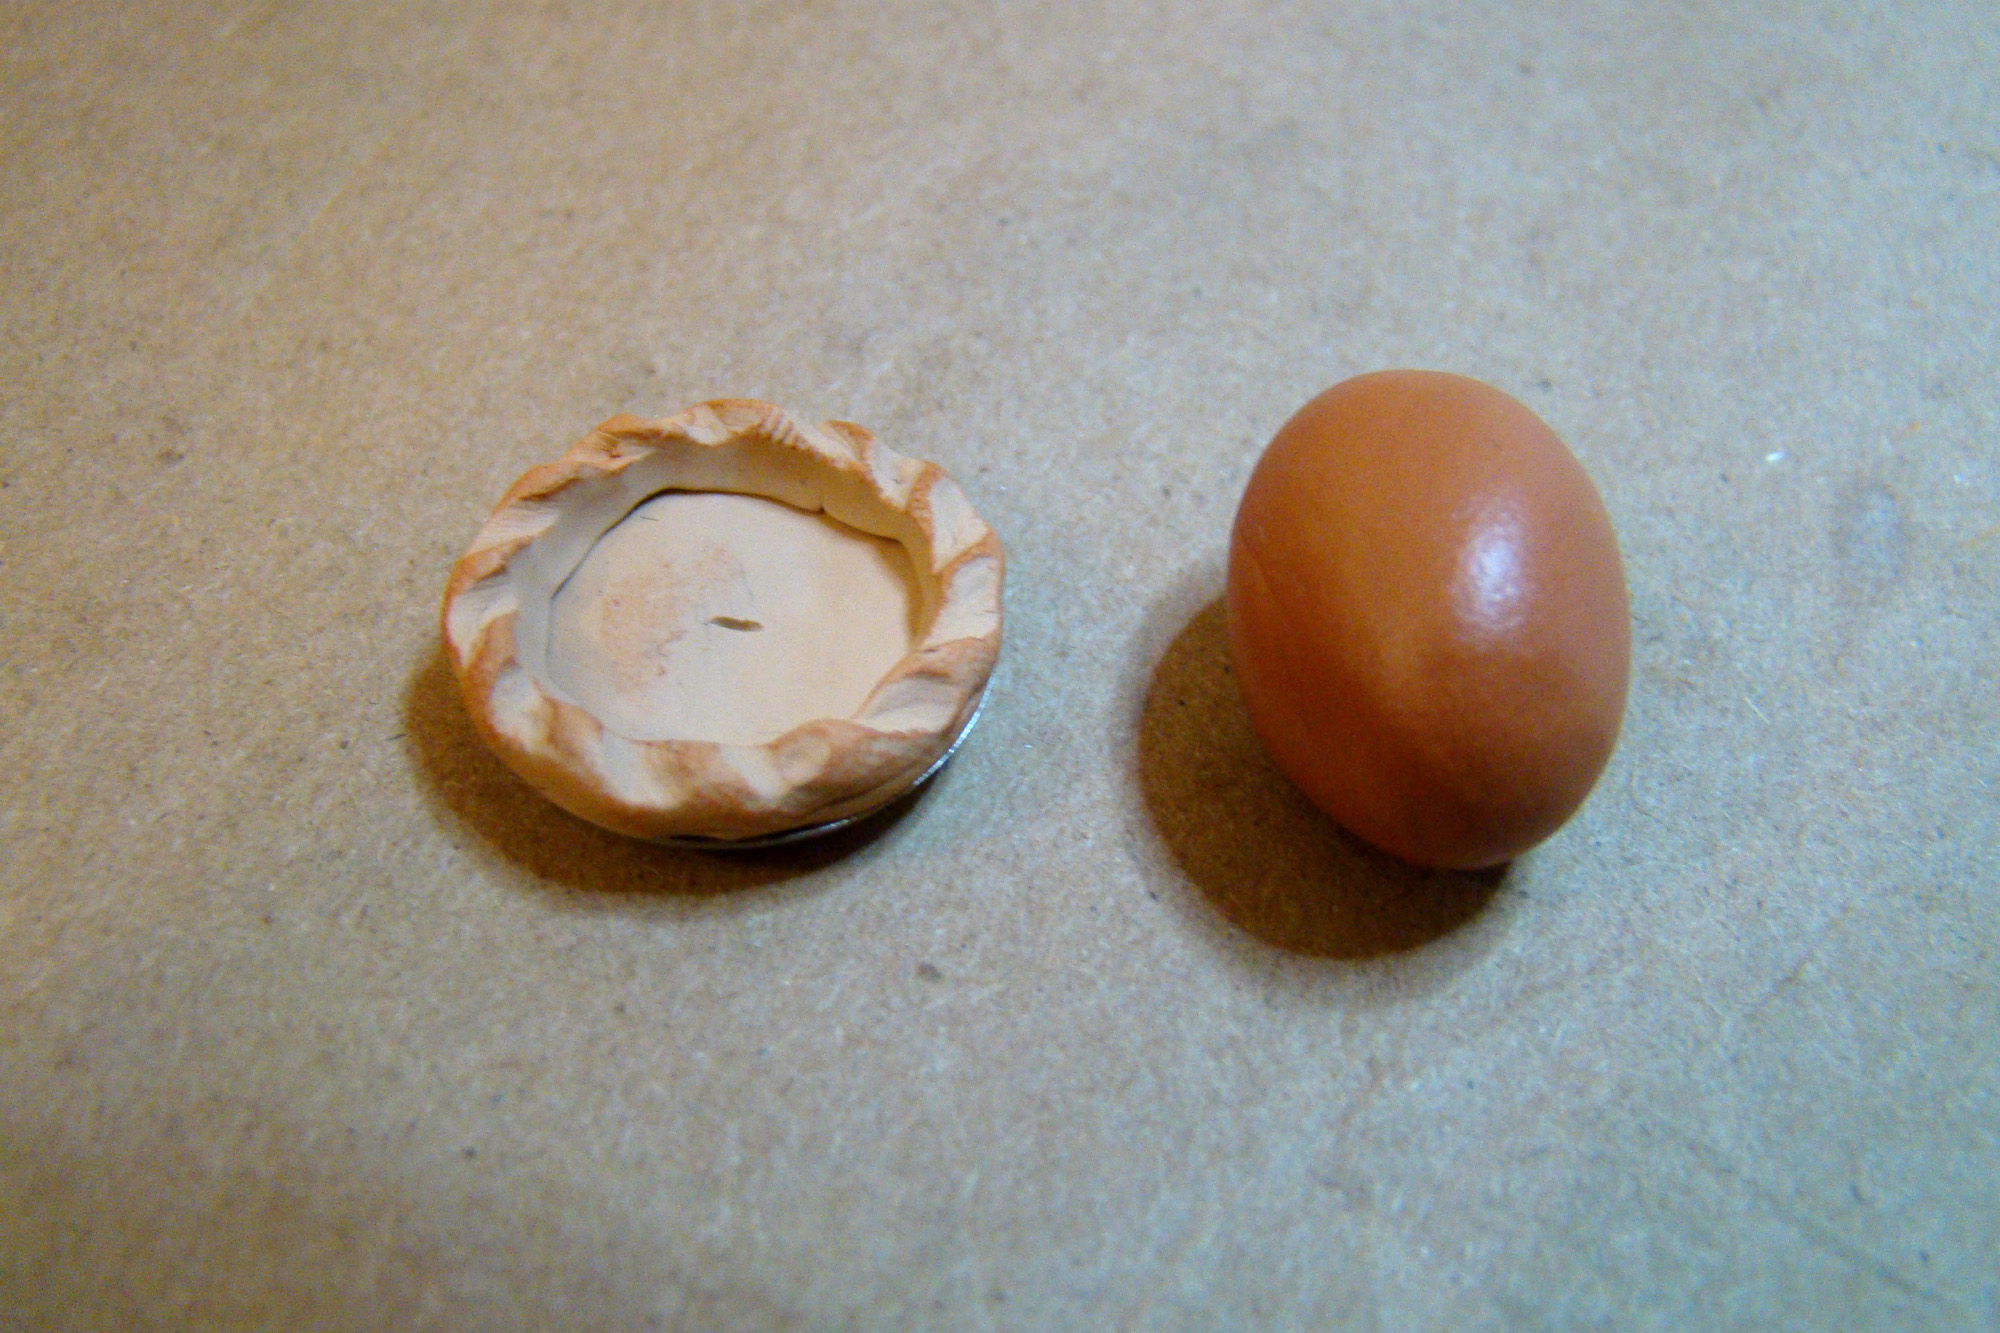
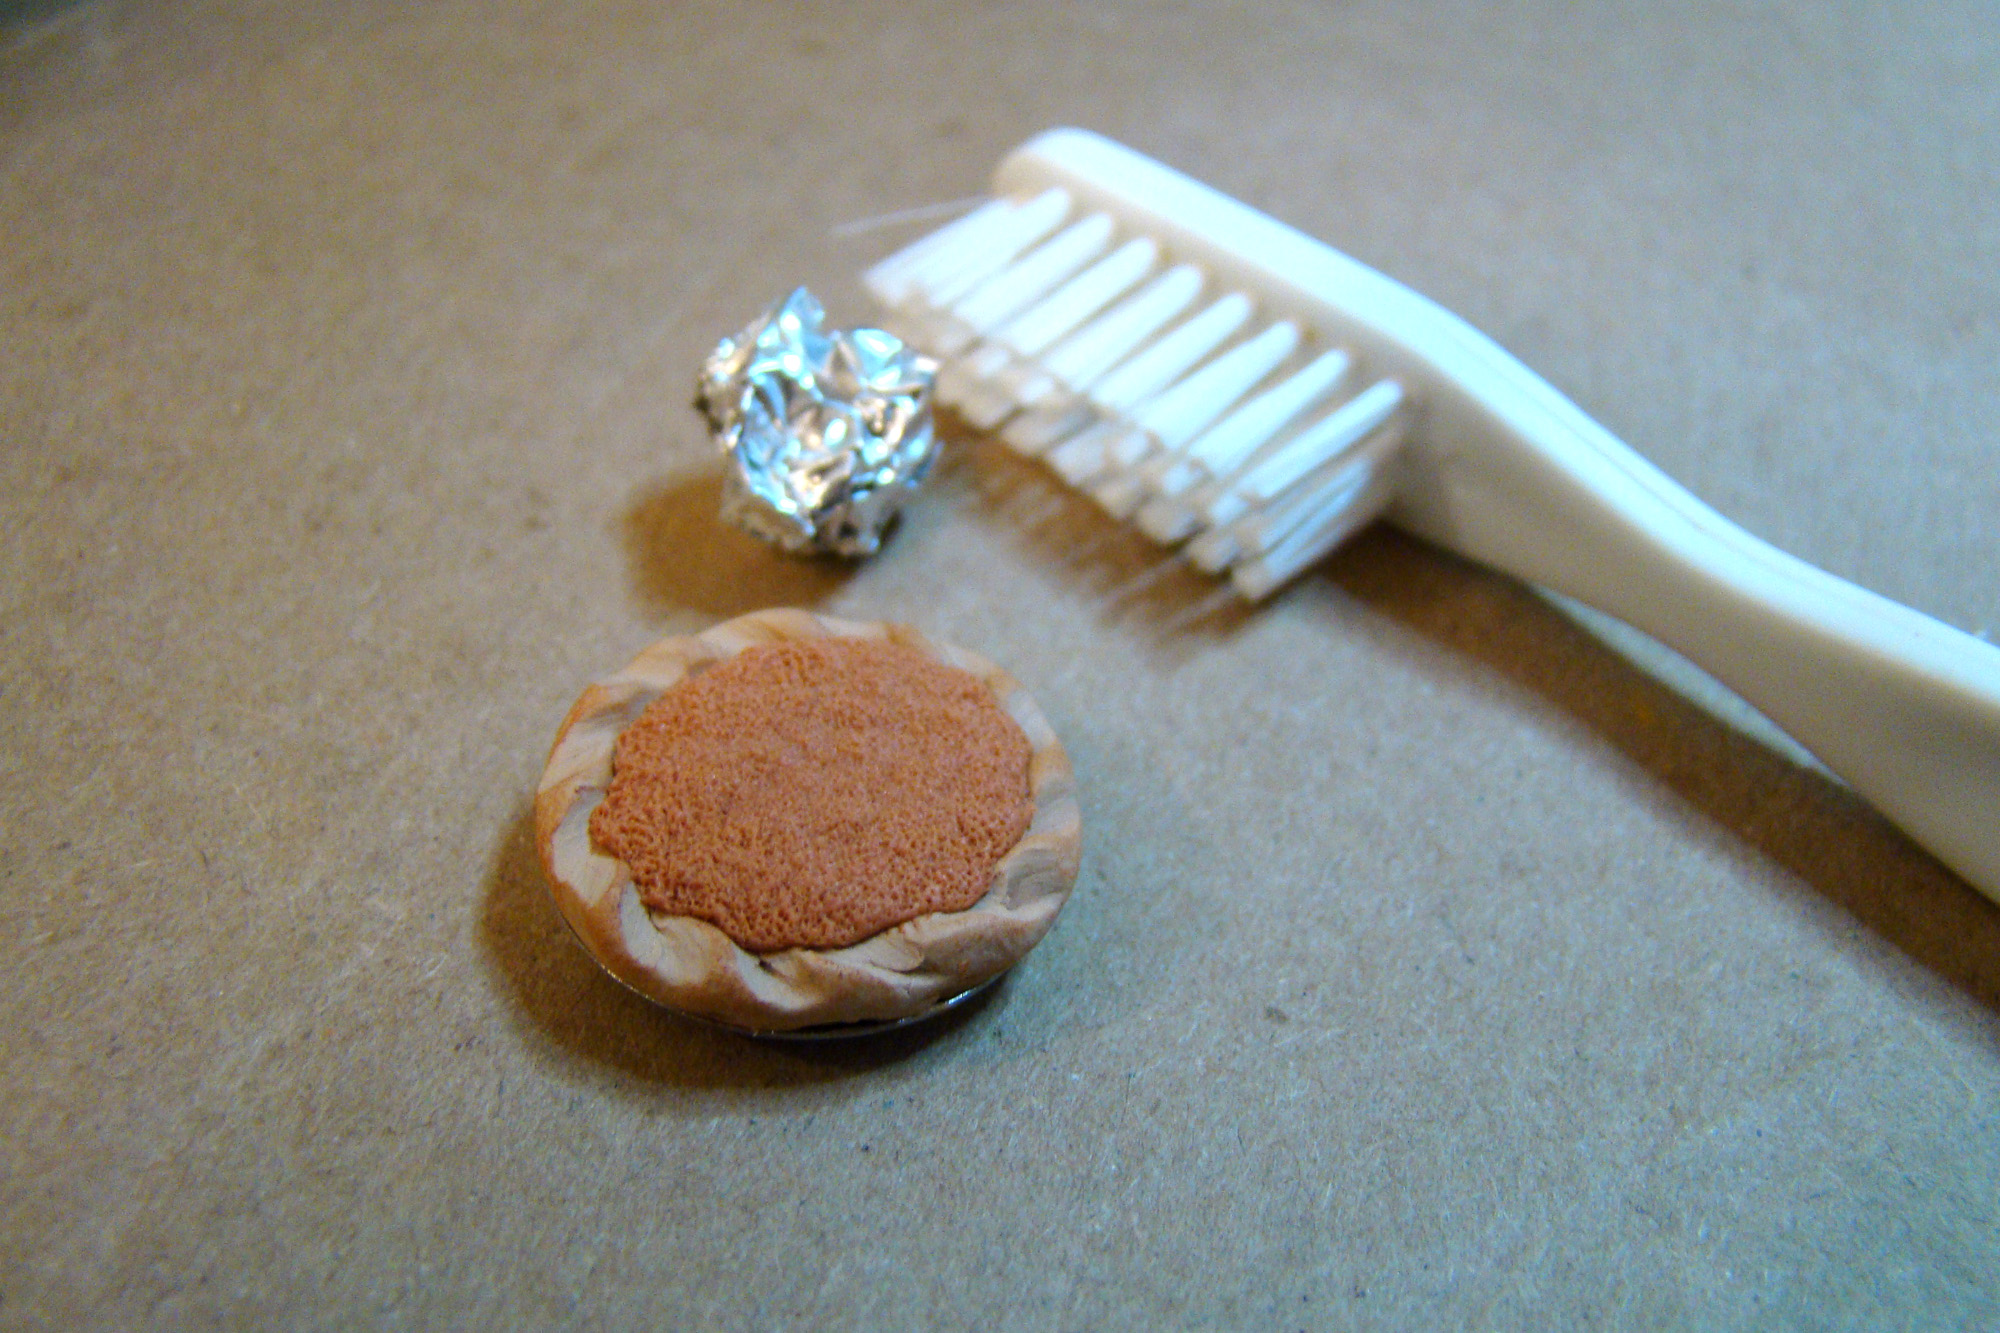
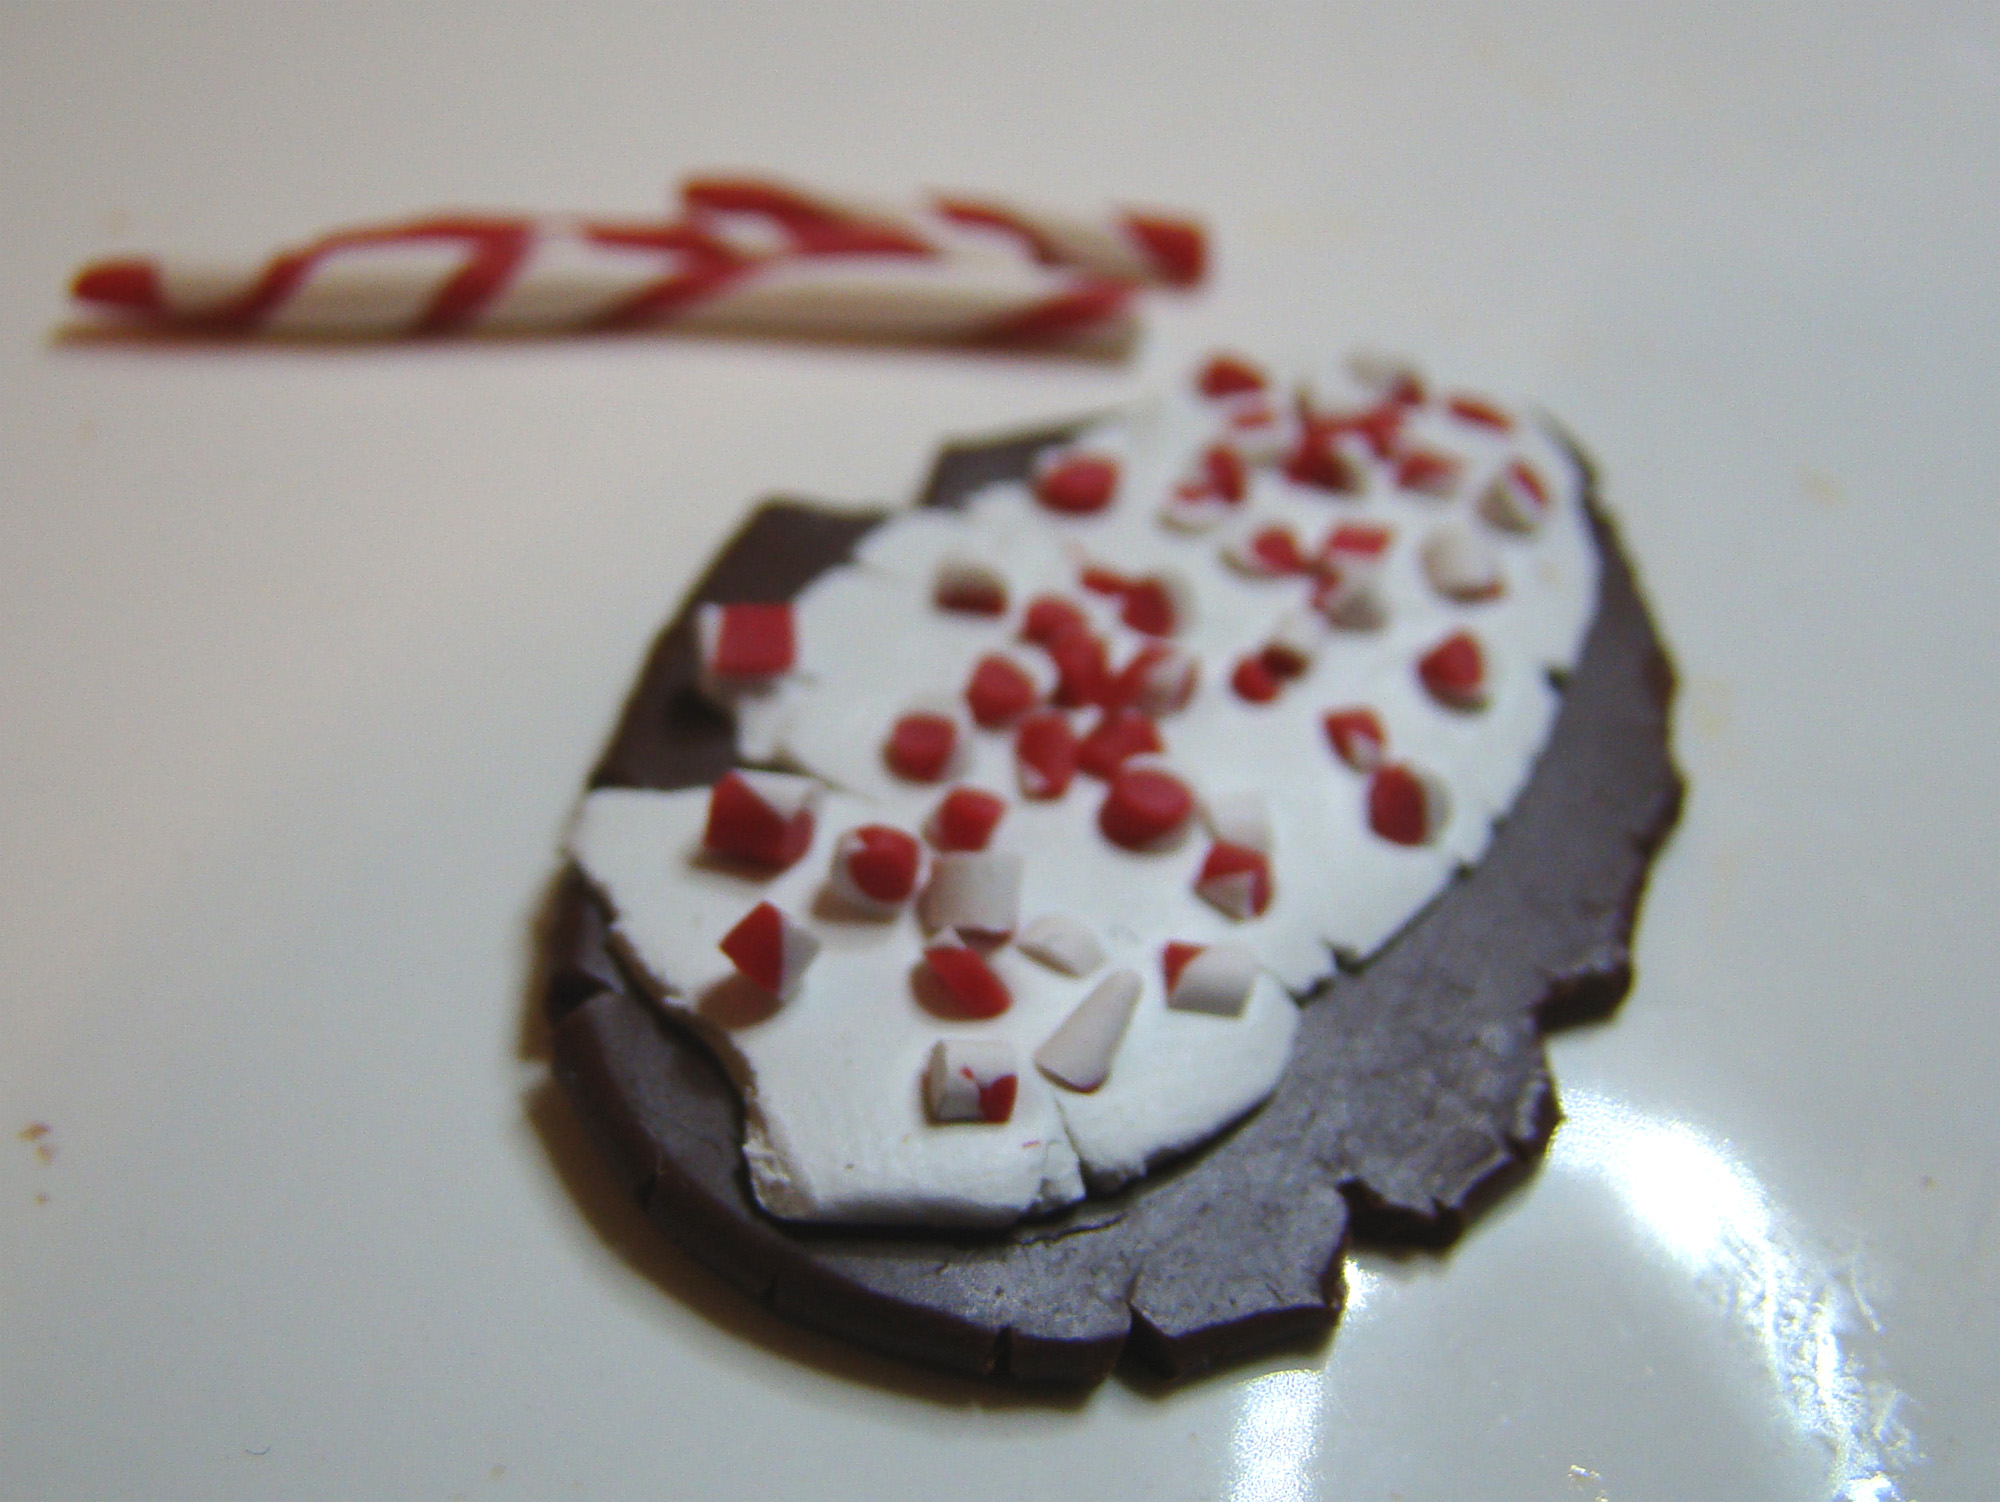
One of the holiday treats I make every year is peppermint bark. It’s a layer of melted dark chocolate that’s allowed to harden. On top of that goes a layer of white chocolate flavored with peppermint extract and crushed candy canes sprinkled on top while the white chocolate is still soft. I kind of did the same thing with polymer clay. A layer of dark brown clay rolled thin topped with a layer of white clay. The peppermint on top is made from white and red clay ropes twisted together and baked. Once hardened I chopped them into small pieces and pressed those into the white clay and baked it all together.

Chunks of bark joined the new Holly 2-Tone Christmas Cookies and Mini Wafer Cookie Rolls in a Green Tree Candy Tray or Mini Shadowbox.

I adore these little 1:12 Scale Chipboard Sleighs. I painted it brown and white reminiscent of gingerbread and decorated it with a little Santa on the front from the set of Mini Resin Christmas Embellishments. It’s filled with Tiny Polymer Clay Candy Canes and Red & Green Striped Candy Sticks.

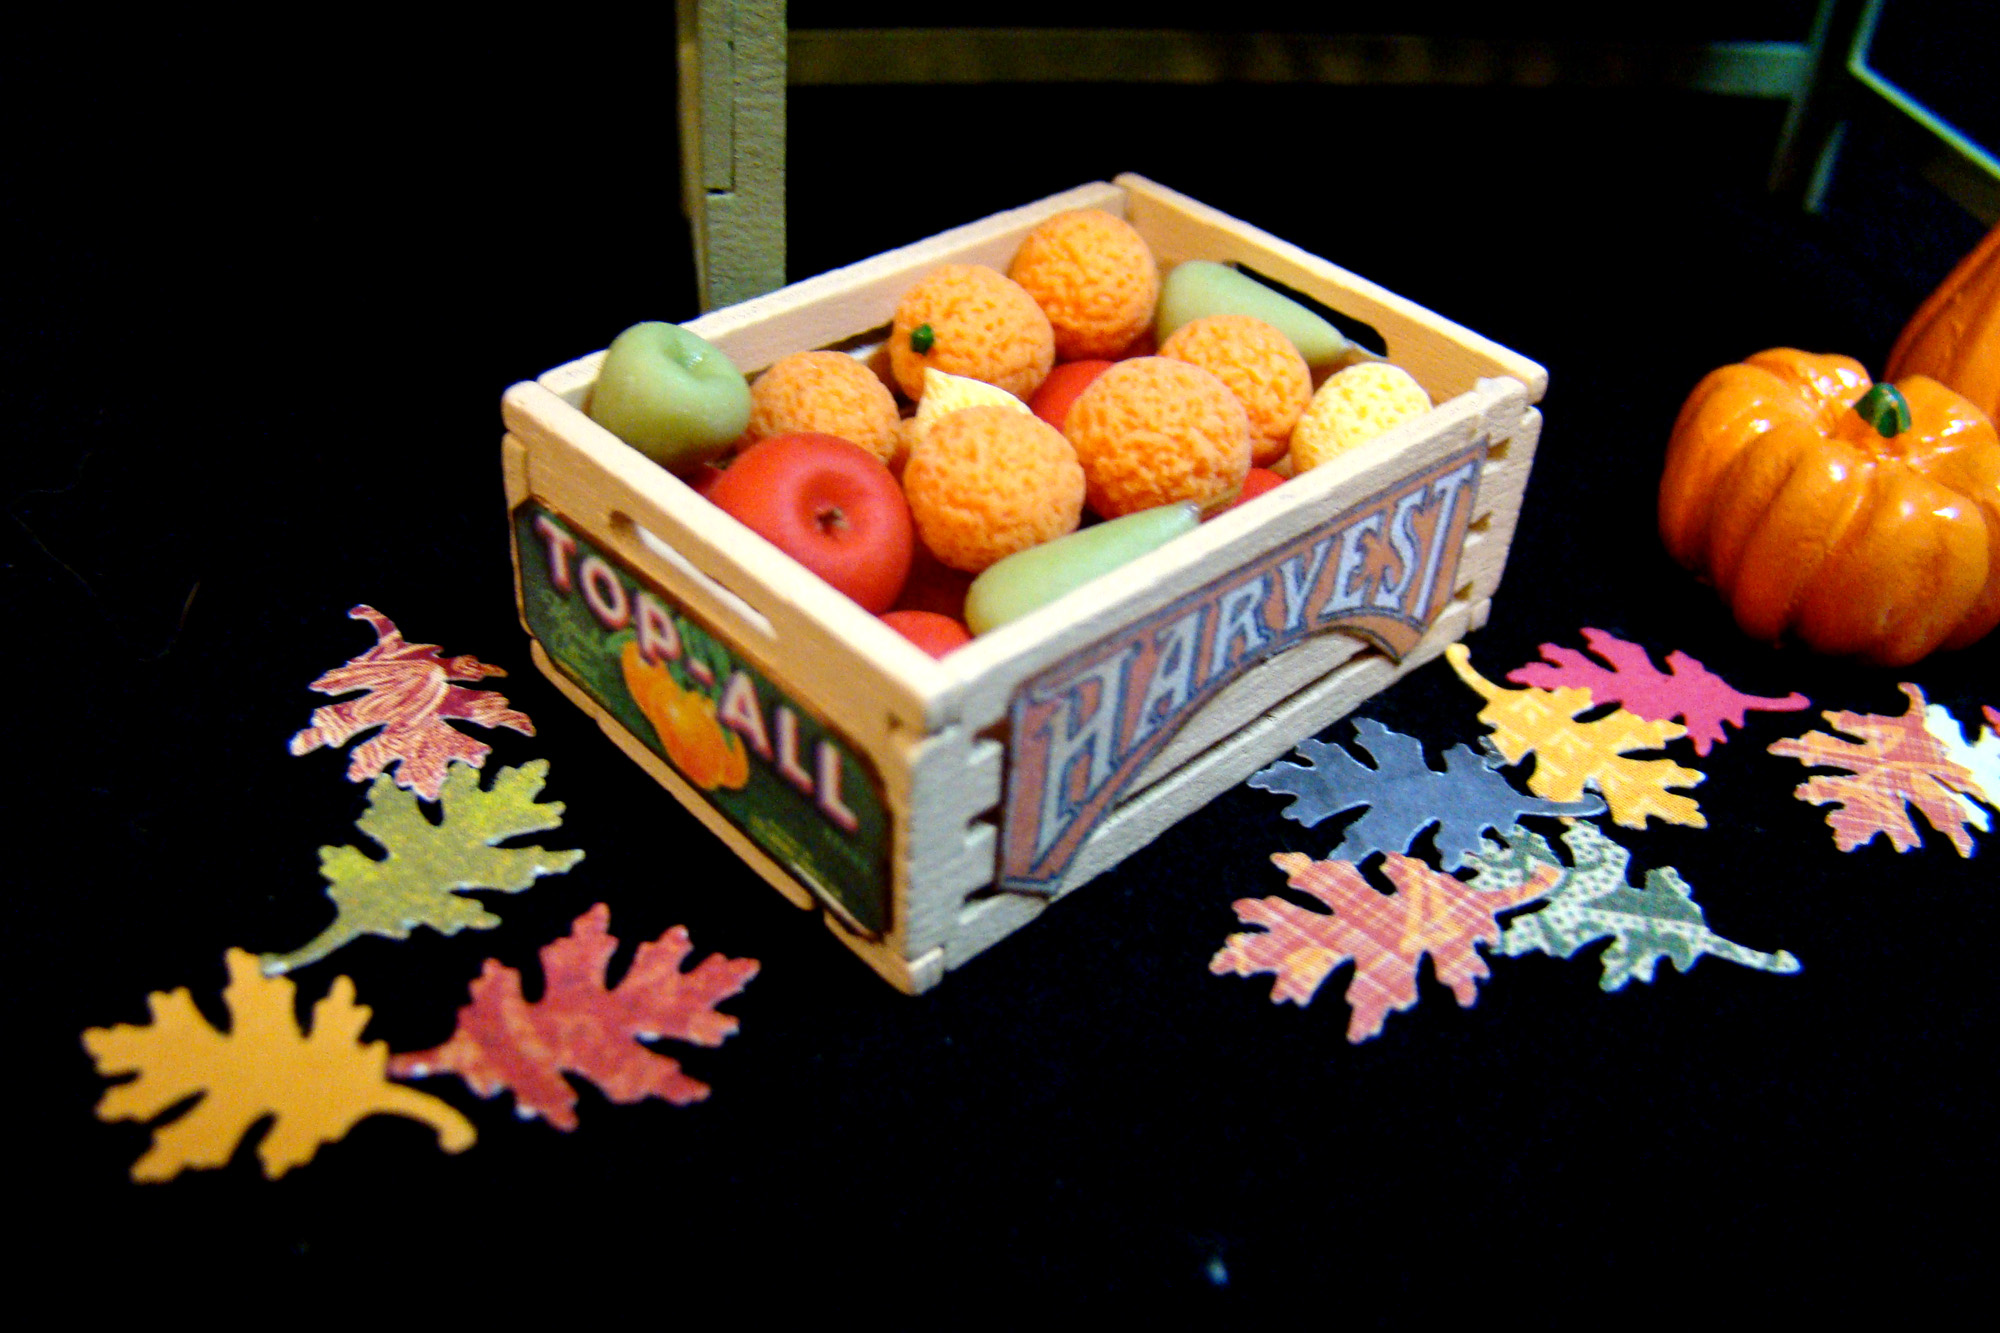
This Mini Cookie Sheet is loaded with a Tall Christmas Tree Cupcake and an assortment of tarts. There’s a Tiny Strawberry Tart, a Tiny Fruit Tart with Shortbread Crust, a Mango Blueberry Fruit Tart and a Tiny Mixed Fruit Tart.

This White Ceramic Serving Tray or Baking Pan holds the new Tiny Christmas Donuts.

I made a festive wreath from a length of the new Mini Red Pip Berry Garland and the new Snowy Christmas Resin Cabochon Mix. This mix has some of the cutest little decorations, including a tiny snow globe.

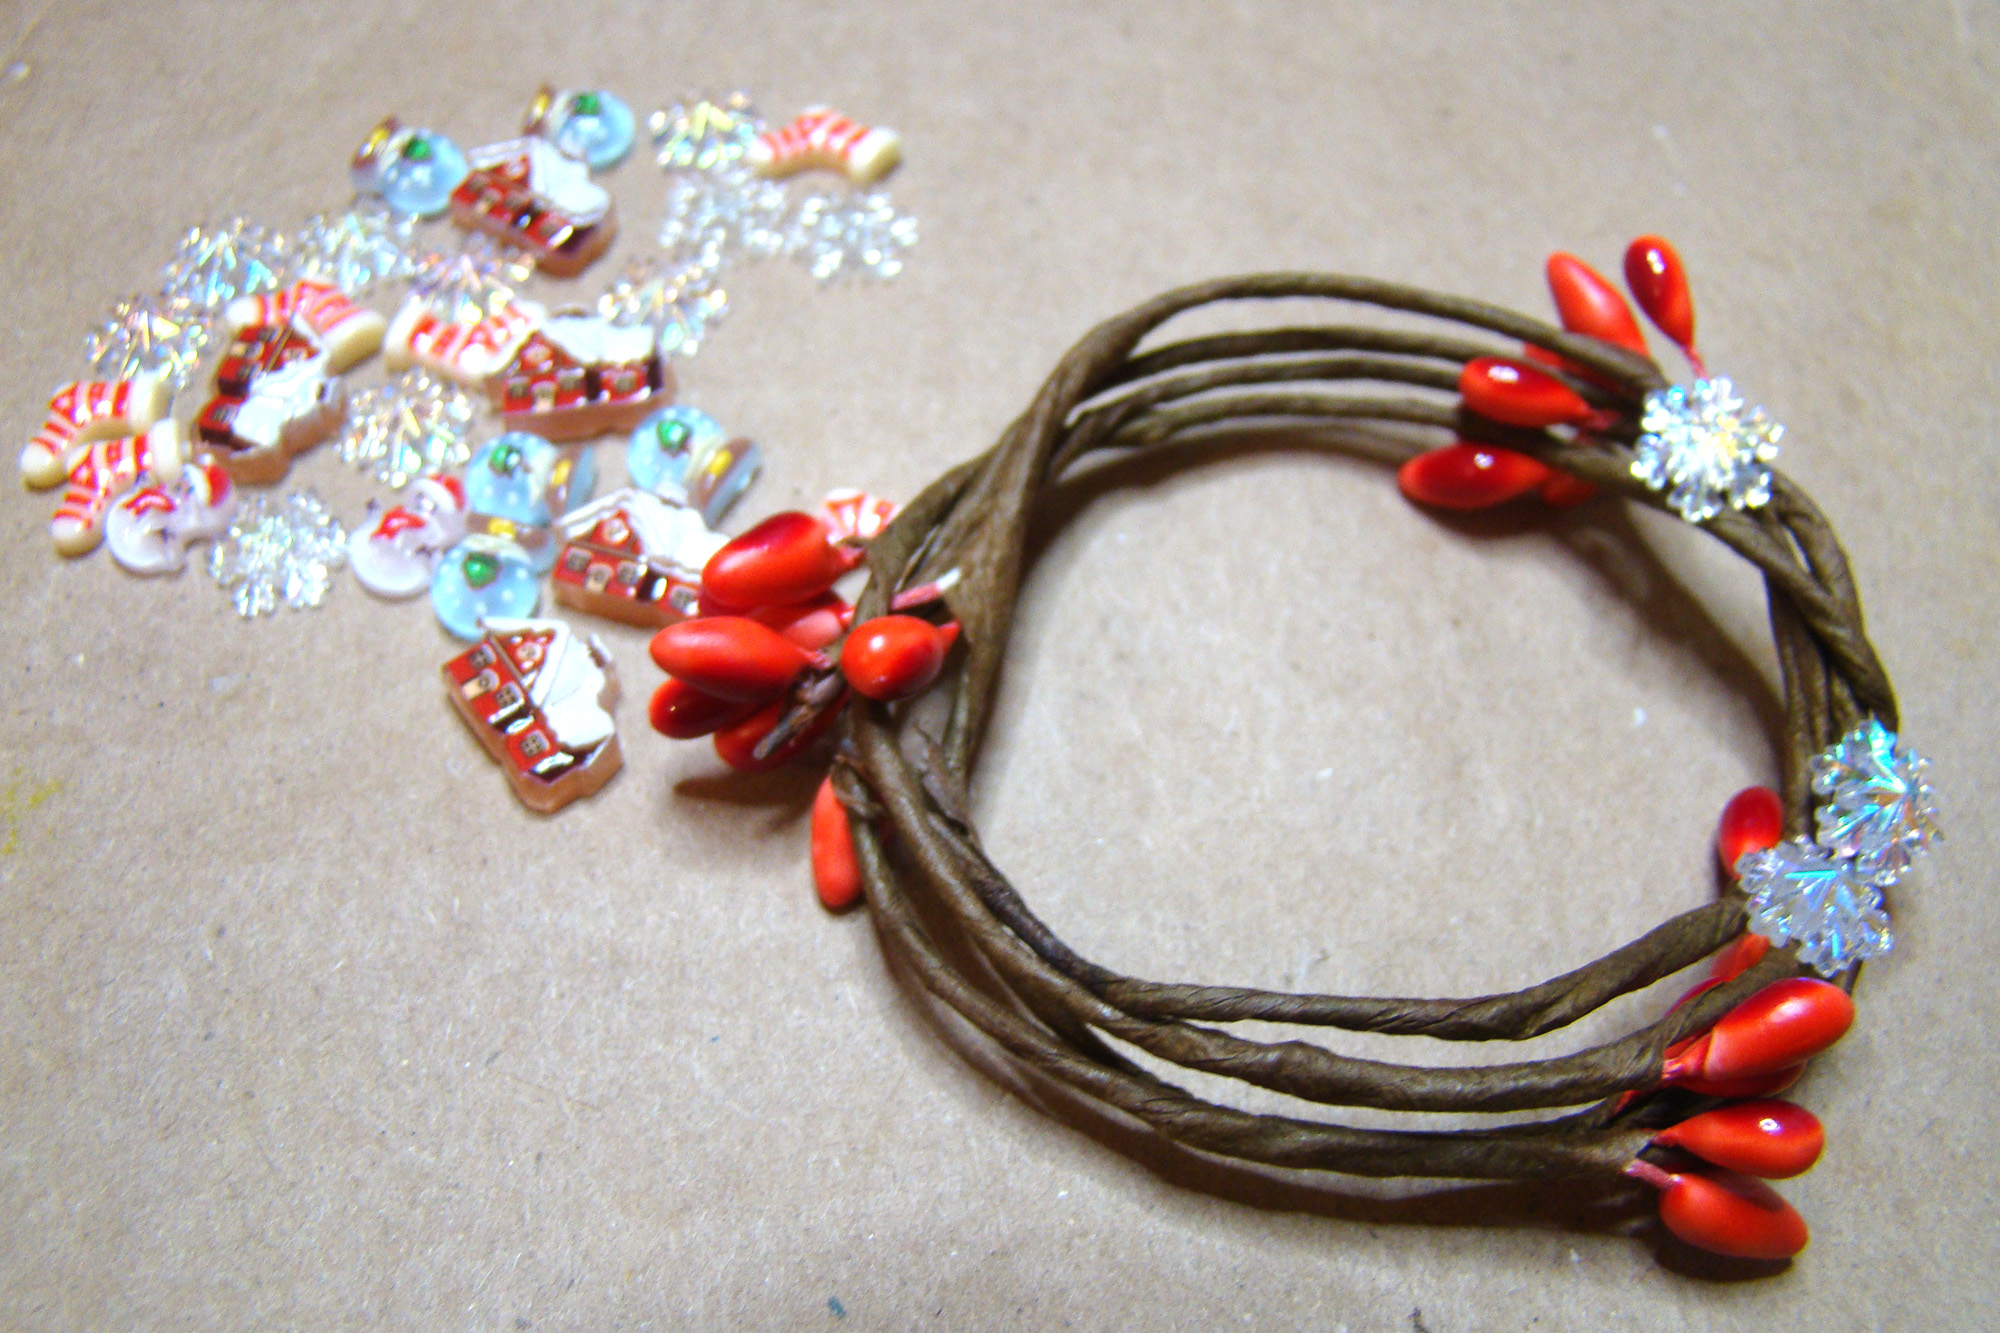
For this project I opted to keep it simple and just used the snowflakes from the mix.

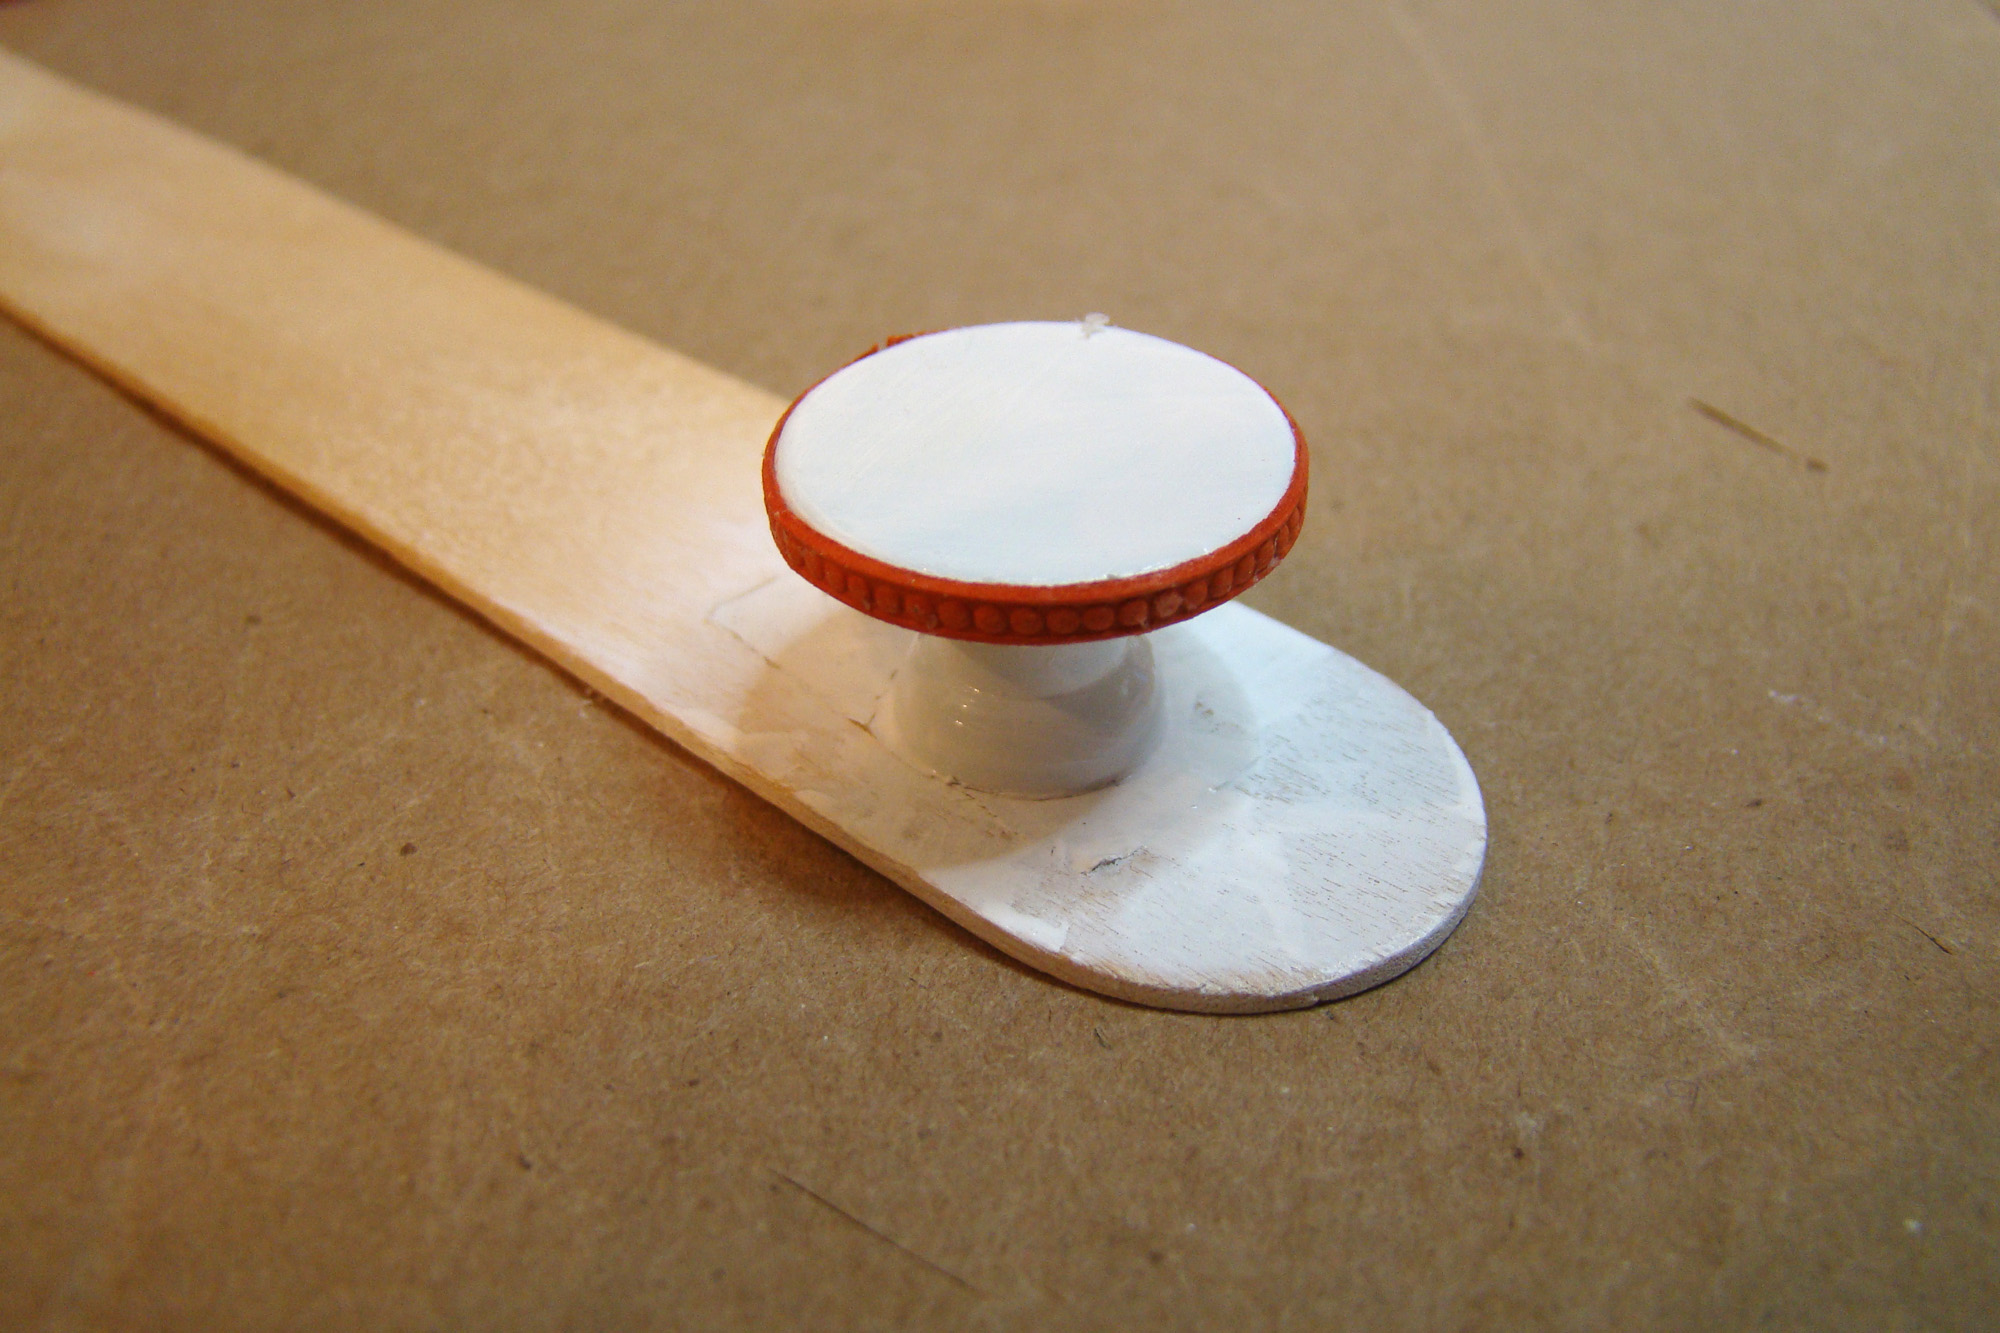
A Wood Double-Layer Rack holds the plates next to a Tiny 3D Resin Santa which reminds me of a Christmas bell. One of the new Christmas Teapot Set -Red sits on the top shelf along with the Square White Ceramic Canister which holds Mini Silverware.

Filling out this brunch banquet are a Yule Log Cake and a Plum Pudding Cake with Holly next to a gold Metal Cake or Pie Server.

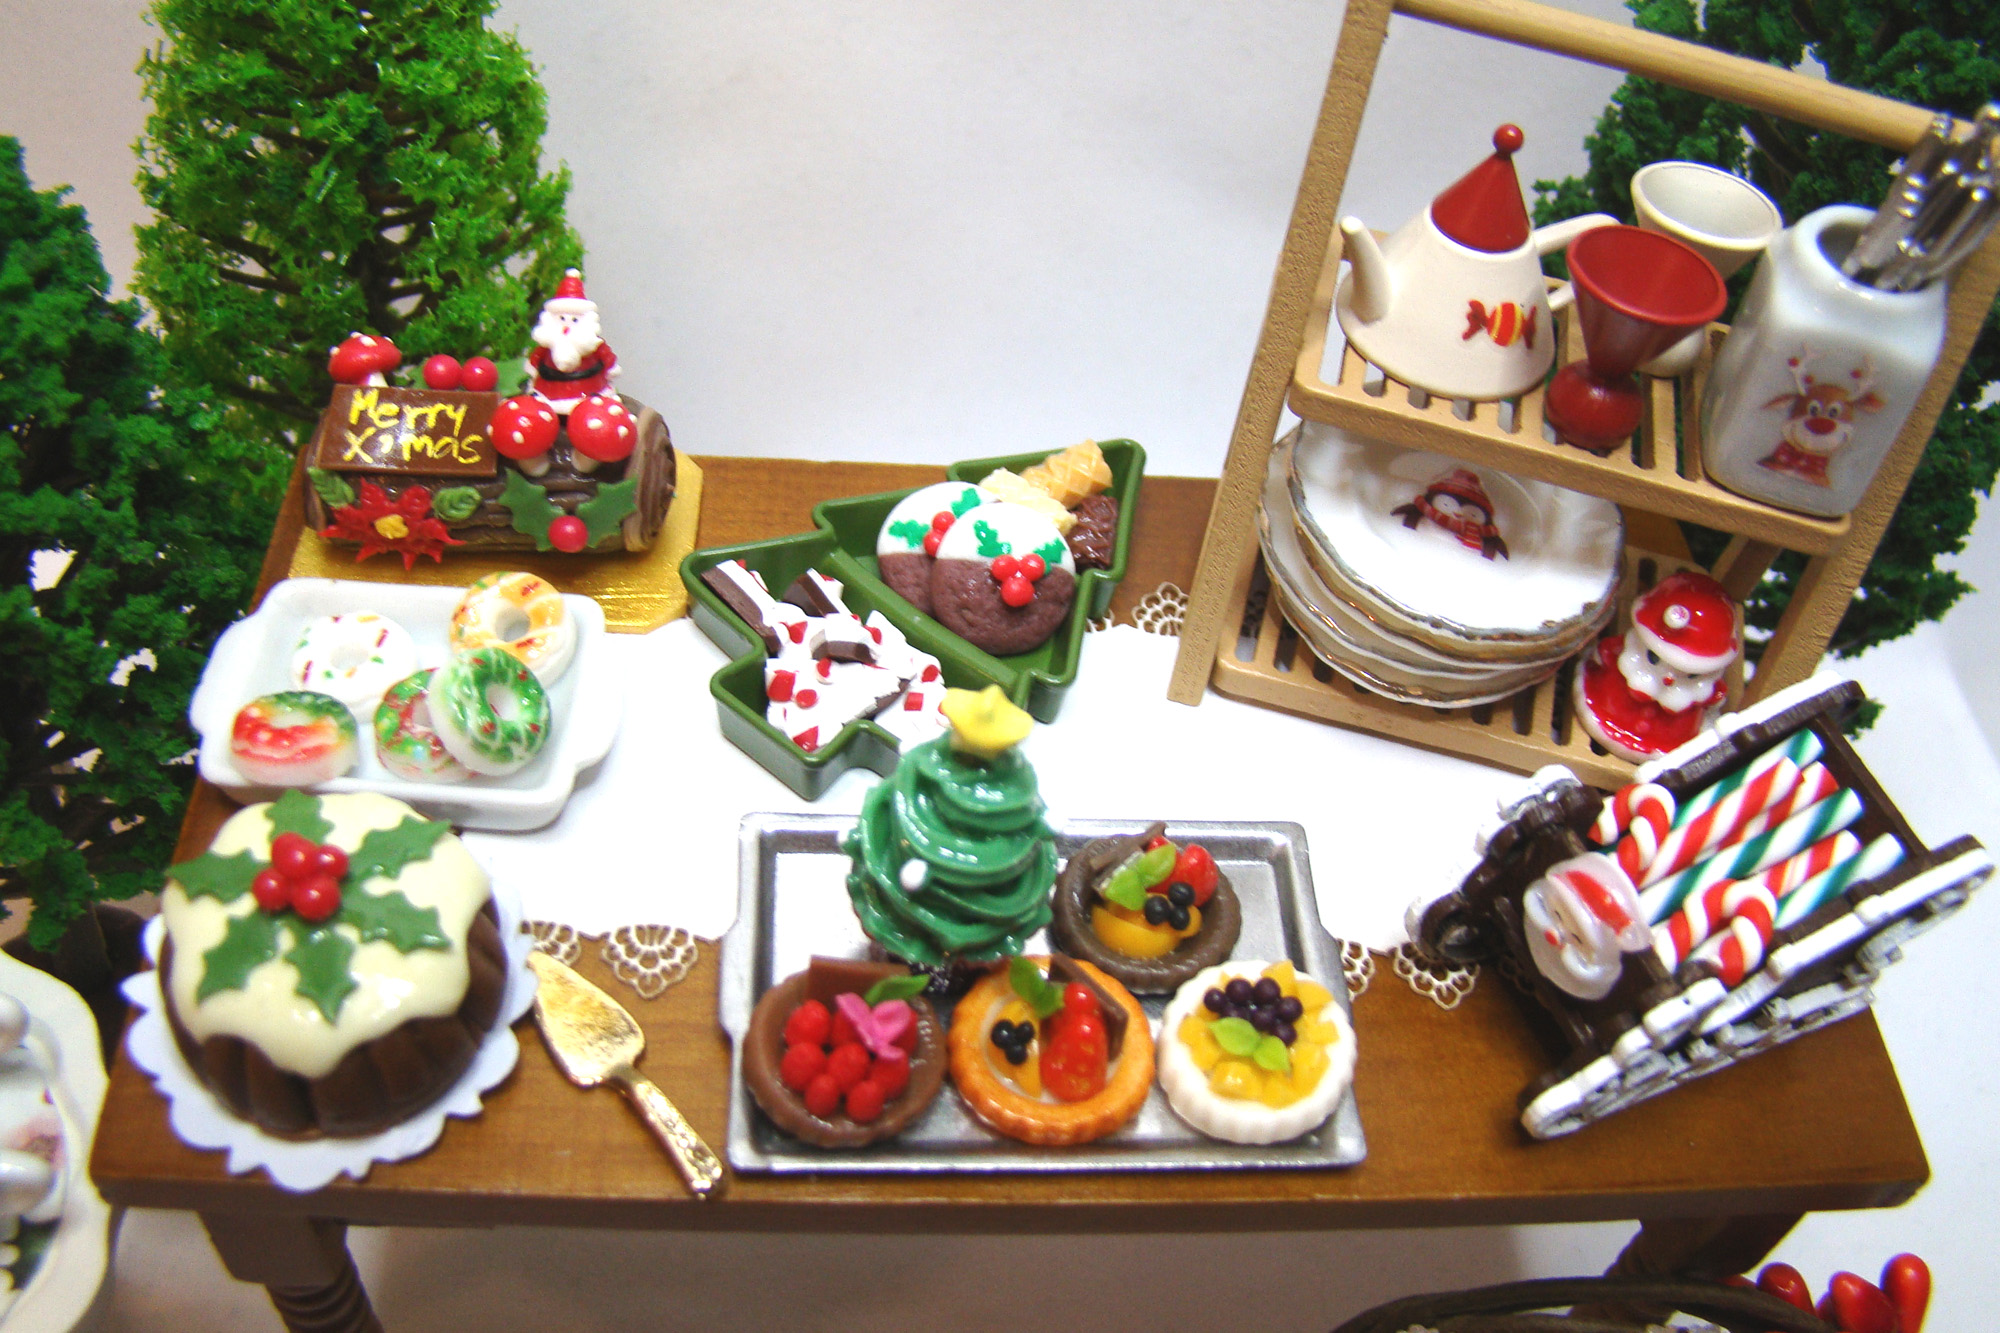
The pie crust table also holds one of the new Red Splatter Coffee Pots next to the mugs and candy dish.

Thanks so much for stopping by! I hope you’re inspired to make a holiday buffet of your own! The wonderful supplies I used may be found right HERE.

Candy Corn Harvest Table

As Christmas creeps closer and closer I find myself holding onto Autumn, unwilling to trade candy corn for candy canes just yet. Welcome to my harvest display.

The Leafy Swirl Desk seemed the perfect setting for pumpkins and fall leaves. I painted the legs in a grassy green acrylic paint then assembled it with tacky glue. The edges of the tabletop were painted brown then a wood grain paper was glued on top.

I made a couple of the sweet treats for the display, starting with some turkey cookies. I had seen these in both cookie and cupcake form in real life and thought it would be fun to make them in miniature. The cookies are made from paper clay using the Mini Silicone Mold – Biscuits & Bread. Once dry, they were painted beige then given a baked look with brown pastel chalk. The turkey’s feathers are Candy Corn Polymer Clay Slices glued in place. I added the turkey’s features with liquid polymer clay that was baked between each color to keep the colors from running together. Coloring white liquid clay is as easy as mixing in pastel chalk dust. I made way too many of these but am happy to have extra cookies for a future project or two!

I displayed the cookies on a Mini Cookie Sheet along with a Candy Corn Cupcake, two of the new Tall Chocolate Cupcakes with Candy Corn and a handful of the new adorable Tiny Candy Corn.

The turkey cookies aren’t the only real life inspiration I got for this project while searching for seasonal treats. I found a few instances of cakes decorated with shards of dark chocolate and imitated that design feature with thin triangles of dark brown polymer clay.

A disc of brown polymer clay ‘cake’ was baked then glazed with a drizzle of tinted liquid polymer clay (love this stuff!) and baked again. Besides the chocolate shards, I used the new Autumn Cake Decorations Mix as well as the 2mm Halloween Mix Tiny Faux Candy. Super fancy!

The larger cake sits on a Mini Cake Stand. I love the light turquoise that the stand comes in but decided to go for a white version so gave it a quick white spray paint primer followed by a few coats of white acrylic paint. It’s stuck to a craft stick with double sided tape for ease of handling. It was finished with an edging of thin orange trim from the Halloween Dresden Borders Set.

I knew this display needed to include a pumpkin pie. I used one of the Mini Pie Pan Set as a template to cut a round piece of polymer clay to fit inside. The crust is a thin rope of the same clay that was crimped using a round toothpick.

It got baked right inside the pie pan then pastel chalks were used to give it a toasty look.

A bit of pumpkin orange clay was set inside the crust then textured with a ball of foil and a tootbrush.

Once that was baked I added a touch of thinned brown acrylic paint around the pie’s border and topped it with a dollop of polymer clay whipped cream.

Here’s everything set into place. The pumpkin pie joins one of the new Mini Apple Pies. Both sit on new Tiny Doilies – Orange – Set of 4. There is one of the gorgeous 18mm Tall Pumpkin Soup Tureens (how I wish I owned one of these in real life size), and a 1:12 Resin Brandy Bottle that I added a label from the Cafe Bottle Labels Half Sheet. The Even Tinier Bottle on the right is filled with Candy Corn Polymer Clay Slices.

I pulled some labels from the Tiny Labels for Crates, Jars & Cans Collage Sheet for the Small Wood Crate with Handholds. The Harvest label on the front is from the Fall Market Signage and Labels Collage Sheet. It’s filled with Mini Oranges, Mini Lemons, Mini Pears and Red Apples – 1:12 Scale. Adding to the scene are pumpkins from the Mini 3D Pumpkins – Set of 5 as well as some leaves I made from autumn colored papers and a leaf punch.

Thanks so much for stopping by! I hope you’re inspired to make a harvest display of your own! The wonderful supplies I used may be found right HERE.

Design a site like this with WordPress.com
Get started