This project all started with the new Tiny Black Caviar microbeads from Alpha Stamps. I love caviar and they look exactly like delicious sturgeon eggs to me. Once I made that connection, the project fell right into place. Caviar is a special treat that I associate with a special occasion, the perfect date night.

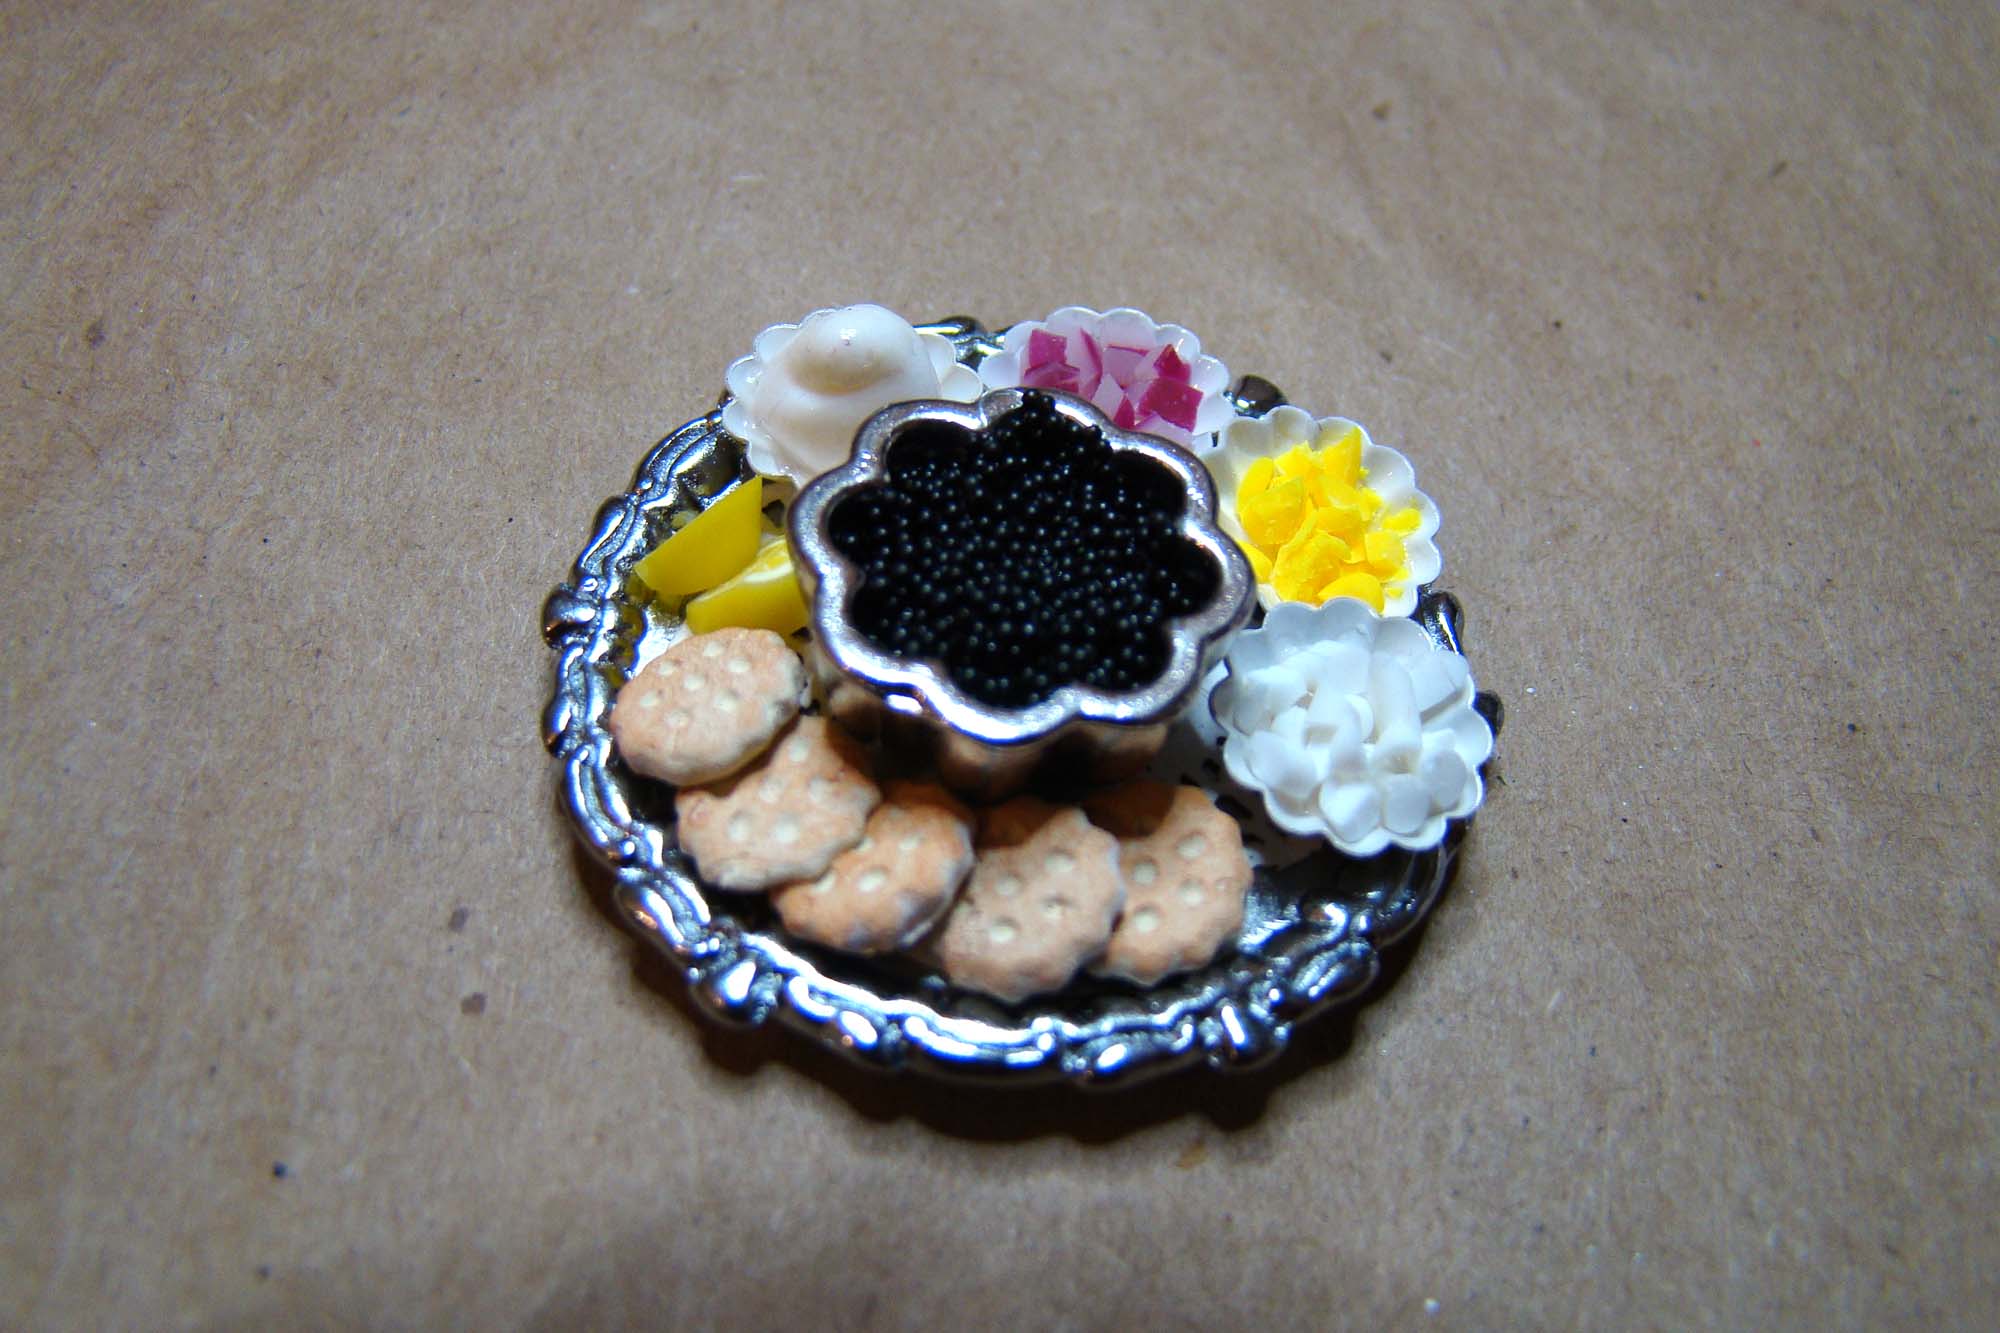
I started with making all the accompaniments in miniature. To make little white scalloped ceramic dishes to hold the traditional condiments I used the new 10mm Silver Fluted Bead Caps and gave them a few coats of white nail polish.
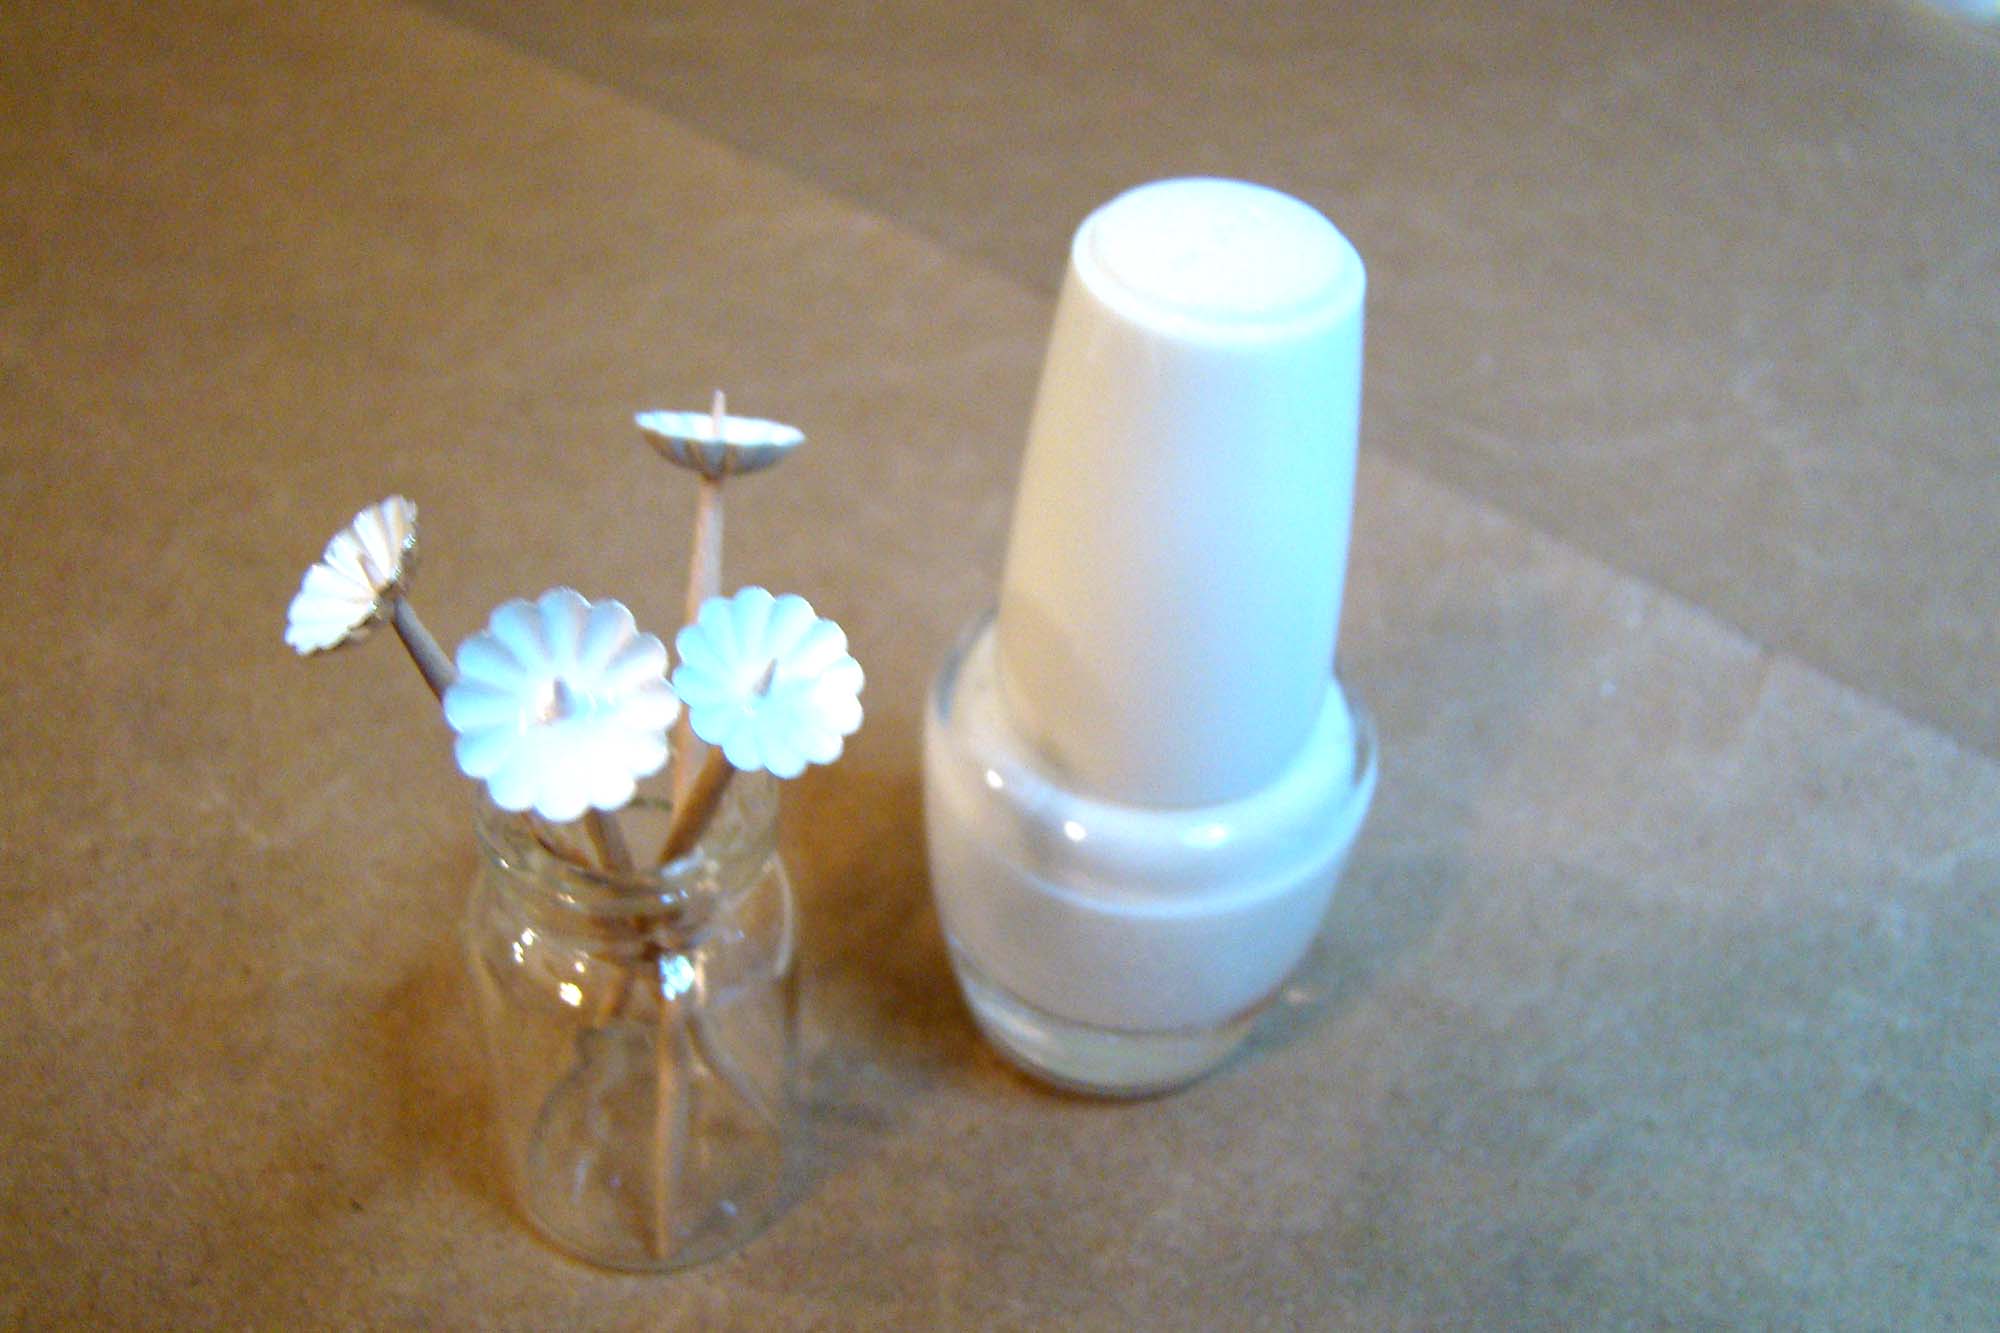
Creme fraiche, egg and red onion are traditionally served alongside caviar. Those were made from polymer clay. The eggs were made by rolling very thin ropes of white and yellow clay. Those got chopped into small pieces after baking. The onion was done similarly with a mixture of translucent and purple clay layered together and sliced thin.
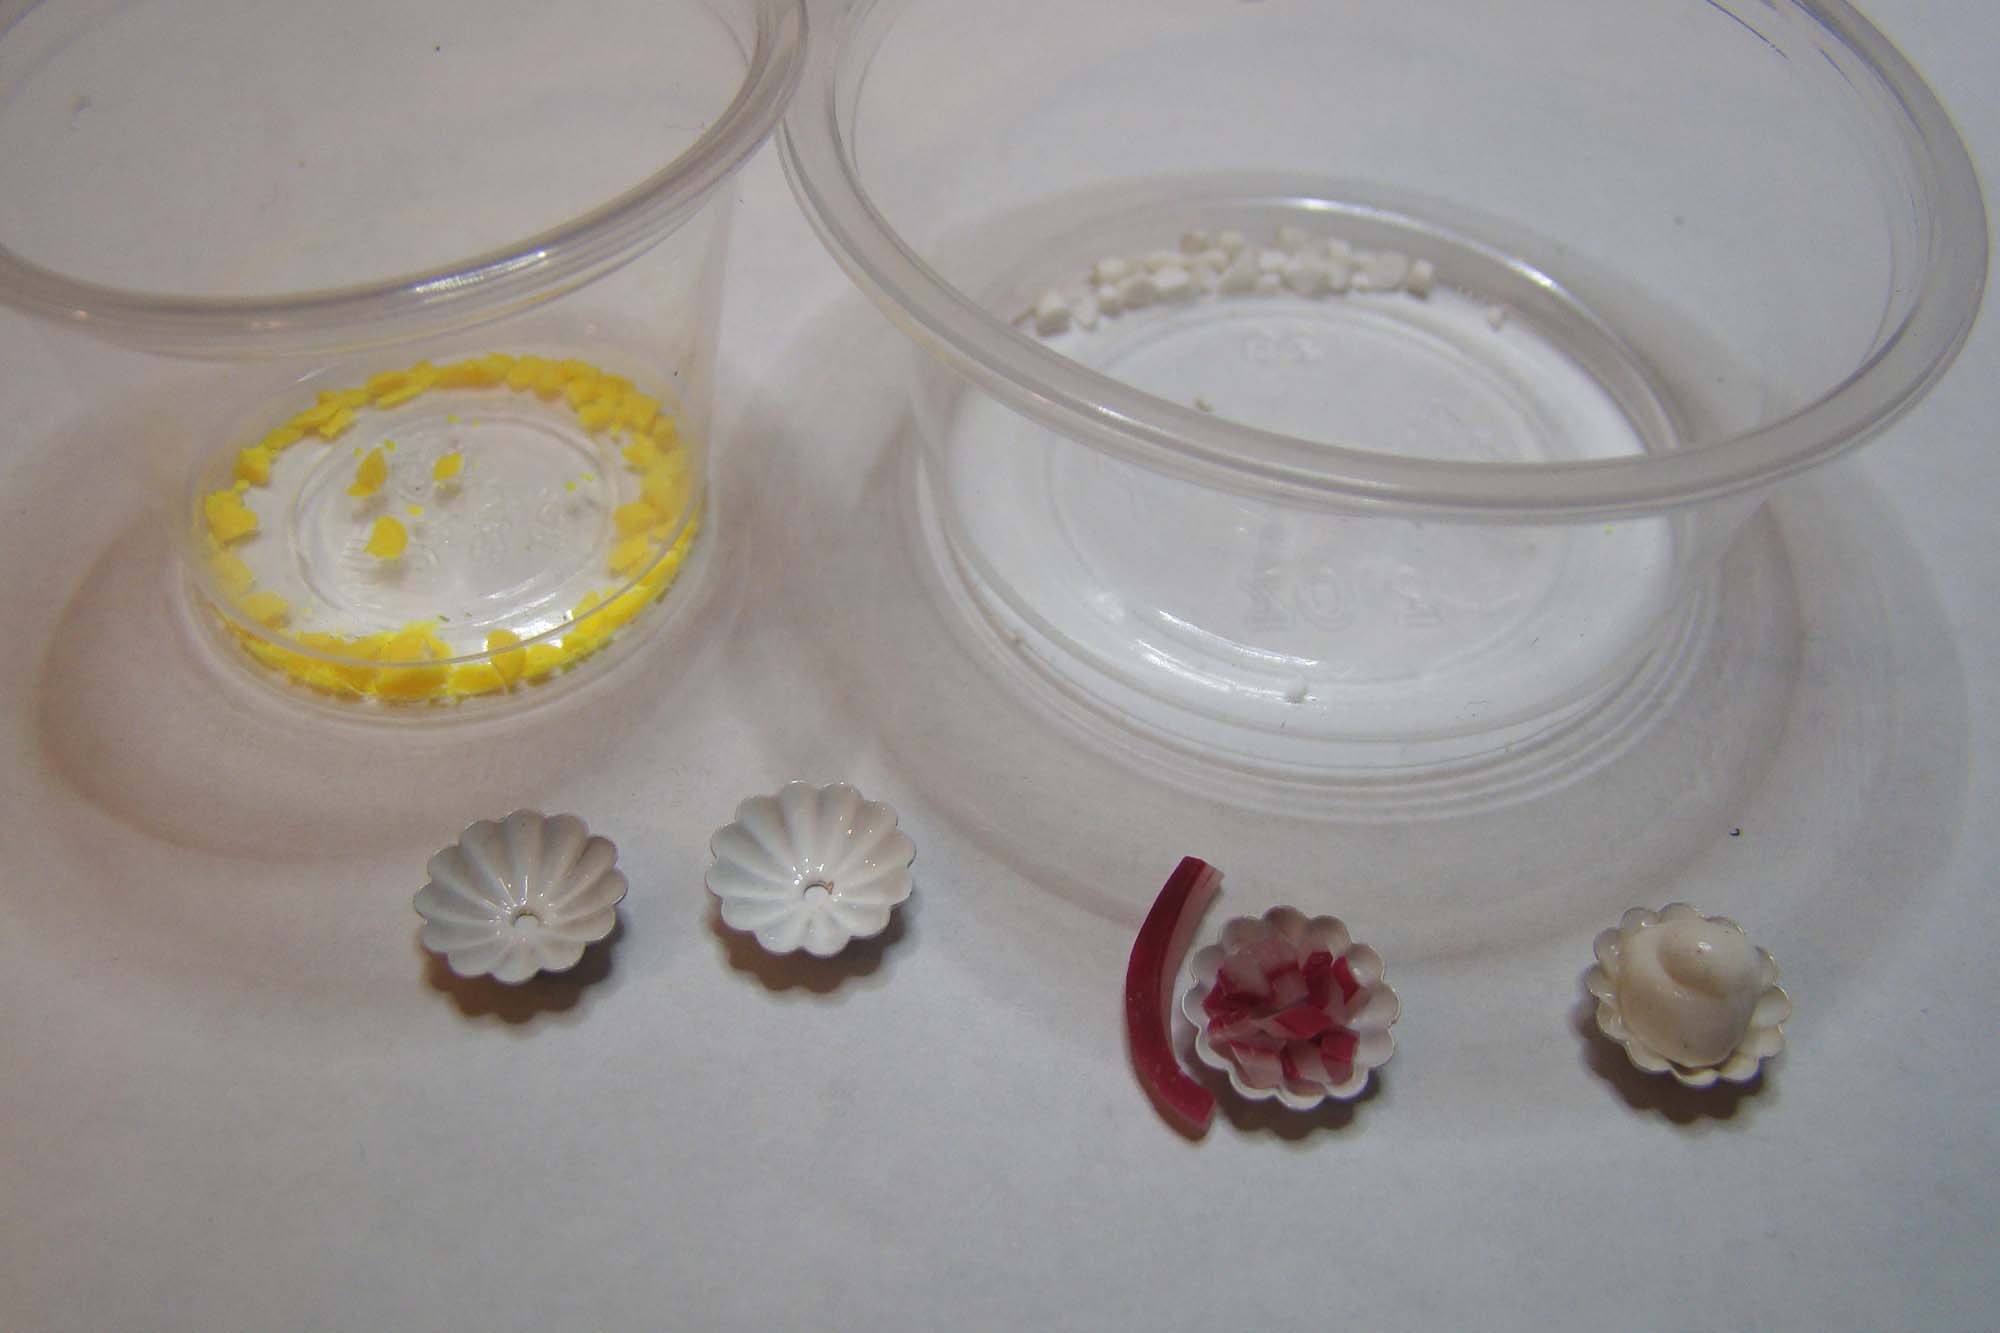
The dish of caviar was simply made by gluing the Tiny Black Caviar microbeads in an Aluminum Bundt Cake Pan. Everything was set on a Round Ornate Metal Tray with a Tiny White Doily.
The caviar service was completed with a few slices of Polymer Clay Lemon Cane and some tiny crackers made with the Mini Silicone – Biscuits & Bread Mold and paper clay.
Looks pretty realistic to me!
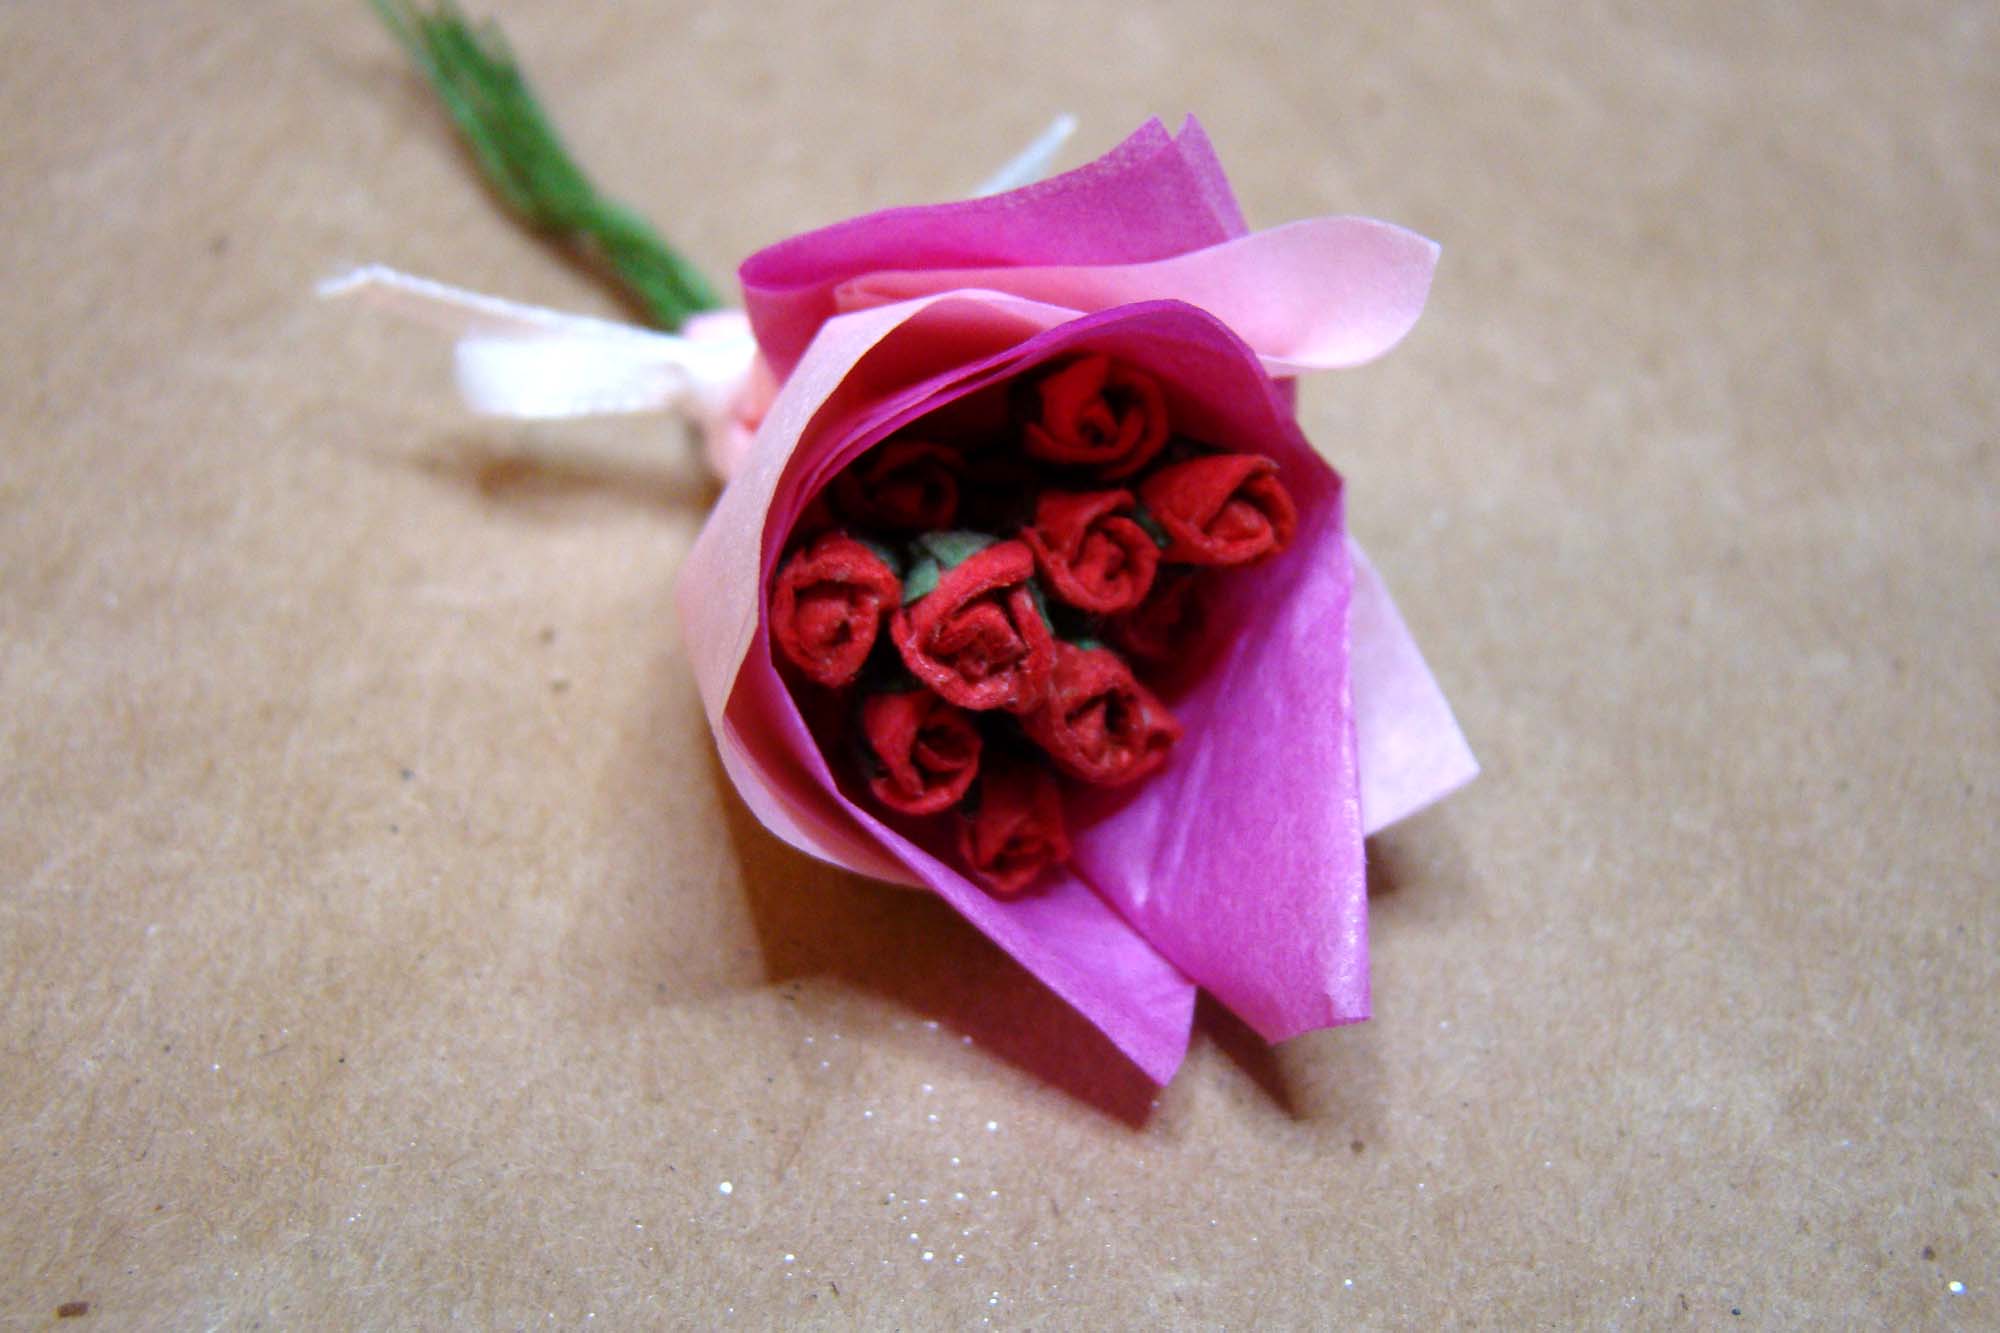
What else belongs with a fancy date night? Roses! This is a set of Mini Red Rosebuds wrapped in squares of tissue paper. My first few attempts at wrapping up a nice bouquet were a big failure so I looked at some videos on youtube on how to wrap full size bouquets for inspiration and it ended up being super easy.
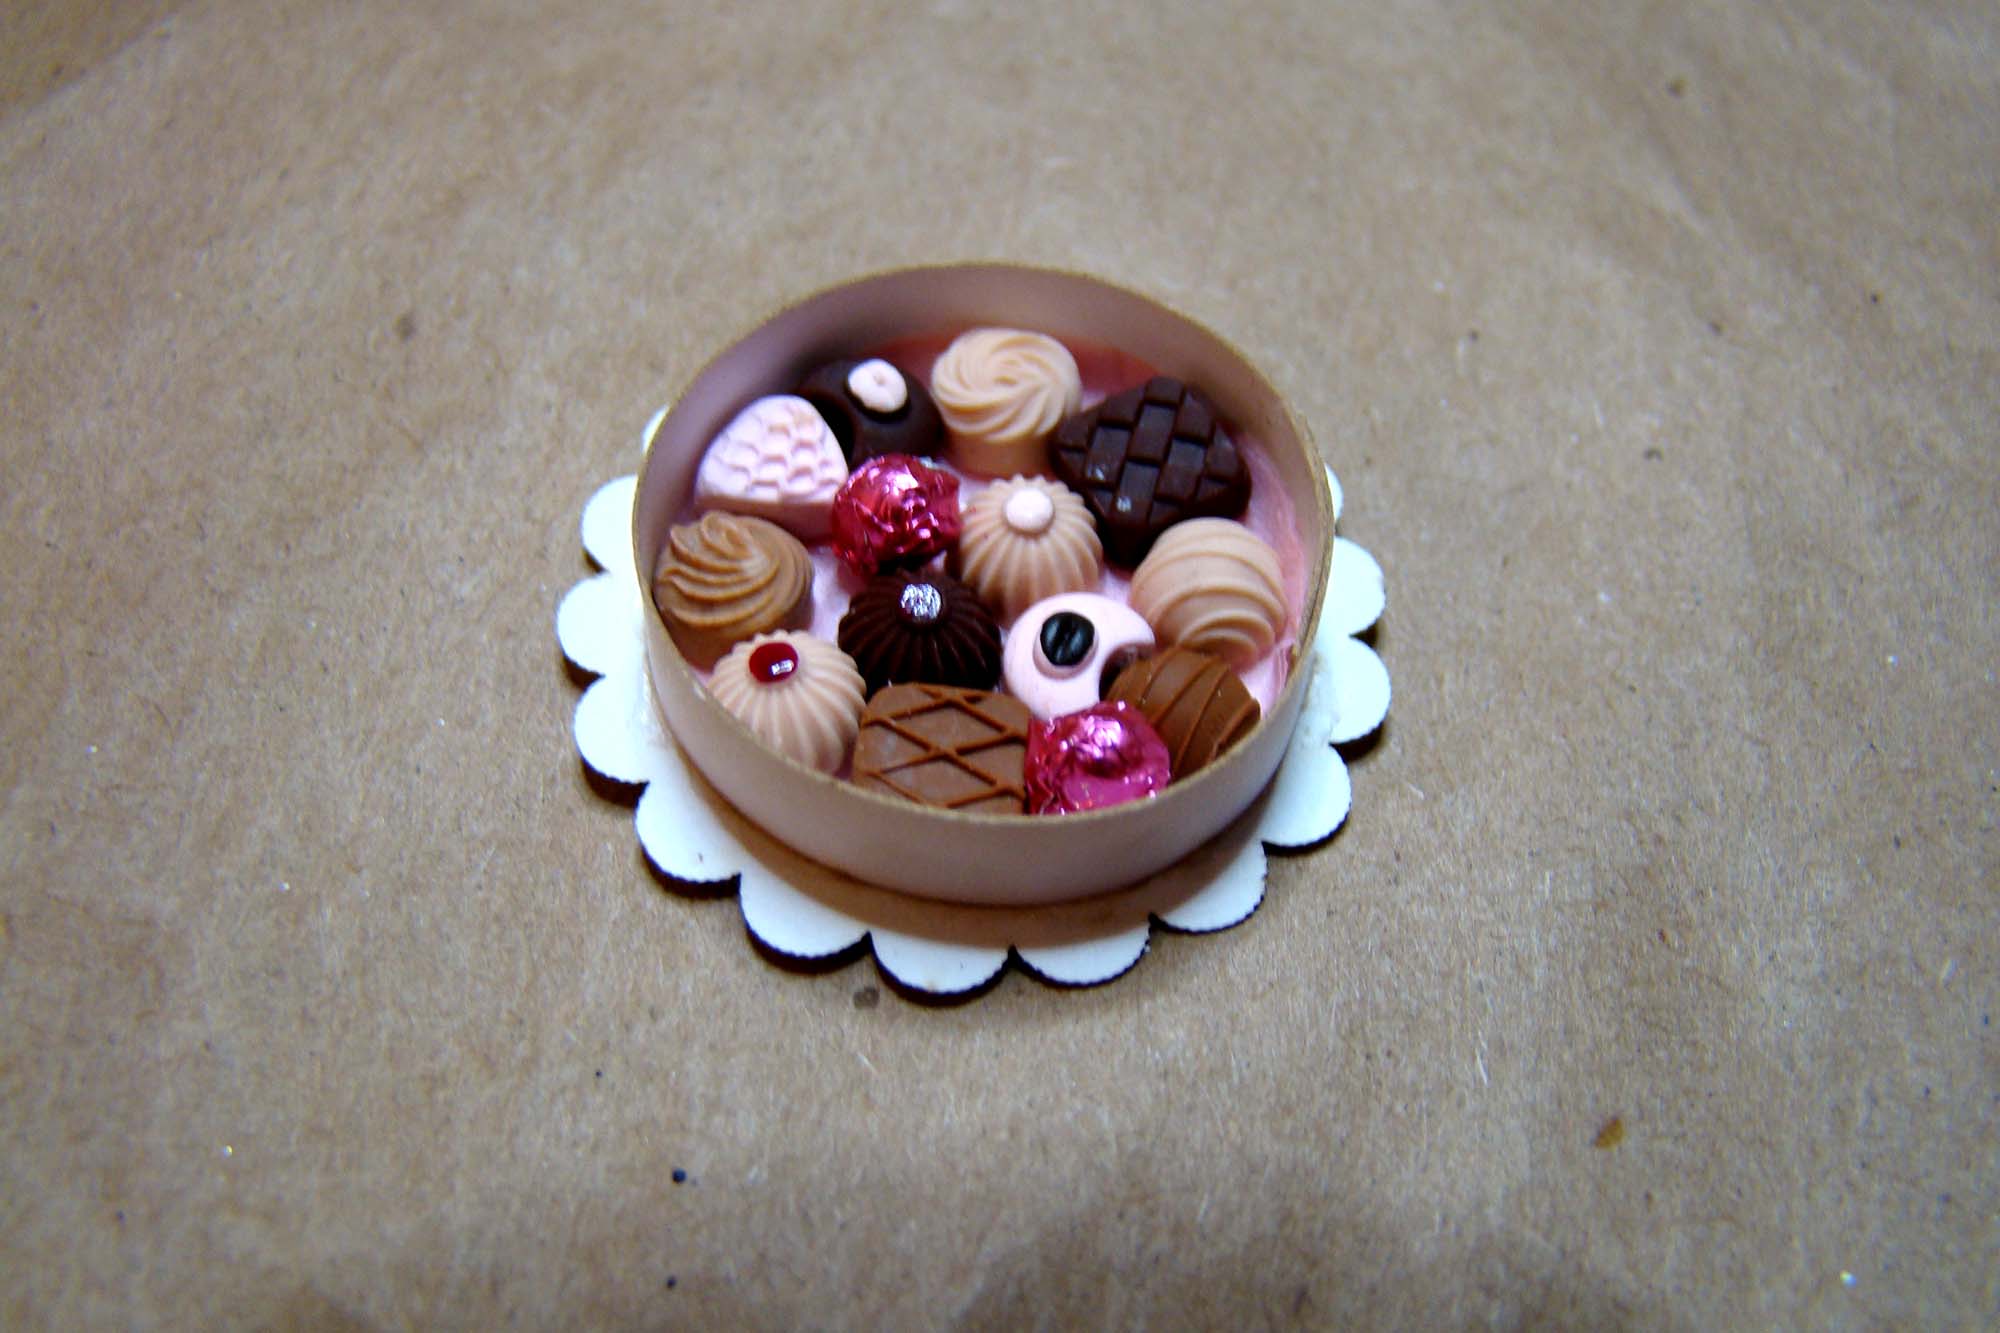
Caviar and flowers and of course a box of chocolates, a universal symbol of love. This was maybe the most fun tiny little thing I have made in a very long time.
The candy box is made from a Scallop-Edged Round Candy Box. Here’s how it comes before assembly.
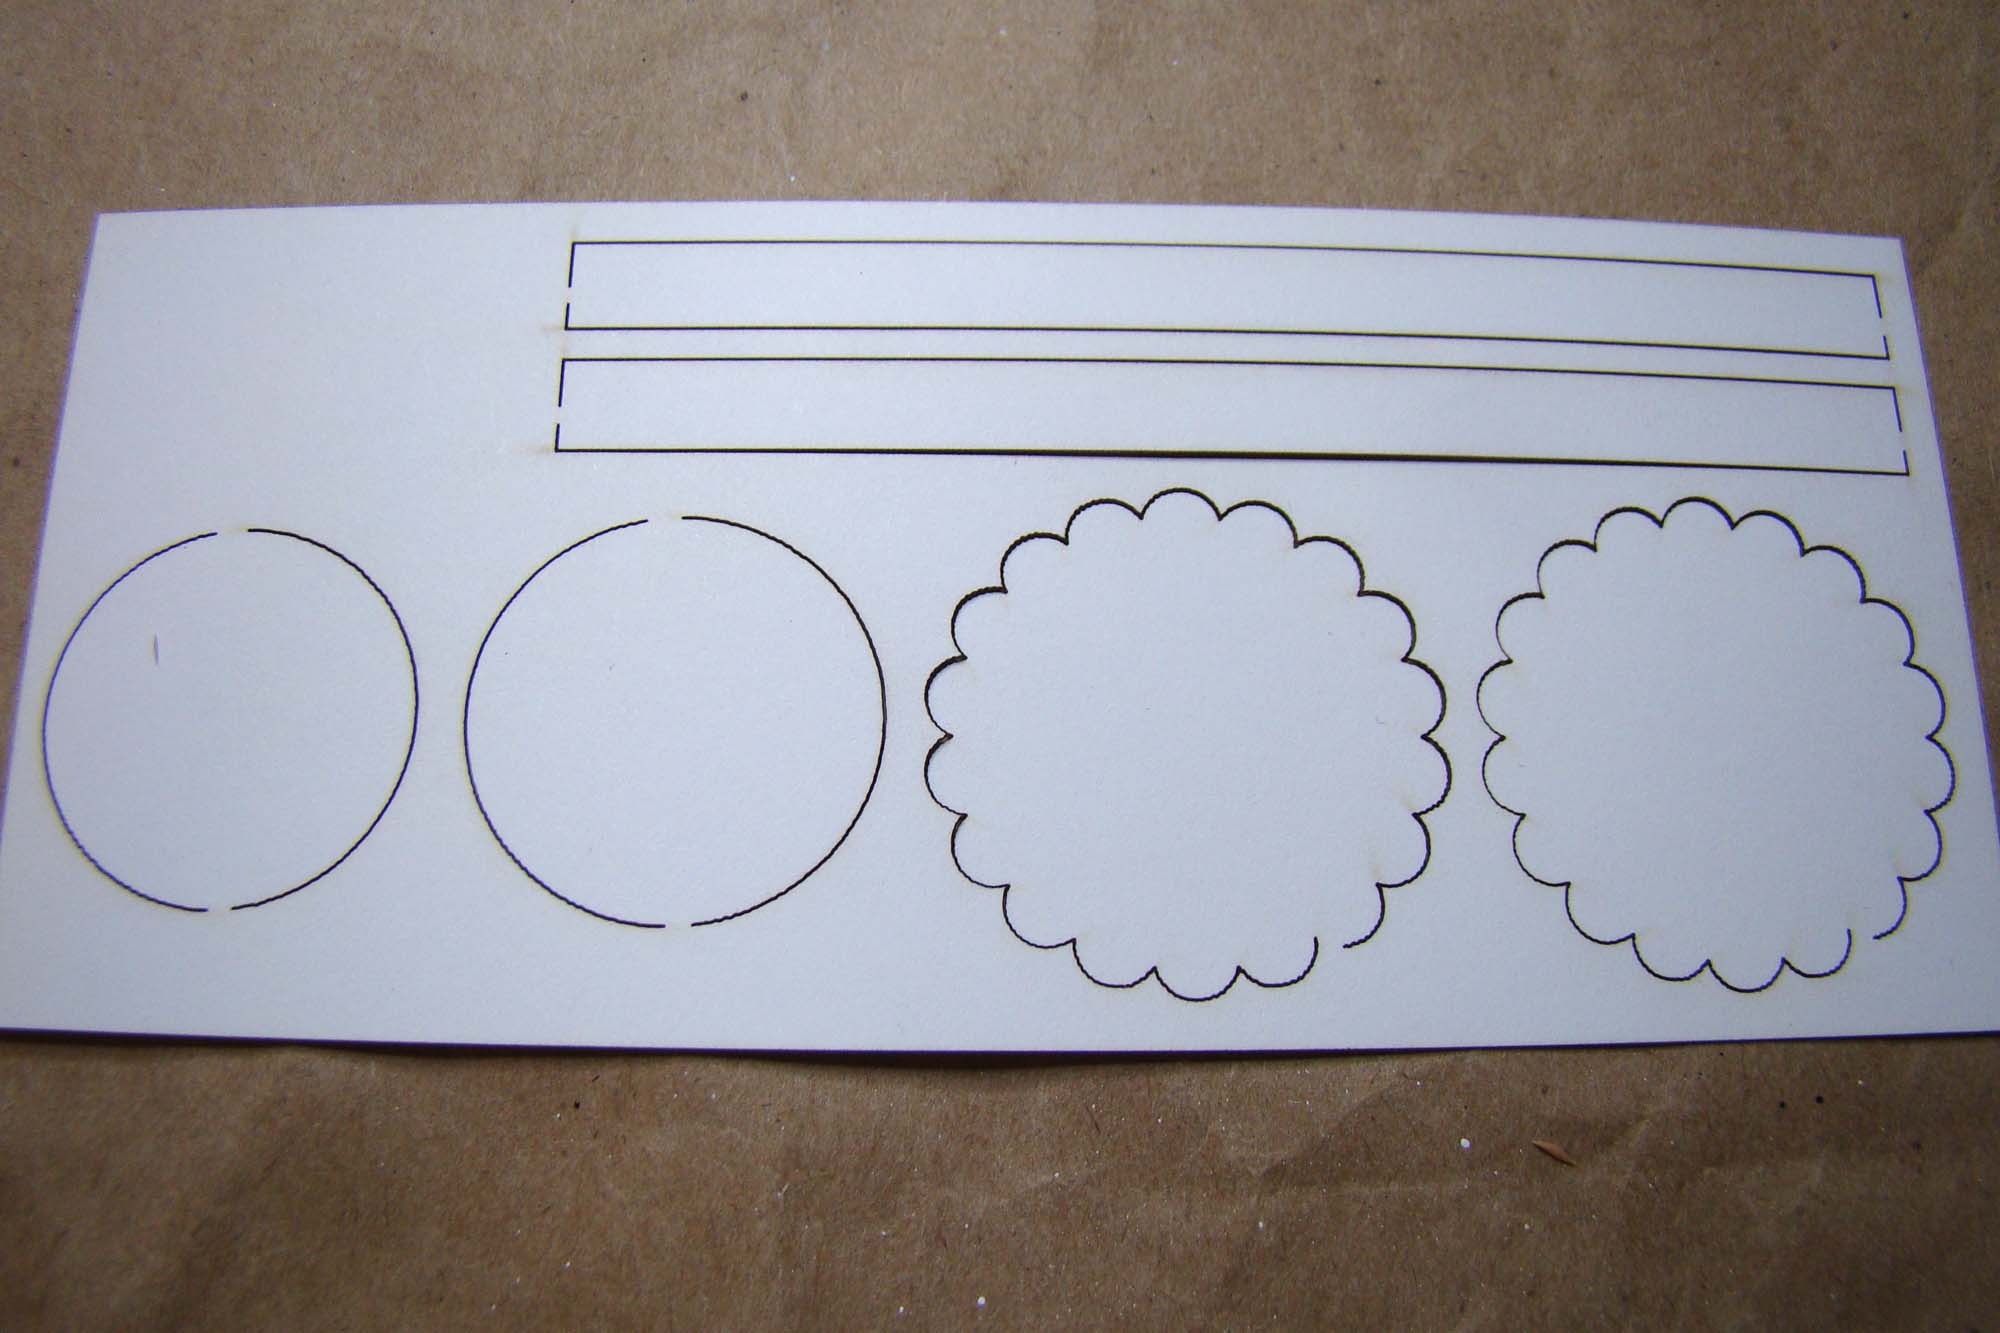
The scalloped circles are both the same size but one of the smooth circles is slightly larger than the other in order to fashion a lid.
I glued the smooth circles onto the scalloped ones.

Once the glue was dried the long strips were secured around the inner circles with a bit of tacky glue. I just held it in place for a bit until the glue set.

To fill the box I started playing around with the new Mini Silicone Chocolate Candies Mold. I did a search for chocolate box images to help determine the shades of polymer clay I wanted to use, imitating dark, milk, white and ruby chocolates Once the mold was filled I baked it for about 10 minutes then unmolded the candies.
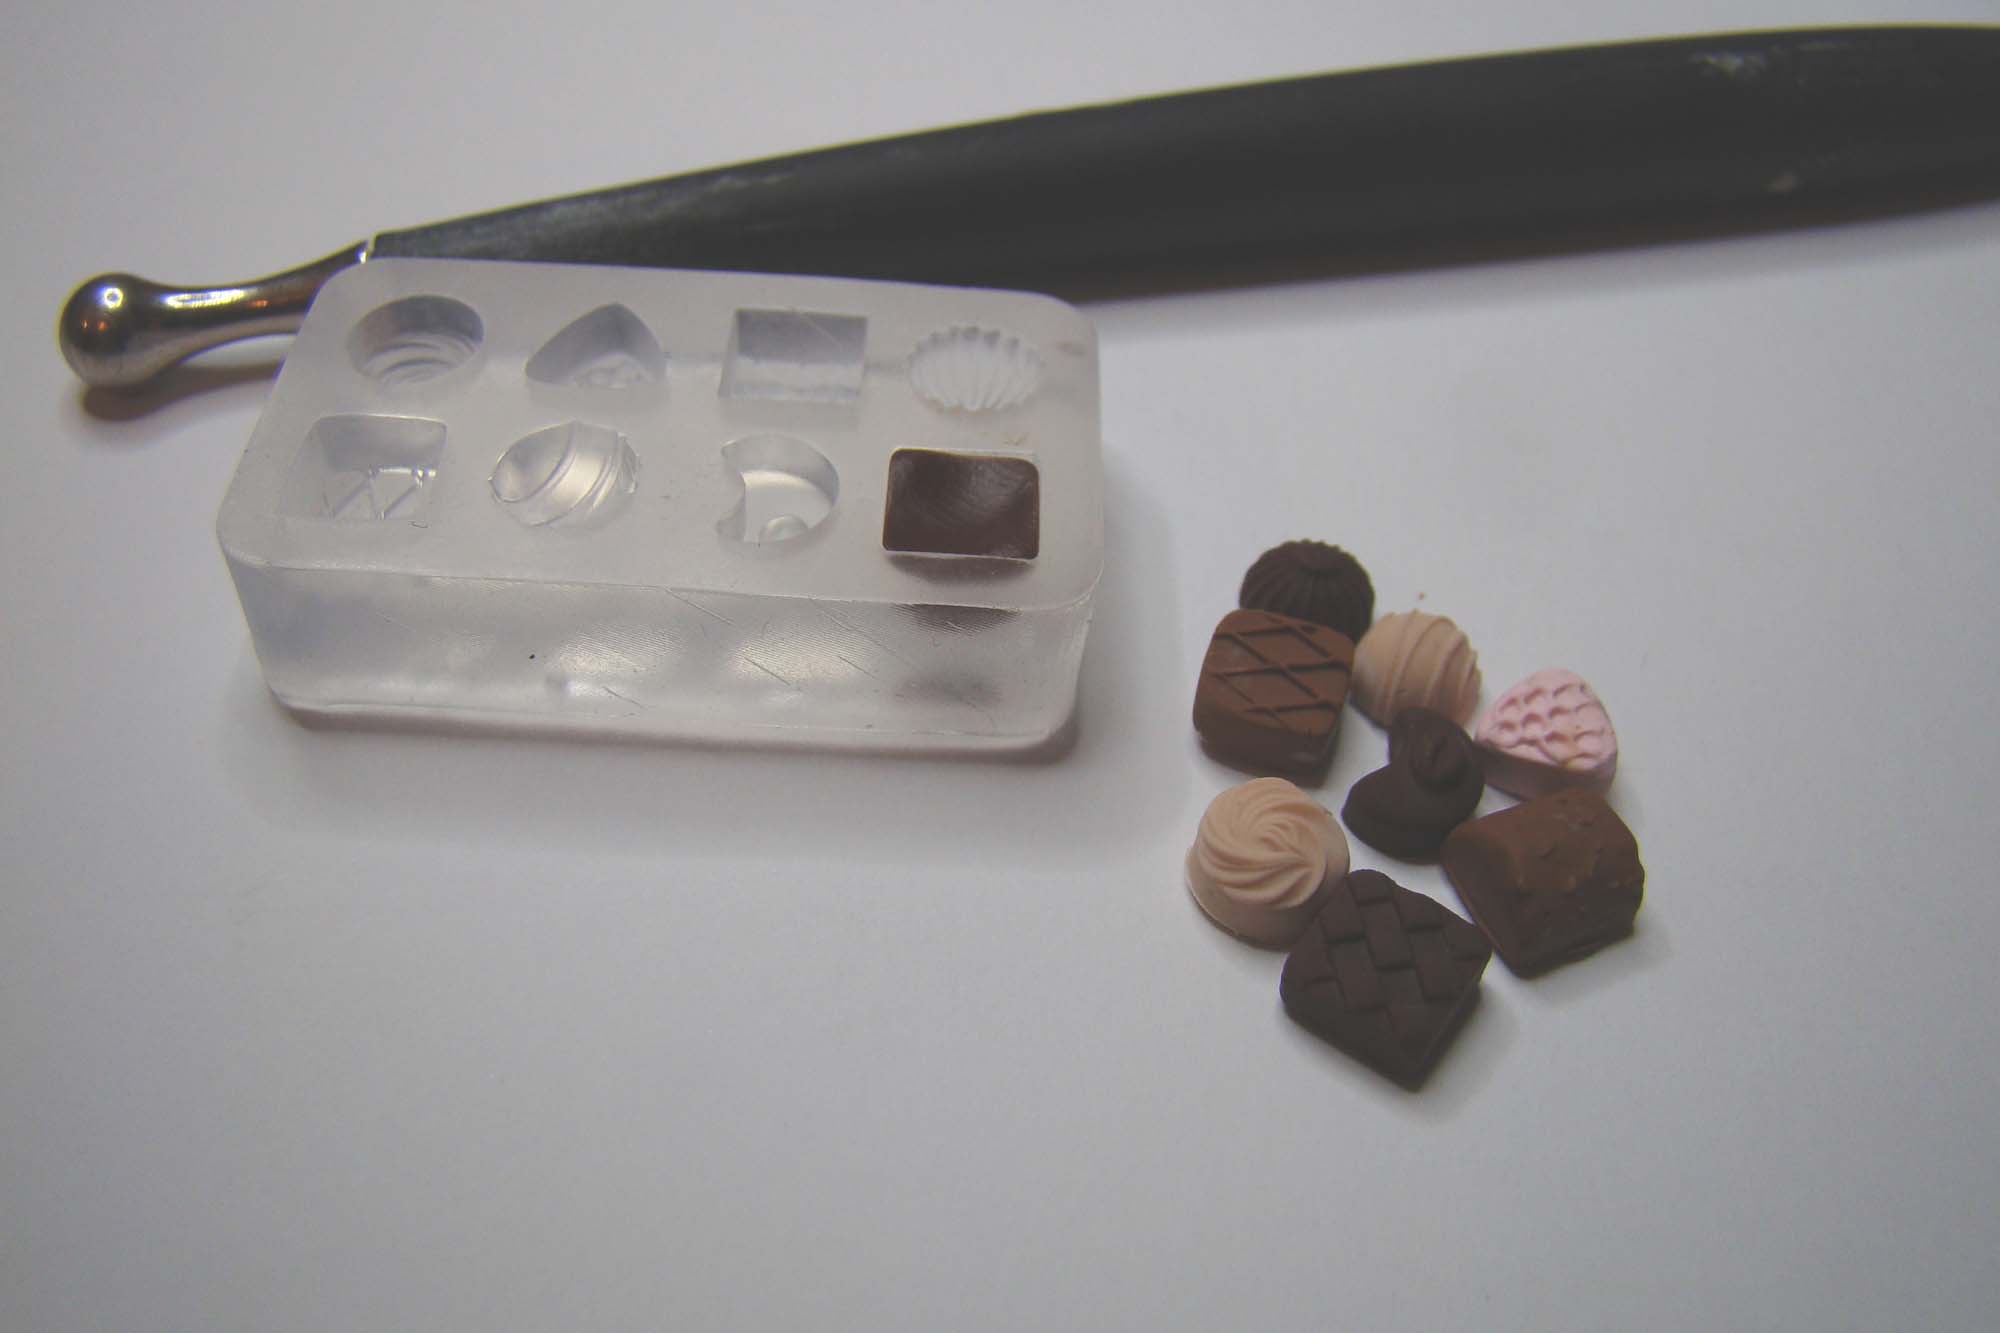
I also added a few of the 4mm Mini Chocolate Beads that were wrapped in Metallic Foiled Origami Paper to emulate liqueur filled chocolates.
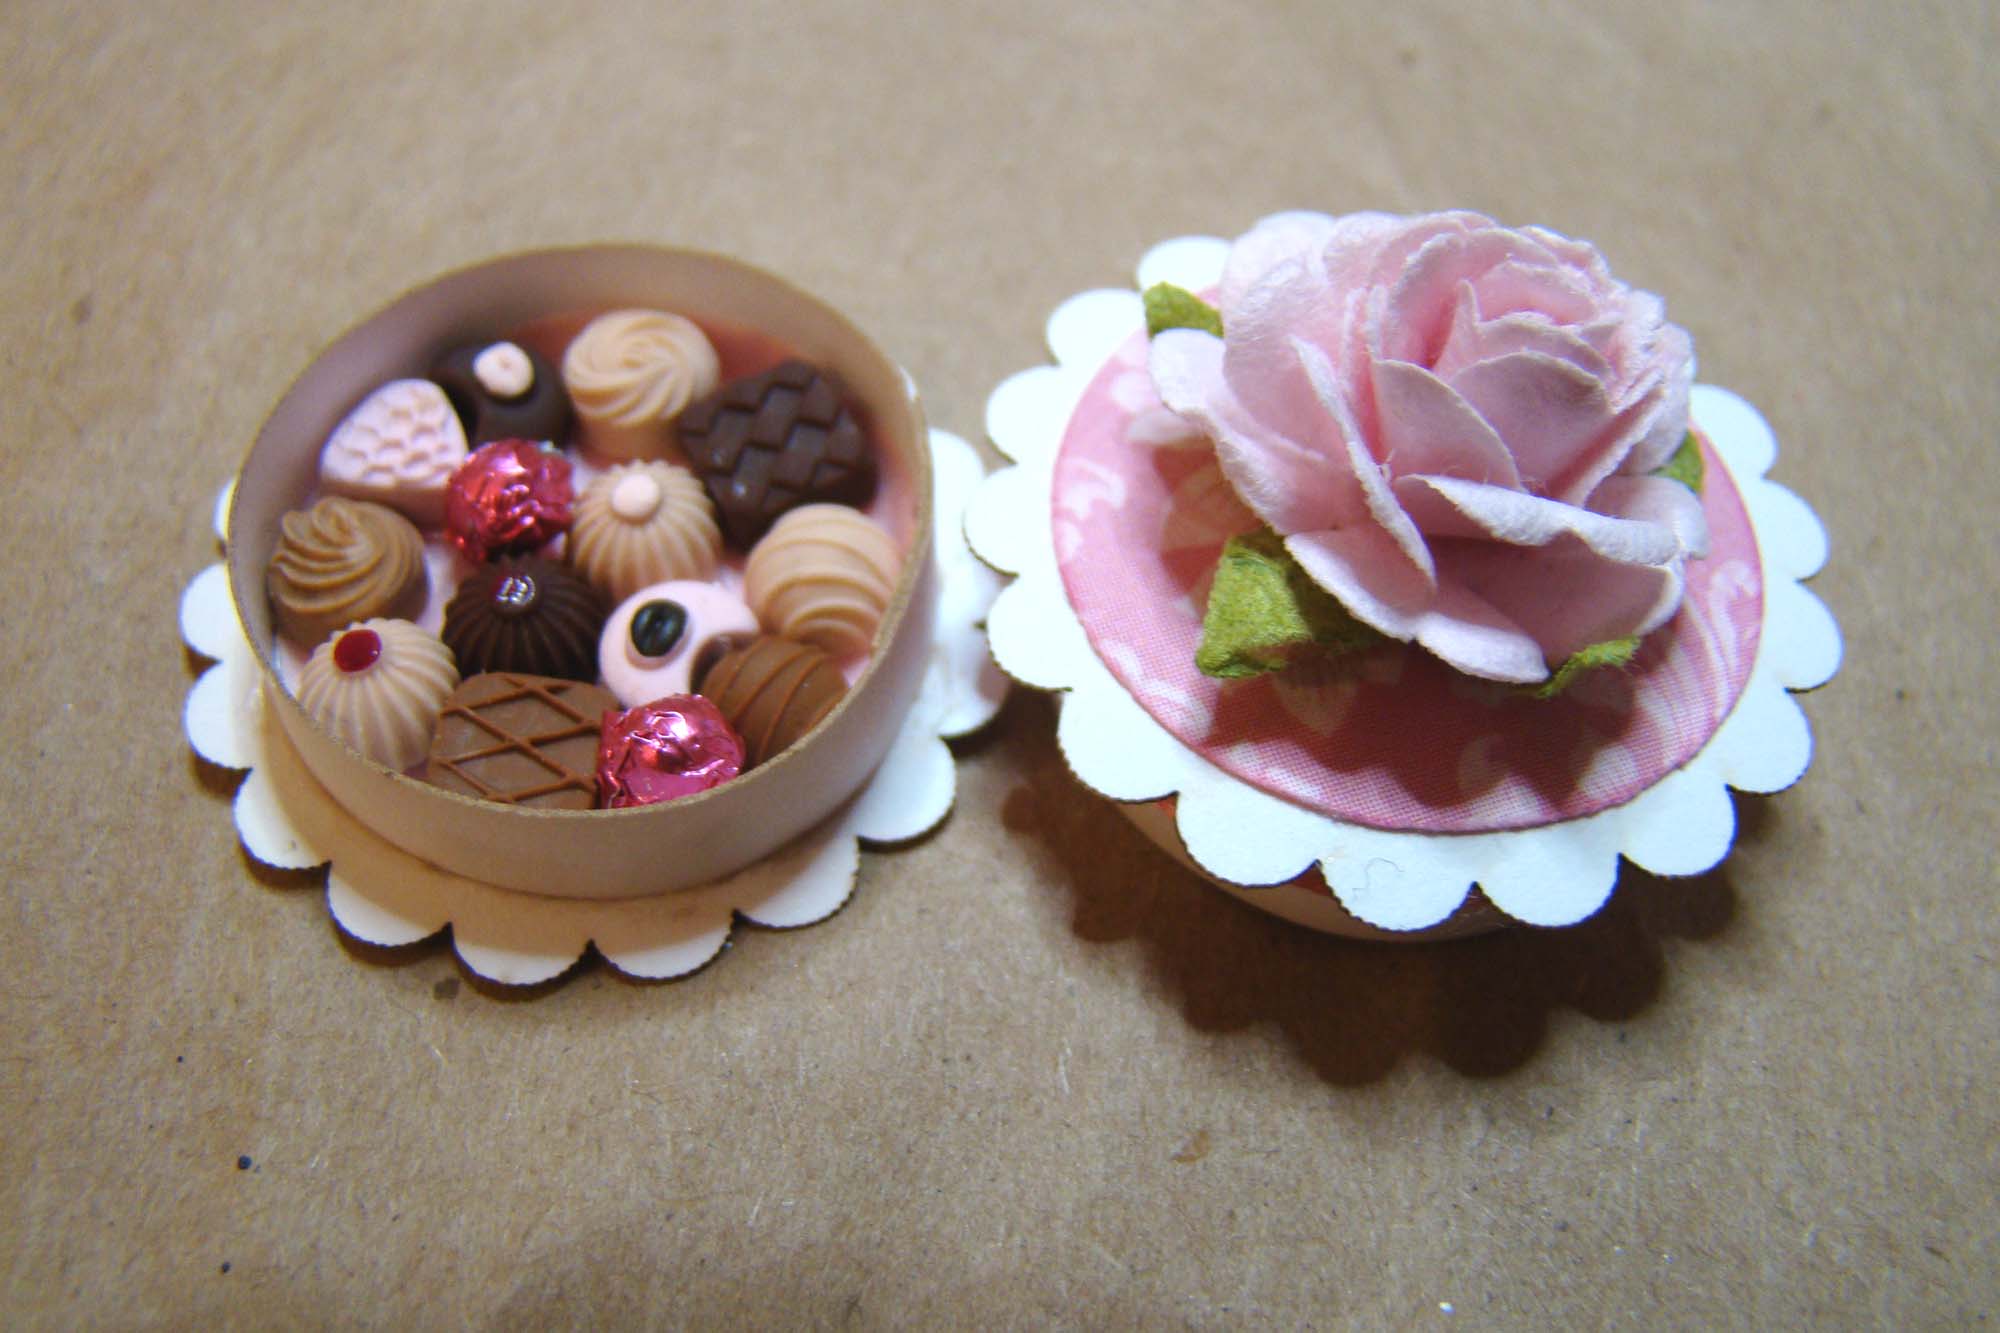
They were assembled in the box on top of a round of pink tissue paper. I made way too many of these little chocolate treats because I just couldn’t stop myself. Tiny chocolates will absolutely be used in future projects!
The final touch was a circle of decorative paper on top along with a Soft Pink 2cm Rose. A bit of pink ribbon around the lid was the final touch.
To complete the scene I included a candle from the Black 3 Piece Candleholder Set and a Champagne Bottle with 2 Filled Glasses with a label from the Cafe Bottle Labels Half Sheet.
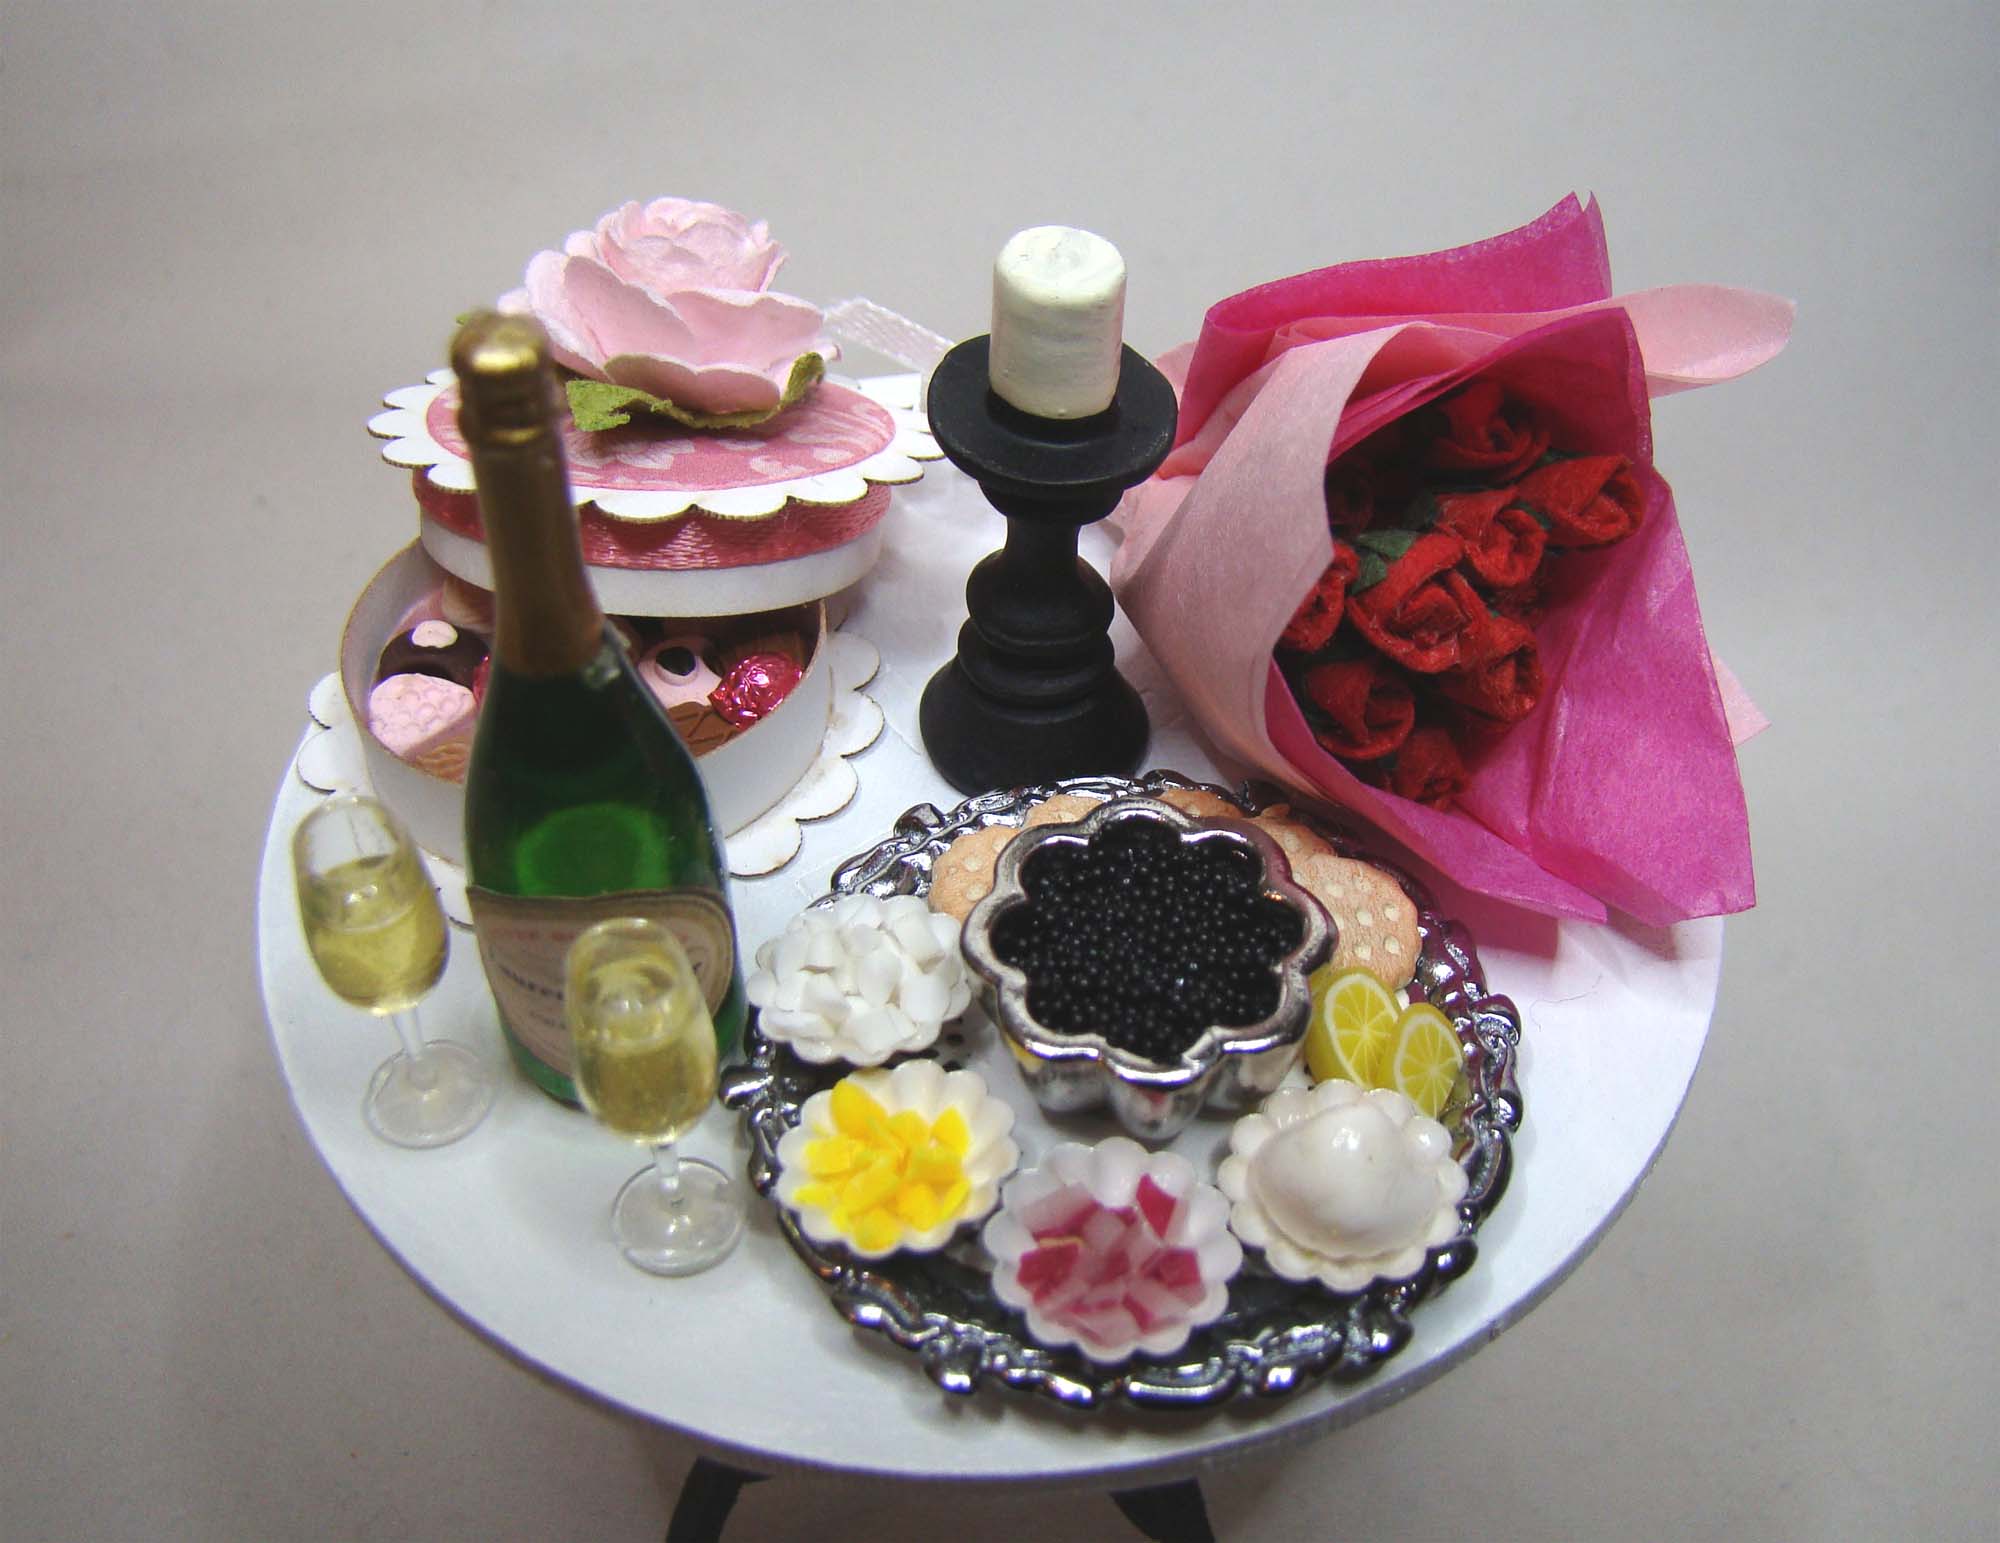
Everything was set in place on a Wrought Iron Patio Table painted white with iron oxide legs.

Thanks so much for your visit today. There are lots of new supplies to play with, I hope you are inspired to make something wonderful! You can find all the supplies I’ve used right HERE.


Jun 07, 2025 @ 12:09:18
Once again, your imaginati